| |

Example of spring application in MyeclipseCreating spring application in myeclipse IDE is simple. You don't need to be worried about the jar files required for spring application because myeclipse IDE takes care of it. Let's see the simple steps to create the spring application in myeclipse IDE.
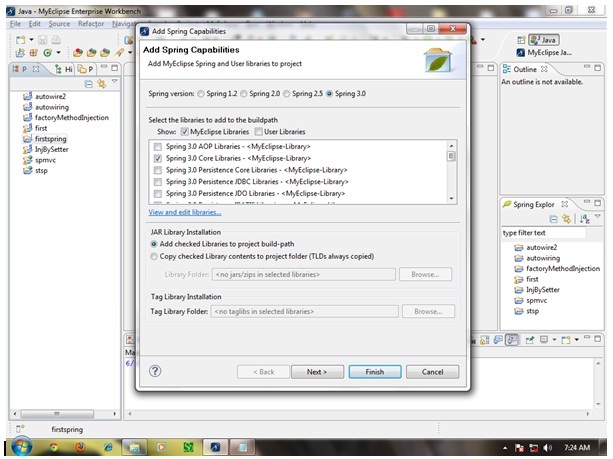
Steps to create spring application in Myeclipse IDELet's see the 5 steps to create the first spring application using myeclipse IDE. 1) Create the Java ProjectGo to File menu - New - project - Java Project. Write the project name e.g. firstspring - Finish. Now the java project is created. 2) Add spring capabilitiesGo to Myeclipse menu - Project Capabilities - Add spring capabilities - Finish.
Now the spring jar files will be added. For the simple application we need only core library i.e. selected by default.
3) Create Java classIn such case, we are simply creating the Student class have name property. The name of the student will be provided by the xml file. It is just a simple example not the actual use of spring. We will see the actual use in Dependency Injection chapter. To create the java class, Right click on src - New - class - Write the class name e.g. Student - finish. Write the following code: This is simple bean class, containing only one property name with its getters and setters method. This class contains one extra method named displayInfo() that prints the student name by the hello message. 4) Create the xml fileIn case of myeclipse IDE, you don't need to create the xml file as myeclipse does this for yourselves. Open the applicationContext.xml file, and write the following code: The bean element is used to define the bean for the given class. The property subelement of bean specifies the property of the Student class named name. The value specified in the property element will be set in the Student class object by the IOC container. 5) Create the test classCreate the java class e.g. Test. Here we are getting the object of Student class from the IOC container using the getBean() method of BeanFactory. Let's see the code of test class. The Resource object represents the information of applicationContext.xml file. The Resource is the interface and the ClassPathResource is the implementation class of the Reource interface. The BeanFactory is responsible to return the bean. The XmlBeanFactory is the implementation class of the BeanFactory. There are many methods in the BeanFactory interface. One method is getBean(), which returns the object of the associated class. Now run the Test class. You will get the output Hello: Vimal Jaiswal.
Next TopicExample Of Spring Application In Eclipse
|
 For Videos Join Our Youtube Channel: Join Now
Feedback
- Send your Feedback to [email protected]
Help Others, Please Share


