| |

Spring MVC TutorialA Spring MVC is a Java framework which is used to build web applications. It follows the Model-View-Controller design pattern. It implements all the basic features of a core spring framework like Inversion of Control, Dependency Injection. A Spring MVC provides an elegant solution to use MVC in spring framework by the help of DispatcherServlet. Here, DispatcherServlet is a class that receives the incoming request and maps it to the right resource such as controllers, models, and views. Spring Web Model-View-Controller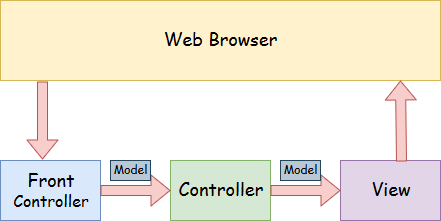
Understanding the flow of Spring Web MVC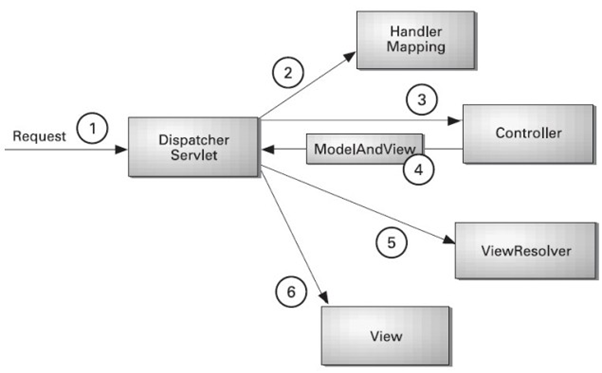
Advantages of Spring MVC FrameworkLet's see some of the advantages of Spring MVC Framework:-
Spring Web MVC Framework ExampleLet's see the simple example of a Spring Web MVC framework. The steps are as follows:
Directory Structure of Spring MVC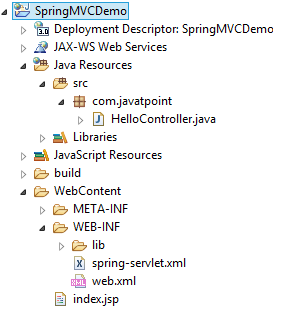
Directory Structure of Spring MVC using Maven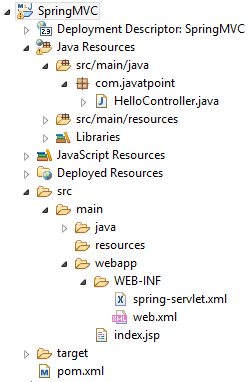
Required Jar files or Maven DependencyTo run this example, you need to load:
Download Link: Download all the jar files for spring including JSP and JSTL. If you are using Maven, you don't need to add jar files. Now, you need to add maven dependency to the pom.xml file. 1. Provide project information and configuration in the pom.xml file.pom.xml 2. Create the controller classTo create the controller class, we are using two annotations @Controller and @RequestMapping. The @Controller annotation marks this class as Controller. The @Requestmapping annotation is used to map the class with the specified URL name. HelloController.java 3. Provide the entry of controller in the web.xml fileIn this xml file, we are specifying the servlet class DispatcherServlet that acts as the front controller in Spring Web MVC. All the incoming request for the html file will be forwarded to the DispatcherServlet. web.xml 4. Define the bean in the xml fileThis is the important configuration file where we need to specify the View components. The context:component-scan element defines the base-package where DispatcherServlet will search the controller class. This xml file should be located inside the WEB-INF directory. spring-servlet.xml 5. Display the message in the JSP pageThis is the simple JSP page, displaying the message returned by the Controller. index.jsp Output:
Spring MVC IndexSpring MVC Spring MVC Form Spring MVC Applications Spring MVC Validation Spring MVC Tiles
Next TopicMultiple View Page
|
 For Videos Join Our Youtube Channel: Join Now
Feedback
- Send your Feedback to [email protected]
Help Others, Please Share


