| |

Steps to create a servlet exampleThere are given 6 steps to create a servlet example. These steps are required for all the servers. The servlet example can be created by three ways:
The mostly used approach is by extending HttpServlet because it provides http request specific method such as doGet(), doPost(), doHead() etc. Here, we are going to use apache tomcat server in this example. The steps are as follows:
download this example of servlet
download example of servlet by extending GenericServlet download example of servlet by implementing Servlet interface 1)Create a directory structuresThe directory structure defines that where to put the different types of files so that web container may get the information and respond to the client. The Sun Microsystem defines a unique standard to be followed by all the server vendors. Let's see the directory structure that must be followed to create the servlet. 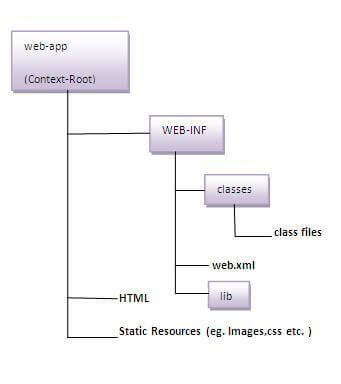
As you can see that the servlet class file must be in the classes folder. The web.xml file must be under the WEB-INF folder. 2)Create a Servlet
DemoServlet.java 3)Compile the servletFor compiling the Servlet, jar file is required to be loaded. Different Servers provide different jar files:
Two ways to load the jar file
Put the java file in any folder. After compiling the java file, paste the class file of servlet in WEB-INF/classes directory. 4)Create the deployment descriptor (web.xml file)The deployment descriptor is an xml file, from which Web Container gets the information about the servet to be invoked. The web container uses the Parser to get the information from the web.xml file. There are many xml parsers such as SAX, DOM and Pull. There are many elements in the web.xml file. Here is given some necessary elements to run the simple servlet program. web.xml file Description of the elements of web.xml fileThere are too many elements in the web.xml file. Here is the illustration of some elements that is used in the above web.xml file. The elements are as follows:
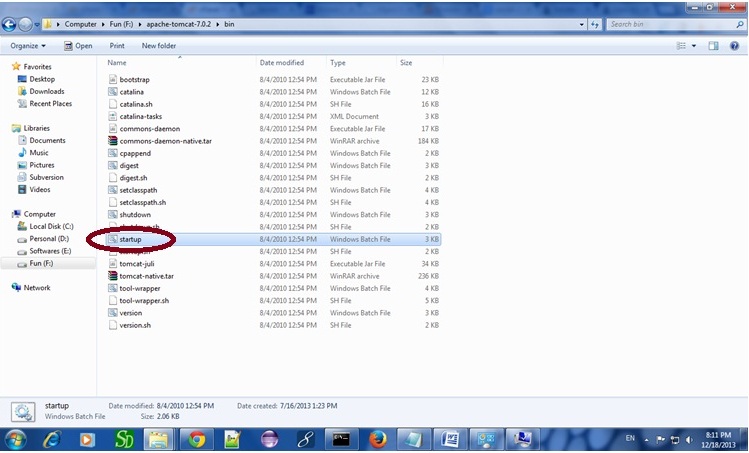
5)Start the Server and deploy the projectTo start Apache Tomcat server, double click on the startup.bat file under apache-tomcat/bin directory. One Time Configuration for Apache Tomcat ServerYou need to perform 2 tasks:
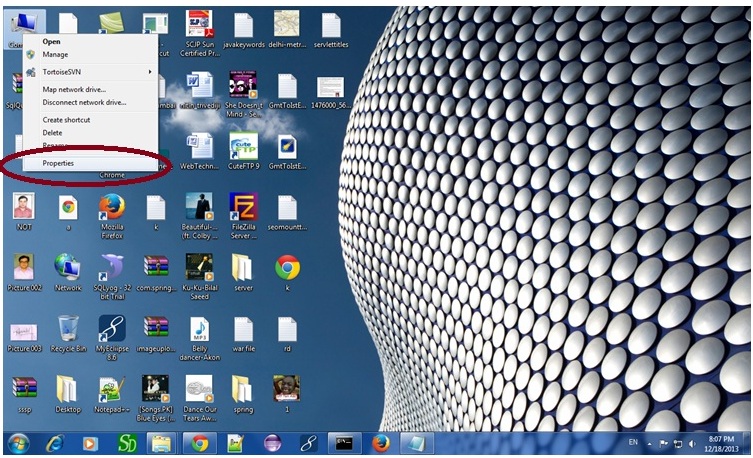
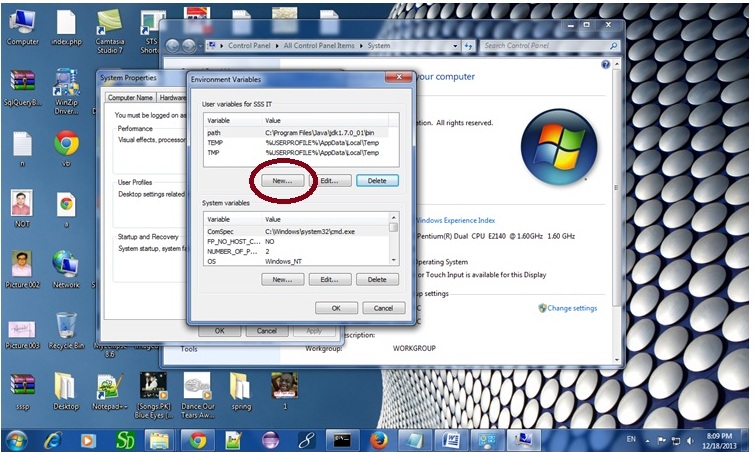
1) How to set JAVA_HOME in environment variable?To start Apache Tomcat server JAVA_HOME and JRE_HOME must be set in Environment variables. Go to My Computer properties -> Click on advanced tab then environment variables -> Click on the new tab of user variable -> Write JAVA_HOME in variable name and paste the path of jdk folder in variable value -> ok -> ok -> ok. Go to My Computer properties:
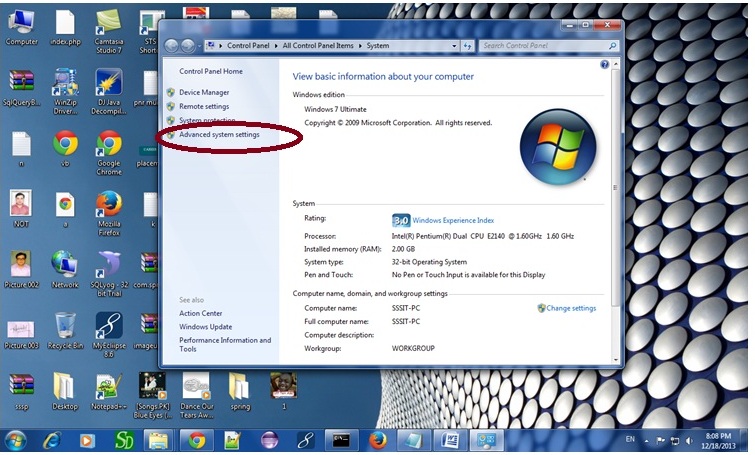
Click on advanced system settings tab then environment variables:
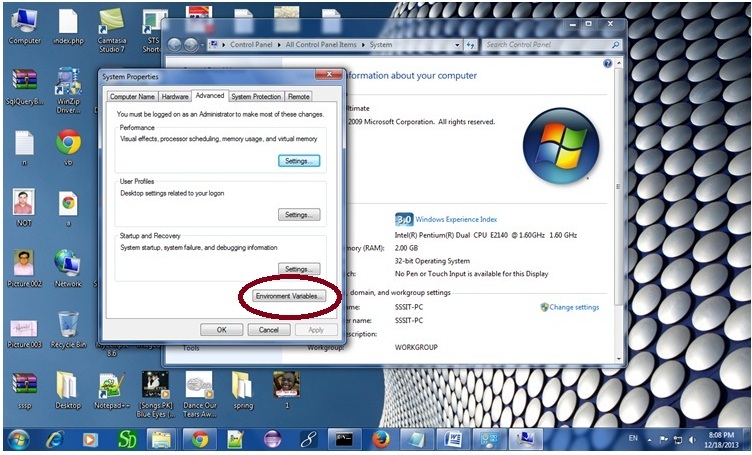
Click on the new tab of user variable or system variable:
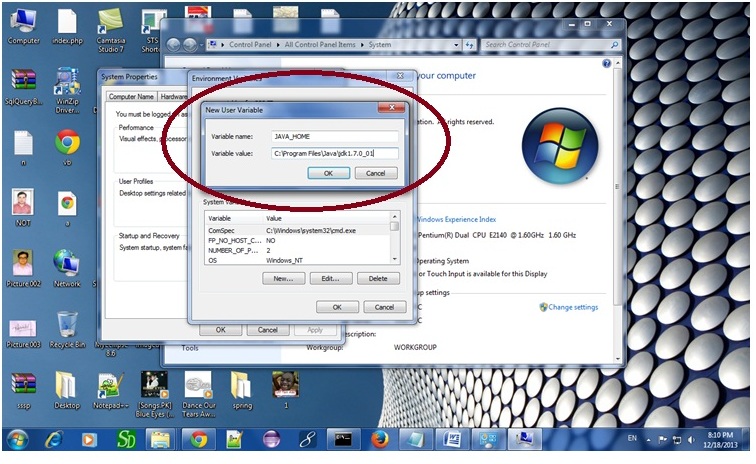
Write JAVA_HOME in variable name and paste the path of jdk folder in variable value:
There must not be semicolon (;) at the end of the path.
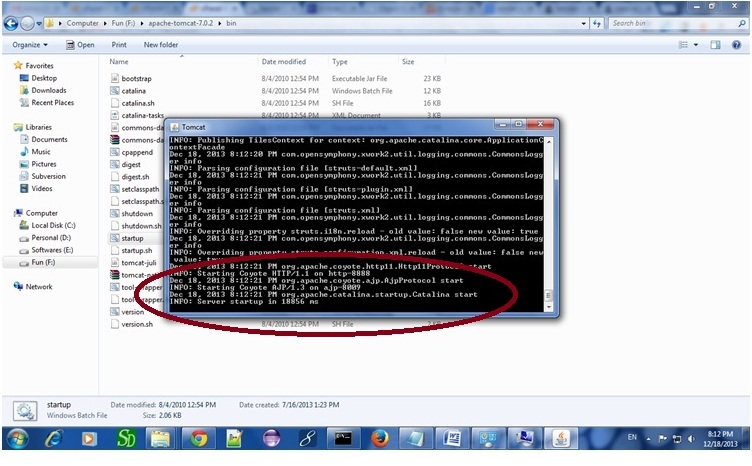
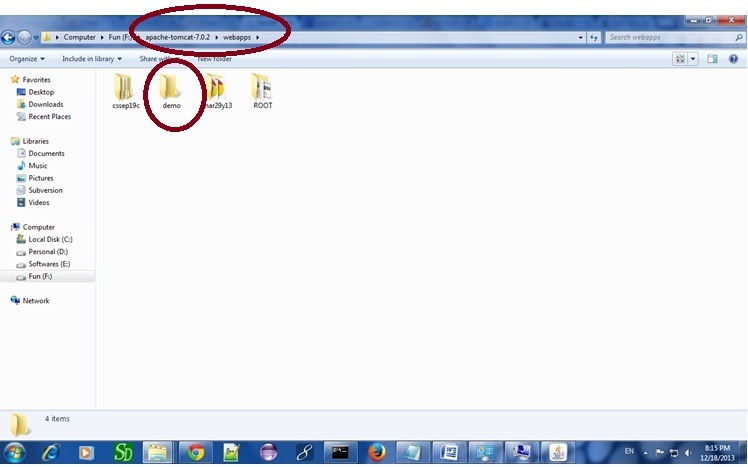
Now server is started successfully. 2) How to change port number of apache tomcatChanging the port number is required if there is another server running on the same system with same port number.Suppose you have installed oracle, you need to change the port number of apache tomcat because both have the default port number 8080. Open server.xml file in notepad. It is located inside the apache-tomcat/conf directory . Change the Connector port = 8080 and replace 8080 by any four digit number instead of 8080. Let us replace it by 9999 and save this file. 5) How to deploy the servlet projectCopy the project and paste it in the webapps folder under apache tomcat.
But there are several ways to deploy the project. They are as follows:
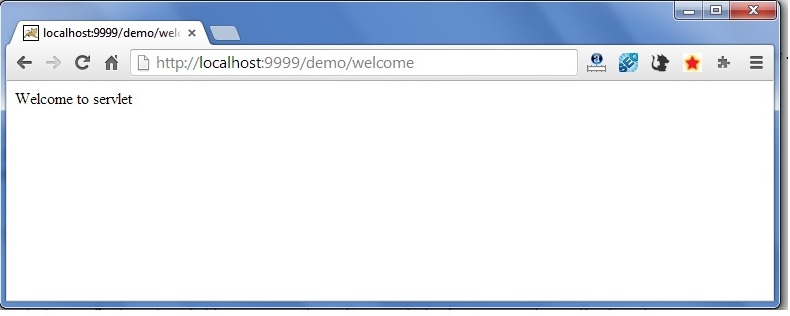
Here, we are using the first approach. You can also create war file, and paste it inside the webapps directory. To do so, you need to use jar tool to create the war file. Go inside the project directory (before the WEB-INF), then write: Creating war file has an advantage that moving the project from one location to another takes less time. 6) How to access the servletOpen broser and write http://hostname:portno/contextroot/urlpatternofservlet. For example:
download this example of servlet (using notepad)
download example of servlet by extending GenericServlet download example of servlet by implementing Servlet interface
Next TopicHow Servlet Works
|
 For Videos Join Our Youtube Channel: Join Now
Feedback
- Send your Feedback to [email protected]
Help Others, Please Share


