ABAP Projection View
- ABAP Projection views are special views used to hide some fields of a database table and display only the required or selected fields. Hence, using this type of view, we can minimize the fields by projecting only required fields and rest fields will be filtered out.
- This view allows us to read and also maintain the needed data.
- The projection view is created on a single table only, and we cannot specify any selection/join conditions for this view.
- With the projection view, apart from the transparent database table, we can also access the pooled tables or cluster tables.
Let's consider an example to understand the use of the projection view. Suppose we have Students Details table, which contains records such as Student Name and Roll number, Student address, Student fees, etc. We only want to share student name and roll number with some companies. In this case, we will use the projections view of the Student Details table. Hence, if there is a huge amount of data, but we only want to display the relevant data field, we can choose the projection view as the perfect option.
The below diagram explains the projection view for a table:
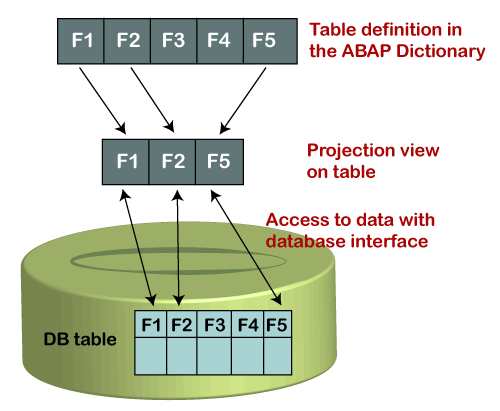
As shown in the above diagram, only the selected fields of the table are displayed by the projection views.
Creating Projection Views in ABAP:
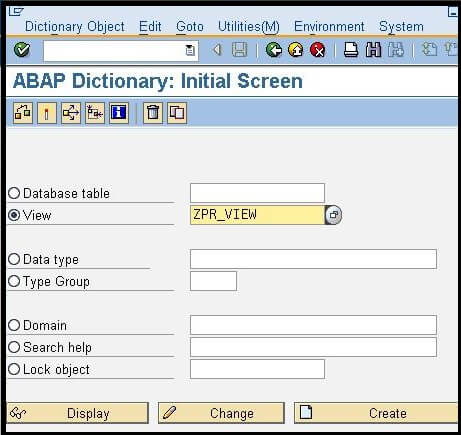
- Step-1: Open the ABAP dictionary initial screen by navigating the menu path or entering the transaction code SE11 in the command field.
- Step-2: Click the radio button in front of the View Give a name to the view, and click on the Create button, given on the screen. (The name of the view should be started with z).
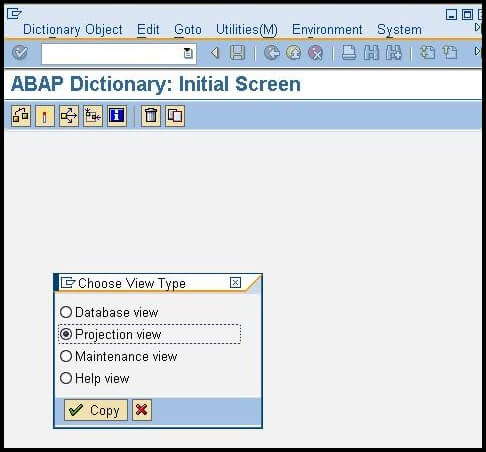
- Step-3: A pop-up window will appear with all the views, from where select the "Projection view," and click on the Copy button.
Dictionary: Maintain Screen Appears, consider the below image:
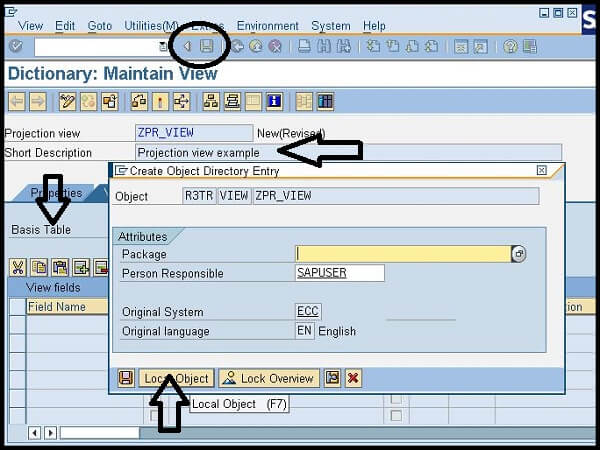
- Step-4: Here, we have provided the short text for an explanation of view in the "Short Description" field, and entered the table name "ZEMPLOYEE"(we have created in the table creation)that we are going to use, in the Base Table Consider the above image. After entering the details, we need to save (CTRL+S) it as the local object or within a package. We are saving it as a local object.
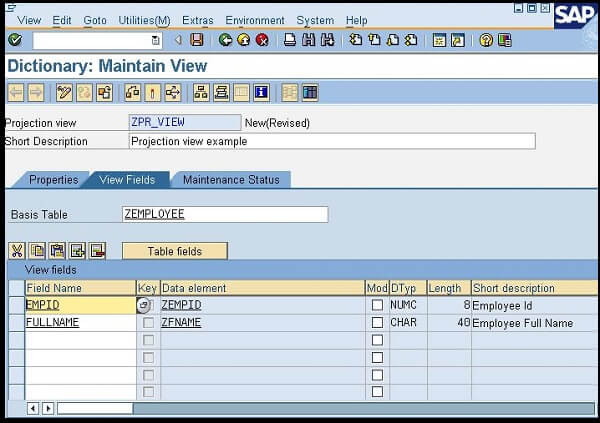
- Step-6: Click on Table fields button, and select the required fields that you want to display in the output. Click the Copy button, and all the selected fields will be displayed on the maintenance screen, as in the given image:
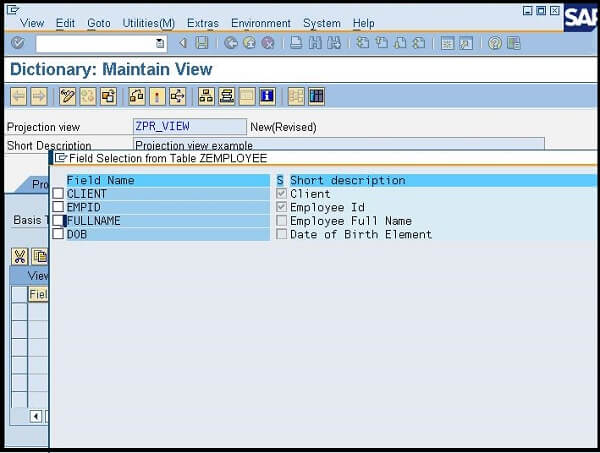
Here, we are choosing the EMPID and FULLNAME fields from the table. These fields will appear under the Field Name option.
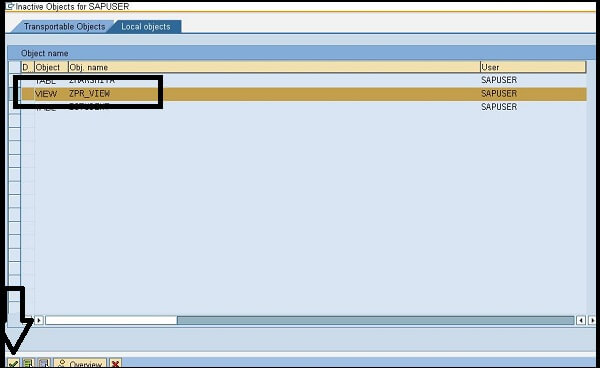
- Step- 8: Now, save the view, check for any inconsistency, and Activate the view using
 the symbol. the symbol.
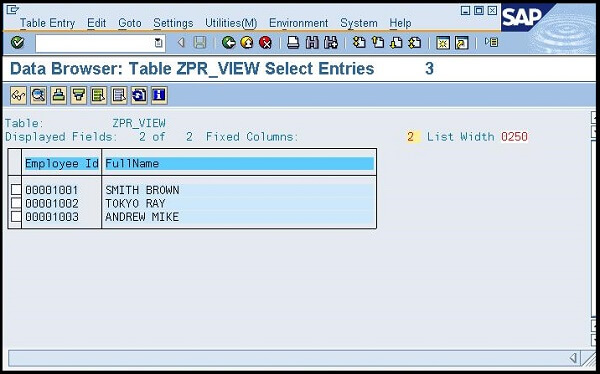
- Step-9: Click on the Utilities -> Contents, and execute, and you will get the Selection screen. The output data will be displayed at your screen. Consider the below output image:
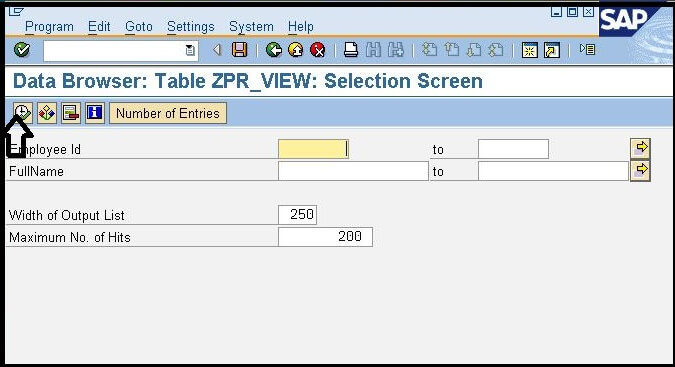
As we can see in the above output image, only two fields are displaying here that we have selected in the table.
- We can either enter the details or can click on the execute or F8 given on the above screen for displaying all the records of the selected field. Consider the below image:
Advantages of ABAP Projections View
- Using the projection view, we can display only the required fields and mask other fields.
- It helps to limit the complete data access of a table from an unauthorized user.
- Data access and the view from the projection view is faster than other views.
- It also improves the system's performance, as we minimize the fields by masking in this view.
|

 For Videos Join Our Youtube Channel: Join Now


