| |

Adobe XD Scroll GroupsScrolling is a new feature of the Adobe XD which was released with XD version 30.0. It is one of the finest features of the Adobe XD that allows us to create the content scrollable in a single frame. Before the scrolling feature, we need to create multiple screens for displaying more content of the design. Now, using Adobe XD we can create scrollable objects which will be scrolled without affecting other components of the design. It provides a real-time experience of the application. The scroll groups feature useful for creating sliders, carousel, and navigable maps. XD supports horizontal and vertical scrolling. There are three different buttons available in the right sidebar for horizontal, vertical, and horizontal and vertical scrolls. In this section, we will discuss how to create scrollable objects in Adobe XD. Let's understand how to create scroll groups. How to Create Scroll Groups in Adobe XD?Follow the below steps to create the scroll groups: Step1: Select an Artboard To design in Adobe XD, we have to choose an artboard. Select any of the artboards as per your requirement. See how to create artboards in Adobe XD. We are selecting iPhone 12, 12 pro artboard sizes. Step2: Create Objects Now, create objects that you want to make scrollable. You can also use the repeat grid feature to create the same card or container multiple times. We will explain the repeat grid feature in the upcoming sections. For now, if you are not familiar with the repeat grid, you can manually copy and paste the objects. 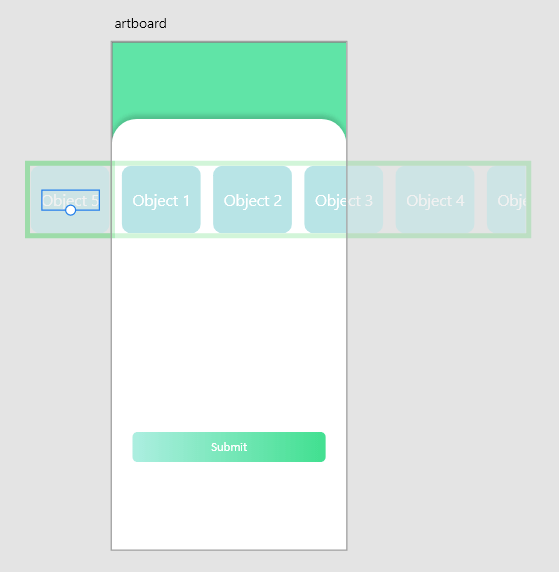
Step3: Select the Scroll Option Now, select the scroll option from the right sidebar menu. We have three options for the scrolling. 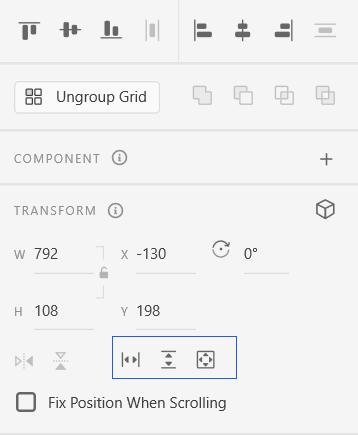
Select any scroll option from the given options in the above image. These options are horizontal scroll, vertical scroll, and vertical and horizontal scroll, respectively. We are selecting the horizontal scroll. Step4: Define the Width Now, our final step is to define the width of the scroll group. After selecting the scroll option, the width slider will automatically set to the objects. Drag the slider to define a width and select the items that need scrolled. 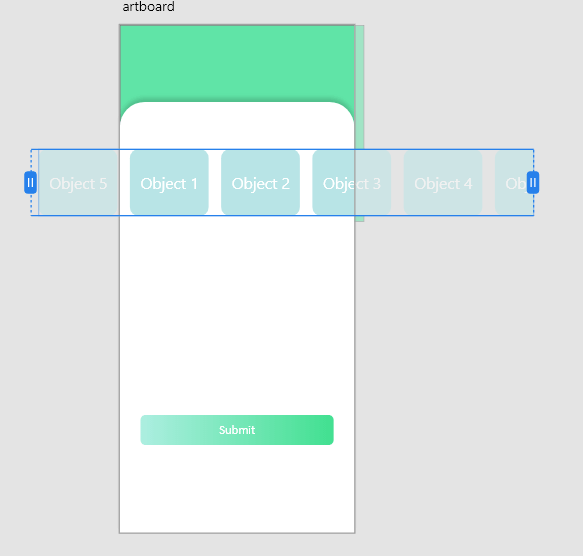
Once the width of the scroll group is defined, our objects are ready to be scrolled. We can have a preview for viewing the scroll effect. Step5: Preview the Scroll Effect To preview the scroll effect, press the Ctrl+Enter key combination to preview the screen. Similarly, we can have horizontal or vertical and horizontal scroll effects. LimitationScroll groups do not work in design specs. Add scroll groups in a separate artboard and publish them as part of the design specs as a workaround. Tips and tricksNow that we are familiar with the scroll groups and scrolling effects, here are a few tips that will be helpful for you:
Here, we have discussed the scroll effect and groups. Now, we can create different scrollable design elements such as sliders, carousel, and navigable maps in our design.
Next TopicAdobe XD Guides & Grids
|
 For Videos Join Our Youtube Channel: Join Now
Feedback
- Send your Feedback to [email protected]
Help Others, Please Share


