After Effect- Importing FootageWe can import source files in the After effect project as the basis for footage items, and we can use these sources for layers. We can work with the footage items in the Project panel first. We can import different types of files, collection of files, or components of files as sources for individual footage items. It also includes moving image files, still-image files, still-image sequences, and audio files. When we import any files to the After Effect, it does not copy any data itself into our project but creates a reference link to the footage item's source. This helps in keeping project files relatively small. Note: If you try to delete, rename, or move an imported source file, the reference link will be broken to that file.Supported import formatsImporting and using some of the files in After Effect Requires the installation of additional import plug-ins. Adobe Premiere Pro can import so many formats that After Effects can't import, so you can use Premier to bring data into After Effect in many ways. We can also extend the ability of After Effects to import additional file types by installing additional codecs. Some of the following extensions demote the container file formats rather than denoting specific audio, video, or image data format. MOV, AVI, MXF, FLV, and F4V Audio formats supported by After Effect
Still-image formats
Video and animation formats
Project formats
We can also import the Final Cut Pro projects into Premiere Pro, and then we can fetch that project's components into the After Effects. How to Import Footage Items in After EffectWe can import files using the import dialogue box, or we can import files by dragging them to the project panel. Step 1: Go to the File menu and select Import. 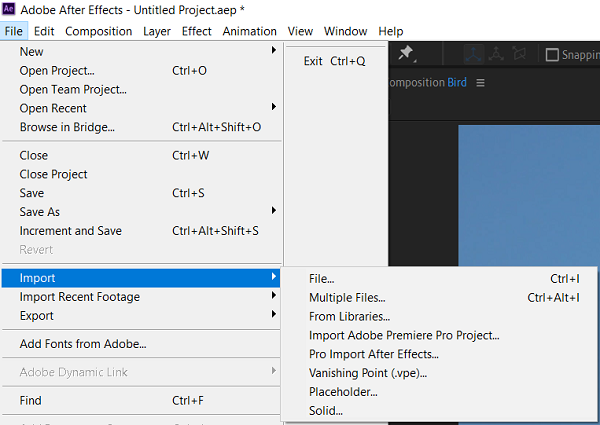
Step 2: Now, click on the File option to open the explorer. 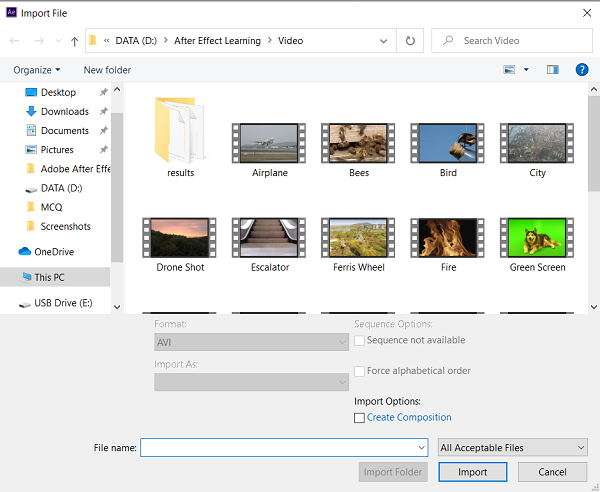
Step 3: Choose the file and click the import button. Step 4: Click on the multiple file button to import multiple files. 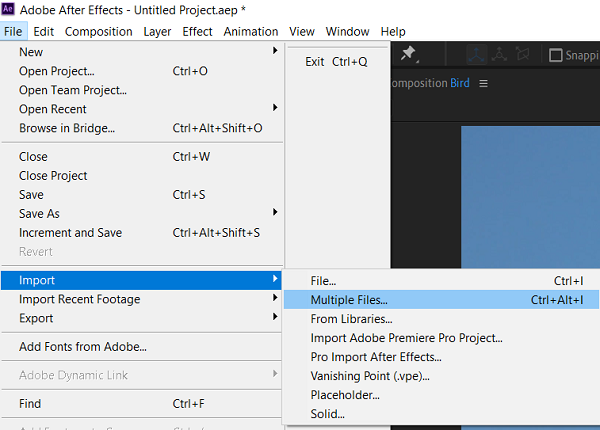
In the case of multiple file import, we have to perform the next step more than once without any need to choose an import command multiple times. Step 5: Choose the file and click on the Open button. Step 6: Ctrl-click on the multiple files to select them, and then click Open. 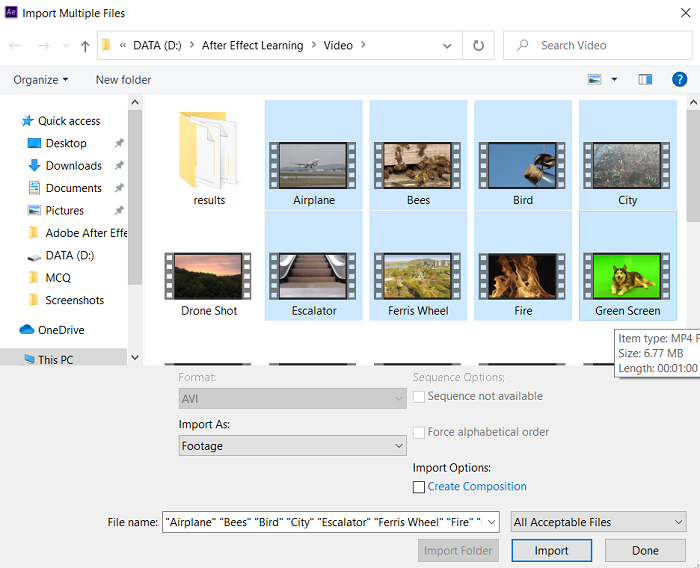
Step 7: Shift + click another file while selecting a file to select a range of files and then click on Open. Importing a file by dragging Step 1: Drag the file from Windows Explorer to import a single file into the Project Panel. Step 2: To import a sequence of a still image that appears in the Project panel as a single footage item. Interpreting footage items in After EffectTo interpret the footage item, After Effect uses a set of internal rules that we can import according to its best source file's pixel aspect ratio, frame rate, color profile, and alpha channel type. Interpreting a footage item using the Interpret Footage dialogue box Step 1: Go to the Project panel and select Footage. Step 2: Go to the bottom of the Project panel and click the Interpret Footage button. OR
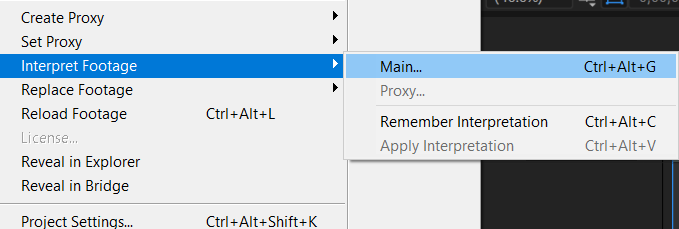
Interpreting a proxy using the Interpret Footage dialogue box Step 1: Go to the Project panel and select the original media file. Step 2: Press Alt and click on the Interpret Footage button at the bottom of the Project panel. 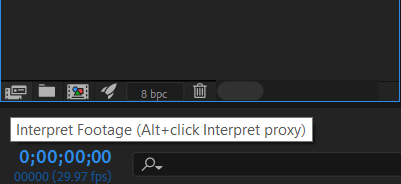
Applying Interpret Footage setting to multiple footage items in After Effect Step 1: Go to the Project panel and select the item with the interpretation settings that we want to apply. Step 2: Click on the File menu and choose the Interpret Footage. 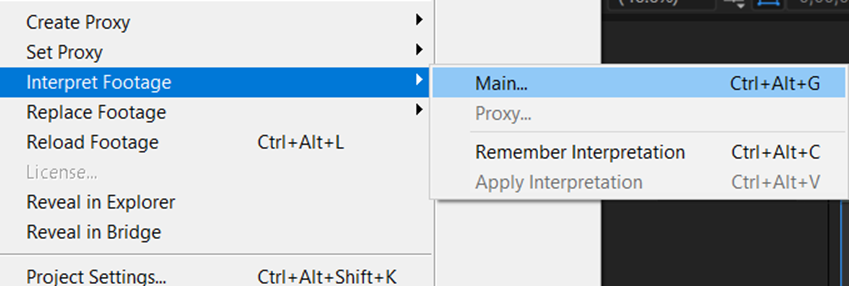
Step 3: Now, Select Remember Interpretation. 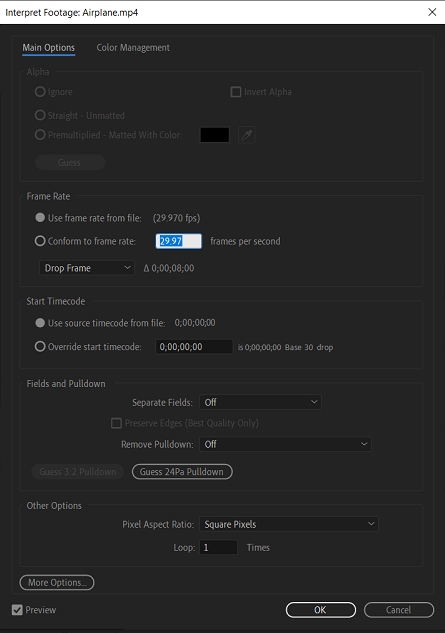
Step 4: Go to the Project panel and select one or more footage items. Step 5: Go to the File menu. Step 6: Click on the Interpret Footage. Step 7: Finally, select the Apply Interpretation. Alpha Channel InterpretationThe Alpha channel interpretation can be used to prevent problems when we import a file. For example, undesirable colors at the edge of an image or a loss of image quality at the edge of the alpha channel. Step 1: Select a footage item from the Project panel. Step 2: Go to the File menu and choose to Interpret Footage. Step 3: Now, click on the Main. Step 4: Select the Invert Alpha in case we want to switch the opaque and transparent areas of the image. Step 5: Now, go to the Alpha section and select one of the interpretation methods from the following:
Setting the default Alpha channel preferencesStep 1: Go to the Edit menu. 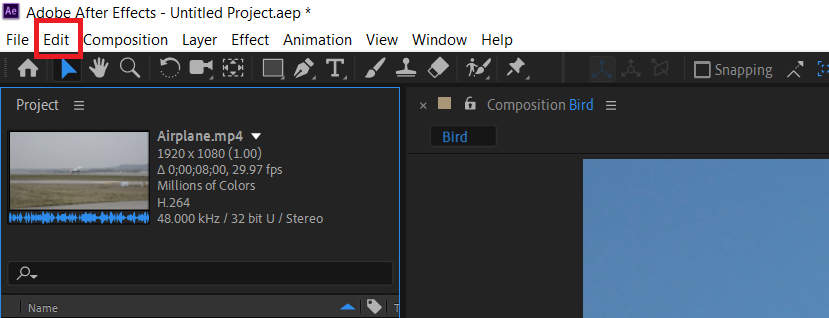
Step 2: Choose preferences and click on the Import. 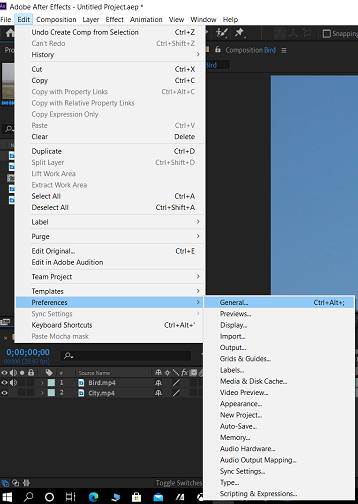
Step 3: Select the options from the Interpret Unlabeled Alpha As menu. Importing and interpreting video and audioStep 1: Click and select the footage item in the Project panel. Step 2: Go to the File menu, choose Interpret Footage and click on the Main option. 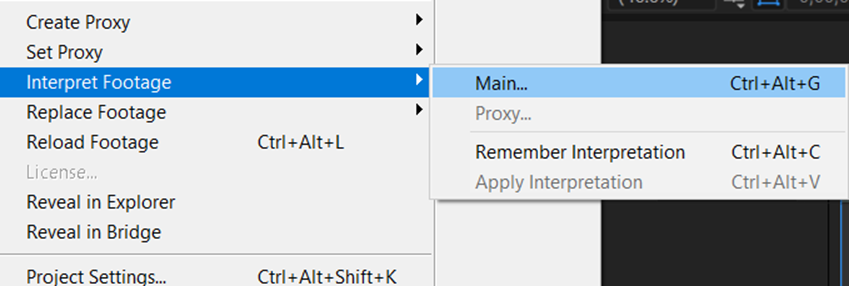
Step 3: Go to the Separate Fields menu and select an option. Step 4: Now, to increase the image quality in non-moving areas, click on the Preserve Edges when the final image is rendered at the Best quality. 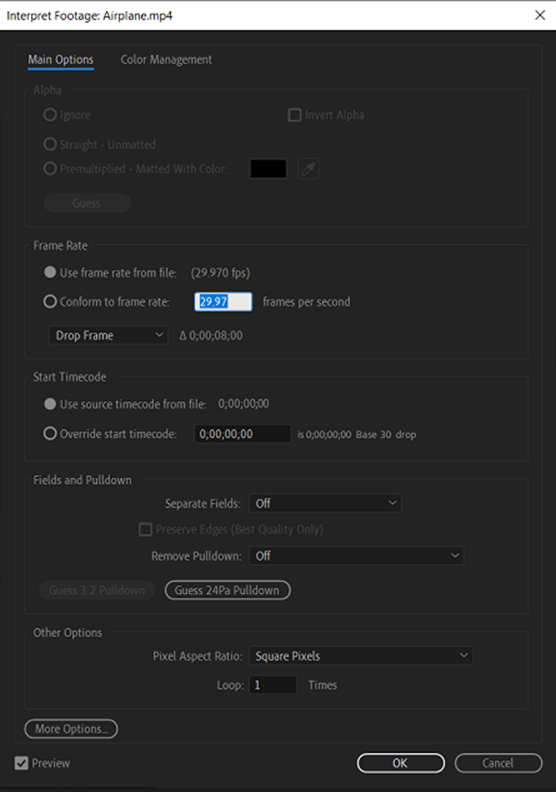
Step 5: Finally, click on the OK button. Determining the Original Field order in After EffectIt determines the order in which the two video fields are displayed. Step 1: Go to the Project Panel and select an item. Step 2: Now, click the File menu, then select Interpret Footage and click on Main from the Sub-menu Step 3: Go to the Interpret Footage dialogue box. Then select the Upper Field First from the Separate Fields menu, and then click OK. Step 4: Go to the Project panel. Press Alt and double click on the footage item to open it in the Footage panel. Step 5: Go to the Windows menu and click on Preview. Step 6: Find the segment that contains one or more moving areas in the Footage panel.
Next TopicAfter Effect Timeline
|
 For Videos Join Our Youtube Channel: Join Now
Feedback
- Send your Feedback to [email protected]
Help Others, Please Share


