Angular Lazy-loadingLazy loading is a technology of angular that allows you to load JavaScript components when a specific route is activated. It improves application load time speed by splitting the application into many bundles. When the user navigates by the app, bundles are loaded as needed. Lazy loading helps to keep the bundle size small, which helps reduce load times. We must use the class decorator to create an Angular module @NgModule, and the decorator uses a metadata object that defines the module. The main properties are:
Example of a native root module: In the above sample code, we have converted the AppModule class into an Angular module using the @NgModule decorator. Lazy Loading BasicsThis section introduces the basic process of lazy-loaded routing configuration. In the lazy load Angular modules, use load children in your AppRoutingModule root configuration as follows. Add a route for the component in the lazy-loaded routing module. Routing module for the lazy-loaded module Continue the below sections of the page for step-by-step instructions on lazy loading modules. Please follow the below steps to implement Lazy Loading in an Angular Project:Step 1: Create a new Angular project, Step 2: The purpose of independent routing is to handle all components with Angular lazy-loading modules. 
Step 3: Create a component called lazy-demo within the lazy-loading module, 
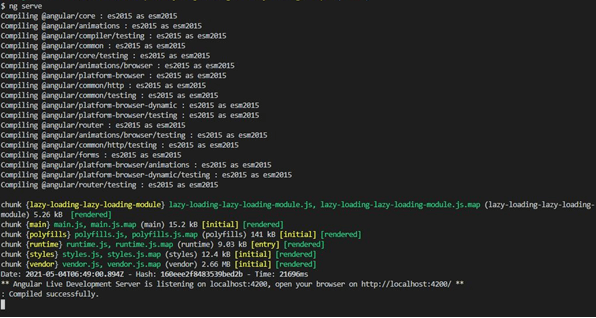
Step 4: Adding a link to the header will implement lazy loading. app.component.html Step 5: Here we will lazily load the module using load children. app-routing.module.ts Step 6: Set the route in lazy-loading-routing.module.ts. lazy-loading-routing.module.ts If above import option gives error, then try this, Run the application. Go to the terminal and execute the "ng serve" command. 
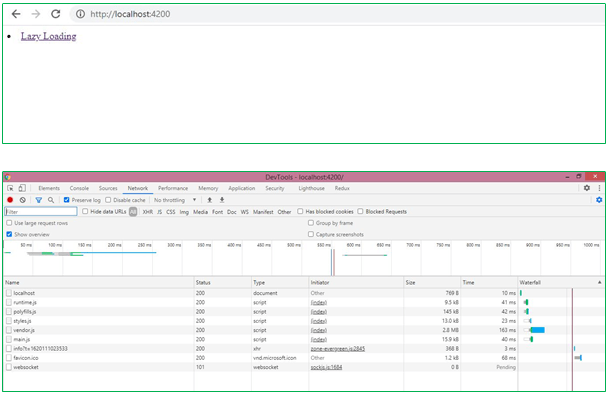
Now go to the browser https://localhost:4200. 
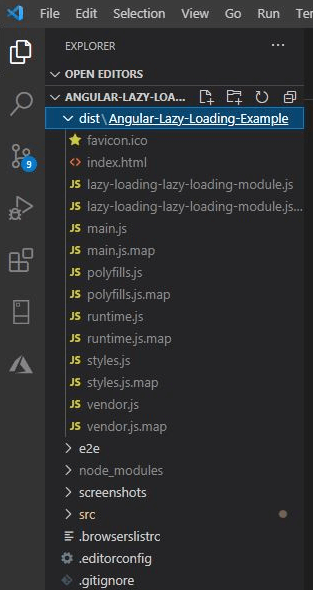
You will see that main.js is being served upon refreshing the browser. The Lazy Loading module is loaded only when the root /lazy-loading is hit. Validate lazy loadingRun the following command to generate the build, 
The above image verifies that a separate section is generated for the lazy loading module. There you will see a separate file for modules that use lazy loading. 
There are two steps to install the Lazy Loaded Feature Module:
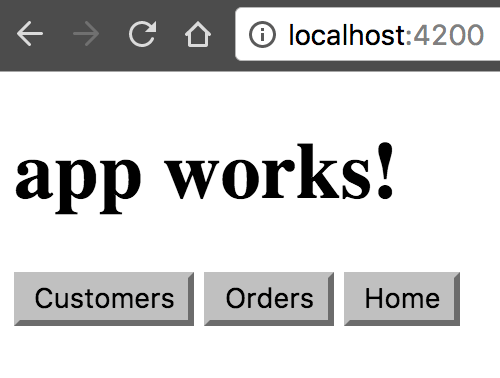
Set Up an AppIf you don't have an application, you can follow the below steps to create an app with CLI. If you already have an app, go the configured route. Enter the command below where customer-app is the name of the app: It creates an application named client-app and a file called the routing flag app-routing.module.ts, one of the important files to set up lazy loading. Navigate to the project by issuing the cd client-app command. Create a Module with RoutingThe path to load the client feature module is the client as it is specified with the --route option: It creates an application called client-app, and the --routing flag creates a file called app-routing.module.ts, which is one of the files needed to set up lazy loading for your feature module. Navigate to the project by issuing the cd client-app command. The --routing option used Angular/CLI version 8.1 or higher. It defines a new lazy-loadable convenience module, CustomersModule in the Customer.module.ts file, and the routing module CustomersRoutingModule in the customers-routing.module.ts file. String-based lazy loadingThe string syntax for the loadChildren route was deprecated in the import() syntax. You can choose to use string-based lazy loading (loadChildren: './path/to/module#Module') to include lazy-loaded routes in your tsconfig file, including lazy-loading compilation. By default, the CLI will create strict file inclusion projects with import() syntax. Add another Feature ModuleUse the same command to create a lazy-loaded module with routing and its stub component. It creates a new folder called Orders which contains the Order module and the Order Routing module, and the new OrderComponent source files. Set up the UIYou can type the URL in the address bar, and navigation UI is easy and common for the user. To see your application in the browser so far, enter the below-given command in the terminal window: content_copying serveGo to localhost:4200, where you can see "customer-app" and three buttons. 
The buttons work because the CLI adds routes to the feature module in the Routes array of app.modules.ts. Import And Route ConfigurationThe CLI adds each feature module to the route map at the application level. In the app-routing.module.ts file, update the route array: The first two routes to the Customer module and Order module. If you are using CLI and then the following steps mentioned in the page. The Customers.module.ts file imports the customers-routing.module.ts and Customers.component.ts files. The CustomersRoutingModule is listed in the @NgModule import array and gives the Customers module access to its routing module. The CustomersComponent declaration is in the Array, which means that the CustomersComponent belongs to the CustomersModule. The feature-specific route definition file imports its feature components defined in the customer-routing.module.ts file and in the JavaScript import statements. The routing module of other feature modules is configured similarly. forRoot() and forChild()You can see that the CLI adds RouterModule.forRoot(routes) to the AppRoutingModule import array. It specifies that Angular AppRoutingModule is a routing module and forRoot() specifies a routing module. It configures all the routes you pass, gives you access to the router's instructions, and registers the router service. The CLI also adds RouterModule.forChild to feature routing modules. The forRoot() method takes care of the router's global injector configuration. There is no injector configuration in its forChild() method. It uses instructions like Router Outlet and RouterLink. PreloadingThe Preloading improves UX by loading parts of the application in the background. You can preload module or component data. Preloading Module Preloading modules improve UX by loading parts of your application in the background, so users don't wait for elements to download when they activate root. To enable preloading of the lazy loaded modules, import the PreloadAllModules token from the router. In the AppRoutingModule, specify the preloading strategy in forRoot(). Preloading Component DataYou can use a resolver to preload component data. The resolvers improve UX by blocking the page until the necessary data can display on the page. ResolversWith the CLI, create a resolver service. The command to generate a service is below: content_copyng generate serviceImplement the Resolve interface provided by the @angular/router package in the newly created service: Import the resolver into the module's routing module. Feature module's routing moduleAdd a resolve object to the component's route configuration. In the component's constructor, inject an Activated Route class that represents the current route. Component's constructorUse the injected instance of the Activated Route class to access data associated with a given route. Component's ngOnInit lifecycle hookPros of Lazy Loading
Cons of Lazy Loading
Next TopicAngular Redux
|
 For Videos Join Our Youtube Channel: Join Now
Feedback
- Send your Feedback to [email protected]
Help Others, Please Share


