| |

Arduino KitThe Arduino Kit consists of all the components used for building digital or electronic devices. The Arduino boards are also available in the form of DIY kits. Here, DIY specifies Do It Yourself. The DIY kits are created for teaching and as a practice tool for students. The non-engineering students can also use such kits for their projects. 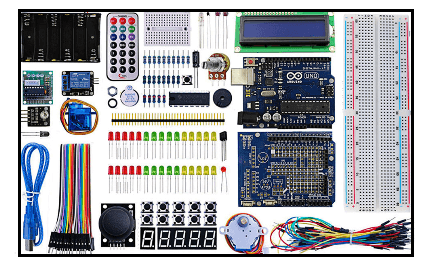
We can easily start with our electronics projects using the complete kit. It also helps us to create hand-on and engaging projects. The kit helps in understanding the fundamentals of programming, voltage, current, and digital logic. The concept of digital and analog signals can be understood by the implementation of actuators and sensors in the projects. Some of the Arduino projects are the Spaceship Interface (designing the control panel for spaceship), Keyboard Instrument, Knock Lock (a secret code, which is used to open the door), etc. There are various types of Arduino kits available in the market. Let's discuss some of the Arduino kits: 1. Arduino Starter KitThe Starter kit is generally the basic kit for freshers in the Electronics stream. It is based on the Arduino UNO board. 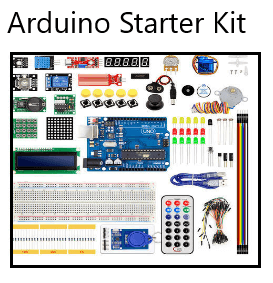
The components in the Starter kit are listed below:
Arduino UNO boardUnit: 1The Arduino UNO is a standard board of Arduino. Arduino UNO is based on an ATmega328P Microcontroller. It is easy to use compared to other boards, such as the Arduino Mega board, etc. The components on the Arduino board are ATmega328P Microcontroller, ICSP pin, power LED indicator, Digital I/O pins, Analog pins, AREF pin, 16 MHz crystal oscillator, GND pins, Vin pin, voltage regulator, Tx and Rx LED, USB, and a reset button. The Arduino board is shown below: 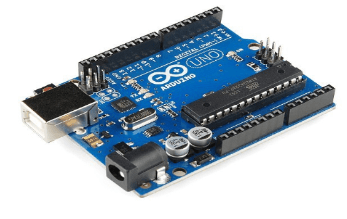
BreadboardUnit: 1 (400 points)A breadboard is defined as a rectangular shape board, which is made of plastic. It has tiny holes on it that are used to insert the wires of the electronic components, such as LED, resistor, etc. 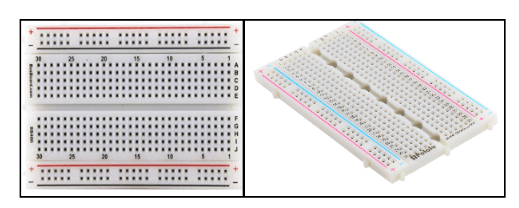
It does not require any soldering to attach the electronic components to the board. We need to join the components using wire to allow electricity to move from one component to another. Bright white LEDUnit: 1LED stands for Light Emitting Diode, which is defined as a semiconductor light source. The bright white LED produces the white light, while other white lights produce a yellow hue. When electrons combine with holes in the semiconductor, energy is released in the form of photons, which produces light. 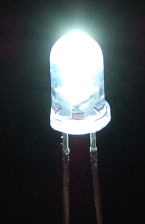
Green LEDUnit: 8The Green LED (Light Emitting Diode) produces the green light when electricity is passed through its terminals. The process is called electroluminescence. 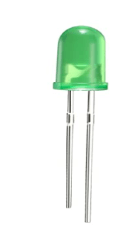
Red LEDUnit: 8The Red LED produces the red light when electricity is passed through its terminals. 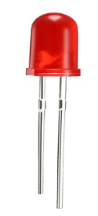
Yellow LEDUnit: 8The Yellow LED produces the yellow light when electricity is passed through its terminals. 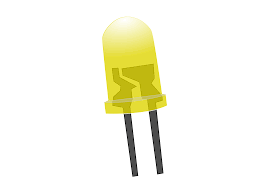
Blue LEDUnit: 3The Blue LED produces blue light when electricity is passed through its terminals. 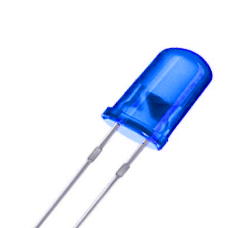
RGB LEDUnit: 1The RGB LED uses the combination of three colors (Red, Green, and Blue) to produce the light. The millions of hue of lights can be created from the combination of these three universal colors. 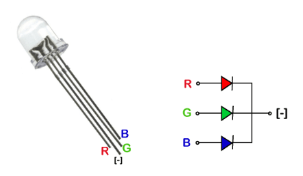
The colors are generated by adjusting the brightness of each of the three colors by using the PWM pin. LCD AlphanumericUnit: 1The LCD (Liquid Crystal Display) is a digital display, which gives information in the form of letters or numbers. It is the basic component in a kit. 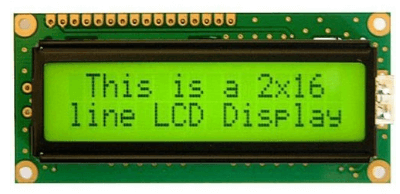
The configuration of the LCD display can vary from 16 x 2, 40 x 4, and 8 x 1. Here, 8 x 1 signifies 8 characters in a row. Wooden base that can be easily assembledUnit: 1The wooden base is a compatible base that is used to assemble the Arduino board and Breadboard on its base. Solid core jump wiresUnit: 70These are the most common wires used in the Breadboard. The wires vary in different lengths and colors. These wires are cheap and come in the form of the spool. We need to cut the wire according to the required length. 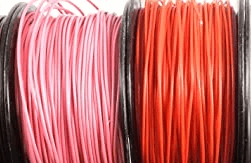
Stranded Jump wires of RED colorUnit: 1The stranded jump wires have solid tips. The RED color stranded jump wire is shown below: 
Stranded Jump wires of BLACK colorUnit: 1The BLACK color stranded jump wire is shown below: 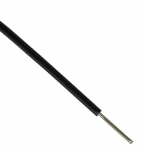
9V BatteryUnit: 1It is a standard-sized battery used for different purposes. A polarized snap is connected at the top of the rectangle-shaped battery. 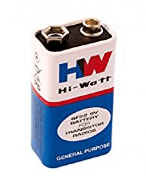
Resistors of 220 Ohms, 560 Ohms, 1kOhms, 4.7kOhms, 10kOhms, 1MOhms, and 10MOhmsUnit: 20 (220 Ohms), 5 (560 Ohms), 5 (1kOhms), 5 (4.7kOhms), 20 (10kOhms), 5 (1MOhms), 5 (10MOhms) A resistor is a two-terminal component having a particular electrical resistance. The function of the resistor is to manage the current flow. It controls the current flowing to the other components. The other functions are dividing voltages, adjusting the signal levels, etc. The resistors with resistance value are shown below: 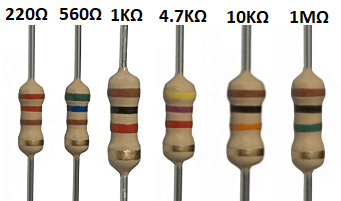
Small DC Motor of 6/9VUnit: 1It is a small motor whose voltage ranges from 6V to 9V. (40 x 1) Male Strip pinsUnit: 1The standard pitch for the 40 x 1 connector pin is 2.54mm. It is a single row male pin consisting of 40 pin headers connected to it. It is shown below: 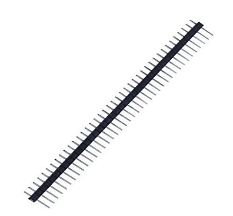
Red, Blue, and Green Transparent GelsUnit: 3The colored gels act as a filter for the sensors, which allows the specific colored light to pass through that gel. Diodes (1N4007)Unit: 5A diode conducts the current in one direction. The diode is an electronic component that has two terminals. The diodes can be used as the signal modulators, and demodulators, switches, voltage regulators, etc. 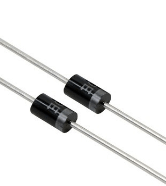
The Capacitors of 100uFUnit: 5The capacitor is a device that stores electrical energy. The energy is stored between the plates of the capacitor in the form of an electrostatic field. The image of 100uF/450V is shown below: 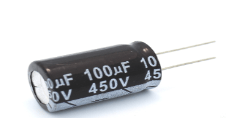
The capacitors like 100uF/25V, 100uF/50V, etc., are also available. OptocouplersUnit: 1The noise from the electrical signals is removed by the Optocouplers. It is also used to separate the low power circuits from the high-power circuits and transfers the electrical signals between these separated circuits. 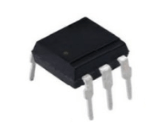
Small servo motorUnit: 1The servo motor is used to control the position, liner speed, and rotational speed. The advantageous features of servo motor are high efficiency, high precision, low heat generation, etc. The servometer will look like the below image: 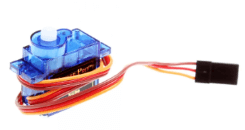
Piezo CapsuleUnit: 1The piezo in Arduino is defined as an electronic device, which produces a voltage when deformed by some mechanical strain, sound wave, or a vibration. Push ButtonsUnit: 10The push buttons are used as a switch. We can power ON the board supply or the connection by pressing the push button. 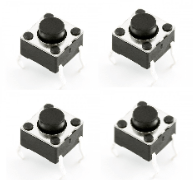
Tilt SensorUnit: 1The tilt sensor is used to measure the tilt with respect to the reference plain. It is also used to detect the inclination of the plane. 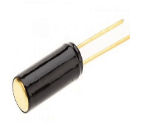
Potentiometer (10kOhms)Unit: 3The potentiometer acts as a knob, which is used to provide variable resistance. It can also be used to alter its resistance. The amount of resistance is measured as an analog value. 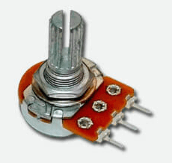
PhototransistorUnit: 6The phototransistor uses the NPN transistors to sense the light level and convert it into the current. 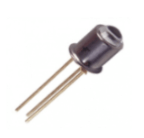
Temperature SensorUnit: 1The temperature sensors are used to record the surrounding temperature. It converts the input data to the electronic data. 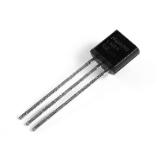
Mosfet TransistorsUnit: 2We can control the high voltage Arduino projects using the Mosfet Transistors. One terminal is used as a power source, and the other two terminals are used onboard. 
H-bridge Motor Driver [L293D]Unit: 1These motors are capable of driving the DC motors. We can turn the motor in both directions with the help of an H-bridge motor driver. USB CableUnit: 1The Universal Serial Bus (USB) is a cable that is used to connect the Arduino board with the computer. We can further program the Arduino board through the Arduino IDE on our computer. 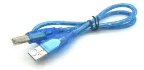
Other Popular KitsThe other popular Arduino kits are listed below:
It includes a CD, which consist of a PDF explaining about the specifications of the kit. It consists of some additional components, such as a joystick, Infrared Receiver, and Remote. The beginners may face some difficulty while using such kit. 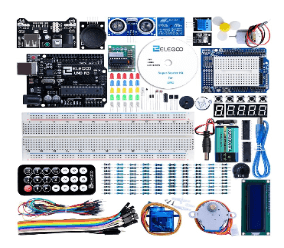
It is the ultimate kit designed for beginners as well as advanced users.
It is the ultimate kit intended for professionals. Beginners with advanced knowledge can use it. The components in the kit are listed below: Arduino Uno R3, Temperature Sensor TMP36, USB Cable, Shift Register, Arduino, Breadboard & its Holder, NPN Transistors, Small Servo motor, 5V Relay, Jumper Wires, DC Motor with wires, Piezo Buzzer, 12 units of Big 12mm Buttons, Photocell, LEDs (1x RGB, 10 x Red, 10 x Yellow), 10K Trimpot, Resistors (45 x 330Ω and 45 x 10KΩ), and 2 units of 1N4148 Diodes.
It includes a vast collection of components. The components in the kit are listed below: MEGA2560 Controller Board, IR Receiver, Button (small) (5), Power Supply Module, Stepper Motor, Humiture Sensor, 4-Digit 7-Segment Display, Dupont wire (Female to Male) (10), 5V Relay, Remote Control, Servo Motor (SG90), USB Cable (5), Stepper Motor Driver, Jumper Wire (Male to Male) (65), 9V Battery Clip Connector, Joystick PS2, Breadboard, Thermistor, Capacitor Ceramic 100nF, Photoresistor, Tilt Switch, Active Buzzer, LCD1602 Character Display LEDs(5 x Yellow, 5 x Red, 5 x Green, 5 x Blue, 5 x White, 1 x RGB, Resistors (10 each 10Ω, 100Ω, 220Ω, 330Ω, 1KΩ, 2KΩ, 5.1KΩ, 10KΩ, 100KΩ, 1MΩ), Potentiometer, NPN Transistor, Small Motor, Fan, and Ultrasonic Sensor Module.
Next TopicArduino Shields
|
 For Videos Join Our Youtube Channel: Join Now
Feedback
- Send your Feedback to [email protected]
Help Others, Please Share


