| |

Arduino MegaThe Arduino Mega is based on ATmega2560 Microcontroller. The ATmega2560 is an 8-bit microcontroller. We need a simple USB cable to connect to the computer and the AC to DC adapter or battery to get started with it. The Arduino Mega is organized using the Arduino (IDE), which can run on various platforms. Here, IDE stands for Integrated Development Environment. The functioning of the Arduino Mega is similar to other Arduino Boards. We need not require extra components for its working. The ATmega2560 Microcontroller is consistent with most of the shields of Arduino UNO. The Arduino Mega board is shown below: 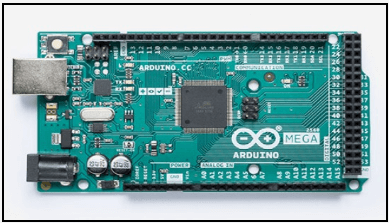
Why we use Arduino Mega?The advantage of using the Arduino Mega board over other boards is that it gives the advantage of working with more memory space. It has higher processing power, which can help us to work with the number of sensors at a time. What is the difference between Arduino UNO and Arduino Mega?
MemoryThe memory structure is shown in the below image: 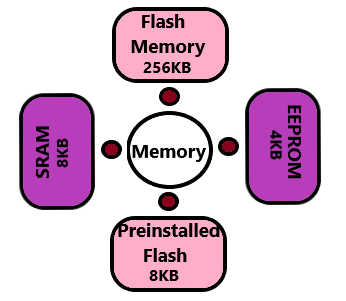
The preinstalled flash has a bootloader, which takes the memory of 8Kb. Here, SRAM stands for Static Random Access Memory, and EEPROM stands for Electrically Erasable Programmable Read-Only Memory. Technical Specifications of Arduino MegaThe technical specifications of Arduino Mega are listed below:
How to get started with Arduino Mega?We can program the Arduino Mega using the Arduino IDE. We need to install the Arduino IDE software to get started with the process. We can also use Arduino Web Editor, which allows us to upload sketches and write the code from our web browser (Google Chrome recommended) to any Arduino Board. It is an online platform. The USB cable is crucial for the connection between the board and the computer. The green LED will light, which indicates the successful connection between the computer and the board. The steps to get started with Arduino Mega are listed below:
To upload and run, click on the button present on the top panel of the Arduino display, as shown below: 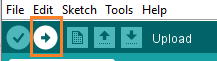
Within the few seconds after the compile and run of code or sketch, the RX and TX light present on the Arduino board will flash. The 'Done Uploading' message will appear after the code is successfully uploaded. The message will be visible in the status bar.
Next TopicArduino Micro
|

 For Videos Join Our Youtube Channel: Join Now
Feedback
- Send your Feedback to [email protected]
Help Others, Please Share


