Javatpoint Logo
Javatpoint Logo

Arduino Micro

The Arduino Micro (a type of Arduino board) is based on the ATmega32U4 Microcontroller. It comes with the inbuilt USB. The Micro can also perform as a mouse or keyboard when connected to the computer. It uses Micro USB cable.

We need to use the micro USB cable to establish the connection between the Micro board and the computer to get started with the programming. The USB port is inbuilt in the ATmega32U4 Microcontroller, which eliminates the use of a secondary processor.

The Arduino Micro board is shown below:

Arduino Micro

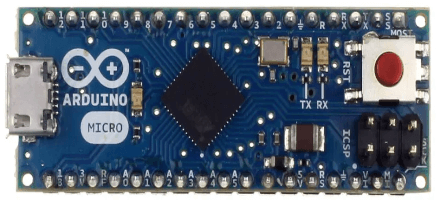
What is the difference between Arduino Micro and Arduino UNO?

  • The Arduino Micro consists of 20 sets of pins. The 7 pins from the set are PWM (Pulse Width Modulation) pins, while 12 pins are analog input pins. The other components on board are reset button, 16MHz crystal oscillator, ICSP header, and a micro USB connection. Whereas, the Arduino UNO consists of 6 analog pin inputs, 14 digital pins, a USB connector, a power jack, and an ICSP (In-Circuit Serial Programming) header.
  • Arduino Micro consumes less power than Arduino UNO.
  • Arduino Micro has a small size compared to UNO.
  • Arduino UNO is based on an ATmeg328p Whereas, Arduino Micro is based on the ATmega32U4 Microcontroller.

What is the main difference between Arduino Micro and Arduino Pro Mini?

  • The oscillator frequency of Arduino Pro Mini is 8MHz, while the oscillator frequency of Arduino Micro is 16 MHz.
  • The size of the Arduino Pro Mini is small as compared to the Arduino Micro.
  • Arduino Micro is based on the ATmega32U4 Microcontroller, while Arduino Pro Mini is based on ATmega328P

What is the difference between Arduino Micro and Arduino Nano?

  • Arduino Micro is based on the ATmega32U4 Microcontroller, while Arduino Nano is based on ATmega328 Microcontroller.
  • Arduino Nano has 2KB of SRAM, while Micro has 2.5KB of SRAM. Here, SRAM stands for Static Random-Access Memory.

Technical Specifications of Arduino Micro

The technical specifications of Arduino Micro are listed below:

  • It consists of 12 analog pins.
  • The 7 pins from the set of digital pins are the PWM (Pulse Width Modulation) pins. These pins are used to convert the digital signal into the analog signal. It is commonly used when the built-in DAC (Digital to Analog Converter) is absent on the Arduino board.
  • The program or firmware with the advanced functionalities is received by a microcontroller with the help of the ICSP (In-Circuit Serial Programming) header.
  • The recommended input voltage is between 7V to 12V.
  • The operating voltage of the Arduino Micro is 5V.
  • The microcontroller used is ATmega32U4. It is a low power microcontroller.

Getting started with Arduino Micro

We can program the Arduino Micro using the Arduino IDE.

We can also use Arduino Web Editor, which allows us to upload sketches and write the code from our web browser (Google Chrome recommended) to any Arduino Board. It is an online platform.

The steps to get started with Arduino Micro are listed below:

  • Install the drivers of the Arduino Micro board.

The driver will be installed automatically when we plug-in the board into our computer using the USB. But in some Windows (Vista, 10, and 7), we need to manually install the driver using the option Start-> Control Panel-> Hardware-> Select the appropriate board -> Right-click -> select Update Driver.

  • Open the code or sketch written in the Arduino software.
  • Select the port and the type of board.
    .
    Here, we will select the Arduino Micro. The port will be visible, when the board is successfully connected to our computer.

For example, let's open an example of Button using the options File -> Examples -> Digital -> Button. It is shown below:

Arduino Micro

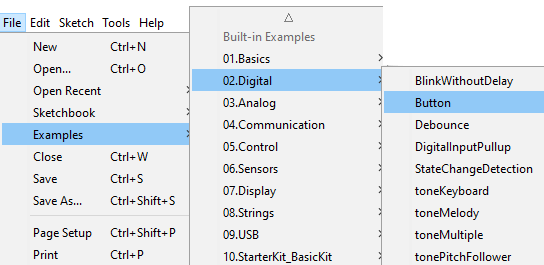
The example of the Button sketch will be opened.

The selected board is shown below:

Arduino Micro
  • Now, upload and run the written code or sketch.

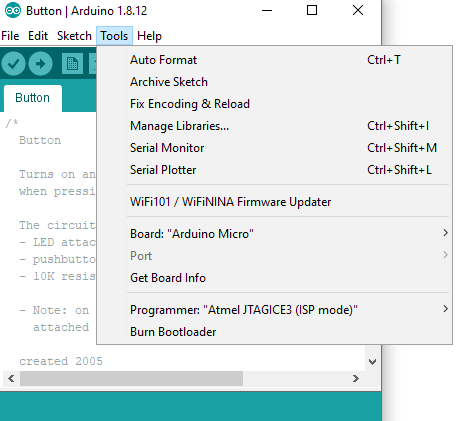
To upload and run, click on the button present on the top panel of the Arduino display, as shown below:

Arduino Micro

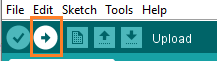
Within the few seconds after the compile and run of code or sketch, the RX and TX light present on the Arduino board will flash.

The 'Done Uploading' message will appear after the code is successfully uploaded. The message will be visible in the status bar.


Next TopicArduino Due


Youtube For Videos Join Our Youtube Channel: Join Now

Feedback


Help Others, Please Share

facebook twitter pinterest

Learn Latest Tutorials


Preparation


Trending Technologies


B.Tech / MCA