| |

Arduino Pro MiniThe Arduino Pro mini is a small Arduino board based on ATmega328P or Microcontroller. The connectivity and functionality are the same as other Arduino boards. It is preferred by advanced users for greater flexibility and small size. The board comes in different variants. If we want to use the operating voltage of 3.3V, we need to use the Arduino Pro Mini 3.3V board. For 5V, we are required to use the Arduino Pro Mini 5V board. It is primarily used in compact size projects due to its small size. The Arduino Pro Mini is organized using the Arduino (IDE), which can run on various platforms. Here, IDE stands for Integrated Development Environment. The Pro Mini comes without the header. We need to solder the headers while implementing the board in our projects. Drawback: The Built-in programmer, shield, and USB port are absent in Arduino Pro Mini. Arduino Pro Mini board is shown below: 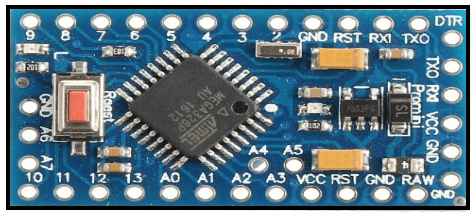
What are the differences between Arduino UNO and Arduino Pro Mini?The differences between Arduino UNO and Pro Mini are listed below:
What is the main difference between Arduino Nano and Arduino Pro Mini?The differences between Arduino Nano and Pro mini are listed below:
MemoryThe Memory structure of the Pro Mini is similar to Arduino UNO. The memory structure is shown below: 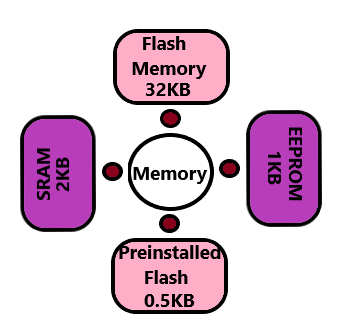
The preinstalled flash has a bootloader, which takes the memory of 0.5 Kb. Technical Specifications of Arduino Pro MiniThe technical specifications of Arduino Pro Mini are listed below:
PinoutThe Pinout of Arduino Pro Mini is shown in the below image: 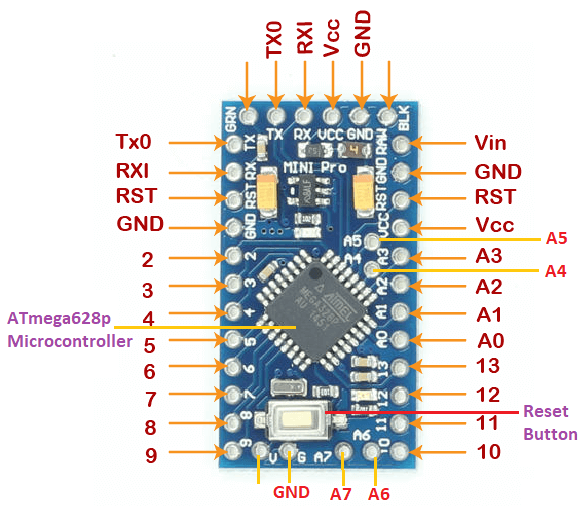
The description of pins is listed below:
There are three GND (Ground) pins present on the Pro Mini board.
Tx0 and RX1 pins are used for serial communication. These two pins can also be used as the digital I/O pins. The Tx0 pin is used for transmission of the data.
RX1 is the communication pin, which is used for receiving the data.
It is used to add a Reset button to the connection.
It is the regulated voltage of 3.3V. We can also regulate the voltage of 5V depending on the versions of the board.
The Vin is the input voltage pin, which is applied while using the external power source.
A0, A1, A2, A3, A4, A5, A6, and A7 are the analog pins. The resolution of the analog pins is 10 bits. The above 8 analog pins are used as the analog inputs in the Arduino Pro Mini board.
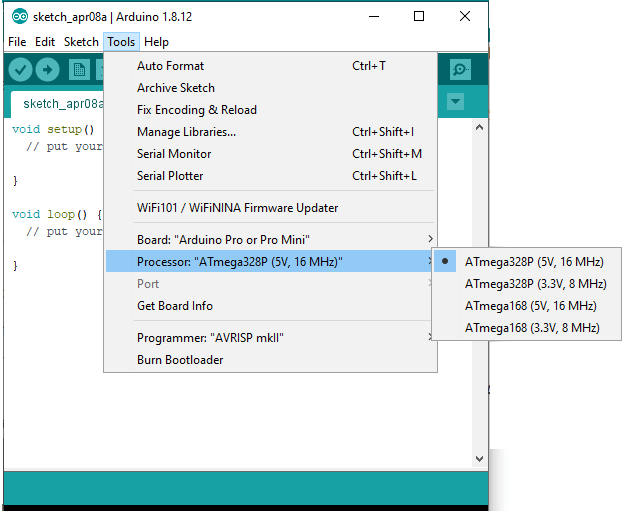
The PIN from 2 to 13 are the digital I/O pins. How to get started with Arduino Pro Mini?We can program the Arduino Pro Mini using the Arduino IDE. We can also use Arduino Web Editor, which allows us to upload sketches and write the code from our web browser (Google Chrome recommended) to any Arduino Board. It is an online platform. The steps to get started with Arduino Pro Mini are listed below:
To upload and run, click on the button present on the top panel of the Arduino display, as shown below: 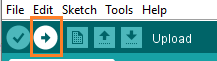
Within the few seconds after the compilation and run of code or sketch, the RX and TX light present on the Arduino board will flash. The 'Done Uploading' message will appear after the code is successfully uploaded. The message will be visible in the status bar.
Next TopicArduino Mega
|
 For Videos Join Our Youtube Channel: Join Now
Feedback
- Send your Feedback to [email protected]
Help Others, Please Share


