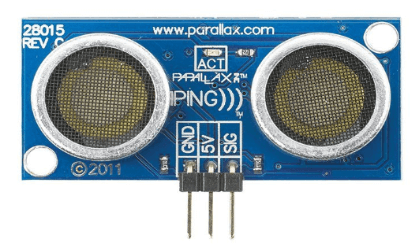
Arduino Ultrasonic Range finderIn previous topic of Arduino Ultrasonic Distance Sensor, we have used a four-terminal Ultrasonic sensor. Here, we will use a three-terminal Ultrasonic sensor, which is shown below: 
It has three terminal GND (Ground), 5V, and SIG (signal). The process and the function of this sensor is similar to the Ultrasonic Distance Sensor. The frequency waves travel through the air and strike the object on its path. The waves bounce back from the object and reach back to the module. The Ultrasonic Range sensor pings the obstacles or objects with the ultrasound. It detects the range from 3 cm or 4m or 400 cm. The example of such a sensor is: SEN136B5B It is a sensor from SeedStudio. We need to switch the state between HIGH and LOW to notice the output. Let's start the project. Hardware RequiredThe components required to create the project are listed below:
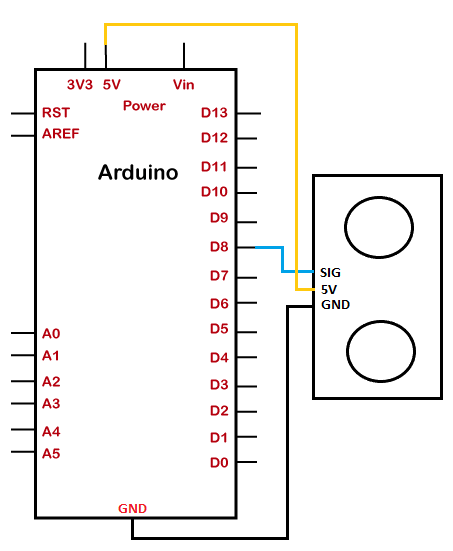
Structure of the projectThe structure of the project is shown below: 
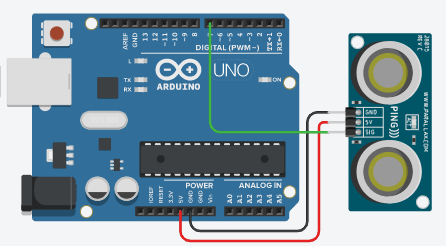
ProcedureThe steps to connect the Ultrasonic sensor to the board are listed below:
SketchConsider the below code: Steps to upload the code to the projectThe steps are listed below:
Connection DiagramThe connection diagram is shown below: 
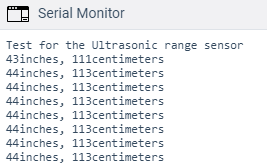
Output The output on the serial monitor will appear as: 
Next Topictemperature sensor
|
 For Videos Join Our Youtube Channel: Join Now
Feedback
- Send your Feedback to [email protected]
Help Others, Please Share


