AutoCAD 2017 Free DownloadThe AutoCAD 2017 version was released on March 2016. We need to first sign-in to download the AutoCAD software. The official website of AutoCAD is Autodesk.in or Autodesk.com. We need to sign-in as an educator or student to avail the benefits of the free version. The license for the free version is valid for 3-years. If we want to use AutoCAD commercially or for other purposes, we can download the free trial available for 30 days. The steps to download the AutoCAD 2017 free version are listed below: 1. Open the browser or any other search engine. 2. Use the URL: https://www.autodesk.com/education/free-software/autocad. The Sign-in window will appear as shown in the below image: 
3. We need to sign-in using the same email-id and password, as we have mentioned while creating the account in Autodesk. 4. Enter the email-id and password. 5. After the sign-up, the screen will look like the given image: 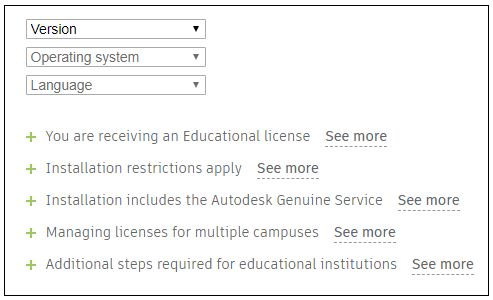
6. Select the 'AutoCAD 2019' version from the drop-down list of the Version category. The Operating system and the Language will appear according to the selected version. The drop-down list for Version category will look like the below image: 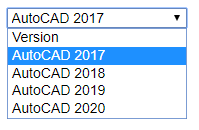
7. Now, we need to choose the Operating system, as shown in the below image: 
We can select the Windows 32-bit or 64-bit according to our system requirements. 8. Now, we need to select the language from the drop-down list, as shown below: 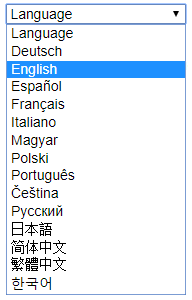
After selecting the above categories, a window will appear. Consider the below image: 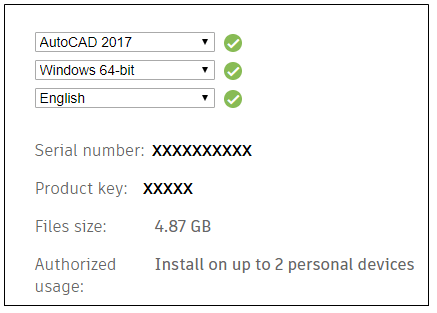
9. Click on the 'INSTALL NOW' option at the bottom of the page. It will appear as: 
10. Open the downloaded file. The process will look like the below image: 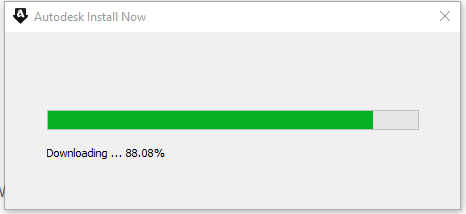
11. The Autodesk Download Manager dialog box will appear. Accept the license and click on the 'Install' as shown in the below image: 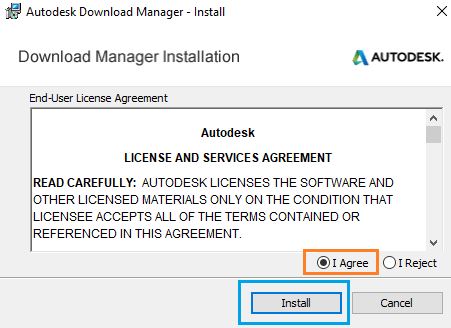
12. Specify the location, and the downloading will start. It will appear like the below image: 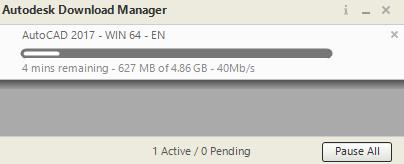
We need to wait till the downloading process is complete. 13. As soon as the downloading is completed, click on the Install button to start the installation process as shown in the below image: 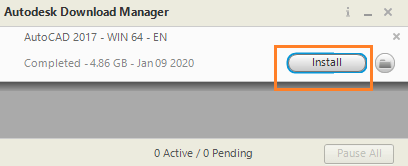
14. The AutoCAD window will appear. Click on the 'Install' option as shown in the below image: 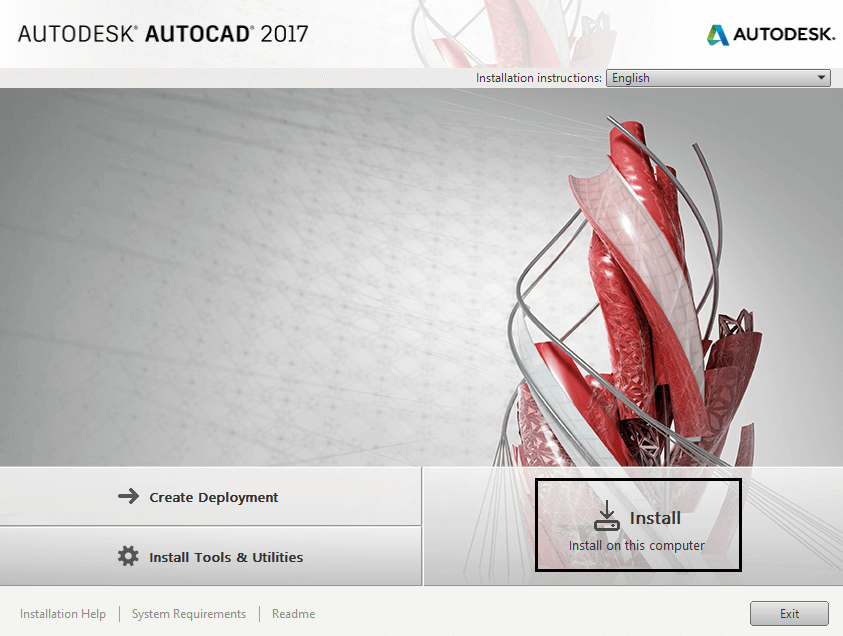
15. The Autodesk License window will appear. Accept the license and click on the Next button at the bottom, as shown in the below image: 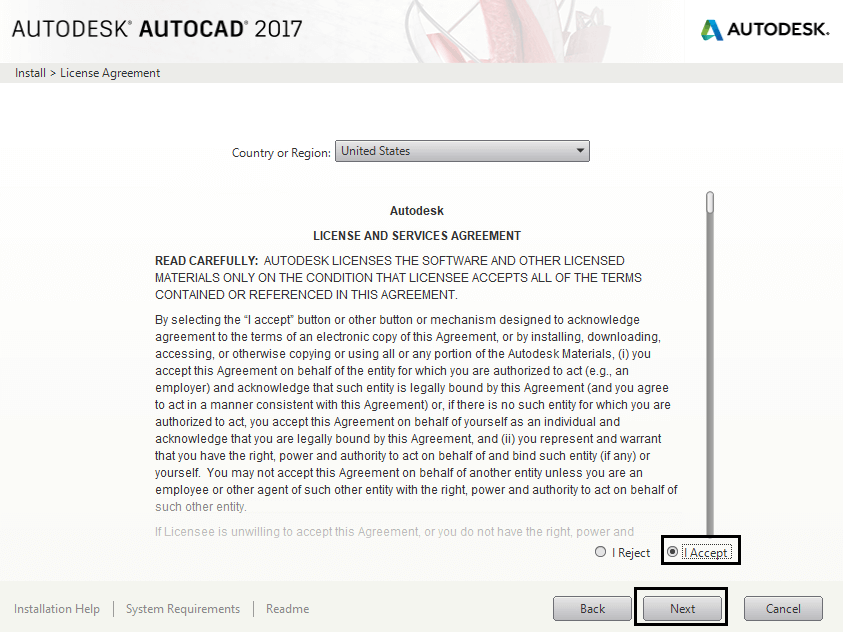
16. Now, click on the Install button, as shown in the below image: 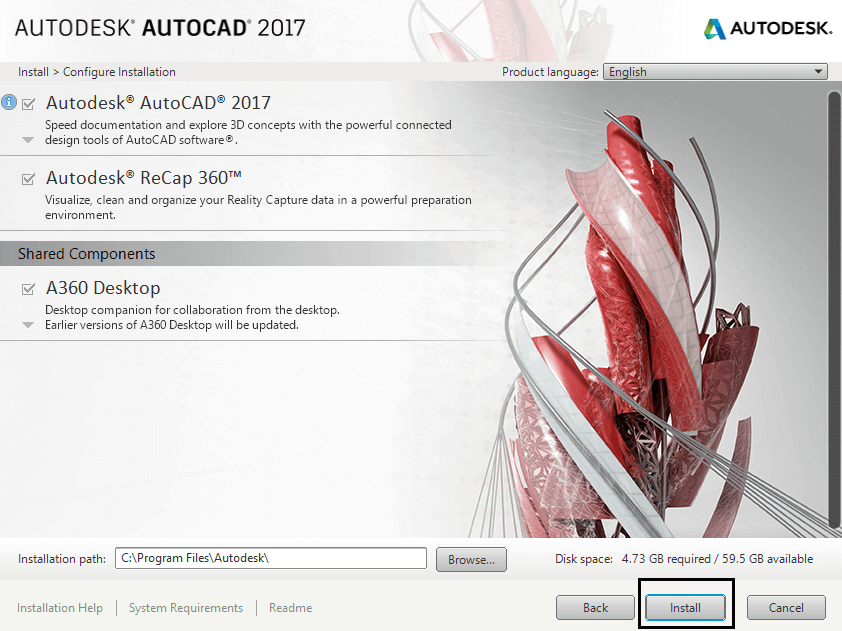
17. The installation process will now start. Wait until the installation process is complete. 18. After the process is completed, click on the Finish button at the bottom. 19. The AutoCAD software is now ready for use. 20. We can open the AutoCAD software and can start creating drawings.
Next TopicAutoCAD LT
|
 For Videos Join Our Youtube Channel: Join Now
Feedback
- Send your Feedback to [email protected]
Help Others, Please Share


