Practice Question A
Nut and Bolt
Here, we will create a Nut and Bolt in AutoCAD 3D.
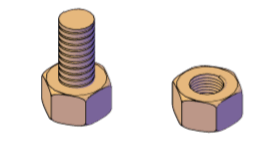
Below is the object:
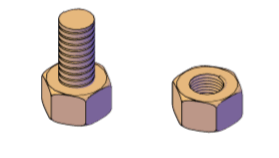
Note: It would be best if you first tried creating the above figure by yourself
Solution:
Convert your display to:
- 3D Modeling
- SW Isometric view control
- Turn ON the Ortho Mode
- Set the Limits accordingly.
The steps to create the above figure are listed below:
- Draw a hexagon of radius 20.
- Draw a circle of radius 10. The center points of hexagon and circle are the same.
- Draw a circle circumscribing the hexagon of radius 20, as shown below:

- Select the Extrude Now, extrude the inner circle and hexagon with a height of 20.
- Select the Subtract command and subtract circle from the hexagon, as shown below:
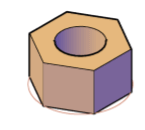
- Extrude the outer circle with a height of 20.
- Select the Fillet command and apply a fillet of radius 3 on the upper and lower edge of the outer circle, as shown below:
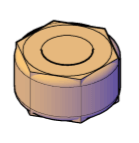
- Select the Intersect command and select both the created solids < press Enter, as shown below:
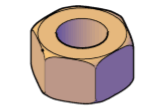
Change the view control to TOP.
- Select the Helix command < specify the center as the center of the inner circle < specify the base radius of 10 < specify top radius 10 < specify number of turns 10 < specify helix height 20 < press Enter.
Change the view control again to SW Isometric.
- Draw the circle of radius 0.6 anywhere on display < select the sweep command < select the circle of radius 0.6 and press Enter < select helix and press Enter.
The object will now appear as:

- Now, again draw the figure shown in step 3:

- Select the Extrude command < Extrude the inner circle with the height of 60 and outer hexagon with height 20.
- Extrude the outer circle with a height of 20.
- Select the Fillet command and apply a fillet of radius 3 on the upper and lower edge of the outer circle.
- Select the Intersect command and select both the hexagon and outer circle< press Enter. An image will appear as shown below:
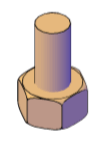
- Select the Helix command < specify the center as the center of the inner circle < specify the base radius of 10 < specify top radius 10 < specify number of turns 10 < specify helix height -40 (in downward direction) < press Enter.
- Draw the circle of radius 0.6 anywhere on display < select the sweep command < select the circle of radius 0.6 and press Enter< select helix and press Enter, as shown below:
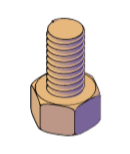
- Select subtract < subtract helix from the inner circle, as shown below:
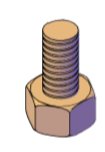
Both Nut and Bolt will now appear as:
|


 For Videos Join Our Youtube Channel: Join Now


