| |

Chrome AutofillChrome is a huge infrastructure-powered search that covers multiple ergonomic features. One such popular feature these days is the Autofill. In this article, we'd to gain some knowledge back and forth about Chrome Autofill. Let's discover some specific ways and tactics behind the Chrome Autofill. The Chrome Autofill extension is designed to roll out one simple objective: fill form fields automatically on a page without any user interaction. Although it is a primary function, it can serve much more. Chrome comes with an in-built autofill feature, but it doesn't work fine on all fields and requires you to select content from a drop-down menu. Moreover, Autofill is also powered by smart artificial intelligence internal engines that channel the autofill feature into reducing the time of filling frequently used forms. Setting up Chrome AutofillAutofill has been a part of the browser experience for quite a long time yet somehow it seems to persist as one of those features which are less discuss and often is never put to use, until and unless someone points it to make use of it. Autofill itself acts as a database that stores certain data such as name, address, telephone number, and so on in the browser, which can later be used to automatically fill forms with the successive data across any form online. To proceed with setting up the Autofill option in Chrome, we may need to follow some steps given below.
The options might look like the image shown below: 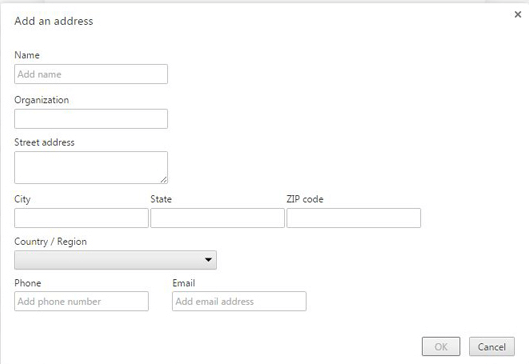
How to use the Autofill extension?To take the advantage of the Chrome Autofill, all you need to do is to simply find the menu icon that is present at the top-right corner of the Chrome browser. It resides just next to the address bar where you can fill all the necessary details accordingly. Another way of using Autofill is by simply typing "chome://settings" in the browser's address bar and then hit "Enter". Once you have been redirected to the settings page, you just need to move down until you see the advanced features option. You need to find options all the way down to get "Passwords and forms". Click on the "Autofill settings" so that you can easy turn the feature on and off as and when required. To begin doing so, we need to sign to our Chrome using Google account, and once signed in, add the Autofill option as shown in the previous steps. Now, once this extension is enabled, click on the "Options" tab. Once clicked, it would display the "Form Fields". You now need to click on this option and a list shoots up. Start fillings all the desired data that you want Chrome Autofill to fill it automatically. Fill all the corresponding input fields. Those fields constitute certain terms that are described below. Field type: Here, you need to select the desired data you want Autofill to input from the drop-down menu. The options include checkbox, passwords and texts. Field name: Here, you input a name which is later addressed to find out with the label matching with "id" just like you see in a general web form. These field names can be your name, your email, messages or subjects. Field value: This field includes automatic filling whenever you might fill it for. The input specified is kept under some constraints and rest is your concern what value you will be putting into it. Site: Here, the Autofill mechanism is automatically triggered whenever you move across the site where the document of title or the URL is surfed. It automatically fills out any web forms matching with the inputs fields defined under the Autofill. 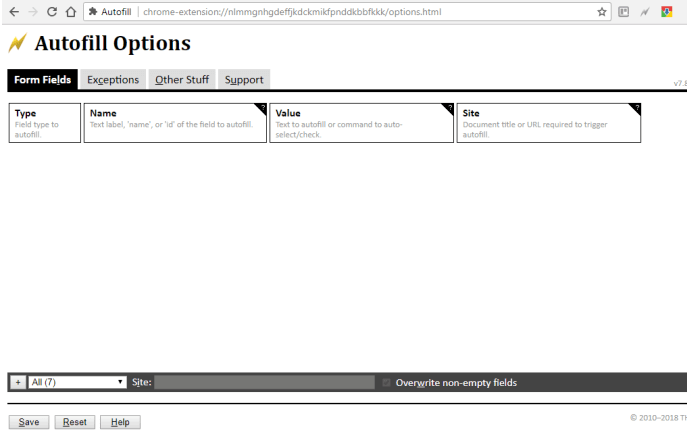
We just need to repeat the steps by adding entries until we get all the values that are needed to be auto-filled. Once done, don't forget to save the changes made. That's it. We are now ready to test it out by loading any web form. If the extension is working properly, you'll suddenly notice a change that reflects how you configured the Autofill in the settings.
Next TopicMinify JS
|
 For Videos Join Our Youtube Channel: Join Now
Feedback
- Send your Feedback to [email protected]
Help Others, Please Share


