| |

Clipping Mask in PhotoshopClipping masks provides a powerful control on the visibility of a layer. It is similar to the layer masks. However, their usage is the same which is to control the visibility of the layer. Maybe the result of the layer mask and clipping mask will be the same, but they are two different features. If we break the term clipping mask, then the clipping stands for the path, and the mask stands for the images. The layer mask uses the black and white filter to show or hide the layer content. In contrast, the clipping mask uses the content and transparency of a layer to control the other layer's visibility. We need two layers to create a clipping mask. The bottom layer will control the visibility of the above layer; The bottom layer works as a mask for the above layer. Make the bottom layer to that layer that contains the actual content of the image to control its visibility. If any part of the bottom layer is transparent, the same region for the above layers will be hidden. It may seem complicated how a clipping mask works, but it is super easy once we practically use it. Let's consider an example; suppose we have an image layer and a text layer. We want to add the image inside the text; then, we can do so by using the clipping mask on the layers. Remember, we can only group the successive layers. We cannot group a layer if any other layer is in between the layers to be masked. The base layer name will be displayed as underlined, and the thumbnail icons for the overlying layers are displayed as indented. Also, the overlying layer will have the clipping icon. 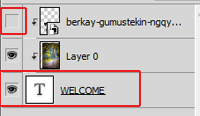
In the above image, the base layer is the text layer, and the rest of the above layers are underlying layers of it. The following are the output of the above layers: 
In the above image, we have masked the image layer with the text layer. The above image is clearing a picture of what a layer mask does? Let's understand the clipping mask in detail: What is Clipping Mask?The clipping mask is a layer clipped inside another layer or a group. The clipped layer will only be visible within the boundaries of the base layer, which is the main content layer. It could be shape, text, or anything else. Once we clipped layers to a layer, the main layer will be underlined to indicate a base layer. Let's understand how to use clipping masks: How to use clipping Mask in Photoshop?Creating a clipping mask in Photoshop is a straightforward process; all we need to keep the layers in the right order. Photoshop provides a visual indicator to display how and where the clipping mask is being applied. Let's discuss how to use a clipping mask by putting an image inside a shape. Follow the below steps to apply a clipping mask to a picture: Step1: Create a new document Press the Ctrl+N keys or select the new option from the file menu to create a new document. It will open a dialogue window to specify the document size and background. Specify the document size and background and click OK to continue. 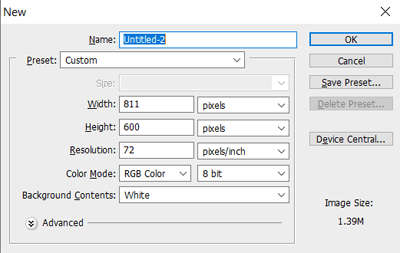
It will create a specific size document. Step2: Create a new shape layer Now, create a new layer by pressing the Ctrl+Shift+N keys. Now add any shape or text or anything that you want to make a mask underlying it. For example, we are creating a circle to make the image clipped with it. To create a circle, rectangle, or any other shape, select the respective shape tool from the toolbox given at the left of the workspace. 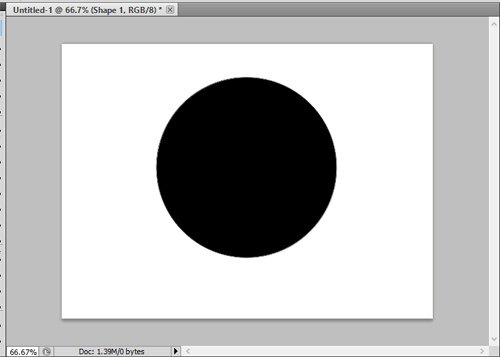
Step3: Create a new content layer Now, create a new layer by pressing the Ctrl+Shift+N keys. Now add the content that you want to clip with the shape. For example, we want to clip an image with a circle. Then, we will add an image into this layer by dragging it into this workspace. 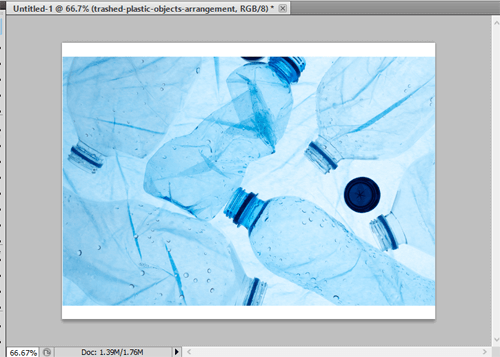
The layering order is very important for clipping. It should be proper. The main layer in which you want to put the content should be at the bottom. It is called the base layer and defines the boundaries for the mask. Consider the below layer stack: 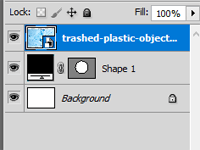
In the above layer stack, we have to keep the base layer at the bottom just after the background layer and the image layer at the top of the shape layer. In this stack, the image will be properly clipped with the shape after applying the clipping mask. Step4: Apply clipping mask To apply the clipping mask, press the Alt key and move the cursor to the top edge of the shape layer. The mouse pointer will be converted into a clipped shape from the arrow. When it is showing a clip pointer, click on edge. It will merge the image with the shape. Alternatively, we can apply the clipping mask by selecting the top layer and press the Ctrl+Alt+G keys. Also, we can apply it by navigating to the layer -> Create Clipping Mask menu. Consider the below image: 
Just like the above shape, we can merge a text with an image or any other shape. Clipping Mask ControlsPhotoshop provides a powerful way to control the clipping mask. We can tweak the clipping mask anytime, such as resize, move, etc., by using few tools. Let's discuss clipping mask controls: Move Content within the MaskIt is straightforward to move to content within the clipping mask. To do so, select the topmost layer that you want to fit in the mask; after that, select the move tool from the toolbox to give at the left of the workspace or hit the V key. Now, we can reposition the mask content by dragging the mouse cursor in respective directions. Resize Content within the MaskWe can easily resize the content within a mask by using the free transform tool. To resize the mask content, select the top layer, then activate the free transform tool by navigating to Edit-> Free Transform tool; alternatively, we can press the Ctrl+T keys to activate it. Once the transform tool is activated, we can resize the document by dragging it on its corners. Add Multiple Clipping MasksWe can also create a stack of clipping masks to a layer that is invaluable while adding the clipping mask we have created. For example, if we want to add two frames in a picture, keep the main frame at the bottom, then the next frame on top of that and the picture in the same sequence. Now, we can clip each layer just with the above layer. For a better visibility, resize the layer as per the requirement. Remove a Clipping MaskIn case you have accidently clipped the wrong layer and want to remove the existing clipping mask. We can easily remove the clipping mask if we want. It is a straightforward process, just like adding the mask. When we ungroup the base layer from the above layer, all layers in the clipping mask will ungroup. Follow one of the below steps to remove a clipping mask:
Here, we have discussed what the clipping mask is? And how to apply and remove it. Most people get confused between layer masks and clipping masks; let's discuss the difference between layer masks and clipping masks. Difference between Layer Mask and Clipping MaskThe layer mask and clipping mask are two different features of Photoshop. However, their main usage is the same is to control the visibility. So, it will be useful to compare both the features to clear the picture of what they do and when to use them. The following are some key differences between the layer mask and clipping mask:
Conclusion:Here, we have discussed the clipping mask in Photoshop and its different use cases. Further, we have compared it with the layer mask. We have also discussed how they are different and similar. The clipping mask is useful for compositing multiple images. It controls their visibility, such as adjusting a photo into a frame or enhancing some text by adding a picture such as fire, water, etc. We want to add a final note to this discussion that masking is one of the powerful features of Photoshop. The clipping mask and layer mask both the tools are both completely different. Both the tools are very useful from a designer's perspective. They provide a powerful way to control the image's visibility. We can create imaginary graphics as per our requirement using the masking features.
Next TopicHow to Deselect in Photoshop
|
 For Videos Join Our Youtube Channel: Join Now
Feedback
- Send your Feedback to [email protected]
Help Others, Please Share


