| |

Creating special effects in Adobe IllustratorWe can change the appearance of any object, group, or layer in Adobe Illustrator by using filters, effects, and the Appearance and Graphic style panels. Appearance attributesThe attributes are the properties that affect the visual of an object without altering its structure. It includes fills, strokes, transparency, and effects. We can set the appearance attribute at any level of designing hierarchy. 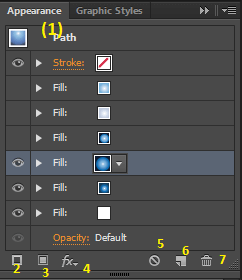
The Appearance panel is the key to working with appearance attributes because we can apply appearance attributes to layers, groups, and objects. To open the Appearance Panel, you can do one of the following:
The effects in the Appearance panel will be listed from top to bottom in the order in which they are applied to the artwork. Show or hide additional attributes in the Appearance panel A triangle Specify the way attributes are applied to new objectsIf you want to apply a single fill and stroke to a new object: Step 1: Click on the New Art Maintains Appearance button Step 2: If you want to apply the current appearance attribute to a new object, click on the New art Has Basic Appearance button Duplicate an appearance attributeStep 1: Go to the artboard and select the object you want to duplicate appearance for. 
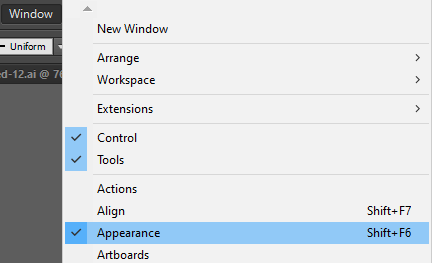
Step 2: Open the appearance panel from the Windows menu. 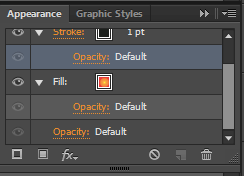
Step 3: Select an attribute in the Appearance panel. Step 4: Click on the duplicated selected item/button on the Appearance panel. 
Step 5: Or you can drag the appearance attribute on to the Duplicate Selected Item button in the panel. Remove appearance attributesStep 1: Select the object or group on the artboard. Step 2: Go to the Appearance panel and select the attribute. Step 3: To remove the specific attribute, click on the Delete icon Copy appearance attribute between objectsThe eyedropper tool can be used to copy the appearance attribute from one object to another. Step 1: Select the object on the artboard for which you want to copy or change the attribute. Step 2: Go to the Tools panel and select the Eyedropper tool Step 3: Now, move the eyedropper tool onto the object whose attributes you want to copy. Step 4: While holding the shift button, click to sample only the color from a portion of a gradient, pattern, mesh object. Effects and filtersThe effect and filters are applied to an object to change the looks of the object. The Effects are live, i.e., we can apply an effect command to an object and then continue to modify the effect's options or remove the effect at any time with the help of the appearance panel. While Filters change the object, i.e., the changes can be reversed once the filter is applied. 
Apply an effect/filter Step 1: Select the object from the artboard on which you want to apply the filter. Step 2: Go to the effect or filter menu and choose a command. 
Step 3: Set the option on the appeared dialogue box and click OK button. 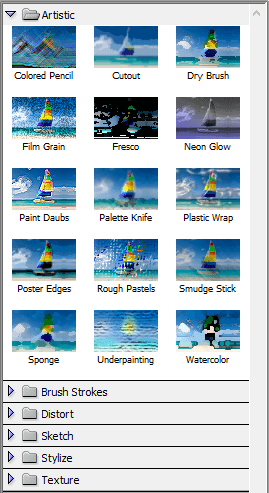
Raster EffectRaster effects generate pixels instead of creating vector data. It includes SVG Filters and all of the effects in the bottom section of the Effect menu. But the drop shadow, Inner Glow, Outer Glow, and the Feather command contained in Stylize submenu. Adobe Illustrator uses the document's raster effects setting to determine the resolution of the resulting image when we apply a raster effect. To set rasterization option for a document, follow these steps: Step 1: Open the artboard. Step 2: Go to the Effects menu. Step 3: Select the Document Raster Effects Settings from the drop-down. 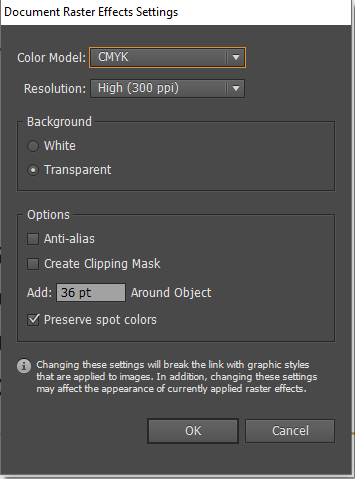
Rasterization optionsFollowing are the options that can be used by the documents: Color Model: The color model is used to generate RGB or CMYK color image, a grayscale image, or a 1-bit image. Resolution: It determines the number of pixels per inch in the rasterized image. Background: It determines how the transparent areas of the vector graphic are converted to pixels. Anti-alias: It can be used to reduce the appearance of a jagged edge in the rasterized image. Create Clipping Mask: It can be used to make the background of the rasterized image appear transparent. Add Around Object: It can be used to add the specified number of pixels around the rasterized image. Artistic filters and effectsThe artistic filters can be used only with the documents in RGB color mode. 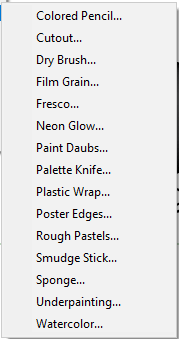
Color pencil: It can be used to draw a rough color image. Using a color pencil, the important edges are retained and given a rough crosshatch appearance. Cut-out: It can be used to create an image that is made through a rough cut-out piece of color paper. Dry Brush: It can be used to paint the edges of the image using the dry-brush technique. Film Grain: It can be used to apply an even pattern to the shadow tones and mid-tones of an image. Fresco: it can be used to paint an image in a coarse manner using a short and rounded stroke. Neon Glow: It can be used to add various types of glow to the objects in an image. Paint daubs: It can be used to access different types of brush sizes. Palette Knife: It can be used to reduce the details in an image. Plastic Wrap: It can be used to coat the image as it is shiny plastic. Poster Edge: It can be used to reduce the number of colors in an image according to the Posterization value we set. Rough Pastels: It can be used to create an image that looks like stroked with colored pastel chalk. Smudge Stick: It can be used to soften the image using short diagonal strokes to smudge or smear the darker areas. Sponge: It can be used to create an image with a highly textured background. Underpainting: It can be used to paint the image on a textured background. Watercolor: It can be used to paint the image in a watercolor style. Blur filters and effectsThe commands in the Blur menu are based on raster and can use the document's raster effect settings in the Effect menu whenever we apply the effect to a vector object. 
Brush Strokes filters and effectsIt is based on the rasters, and whenever you apply the effect to a vector object, it uses the document's raster effects settings. 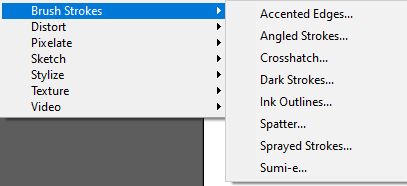
Distort filters and effects The distort filters and effects are memory-intensive. Whenever we apply the effect to a vector object, it can use the document's raster effects. 
Pixelate filters and effects It is also raster-based filters and effects. Whenever we apply the effect to a vector object, it uses the document's raster effects. 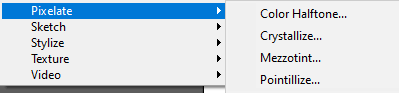
Sharpen filter and effect You can access this menu in the Effect menu that can be used to create a blurry image by increasing the contrast of adjacent pixels. Unsharp Mask: It can be used to find the areas in the image where significant color changes occur and sharpen them. Sketch filters and effects The sketch filters and effects are available only for documents in RGB color mode. Many times it uses the black and white color to redraw the image. 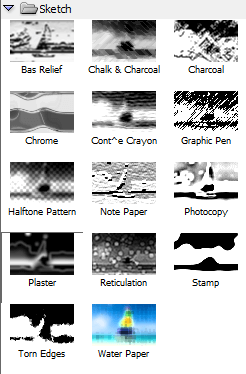
Stylize filters and effects The stylized command can be used only in the RGB color mode. 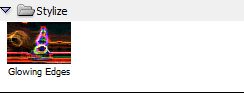
Textures filters and effects It is also raster-based and can be available only with the RGB mode. 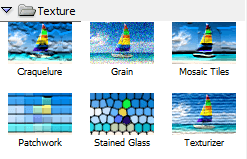
Use texture and glass surface controlTo use the texture and glass effect in illustrator, follow these steps: Step 1: Go to the effect menu and click on filters/effect. Step 2: On the filter or effect's dialogue box, select a texture type from the Texture Pop-up menu. Step 3: Choose one of the following:
Drop ShadowsStep 1: Open an Artboard and select the object or group for which you want to create a shadow. Step 2: Go to the effect menu. Step 3: Click on the Stylize from the drop-down menu then select Drop Shadow or Filter from the sub-menu. Step 4: Now select the Stylize and then click on the Drop Shadow. Step 5: From the available options, select one and click on the OK button. 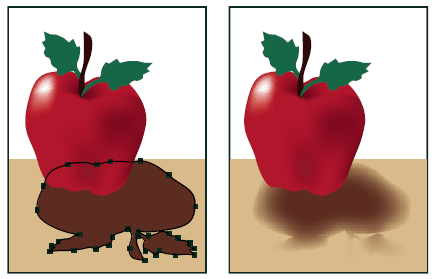
Next TopicWeb Graphics
|
 .
. icon will appear to the left of the Item's name when an item in the appearance panel contains the additional attribute. You have to click that triangle to show or hide additional attributes in the Appearance panel.
 inside the appearance panel, or you can choose the New Art Has Basic Appearance
  from the panel menu.
 . Or Select Remove Item from the panel menu.
 .
. For Videos Join Our Youtube Channel: Join Now
Feedback
- Send your Feedback to [email protected]
Help Others, Please Share


