| |

Creating a Spring Boot Project Using STSWe can also use Spring Tool Suite to create a Spring project. In this section, we will create a Maven Project using STS. Step 1: Open the Spring Tool Suite. Step 2: Click on the File menu -> New -> Maven Project 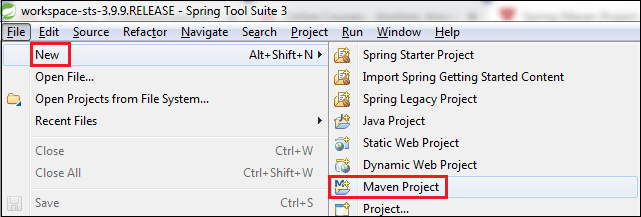
It shows the New Maven Project wizard. Click on the Next button. 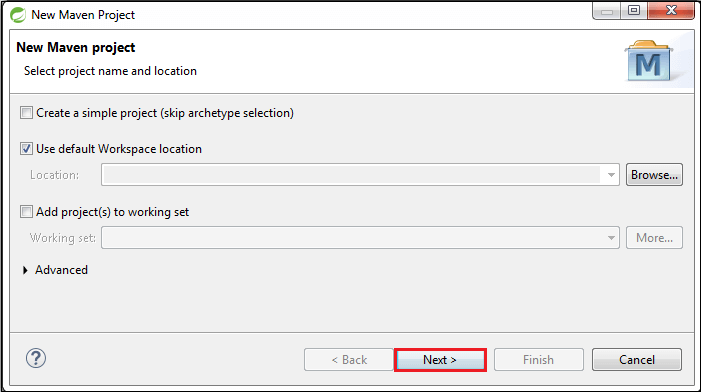
Step 3: Select the maven-archetype-quickstart and click on the Next button. Step 4: Provide the Group Id and Artifact Id. We have provided Group Id com.javatpoint and Artifact Id spring-boot-example-sts. Now click on the Finish button. 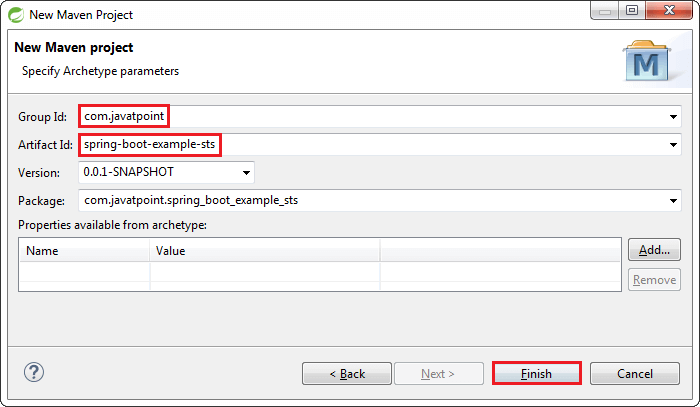
When we click on the Finish button, it creates the project directory, as shown in the following image. 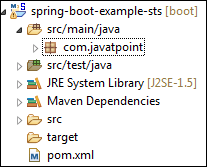
Step 5: Open the App.java file. We found the following code that is by default. App.java The Maven project has a pom.xml file which contains the following default configuration. pom.xml Step 6: Add Java version inside the <properties> tag. Step 7: In order to make a Spring Boot Project, we need to configure it. So, we are adding spring boot starter parent dependency in pom.xml file. Parent is used to declare that our project is a child to this parent project. Step 8: Add the spring-boot-starter-web dependency in pom.xml file. Note: When we add the dependencies in the pom file, it downloads the related jar file. We can see the downloaded jar files in the Maven Dependencies folder of the project directory.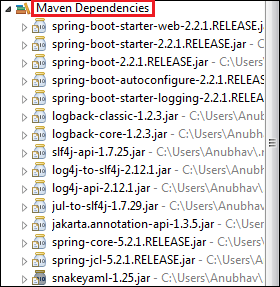
After adding all the dependencies, the pom.xml file looks like the following: pom.xml Step 9: Create a class with the name SpringBootExampleSts in the package com.javatpoint. Right-click on the package name -> New -> Class -> provide the class name -> Finish 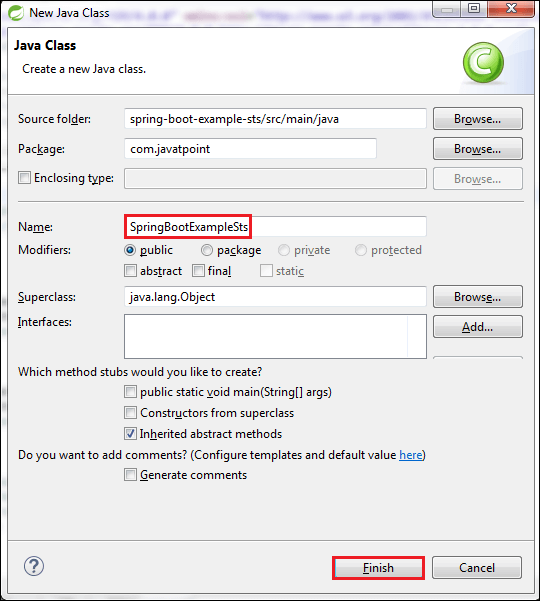
Step 10: After creating the class file, call the static method run() of the SpringApplication class. In the following code, we are calling the run() method and passing the class name as an argument. Step 11: Annotate the class by adding an annotation @SpringBootApplication. @SpringBootApplication A single @SpringBootApplication annotation is used to enable the following annotations:
SpringBootApplicationSts.java Step: Run the file SpringBootExampleSts.java, as Java Application. It displays the following in the console. 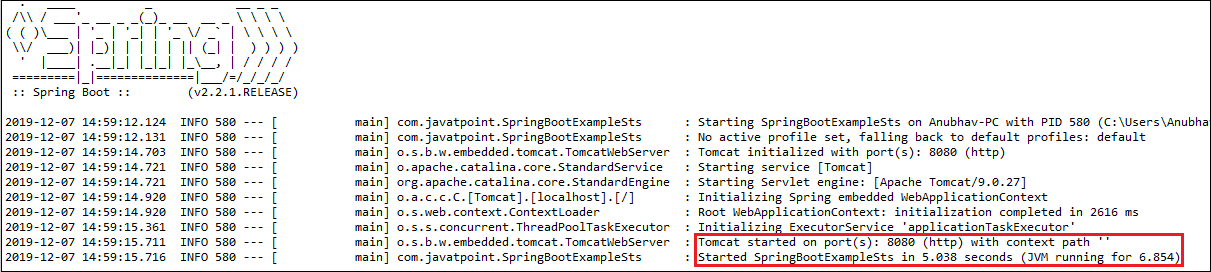
The line Started SpringBootExampleSts in 5.038 seconds (JVM running for 6.854) in the console shows that the application is up and running.
Next TopicSpring
|
 For Videos Join Our Youtube Channel: Join Now
Feedback
- Send your Feedback to [email protected]
Help Others, Please Share


