Disk Cleanup
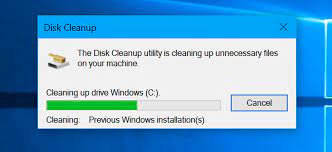
Disk Cleanup is a utility software provided by Microsoft in Windows 98. Later this was also included in the next versions of Windows. The software enables the user to remove files that are no longer required. It deletes the current files, ensuring that deleting them does not cause problems in the operating system's functionality.
The removal of unnecessary temporary files increases the execution of other programs. It also increases the efficiency of the hard disk and the computer. It is advised to run the Disk Cleanup at least once every month to ensure the operating system is properly and frequently maintained.
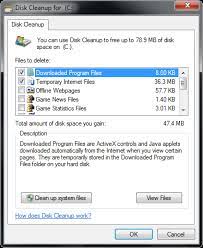
As shown in the image, the user can use Disk Cleanup to delete temporary files from the Internet. These files included the files used by Internet Explorer, downloaded program files, and the web pages loaded offline in the system. It also deletes and frees up space from the system's Recycle Bin. It also deletes any thumbnails.
Steps to Delete the Temporary Files Using Disk Cleanup
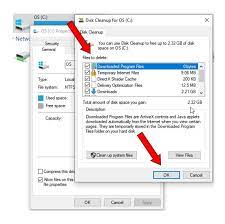
- Open the search box from the taskbar in your system, and search for Disk Cleanup. Select Disk Cleanup from the list of programs. This will open the utility software in the system.
- You will see the list of drives, select the drive you want to clean and then click OK.
- This will open the files occupying the drive in the system from the list of files that can be deleted. The user can select the files they want to remove. If the user wants a description of the file type, select the file.
- Once the user has selected all the files, click on OK.
If the user requires more space in the drive, then the user can also use the Disk Cleanup utility software to delete system files from the system.
- Open the Disk Cleanup in the system, then from the software, click on Clean up system files.
- Select the files that you want to remove from the system. This will open a brief description of the selected file. If you want the description of a particular system file, then select the file.
- Once done selecting the system file, click on OK. It will delete the selected system files and free up space from the drive.
Note: Sometimes, the temp folder in your system may fill up quickly, even after running the Disk Cleanup. This may cause a Low Disk Space error due to the full Temp folder. So, to avoid this, the user should perform Disk Cleanup at regular intervals. The user can also buy additional storage to increase the system's capacity.
The function of Disk Cleanup
When using multiple programs in the system, the system creates a utility to search files. When the utility searches files are no longer required, the user can use the Disk Cleanup software to select the unnecessary files and remove them from memory. The Disk Cleanup divides the files into different categories when the software performs its first disk scan.
The different categories for the files are as follows:
- Compression of old files
- This also includes temporary Internet files (Usually from Internet explorer)
- Temporary Windows Files
- Downloaded program files
- Files that are in the Recycle bin of the system
- It also includes files from programs that are no more used.
- Setup log files
- It clears the web pages loaded offline to the system (Cache memory)
- This is not the entire list, as there can be additional files, such as Remote desktop files or Sync files, that are only present in some computer configurations. These files can differ from operating systems or system that uses additional programs like Remote Desktops.
- It also provides the option to remove the hibernating data. Though this may not be useful for all users as it may remove the hibernate option.
- In Windows 10 and later versions of Windows, the user had an additional option to Clean up the system files. It also provided an additional to clean the Windows update. Once you use this option, you won't be able to uninstall the current Windows update version.
- The user can also reduce the size of the files that have not been used for a certain period by compressing them. This saves disk space. It makes it easier to access the files that are used frequently. The time to access compressed files may increase or be different in different systems.
- The user can also find additional options in the More Options tab. This also includes removing the optional Windows component and installing the program. These are only removed to the point of the last system restoration.
|

 For Videos Join Our Youtube Channel: Join Now


