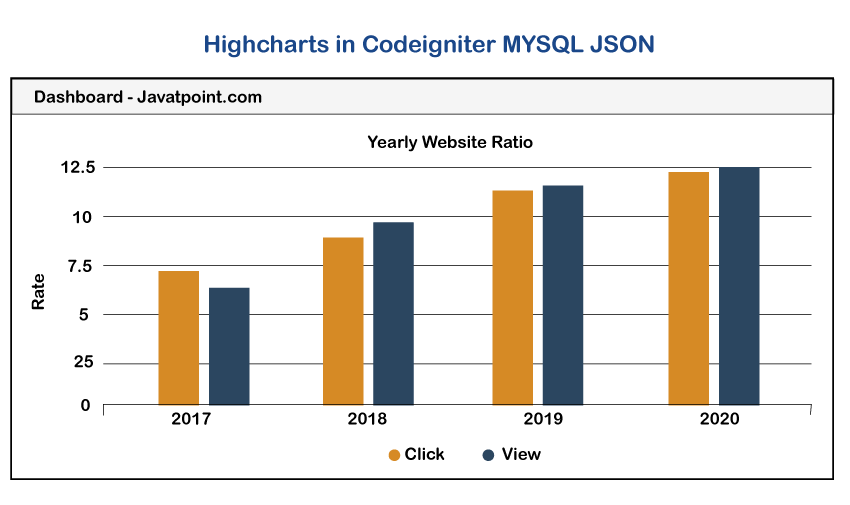
Dynamic Highcharts in Codeigniter 3In this section, we are going to use Codeigniter 3 so that we can get dynamic highcharts. We will use the MySQL app to understand the implementation of highcharts. We will use highchart js to create 3d chart, pie chart, bar chart, map chart, line chart, area chart, etc, in the application of Codeigniter 3. In our Codeigniter project, we will use highcharts js so that we can use the database to create a dynamic column chart. For any admin panel, the basic requirement is a chart. If we are developing a project for a client, they always require that their admin dashboard contains the charts so that they can easily do the compassion between our new subscription, sales, new users, etc. Using the chart, we are able to quickly and easily compare between each month, each year, etc, by using the graph. In our below example, we are going to create a column chart. We create it for viewers, and after that, we will click on the entered website. Using this column chart, we are able to compare the numbers of visitors in months, and we can also get the information of the number of clicks on that month. So for this, we will create the "demo_viewer" and "demo_click" tables. Using this table, we will get dynamic as an output. The output gets from the database, and it will display for us as a chart. The steps to get highcharts of a website are described as follows: Step 1: In this step, we are going to Create Database table. For this, we will create "h_sole" as a new database. If we want to rename it, we can do it. After that, we will describe the comparison between column charts of clicks and viewers. When we want to apply it, we need to create two tables. One table will be created for the viewer as "demo_viewer", and the second table will be created for click as "demo_click". Both tables will be created by using the MySQL queries, which is described as follows: Create demo_viewer table: Create demo_click table: Step 2: In this step, we are going to Make Database Configuration. For this, we will add some details of the database, such as name of the database, username, password, etc, which is described as follows: application/config/database.php: Step 3: In the third step, we are going to Add Route. For the chart and render view, we will add one route. For this, we will open our file named routes.php and then we will put the following code: application/config/routes.php: Step 4: In this step, we are going to Create Controller. For this, a method will be created named "index" with ChartController. In order to fetch all database data, we will write the following code. We will use this controller's folder so that we can create a new method. The code to do this is as follows: application/controllers/ChartController.php: Step 5: In this step, we are going to Create View file. For this, we will use our view folder to create "my_chart.php" as a new view file. After that, we will use that file to add the following code: application/views/my_chart.php: Now our above code is ready to run. After running this, the following output will be generated: 
Next Topic#
|
 For Videos Join Our Youtube Channel: Join Now
Feedback
- Send your Feedback to [email protected]
Help Others, Please Share


