| |

Excel Named RangeWhat is called Named Range in Excel?Named Range is the named group of cells or Range of cells in a worksheet or spreadsheet used in formulas or functions to make the data more readable and easier to manage. It helps to update the worksheet if the data changes. It is used in formulas and functions to make them more readable and easier to manage. For example, if the user needs to sum the Range of rows or columns, the cell reference is used as A1:A5. Other than cell reference, another method called Named Range is used. The name of the named Range is based on the user's preference. It is used in VBA macro programming to refer to a specific range of cells. The purpose of Named Range in ExcelThe purpose of Named Range in Excel is listed below,
Pros of Named RangeNamed Range increases the readability of the data and helps the user to understand the functions and work of the Formula in the data range. While using the named Range in formulas simplifies the Formula and is easier to read. It increases the accuracy of the worksheet by reducing the error caused by typographical mistakes or changes to the structure of the worksheet. The Named Range automatically updates the cells when new cells are added or removed, saving time and reducing the user's workload. Named Range is used in multiple charts, formulas, and other workbooks for calculation, saving time for multiple usages. A large amount of data is handled easily by using the named Range. To reference the specific set of data ranges in a large set of data, a named Range is used and used in formulas for calculation. How to create a Named Range in Excel?To create a Named Range in Excel, the steps to be followed are, Step 1: Enter the required data in the specified Range of rows or columns. Here the data entered is A1:B6. 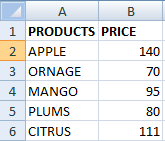
Step 2: Select the Range of rows or columns which needs to be named. In this example, the cells range A1:B6 is selected. Step 3: Select the "Define Name" option from the Formula tab. 
Step 4: The New Name dialog box will appear. In the New Name dialog box, enter the specified name for the selected Range of data. Step 5: Click Ok. Here the name created is "Fruits ."Hence the name "Fruits" is created for data range A1:B6. 
Step 6: The specified Name will be displayed if the data range A1:B6 is selected. 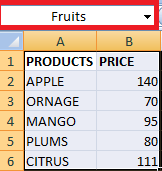
Method 2: Here is another method to create the named Range as follows, Step 1: Select the Range of cells to be named. Here A1:B6 is selected. 
Step 2: Type the desired or specified name in the Name box, which is located on the left of the formula bar. Press Enter. The named Range is created. In the worksheet above, type the named Range in the name box, replacing the cell name A1. 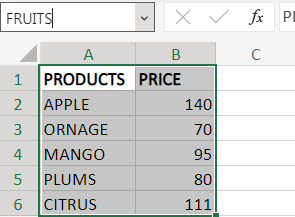
The name "FRUITS" is in the worksheet for the selected Range. Method 3: Here is method 3 to create the named Range. The steps to be followed are, Step 1: Select the Range of cells to be named. Here A1:B6 is selected. Step 2: Click the "Name Manager" in the Formula tab. The Name Manager dialog box will open. In that, click the option "New." 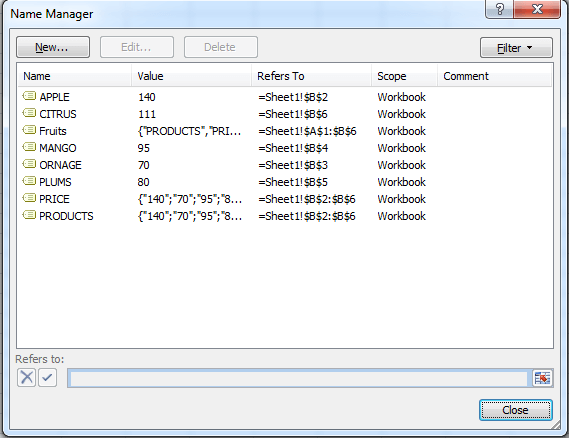
Step 3: The "New Name" dialog box will open. As previously explained, type the desired name in the Name box. Step 4: Press Enter. The Named Range is created for the selected Range. 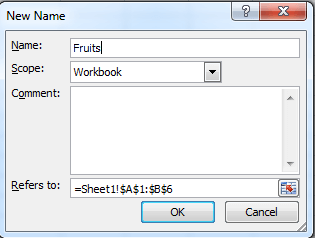
How to edit data in the named Range?For example, if the user created a named range and saved it. If the user wants to edit or change the data present in the named Range, simply the user can type the name of the data. The steps to be followed are, Step 1: Open the document or spreadsheet that contains the named Range. Step 2: Once the document is opened, the user can navigate to the data directly, make changes, and save it. Step 3: One can edit the data depending on the program. They can use the edit or Formula menu in the tab and choose the required option to edit the data. Step 4: The Formula can also be used to edit the data in the worksheet. How to use names in Formula?At the beginning of the tutorial, the named Range called "FRUITS" is created. It contains Products and its price. To sum up the price of the products, the steps to be followed are, Step 1: Select a new cell to display the sum value of the product price. Here cell B7 is selected. Step 2: In cell B7, enter the Formula as =SUM (FRUITS). 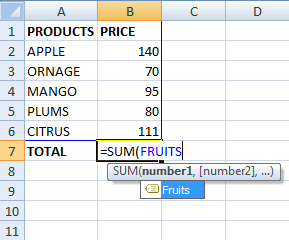
While typing the named Range, the name will display in the list. Click the named range Name. Step 3: Here, FRUITS is the named Range. The result will be displayed in cell B7. 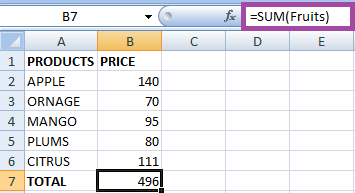
Here the result will be displayed as 496, which is the sum of the price of fruits. Example 1: Edit the data in the named Range To edit the data in the named Range, the steps to be followed are, Step 1: In the named range "Fruits," the product APPLE needs to be replaced with Grapes. Step 2: Open the spreadsheet or worksheet containing the named Range "Fruits." Step 3: Replace the word "Apple" with "Grapes ."Save the Named Range. Step 4: When the named Range "Fruit" is opened, the new data is added. 
Here the data is edited in cell A2 and saved in the named Range. Example 2 - How to edit the name of the Named Range In Example 1, the data is edited in the named Range. Here in this example, the name of the named Range is edited. Usually, there are several named ranges in the worksheet. Sometimes the user wants to change the name of the certain named Range. The steps to be followed to change the name of the named Range are as follows, Step 1: Choose the option Name Manager in the formula tab. 
Step 2: The Name Manager displays all the named ranges in the worksheet. Double-click the required named Range. Step 3: The Edit name dialog box will appear. In that, enter the new named range name in the dialog box. 
Step 4: Press Ok. Here the named range 'FRUITS' is changed to 'LIST .'Close the Name Manager dialog box. SummaryFrom the tutorial, the named Range is a powerful tool that can help work with data in Excel more efficiently and effective. The steps to create a named Range and methods to edit the data and name of the named Range are clearly explained in this tutorial. It provides several benefits which save the time and effort of the user. |
 For Videos Join Our Youtube Channel: Join Now
Feedback
- Send your Feedback to [email protected]
Help Others, Please Share


