| |

Excel Status BarStatus bar is inevitably an essential tool of Microsoft Excel. As the name suggests, the primary role of this feature is to show the status in the lower edge of your worksheet. You might have used the status bar for knowing the equations in Excel, evaluating the calculations for different formulas, or looking at the number of pages quickly. But do you know the status bar is a lot more than this? With some expertise, you can customize the bar as per your need. In this tutorial, we will cover all the details starting from defining a status bar and various examples implementing the advantages of this feature. What is a Status Bar?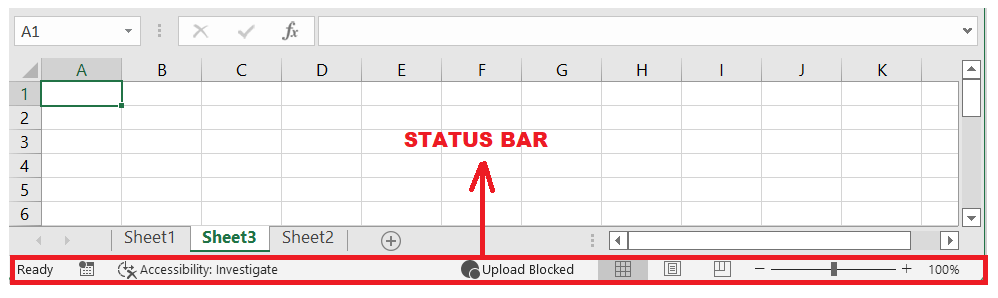
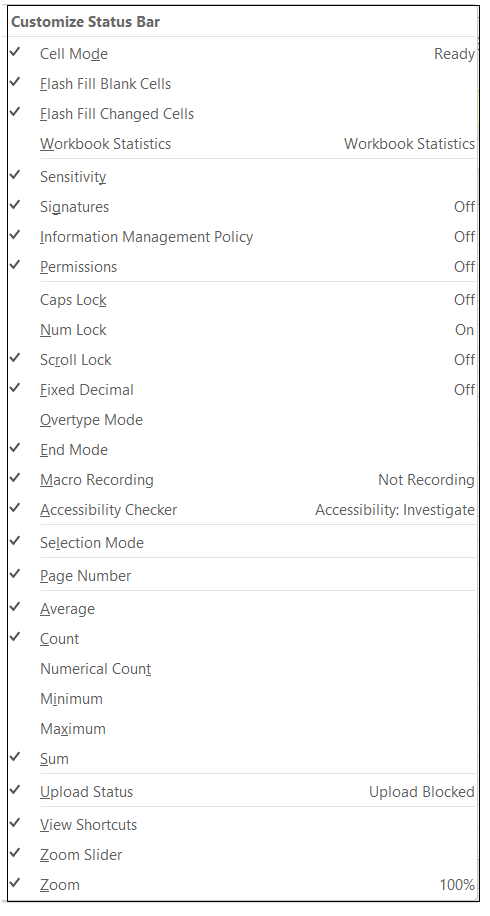
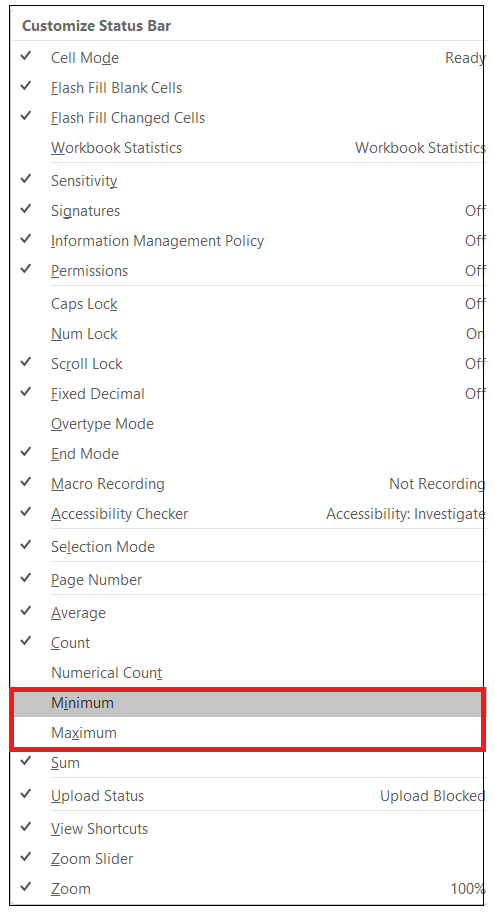
"The status bar is defined as the name for the bottom panel of the Excel worksheet window, which shows several information about your worksheet. This feature can be further utilized to display functions such as the sum, count, and average of the selected cells." Like all other window applications, Microsoft has its status bar at the bottom of the worksheet window. Status Bar is actively used to display the information related to the current worksheet. There are default options that are already there in the status bar though you can also customize your status bar by following the below steps:
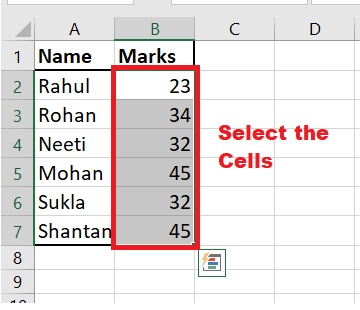
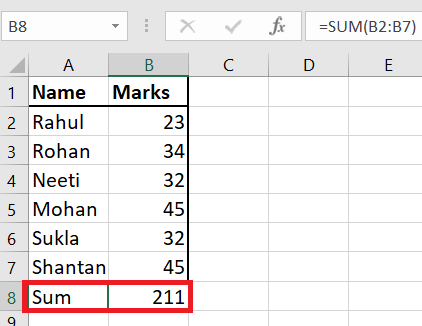
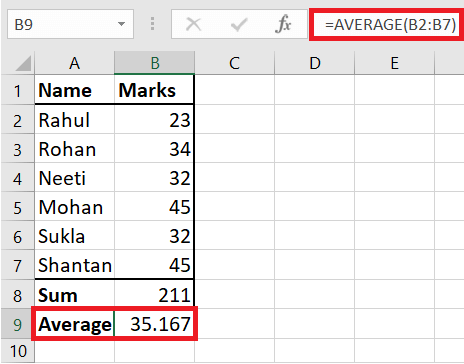
In the above image, as you can see, we have currently checked the average, count, sum, and other various options. We have covered enough about status bar. Now let's gets our hands dirty with some practical sessions. Example #1: To calculate the Average & Total marks using Status BarThis example is certainly for you if you are new to Excel and have little knowledge about Excel functions and formulas. We are given the Excel sheet that contains a list of data of various students. 
We will calculate the student's total and average marks in his exams using the status bar. Following are the step-by-step explanation to calculate the sum and average marks using the status bar:
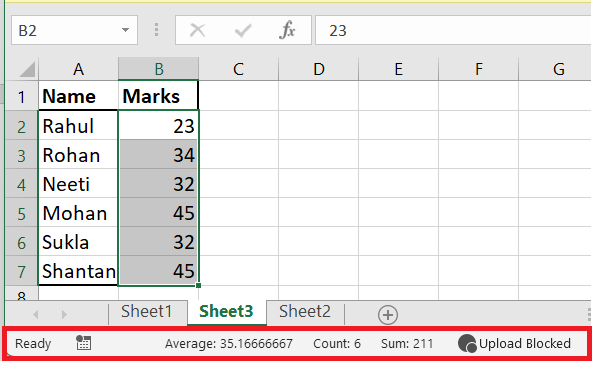
Simple Isn't! Now, you can also cross check the output of the same using Excel inbuilt Sum and Average function.
Again select the same cells and cross-check in the status bar. You will find both the values match the built-in function. 
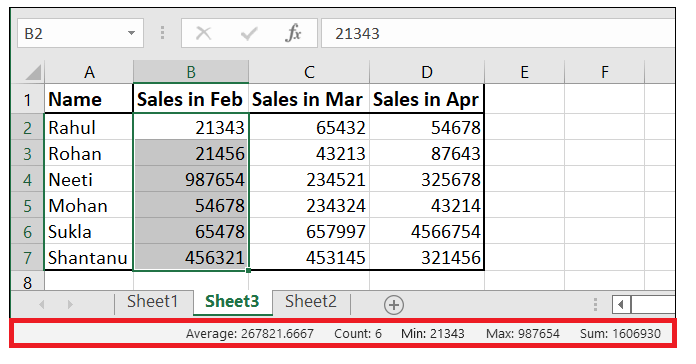
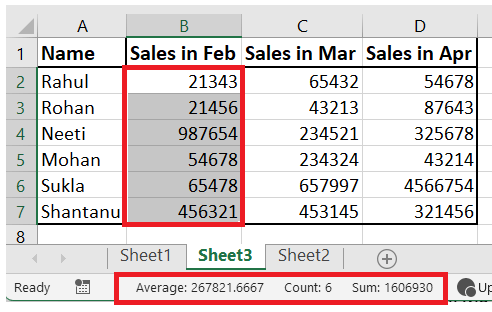
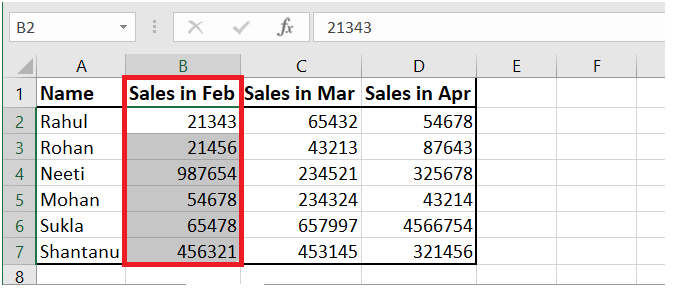
Example #2: Functions using Status BarConsider the below given Excel data, We have taken a sample data of sales done by the sales executives of a certain agency. 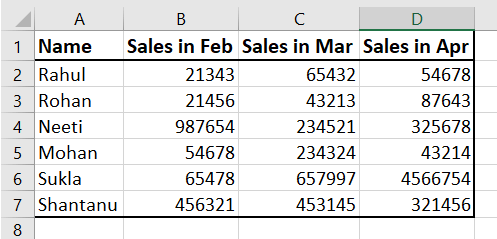
Suppose you asked to quickly fetch the raw data and noted down the calculations of sales done by each executive in a given month or the total sales the company made in the month of April. Following are the steps to achieve the same using status bar:
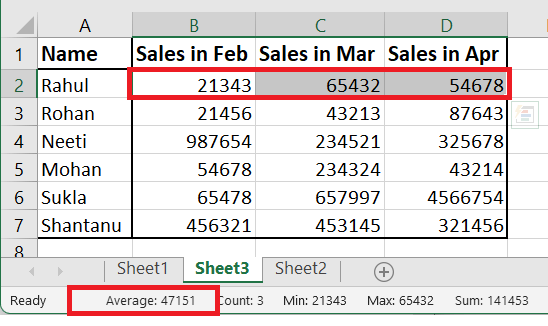
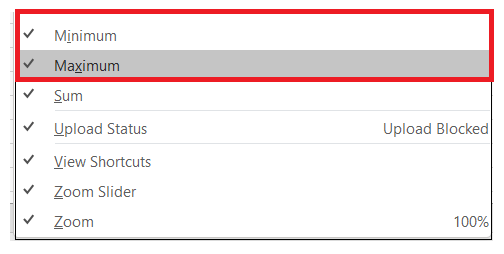
The status bar is not limited to Average or SUM and has more capabilities than you can even think of. We will cover some of them in the below examples: Example #3 - To customize the Status BarAgain, we have taken the same sample data that shows the total sales done by the sales executives of an xyz company. What if you want to calculate the minimum and maximum sales quickly? Do you know you can compute the same using the status bar by following the below steps:
Example #4 - Zoom Slider Option in ExcelOne of the most frequently used tools in in the status bar is the zoom slider option. It is a handy tool that quickly allows the Excel user to zoom in or zoom worksheet for a better readability. Any user can adjust the worksheet size according to their convenience. At the bottom right corner of your status bar, you will notice a zoom slider in the bottom right of the status bar. 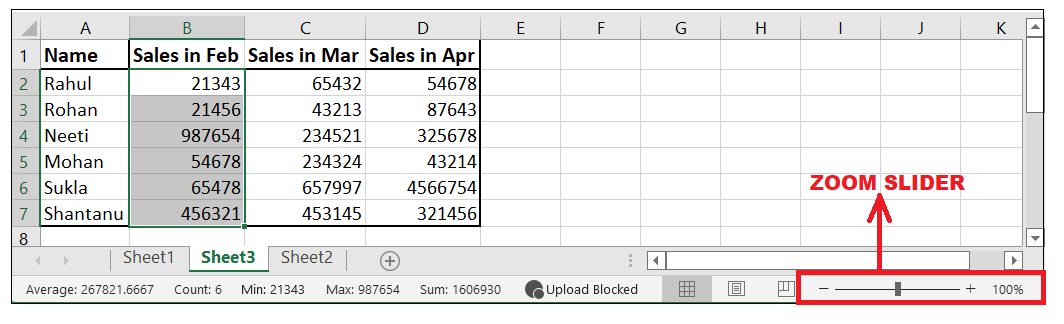
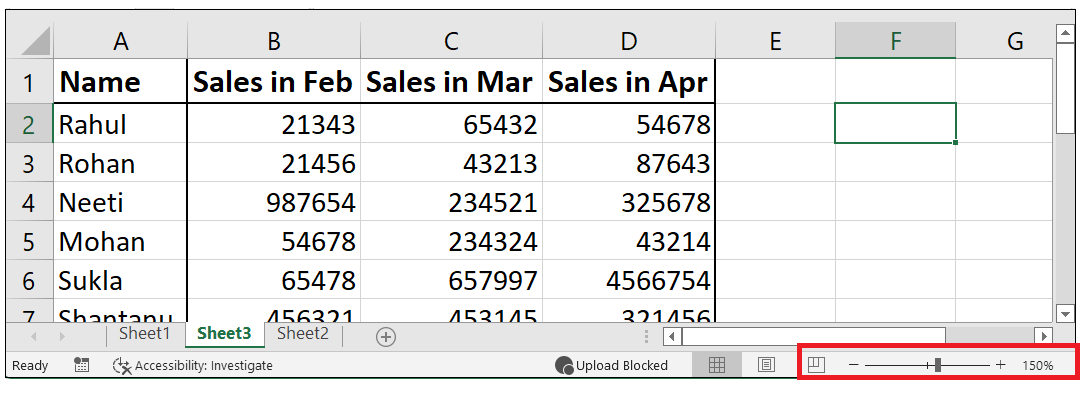
NOTE: The standard default size of your worksheet is 100%. The maximum you can zoom it to 500% and the minimum you can zoom out to 10%.Things to Remember1. Though status bar is a shortcut to quickly view the output of sum, average, minimum, and maximum but make sure to select the appropriate option. 2. Right-click on the status bar if you want to customize your data. 3. Don't forget to select the preferred range of data for which you desire to view the status.
Next TopicExcel Trendline
|


 For Videos Join Our Youtube Channel: Join Now
Feedback
- Send your Feedback to [email protected]
Help Others, Please Share


