| |

GIMP GIFGIMP is a useful tool for photo drawing as well as photo editing. We can create different files such as Jpg, Jpeg, Gif, Tiff, etc. using GIMP. Nowadays, the popularity of Gif images is on the rise. We may require to create a GIF file for our business or any other purpose. GIF (Graphics Interchange Format) is a bitmap image having a ".gif" file extension. It displays a sequence of images in a single image. It is like an animated image. CompuServe introduced the GIF image file in 1987. It was developed as a platform-independent image format. It is widely used for creating greeting messages, graphical images, annotated images, etc. It creates an impressive impact and attracts users. In this topic, we are going to discuss how to create a gif image using GIMP. Let's understand it: How to Create GIF Images Using GIMP?To create a gif image is a straight forward process. But, everything seems complicated until we have done that. Follow the below steps to create a gif image in GIMP: Step1: Import Collection of Images The first step is to create the images that we want to add to our GIF collection. When we have all the images, open these images using the Open as Layers option from the file menu or stroke the "CTRL+ALT+O" keys. 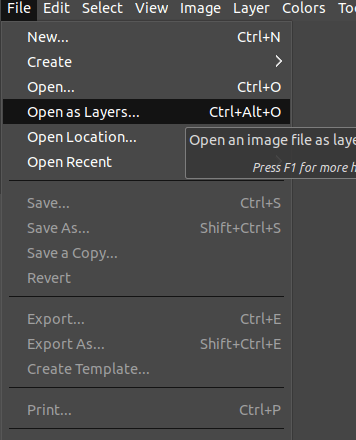
It will open a dialog window for selecting photos. Step2: Select the Images Now, select the images by holding the CTRL key and click to select the images. 
We have to select all the images that we want to keep in GIF file; It will open all the images as in new layers. The layers dialog will look like as follows: 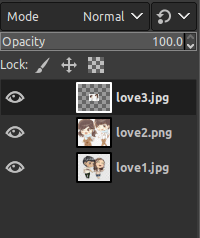
Step3: Arrange the Image orders After adding all the images, arrange the orders in which order we want them to be displayed. To arrange the orders, select the layer and use the below tools from the layers dialog: 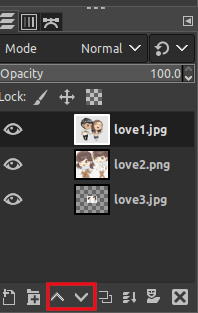
Now crop and edit images from every layer to keep it in gif File. Step4: Create the GIF Use the Export As option from the File menu to create the GIF file. We can stroke the "SHIFT+CTRL+E" keys to the same. 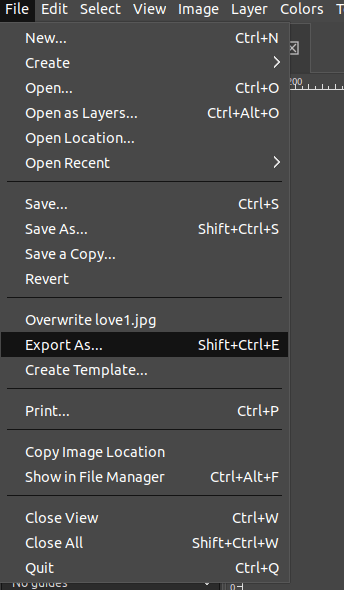
It will open a dialog window to ask for the layers' cropping and levels it with all the layers. Select the Crop option to level all the images in GIF. 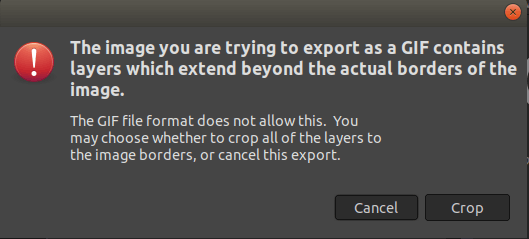
Step5: Tick the "As Animation" Option It will open a dialog window for defining the GIF properties. Here, we can define the delay time, animation effect, and more options for GIF. 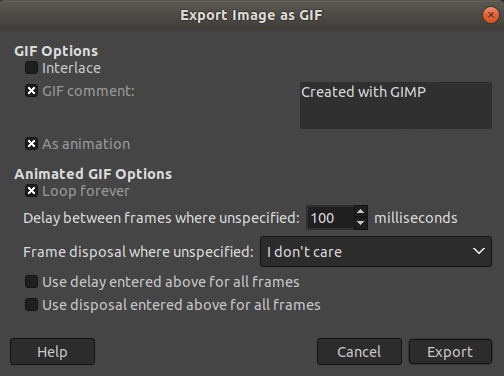
After the complete process, click the Export option to save the file. Here, our GIF is ready. There is another way to the same. Second Method:There is another method to create GIFs. We can also do the same by using the optimized ( For GIF) option. To create a GIF, open all the images we want to put in GIF using the open layers option. Both the option produces the same result. Now select the optimize ( For GIF) by navigating the Filters-> Animation menu. It will reduce all the images' size, remove the overlapping between images, and make it compatible with the GIF format. When we are done with all the things, save the file using the Export As option with the ".gif" extension. Select the animation and loop forever options. Next, and the final thing is to specify the delay time. After specifying all the things, now export the image. We can check our GIF file in our file manager. If the file's speed and size are not as expected, change it by the GIMP using the same process and save the image again. Below is our created GIF file: 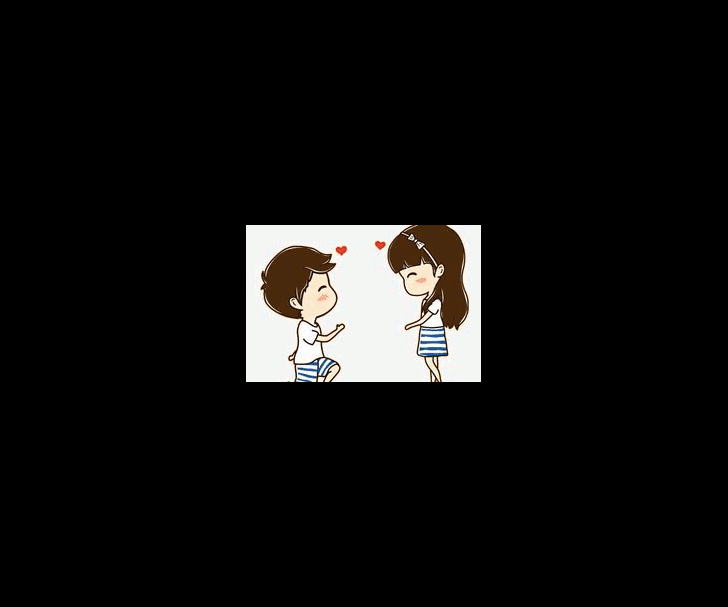
Next TopicGIMP Move Layer
|
 For Videos Join Our Youtube Channel: Join Now
Feedback
- Send your Feedback to [email protected]
Help Others, Please Share


