Node Setup of Game
Click Scene -> New Scene, and we'll create the Mob.
The Mob scene will use the following nodes:
- RigidBody2D (named Mob)
- AnimatedSprite
- CollisionShape2D
- VisibilityNotifier2D (named Visibility)
Don't forget to set the children so they can't be selected, as we did with the Player scene.
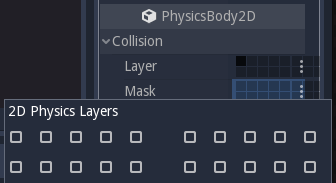
In the RigidBody2D properties, set Gravity Scale to 0, so the mob will not fall downward. In addition, under the PhysicsBody2D section, click the Mask property and uncheck the first box. This will ensure the mobs do not collide with each other.
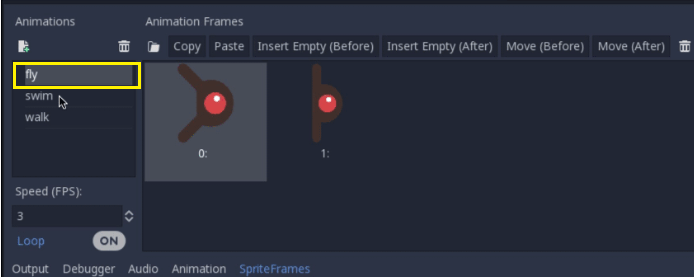
Set up the AnimatedSprite as we did for the player. This time, we have three animations: fly, swim, and walk. Set the Playing property in the inspector to "On" and adjust the "Speed(FPS)" setting, as shown below. We'll select one of these animations randomly so that the mobs will have some variety.
Fly:
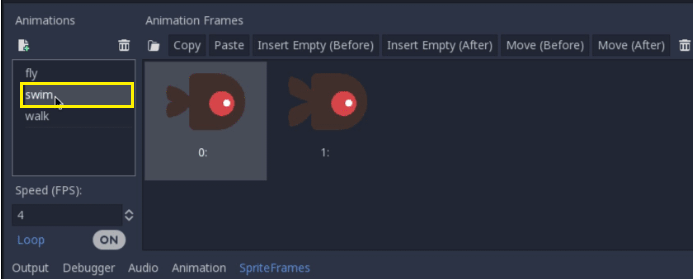
Swim:
Walk:
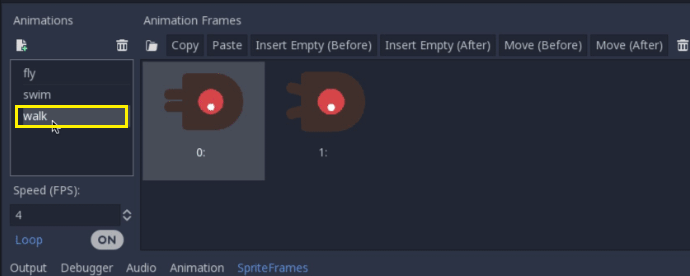
The fly should be set 3FPS, with a swim and walk set to 4 FPS.
Like the player images, these mob images need to be scaled down. Set the AnimatedSprite's Scale property (0.75,0.75).
As in the Player scene, add a CapsuleShape2D for the collision. To align the shape with the image, we'll need to set the Rotation Degrees property to 90 under Node2D.
Enemy Script
Add a script to the Mob and add the following member variables:
GDScript
We have to pick a random value between min_speed and max_speed for how fast each mob will move (it would be boring if they were all running at the same speed). Set them to 150 and 250 in the inspector. We also have an array containing the names of the three animations, which we will use to select a random one.
Now let's look at the rest of the script. In _ready(), we randomly choose one of the three animation types:
GDScript
Note
We must use randomize() if we want our sequence of "random" numbers to be different every time we run the scene. We're going to use randomize() in our Main scene so that we won't need it here. randi()%n is the standard way to get a random integer between 0 and n-1.
The last piece is to make the mobs delete themselves when they leave the screen. Connect the screen_excited() signal of the visibility node add this code:
GDScript
It completes the Mob scene.
Main Scene
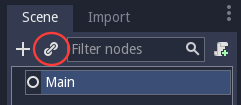
Now it's time to bring it all together. Create a new scene and add a Node named Main. Click the "Insurance" button and select our saved Player.tscn.
Note
See Instancing to learn more about instancing.
Now add the following nodes as children of Main, and name them as shown (values are in seconds):
- Timer (named MobTimer) - it is used to control how often mobs spawn.
- Timer (named ScoreTimer) - it is used to increment the score every second.
- Timer (named StartTimer) - To give a delay before starting.
- Position2D(named StartPosition) - used to indicate the player's start position.
Set the Wait Time property of each of the Timer nodes as follows:
- MobTimer: 0.5
- ScoreTimer:1
- StartTimer:2
In addition, set the One-Shot property of StartTimer to "On" of the StartPosition node to (240,450).
Spawning Mobs
The primary node will be spawning new mobs, and we want them to appear at a random location on the edge of the screen. Add a Path2D node named MobPath as a child of Main. When we select Path2D, we will see some new buttons at the top of the editor:
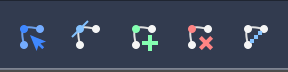
Select the middle one ("Add Point") and draw the path by clicking to add the points at the corners shown. To have the points snap to grid, make sure "Snap to Grid" is checked. This option can be found under the "Snapping options" button to the left of the "Lock" button,
Appearing as a series of three vertical dots. Make sure that the "Use Snap" button is also enabled, which is to the left of "snapping options."
Important
Draw the path in clockwise order, on our mobs will spawn pointing outwards instead of inwards!
After placing point 4 in the image, click the "Close Curve" button, and our curve will be complete.
Now that the path is defined, add a pathFollow2D node as a child of MobPath and name it MobSpawnLocation. This node will automatically rotate and follow the path as it moves, so we can use it to select a random position and direction along the route.
Main Script
Add a script to Main. At the top of the script, we use export (PackedScene) to allow us to choose the Mob scene we want to instance.
Drag Mob.tscn from the "FileSystem" panel and drop it in the Mob property under the script variables of the Main node.
Next, click on the player and connect the hit signal. We want to make a new function named game_over, which will handle what a new function named game_over, which will handle what needs to happen when a game ends.
Type "game_over" in the Method In Node" box at the bottom of the 'Connecting Signals" window. Add the following code, as well as a new_game function to set everything up for a new game:
In _on_MobTimer_timeout() we will create a mob instance, pick a random starting location along the Path2D, and set the mob in motion. The PathFollow2D node will automatically rotate as it follows the path, so we will use that to select the mob's direction as well as its position.
Note that a new instance must be added to the scene using add_child().
GDScript
Important
GDScript uses radians, not degrees. If we are more comfortable working with degrees, we'll need to use the deg2rad() and rad2deg() functions to convert between the two
| 
 For Videos Join Our Youtube Channel: Join Now


