| |

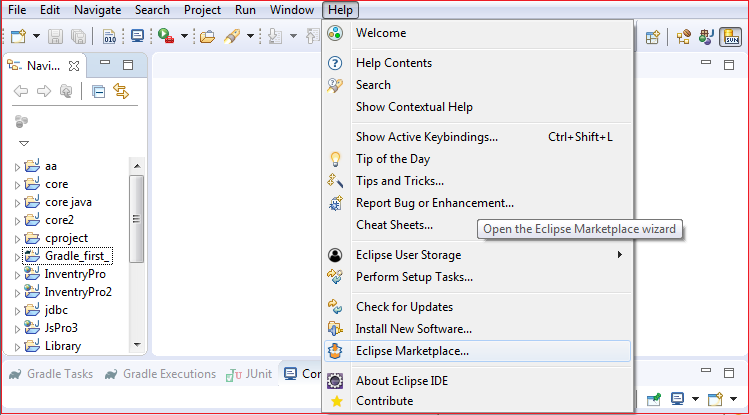
Gradle Eclipse PluginThe Gradle eclipse plugin generates the required files that are used by Eclipse IDE. Therefore, it helps to create and import the project in Eclipse. The latest version of Eclipse IDE provides built-in support for Gradle. If an older version of Eclipse does not give the Gradle option, then we can download and integrate it from the Eclipse Marketplace. Navigate to help-> Eclipse Marketplace and search for the Gradle plugin. The latest Gradle plugin which is available for the Eclipse is Gradle IDE Pack 3.8. To integrate the Gradle plugin in Eclipse, follow the below steps: Step1: Open Eclipse and navigate to Help-> Eclipse Marketplace.
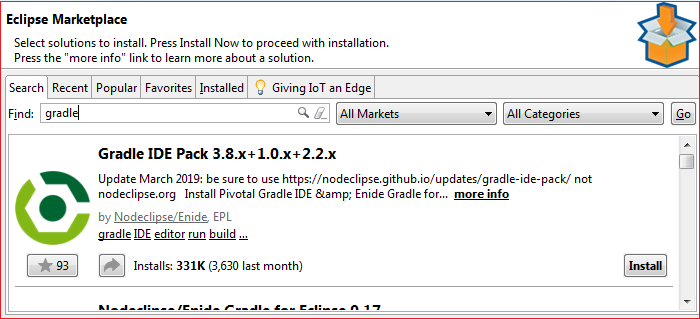
Step2: Search for the Gradle IDE pack and click Install to proceed with the integration process.
Step3: Select and Confirm the Gradle features that you want to install.
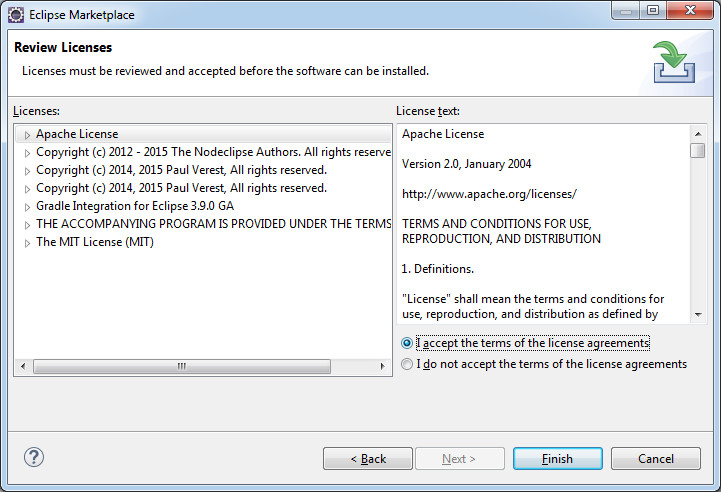
Step4: Review and Accept the terms and conditions for use and click on the Finish option to complete the integration of the Gradle IDE pack.
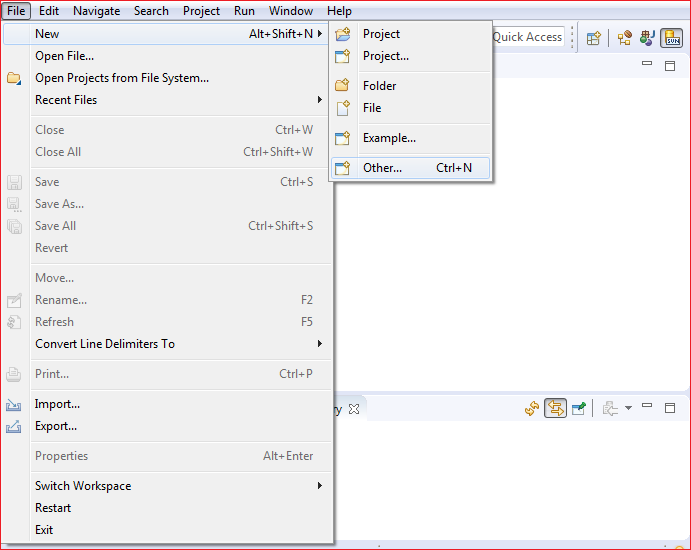
We have successfully integrated the Gradle IDE Pack with our Eclipse IDE. Now, we are ready to create our first Gradle project with Eclipse. First Gradle Project with EclipseCreating a Gradle Project with Eclipse is a straightforward process like creating a Maven Project. Follow the steps below to create a Gradle project. Step1: Click on the File menu and navigate to New-> Other.
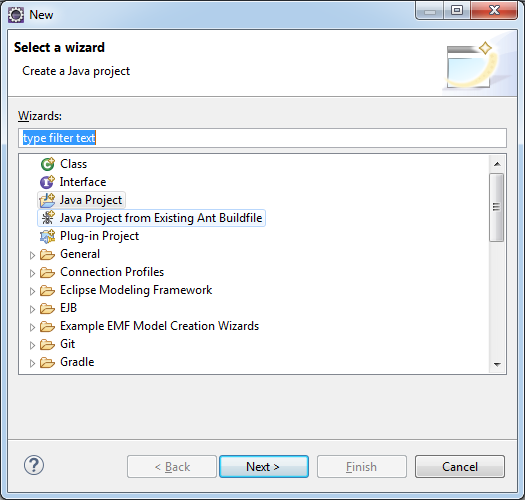
Step2: Type the Gradle in the Search field.
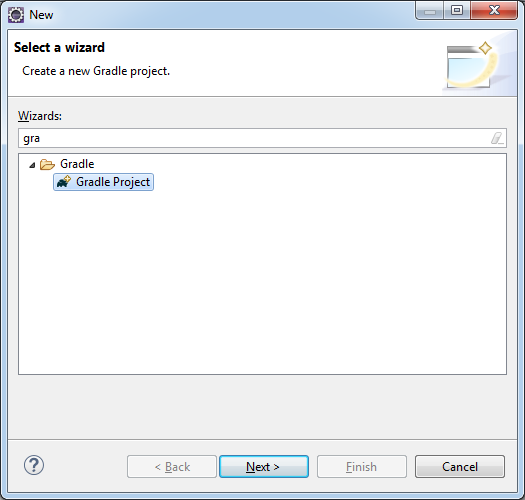
It will display the Gradle option, select it, and click Next to continue.
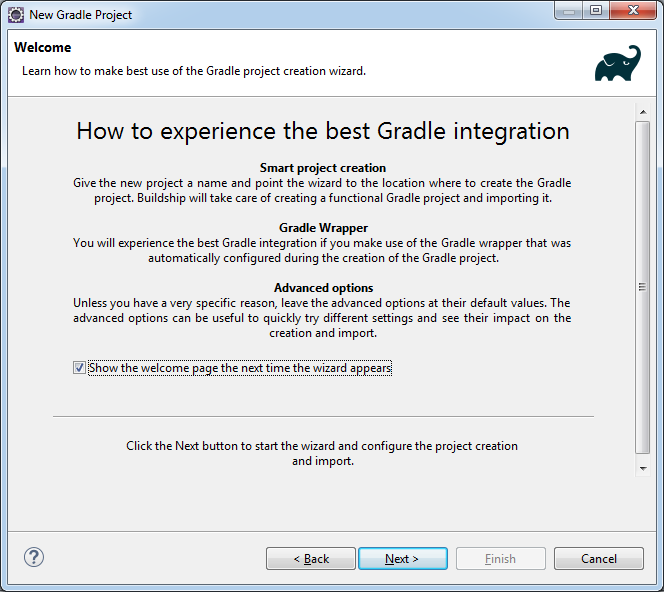
Step3: It will display the Gradle welcome screen and show some tips for the best use of the Gradle creation wizard. Click Next to continue.
Step4: The next step is to enter the project name. In our case, I have given it as Gradle_first. Click Next to continue.
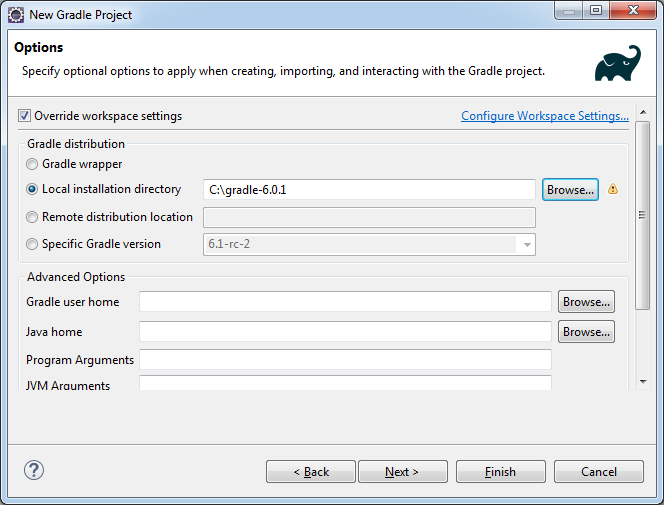
Step5: Here, we can see different options for the Gradle distribution. Specify any one option for creating, importing, and interacting with the Gradle project. Click on the override workspace settings. Choose Local installation directory, browse and select the home directory of Gradle. Click Next to continue.
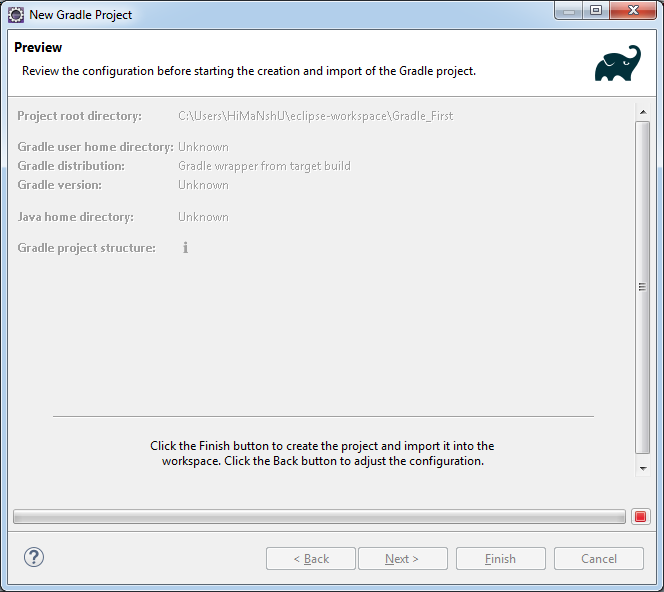
Step6: Click Finish to create the first Gradle project. It will take a while and create our first Gradle project.
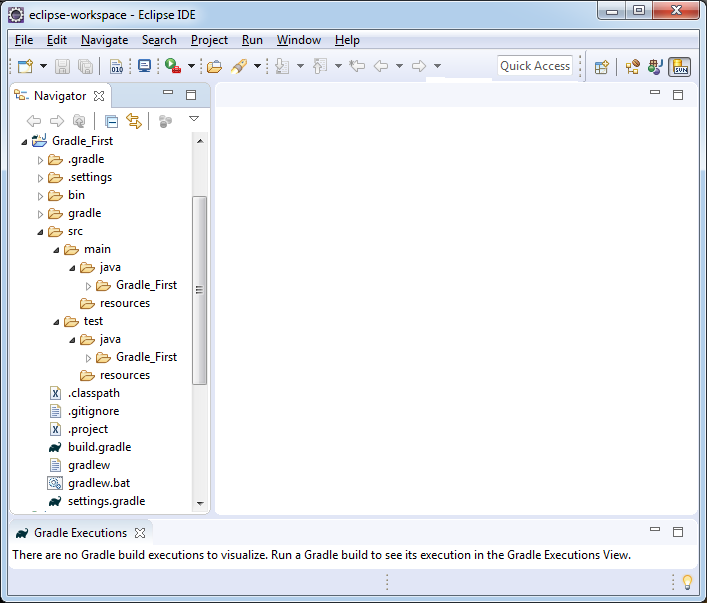
We have successfully created our first Gradle project. The project structure will look like as follows:
The Gradle project contains many auto-generated files. These files are essential for the project declaration. The build.gradle file is the build script of the project like Ant's build script name is build.xml and Maven's build script name is pom.xml, Gradle's default build script is build.gradle. When gradle command runs, it searches for the build.gradle file from the working directory. If it finds, then executes the particular tasks. The default format of build.gradle is as follows: 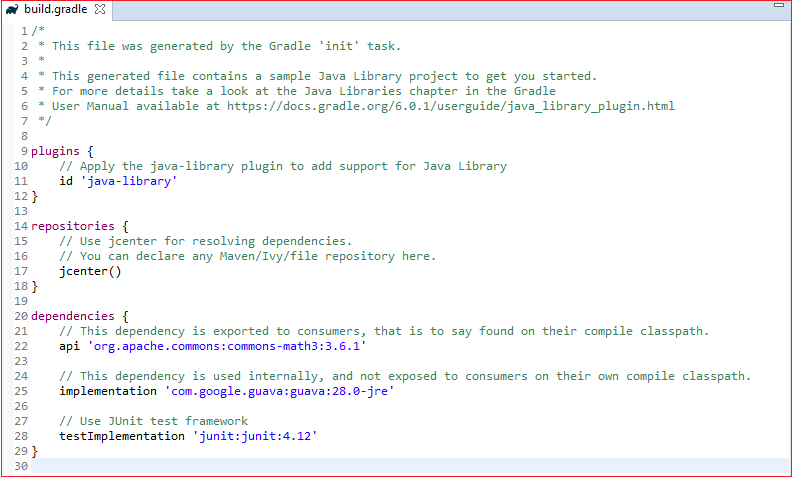
Next TopicGradle Build
|


 For Videos Join Our Youtube Channel: Join Now
Feedback
- Send your Feedback to [email protected]
Help Others, Please Share


