| |

How one can group rows in Microsoft Excel to collapse and expand them?We all know that the particular worksheets with a lot of complex as well as with the detailed information eventually will took a lot of work in order to read and analyze. And luckily, the Microsoft Excel provides an easy way to organize data in various groups, allowing us to collapse and then we will be expanding the rows with the similar content for the purpose of creating more compact and understandable views respectively. In this tutorial, we will be discovering the various topics as follows:
How can one group rows in Microsoft Excel?Now the grouping in Microsoft Excel works best for the structured worksheets with column headings, and no blank rows or columns, as well as a summary row (subtotal) for every subset of the particular rows. And with the data properly organized, we can make use of the various ways in order to group it effectively: a) How can one group rows automatically (create an outline) in Excel?And if in case our particular dataset contains just one level of the information, then the easiest way would be letting the Microsoft Excel group rows for us in an automatic manner. Step 1: First, we will select any cell in one of the particular rows where we want to group it respectively. Step 2: Now, after that, Go to the Data tab > Outline group, and then we will click on the arrow just under Group and select Auto Outline. 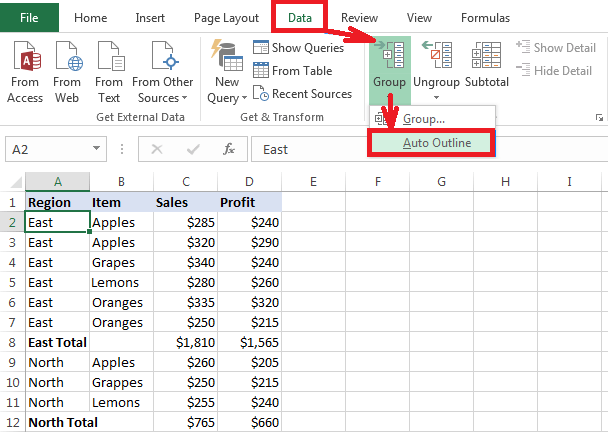
It depicts that the particular rows have been grouped perfectly, whereas the outline bars usually represent the different levels of data organization which has been added to the left of column A respectively. 
Note. It was noted if in case our summary rows are located just above a group of detail rows, before creating an outline, we can go to the Data tab > Outline group, and then will be clicking the Outline dialog box launcher, and clear out the Summary rows below detail checkbox as well.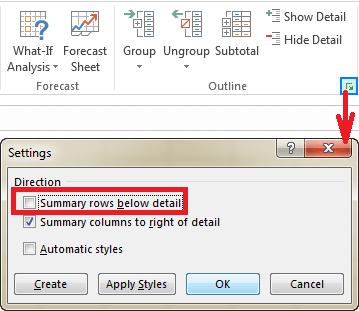
After the outline get created, that we can quickly hide or show the details within a certain group by making a click on the minus Moreover we can also collapse as well as expand all rows to a particular level by clicking on the level buttons b) How to group rows manually in Excel?If in case worksheet contains two or more levels of then information, then Microsoft Excel's Auto Outline may be required to group our data correctly, in that cases we can manually perform the operation by making use of the below mentioned step in a sequence way: 1. Create outer groups (level 1) Firstly we will be selecting one of the larger subsets of that particular data which will be including all of the intermediate summary rows and their detail rows also. And in the given particular dataset below, in order to Group all the data for row 9 (East Total), and we can easily select rows 2 with the help of 8 as well. 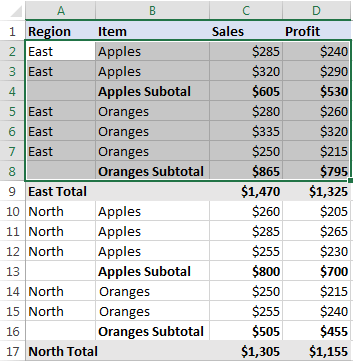
Now on the given Data tab, in the Outline group, we will be clicking the Group button, selecting the Rows, and then clicking on the OK button. 
After performing the above steps it will be adding a bar on the left hand side of the worksheet. 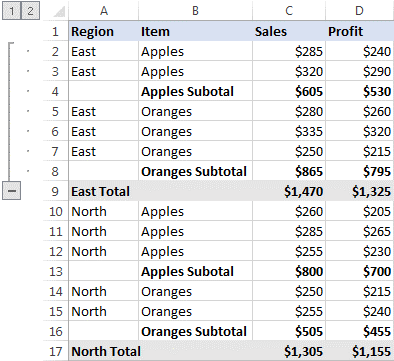
2. Create nested groups (level 2) Now for the purpose of creating a nested group, we will be then selecting all the detail rows just above the related summary row, and we will be clicking on the Groupbutton. For example: In order to create the apple group within the East region, we will be first selecting the rows 2 and 3 after then we will be hitting the Group. And to make the Orangesgroup, we will now choosing rows 5 through 7 and pressing out the Group button again. Similarly, we will be then creating the nested groups for the North regions, and then we will be getting the following result as well: 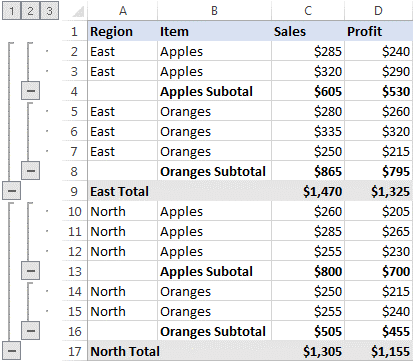
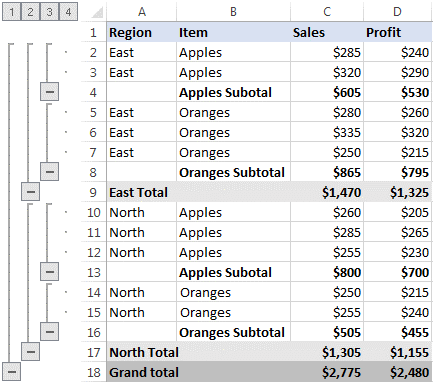
3. Adding of more grouping levels if it is necessary The dataset are said to be complete if at some point, some more data is added to our respective worksheet:
How to collapse rows in Microsoft Excel?In Microsoft Excel, one of the most crucial features is none other grouping an ability to hide. Then after that we will be show the detail rows for a particular group and collapsing or expand the entire outline to a certain level with a mouse click. Collapse rows within a group Now for the purpose of collapsing the rows in a particular group, we will just clicking on the minus button

And the other most important way that can be used to collapse rows in Microsoft Excel is to make a selection of any cell in that particular Group. After that we will be clicking on the Hide Detail button present on the Data tab in the Outline group respectively: 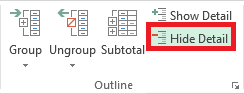
And either way, the Group will be minimized to the summary row, and all of the detail rows will be hidden effectively: Collapse or expand the entire outline to a specific level. And now, in order to minimize or expand all the groups at a particular level, we will be then clicking on the corresponding outline number at the top left corner of our worksheet. Level 1 displays the least data, while the highest number expands all the rows.
The following screenshot demonstrates the outline collapsed to level 3 respectively. 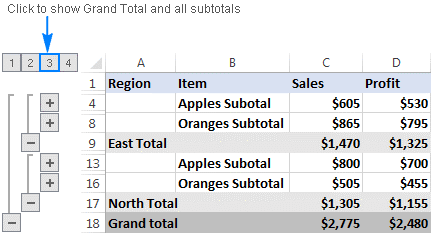
How can one expand rows in Microsoft Excel?Now for the purpose of expanding out the rows within a certain group, we will be now clicking on any of the cell in the visible summary row, and then we will connect the Show Detail button on the Data tab which are present in the Outline group: 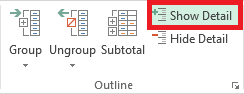
Or we will be clicking on the plus sign 
How can one remove an outline in Microsoft Excel? If in case we want to remove all row groups at once, then for that we will be clearing the outline (e.g. nested). How can one remove the entire outline in Excel Sheet? In this, we will be moving to the Data tab > Outline group, and then click the arrow just present under Ungroup, and click on the Clear Outline option effectively. 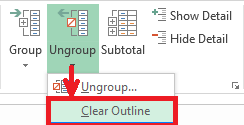
Important Notes:
How to ungroup a certain group of rows in Excel?Now to remove the grouping for certain rows without deleting the whole outline, we will be doing the following: Step 1: First, we will select the rows we want to ungroup respectively. Step 2: After that, we will go to the Data tab > Outline group and click on the Ungroup button. Or just press the Shift + Alt + Left Arrow, which are the ungroup shortcut in Microsoft Excel, Step 3: Now, in the ungroup dialog box, we will select the Rows, and then we will click on the OK button effectively.
Microsoft Excel grouping tipsAs we have seen, grouping rows in Microsoft Excel is easy. And in the below section we will find some of the useful tricks that will make our working with groups even much easier. How can we calculate group subtotals automatically? As depicted in all example discussed as so far, we have just inserted our subtotal rows by making use of the SUM formula for the purpose of getting the subtotals calculated automatically, and we can also make use of the Subtotal command with the summary function of our own choice, such as SUM, COUNT etc. whereas the Subtotal order will not only insert summary rows but instead of that they will also create an outline with collapsible as well as the expandable rows. By applying the default Excel styles to summary rows Microsoft Excel has various predefined styles for two levels of summary rows which are as follows: RowLevel_1 (bold) and RowLevel_2 (italic). We can also apply these styles before or after grouping rows as well. And for the purpose of automatically applying the Excel styles to a new outline, we will be moving to the Data tab > Outline group. Then after that we will clicking on the Outline dialog box launcher, and again we will be selecting the Automatic styles check box and click on the OK button. After that, we will create an outline as usual. Now to apply the styles to an existing outline, we can also select the Automatic styles box as shown above, but we will be clicking the Apply Styles button instead of the OK button. 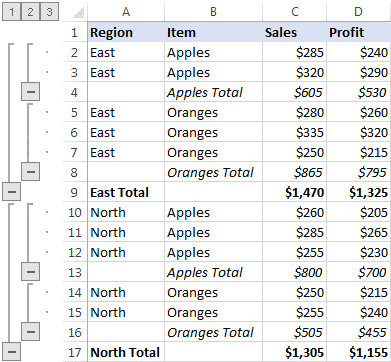
How do you select and copy only visible rows? After collapsing the irrelevant rows, we may copy the displayed relevant data elsewhere. However, when we select the visible rows in the usual way just by making use of the mouse, we select the hidden rows as well: And if we want to select only the visible rows, we are required to perform a few extra steps: Step 1: First, we will select the visible rows using the mouse. For example, We have collapsed all of the detail rows, and now we will be selecting the visible summary rows: 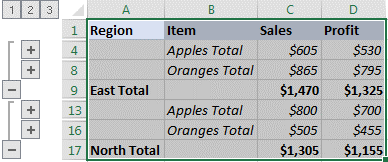
Step 2: Head to the Home tab >Editing group, and then we will click on Find & Select > Go to Special. Or press the Ctrl + G (Go To shortcut), and we will also click on the Special? button. Now in the Go to Special dialog box, we will select the visible cells only and click the OK button respectively. 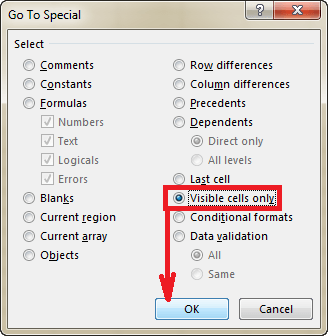
And as a result, only the visible rows are getting selected: 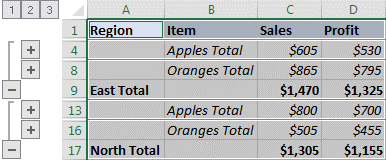
After that, we will then pressing the Ctrl + C for the purpose of copying out the selected rows and we will press Ctrl + V in order to paste them wherever we like to do. How can one hide and show outline symbols For the purpose of hiding or displaying out the outline bars as well as the level numbers in Microsoft Excel, we can make use the following keyboard shortcut that is Ctrl + 8. And then we will be pressing out the shortcut for the first time, hiding the outline symbols, and pressing it again, redisplaying the outline. |
 or plus
 sign for that particular Group effectively.
 which are present in the top-left corner of the worksheet.
 which are present at the bottom of that Group's bar:
 for the collapsed Group of rows that we want to expand as well:
 For Videos Join Our Youtube Channel: Join Now
Feedback
- Send your Feedback to [email protected]
Help Others, Please Share


