How to add a printer in Windows 10?
Similarly asked questions
Answer:
Computer users are required to add their PC to a printer if they want a printout of something. It is a simple and easy process and requires a little technical knowledge to add your PC or laptop to a printer. There are mainly two ways to connect a printer to your PC. The first one is using a USB cable, and the second one uses WI-FI or Bluetooth.
Let's see how to add a printer to your PC, which has a Windows 10 operating system. You can use any of the below methods to add your printer to PC.
Note: Before setting up your printer to PC, you must be sure that your printer and computer are connected to a power source and internet, respectively, so you can download the necessary drivers.
Add a Printer to a Windows 10 Laptop via a Wi-Fi connection.
If you have a WI-FI printer and your printer is not automatically detected by your Windows 10 laptop, you will need to manually set it up. Just go to your printer menu, configure a TCP/IP port, and install the drivers.
Follow the steps given below to add a network printer to a Windows 10 laptop:
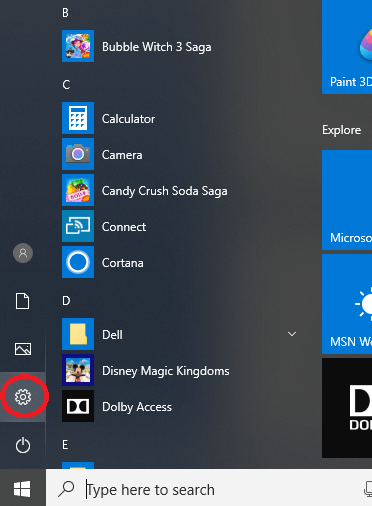
- Click on the Start menu and click on the Setting/gear icon option to open the Windows setting. See the below image.
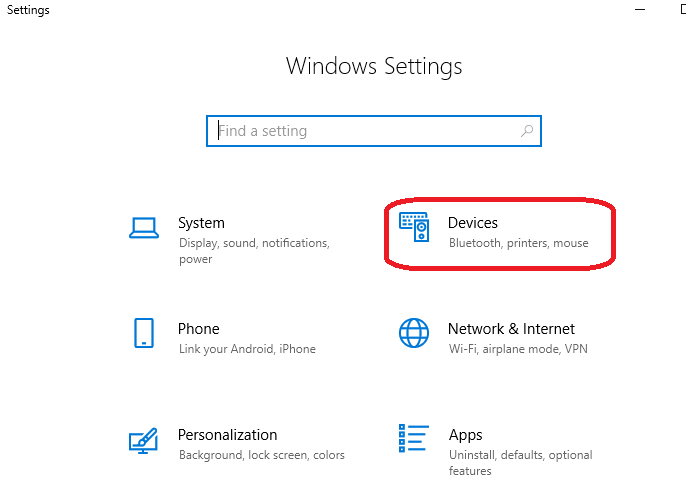
- After clicking on the Setting option, a new window will appear. Click on the "Devices" option.
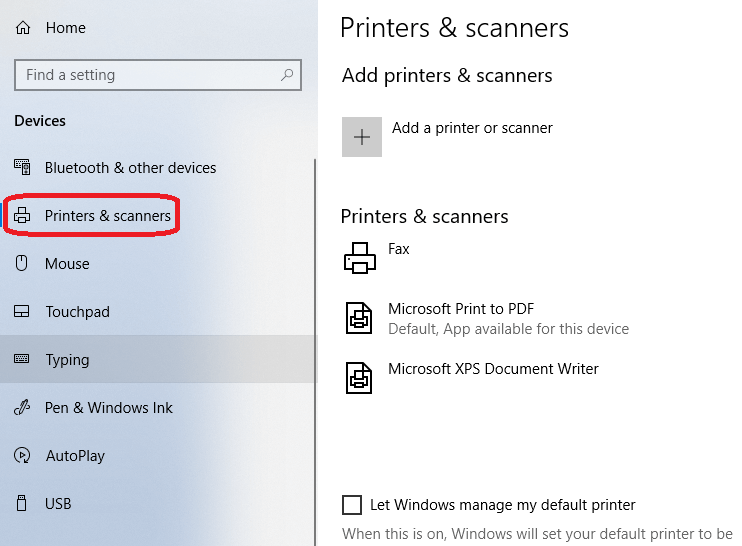
- After clicking on the "Devices" option, a new popup window will appear. Now, click on the "Printer & scanner" option. You can see the "Printer & scanner" option in the left sidebar of the window.
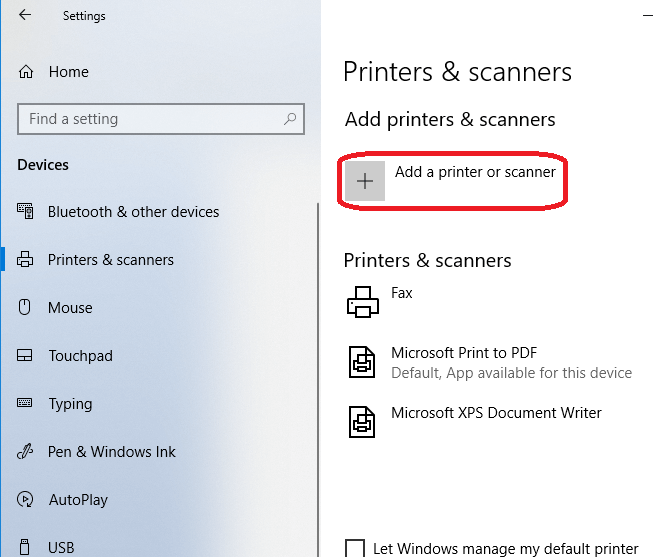
- Now, click on the "Add a printer or scanner" option in the right sidebar of the window. See the below image:
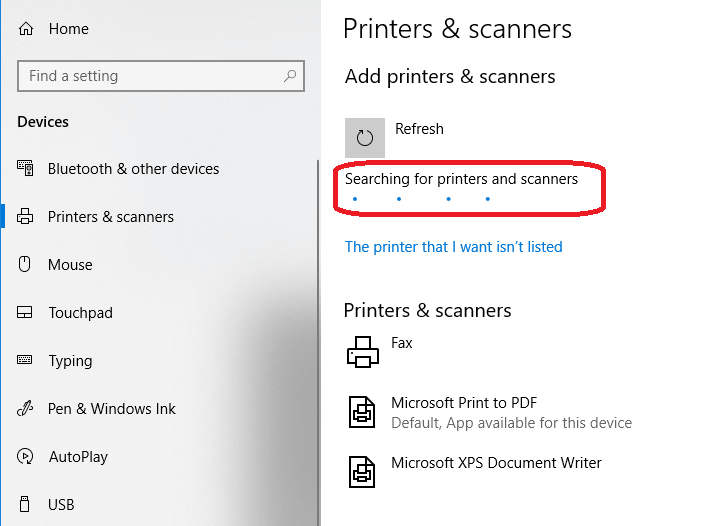
- After clicking on "Add a printer or scanner" option, you will see that window is started searching for your printer. See the below image:
- Once your printer is detected, follow the on-screen instructions to set it up. Now, the printer is connected to your Windows 10 PC.
What to do if Windows does not auto-detect printer?
If Windows does not auto-detect your printer, proceed with the following steps:
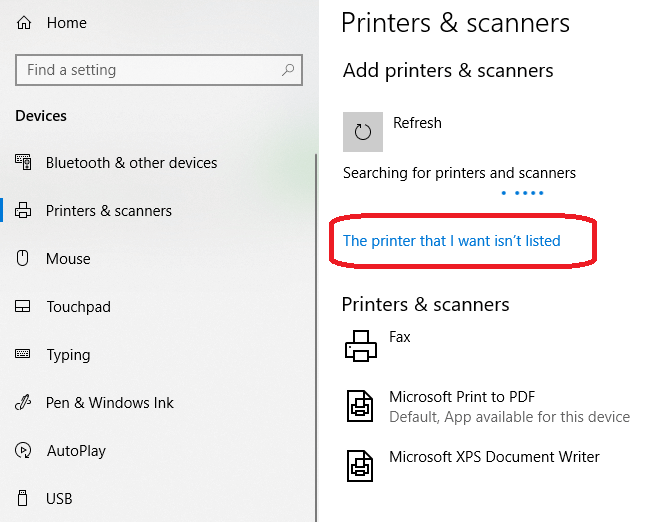
- Click on the "The printer that I want isn't listed." option. After clicking on this, a new popup window named "Add Printer" will appear on the screen. See the below image:
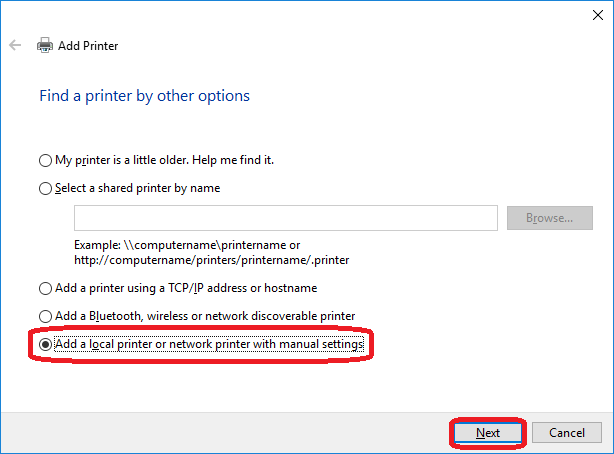
- Go to the new popup window, select the "Add a local printer or network printer with manual settings" option, and click on the Next button.
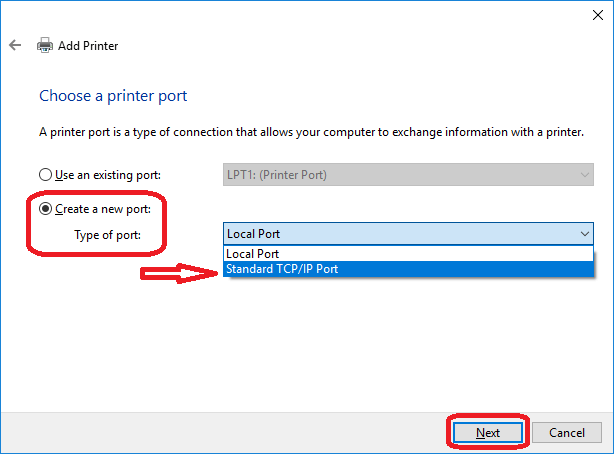
- Now, click on the "Create a New Port" radio button and select the Standard TCP/IP from the drop-down box. After that, click on the "Next" button. See the below image:
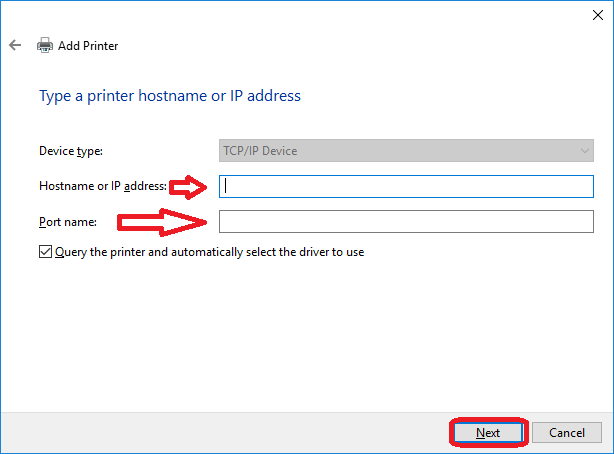
- Now, type your printer's IP address and click on the Next button. This may take some time as your computer is trying to detect the TCP/IP port.
- Now, click on the drop-down menu and select the appropriate device type. Here, you should choose the device type that corresponds with your printer brand. For example, if you are going to use a Canon printer, choose either Canon Network Printer or Canon Network Printing Device. After that, Windows will detect the driver model automatically. Once the window detects the driver, you can see that your printer will be added to the list of devices in the Printer & Scanners menu.
- Install the print driver by selecting the printer manufacturer on the left-hand side column and the driver for your printer model in the right-hand side column. After that, click on the Next button.
- Select the "Use the driver that is currently installed (recommended)" button and then click on the Next button.
- Now, if you want to make your printer sharable, set up printer sharing, and then click on the Next button.
- Now, your printer is successfully connected to the PC. You can verify it by printing a test page; otherwise, click on the Finish button.
Add a Printer to a Windows 10 Laptop via USB
Follow the steps given below to connect your printer to the computer via a USB cable:
- Plug one end of the USB cord to your printer and other to your computer.
- Now, follow the installation steps appear on the screen. After plug-in, Windows will automatically detect your printer and gives you instructions to proceed further.
- Now, click on the Start menu of your PC in the bottom-left corner of your screen to check if your printer was successfully set up. You can check it by going to Settings > Devices > Printers & Scanners.
- You can also do the same by using the Control Panel. Go to Hardware and Sound > and then click on Devices and Printers.
|

 For Videos Join Our Youtube Channel: Join Now


