| |

How to Add Fonts in PhotoshopIf you are a beginner, you may be satisfied with the available fonts in Photoshop. But, if you are a professional web designer or other media professional, you must be aware of the importance of fonts in our media. Font family is one of the major factors of the user interface. It makes our mockups look more attractive. Sometimes we want to use a specific font family for our design or mockups. If we do not know how to add fonts in Photoshop, it may be hard to use the specific font family. Fonts are also important for logo designing, artboard, media banners, and other graphical tasks. So, we should know how to add fonts in Photoshop. In this section, we will discuss how to download specific fonts and add them in Photoshop. Also, these downloaded fonts can be used in other applications as well. The following are some quick steps to download and add the fonts in Photoshop:
Let's discuss these steps in detail to overcome the complications you may face while adding new fonts in Photoshop: How to Download Fonts for PhotoshopTo download fonts for Photoshop is very straightforward. We can easily download the fonts from a web resource. To download a font, search on google for free fonts and download it from a resource. We can directly open a web resource that provides fonts for download. However, there are paid fonts also available on the web. Some useful resources for downloading the fonts are as following:
Apart from all the above resources, several other resources offer free fonts to download. Instead of downloading fonts from a web marketplace, we can buy a CD of fonts from a computer store. In general, CDs are the easiest way to store fonts in a system quickly. But, you have to pay for them. If you know the right places to download the fonts, you don't need to buy CDs. Let's move to our next step, download fonts. We will download the fonts from one of the most popular places for the fonts that is Google Fonts. How to Download Fonts from Google FontsGoogle Fonts are one of the popular and largest libraries available for fonts. We can choose a wide range of fonts from google fonts. It is an open-source resource for fonts, which means we can choose any of the fonts from google fonts. Also, google fonts are an easy to integrate API. To download a font from google fonts, navigate to https://fonts.google.com/. Here, we can see a preview of the font family before selecting it. 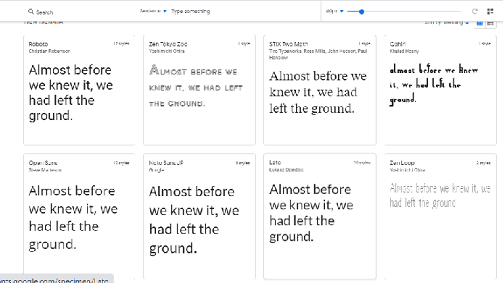
Now, click on the font as per your requirement and click on the download option. We can also download different styles of a font family. Here, we can find a download option at the top-right corner as follows: 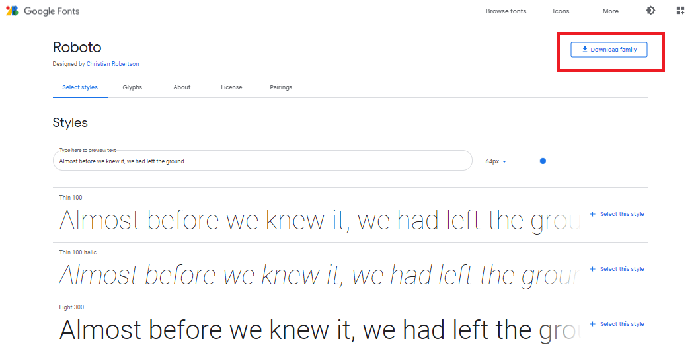
After clicking on the download option, it will download a compressed (zip) file of the font. Now, we can extract and install this font in our system. How to Install FontsTo install the downloaded font in our system, we have to extract the font file. This compressed file contains the license and different styles of font files. Extract this file and install the font file by double-clicking on it. When we double click on a font file, it will open as follows: 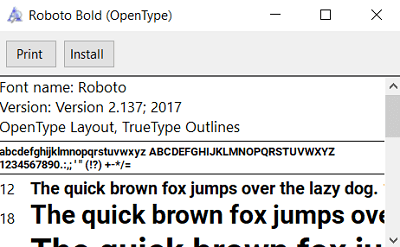
It contains two options; print and install. By selecting the install option, it will install the fonts on our PC. By installing every font style, we will be able to install all the font styles for the downloaded font family. For example, we have downloaded and installed the Roboto font family. Adding Fonts in PhotoshopTo add the font in Photoshop, all we need to install it on our PC. It will automatically be reflected in our Photoshop. Sometimes may be the font family is not displayed in our application. In such a case, restart Photoshop. We can find these fonts in Photoshop by creating a text layer. To create a text layer, select the text tool from the toolbox or press the T key. Once the text tool is activated, the text tool options are reflected in the text tool menu bar given at the top of the workspace. We can choose the font family and font style, font size, etc., from this toolbar. 
From the above image, we can see that the installed font family and font style reflect our Photoshop application. Just like the above steps, we can install any of the font families in our Photoshop application. Conclusion:Here, we have discussed how to install the font in the system and add them to Photoshop. Installing a font in Photoshop is pretty much straightforward. We do not need to do anything in Photoshop. But, that font should be installed on our PC. The system fonts can be used in other applications as well, just like Photoshop. It will automatically be reflected in the application after installing on the PC.
Next TopicHow to Crop an Image in Photoshop
|
 For Videos Join Our Youtube Channel: Join Now
Feedback
- Send your Feedback to [email protected]
Help Others, Please Share


