| |

How to convert a NX model to drawingThis blog tutorial is for you if you're interested in 2D CAD to 3D CAD conversion or if you've just migrated from a 2D CAD to a 3D CAD system and want to convert the 2D legacy drawings into your NX 3D CAD. Furthermore, if a customer provides you with an Auto CAD file and that is all you need to work with to generate a solid model, this is the approach you must follow. 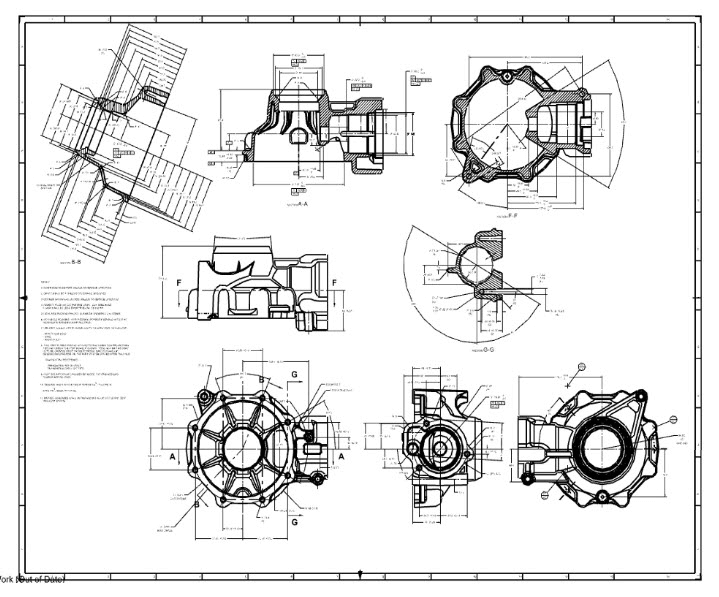
More businesses are seeing the advantages of using a model-based definition (MBD) approach and Product & Manufacturing Information (PMI) as part of their product development process. However, one of the most significant impediments to executing such a plan is old data. What are you going to do with all of those old 2D drawings? The new Convert to PMI command in NX 11 overcomes the problem. Convert to PMI is compatible with both master and non-master model designs. The article today concentrates on the latter, so check out our prior NX Quick Tips video to see a procedure for converting master model drawings to 3D PMI objects. Regardless of the model type with which you begin, the conversion procedure is relatively identical. The only distinction is that you must first generate a master model from your non-master model. If you're thinking, "What is this master model business all about?" "A master model includes both the geometry model and the artwork in separate files." The notion of the master model is founded on the premise that one model drives the whole product development process, including design, simulation, drafting, assembly, manufacturing, and inspection. Because everything is built on this one master model file, any changes you make are instantly reflected everywhere. We must first convert our model to a master model before we can run Convert to PMI. To examine the drawing in the NX Modeling programme, open the file. All of the features featured in this specific design are listed under Model History in the Part Navigator. The drawing is out of date, as indicated by the clock on the left of each image. Click to update all views and wait a few seconds for the process to complete. 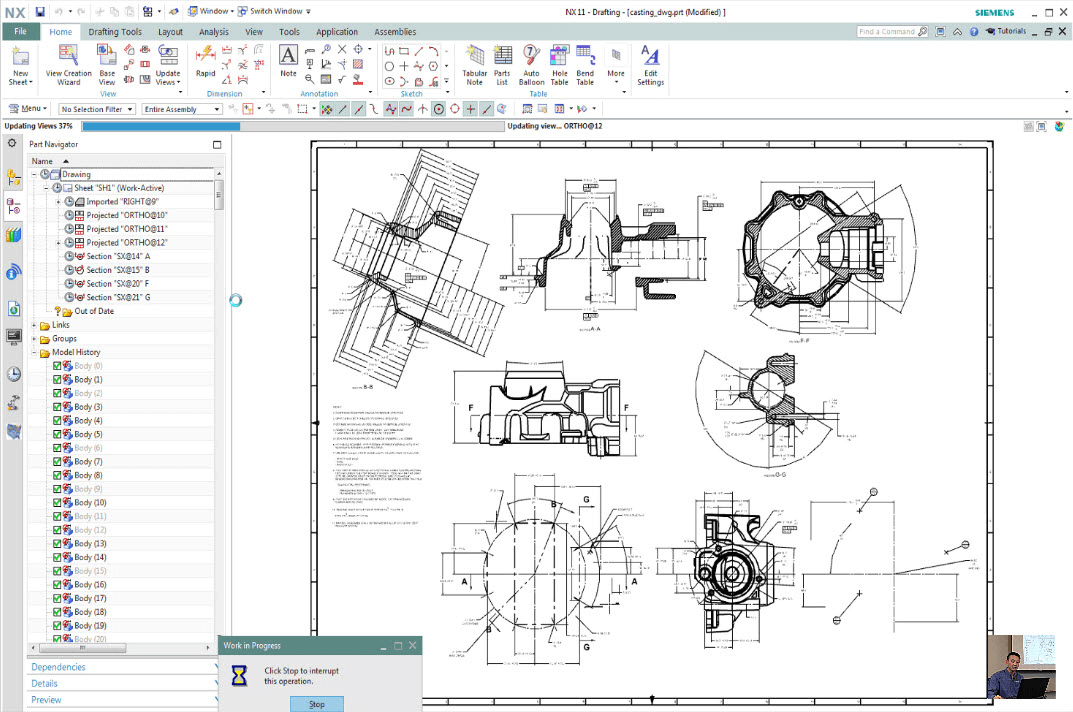
Now that our drawing views are up to date, we may save the file under a new name. The current file name casting dwg is wrong; as we saw in the earlier stages, this file contains the design as well as all of the drafting information. Save the file with the name casting. The following step is to make a new drawing. The purpose here is to generate a specific sheet that is associated to this casting, so choose Reference Existing Part in the Drawing Template beneath the Relationship filter and then OK. 
Right-click the casting in the Assembly Navigator and select Make Displayed Part. Enter the Part Navigator, select all of the drawing views, right-click, and choose Copy. These perspectives will be pasted into the drawing. So, open the casting dwg file once more. Now, in Drafting, paste the copied views into the Part Navigator. A message appears to warn that the action may result in the creation of items on an unseen layer. To proceed, press OK. There is an option in the Layer Settings window that allows you to reactivate certain layers. 
The drawing has an incorrect angular dimension. You might have several. Open the Angular Dimension dialogue and adjust the object selection to correct this. Once the First and Second choices are correct, make the adjustments and zoom out to see the entire drawing. Some of the views can be moved around to fit within the drawing borders. 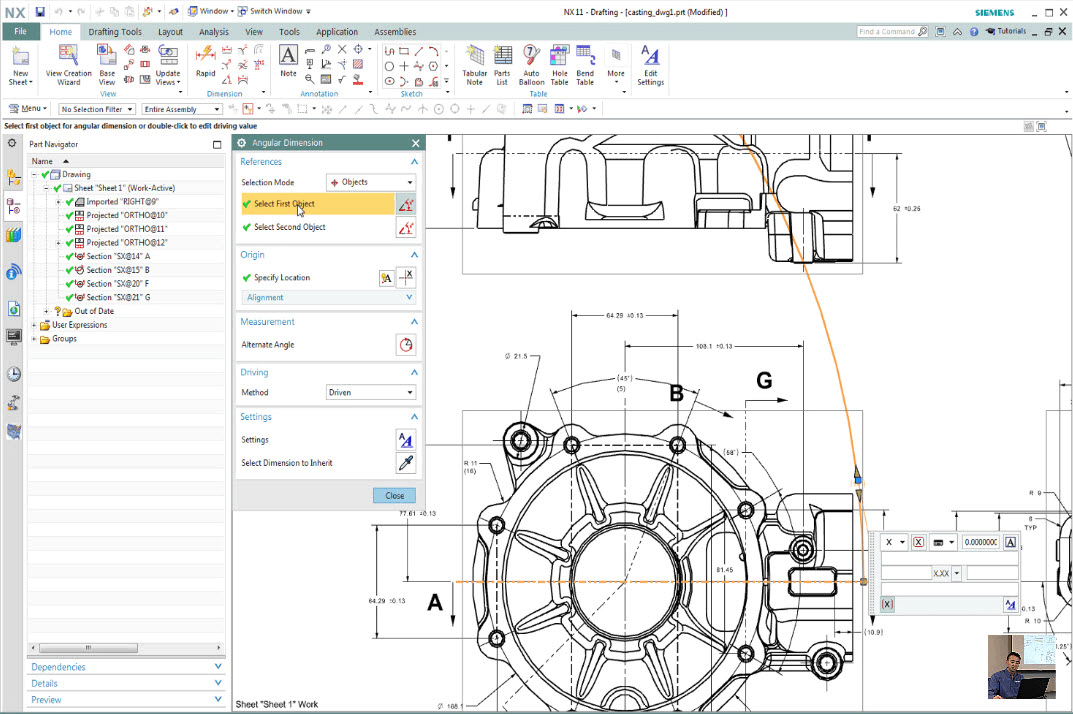
Let's go back and look at the original casting memo. Copy the content and open it. We'll also insert the message into the new drawing file. Once the message has been pasted, click and drag it to position it on the artwork inside the boundaries as well. Change the drawing border colors, making them a bit lighter to assist discern the features of each view. Return to the original casting and take out the sketch sheet. Keep the casting. The 3D geometry and its features should now be the only things in the casting file.
Next TopicHow to make a drawing from a part NX
|
 For Videos Join Our Youtube Channel: Join Now
Feedback
- Send your Feedback to [email protected]
Help Others, Please Share


