How to install Magento 2 on windows?In this section, we are going to install Magento 2.3.2 on Windows platform. The latest version of Magento is Magento 2.3.2. Magento 2 can also be installed using composer, which have their own benefits. Here, we are installing Magento 2 without using the composer. Before starting the installation of Magento 2 on the system, we need to know the system requirement. The pre-requisites are given below: System requirement of Magento 2
Install the XAMPP software for the complete package of PHP, MySQL, and Apache webserver. So, we do not need to install all these software separately. For XAMPP installation, see the Magento 2 XAMPP Installation tutorial. Step 1: Download the Magento from the following site https://magento.com/tech-resources/download. Here, we are installing Magento version 2.3.2 latest version of Magento. 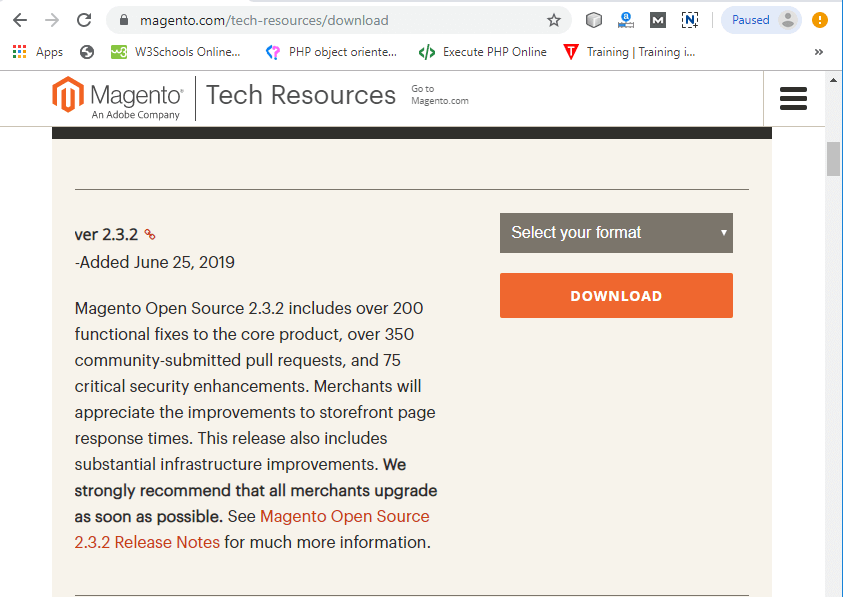
Step 2: Select the zip format of Magento for windows, and click on Download button. The format type can be zip, tar.gz, or tar.bz2, you can select as per your requirement. 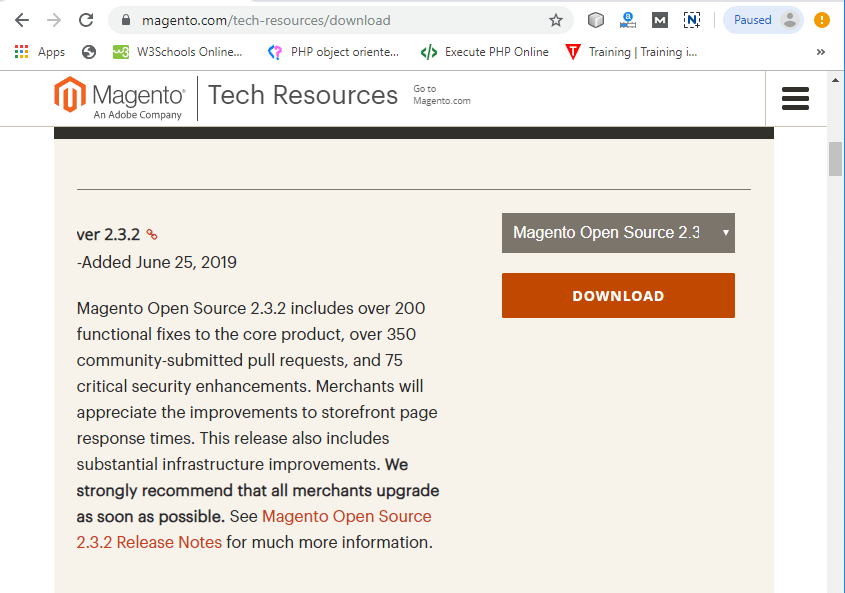
Step 3: Before start downloading, it will ask to login for the existing user. If you do not have an account create a new account by clicking on create a new account. 
Step 4: Now, fill all the details correctly and create a new account. 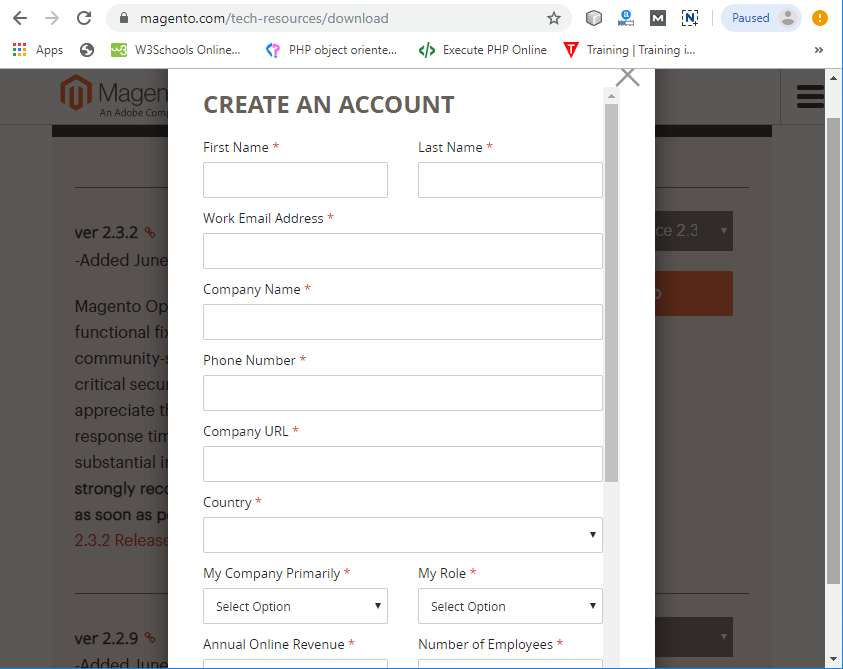
Step 5: After creating the new account, login to the Magento community. Downloading will automatically start after login. 
Step 6: Magento is successfully downloaded in your system. Now, create a new folder by name magento2 in htdocs inside the XAMPP, i.e., xampp -> htdocs 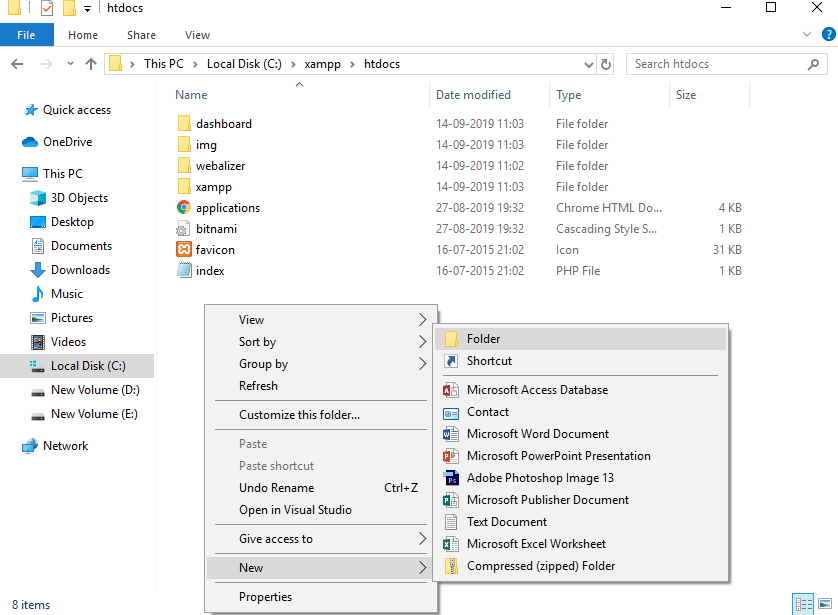
Step 7: Extract the downloaded Magento 2.3.2 zip file in magento2 folder, which you have created in the previous step, i.e., xampp -> ht-docs -> magento2. 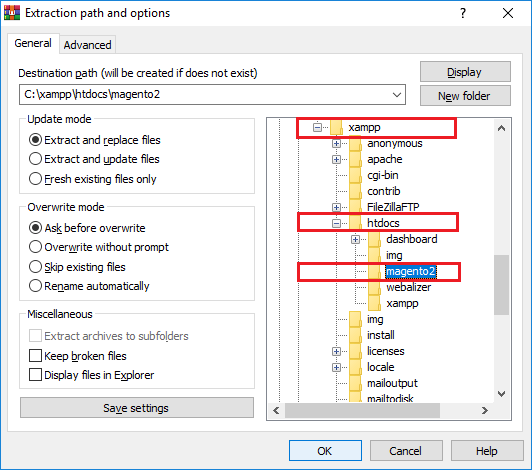
Step 8: After completing the extraction of Magento 2.3.2, run the Apache and MySQL in XAMPP server. 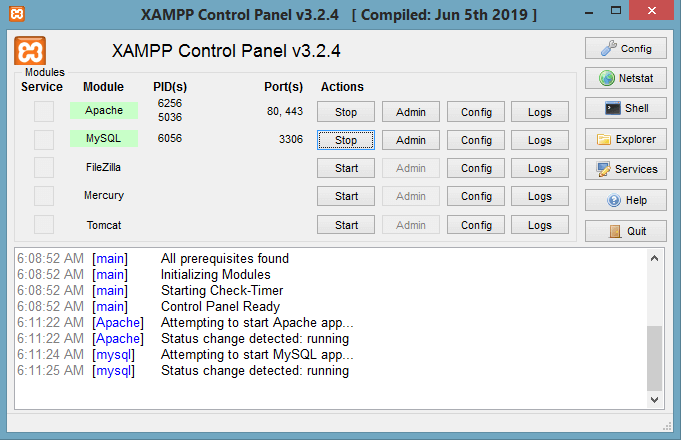
Step 9: Type localhost/magento2/ on the browser and press the Enter key. 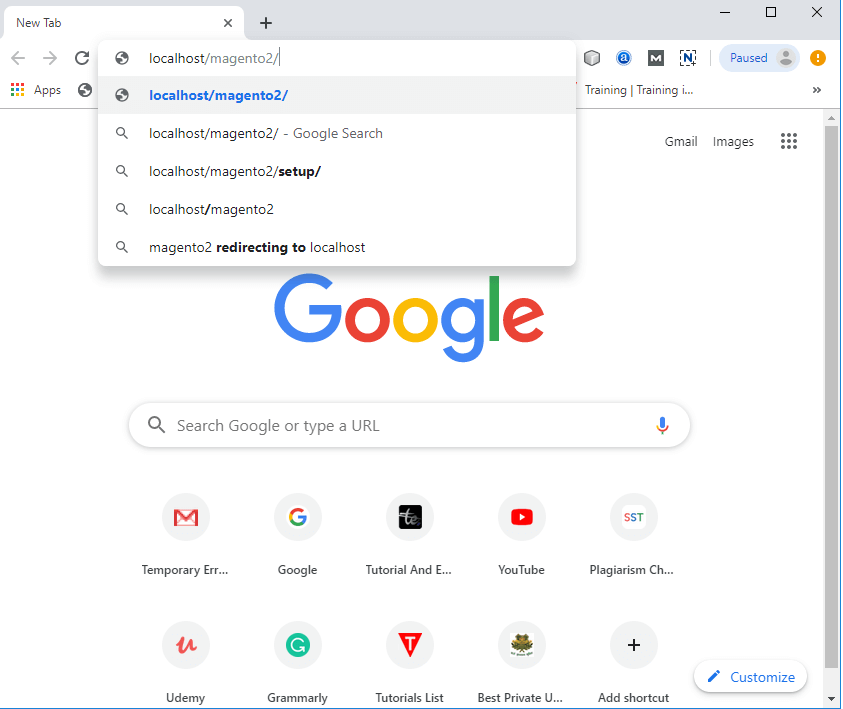
Step 10: Click on Agree and Setup Magento and start the installation process of Magento 2.3.2 on your system. Here you will find six steps to complete the installation. 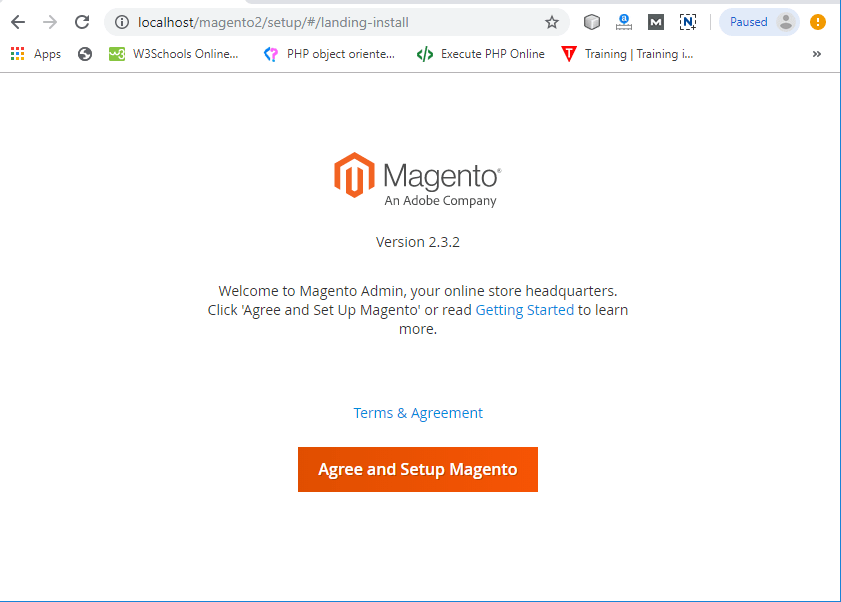
Step 11: The first step is the Readiness check. Click on Start Readiness check, it will give PHP extension missing error. 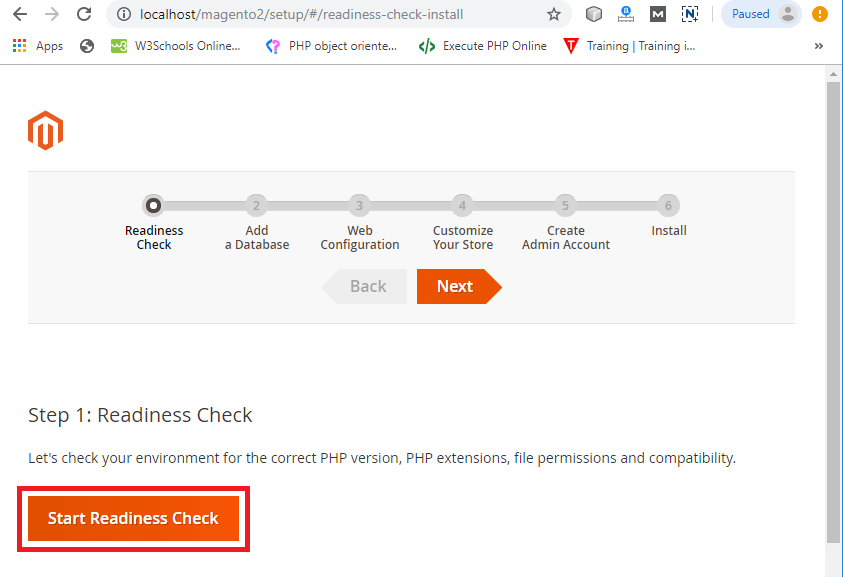
Step 12: The readiness check will show that 3 PHP extensions xsl, intl, and soap are missing. 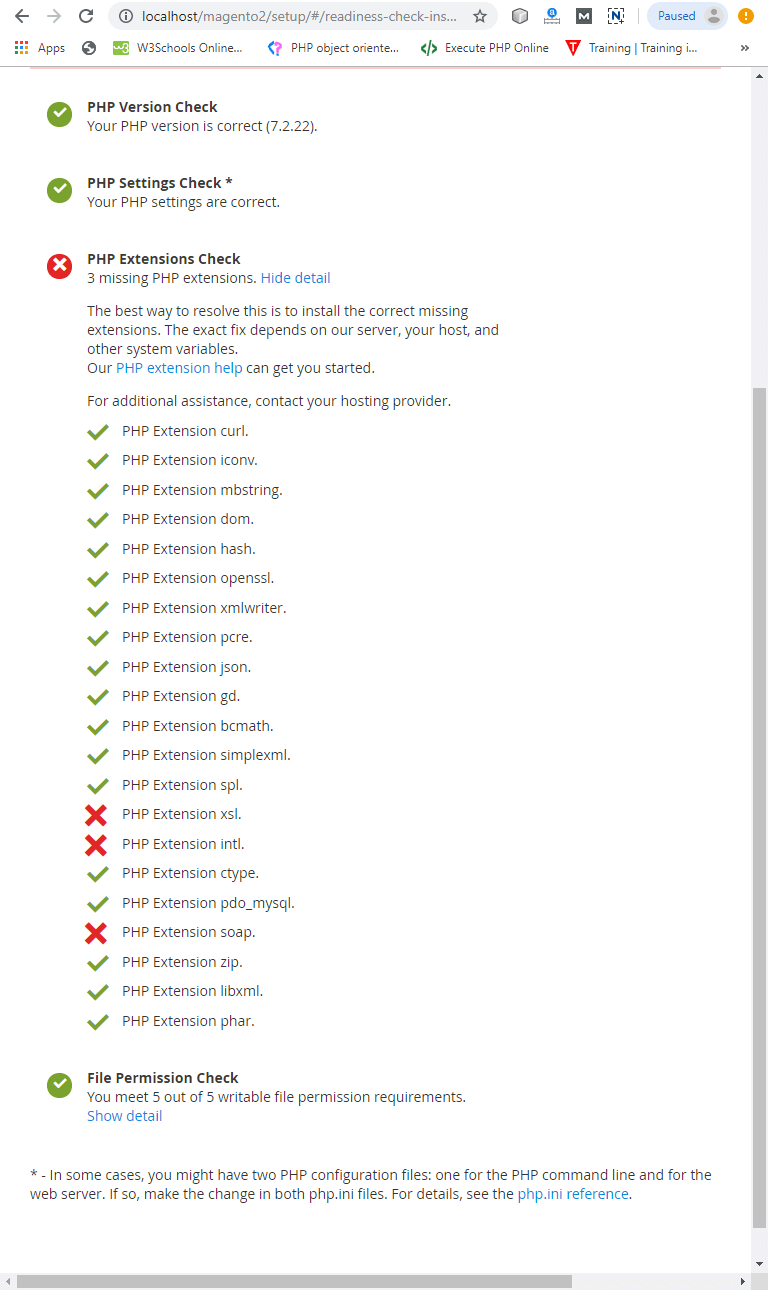
Step 13: To remove this error, open php.ini file from the XAMPP server. Click on Config of Apache and select PHP (php.ini) to open the file. 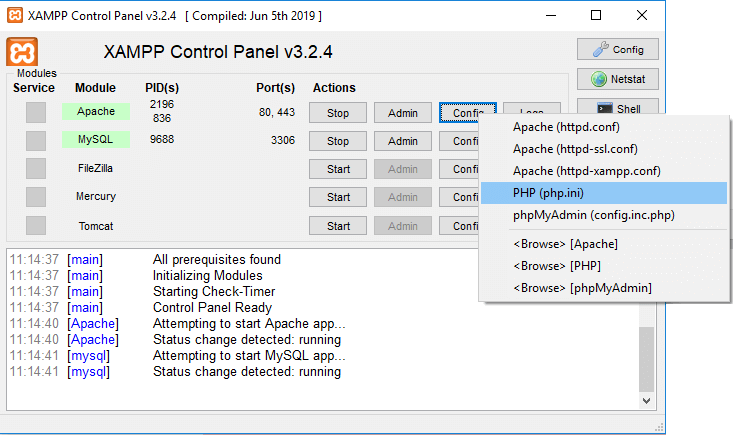
Step 14: Remove semicolon (;) before these extensions and save the file. Restart the XAMPP server again. 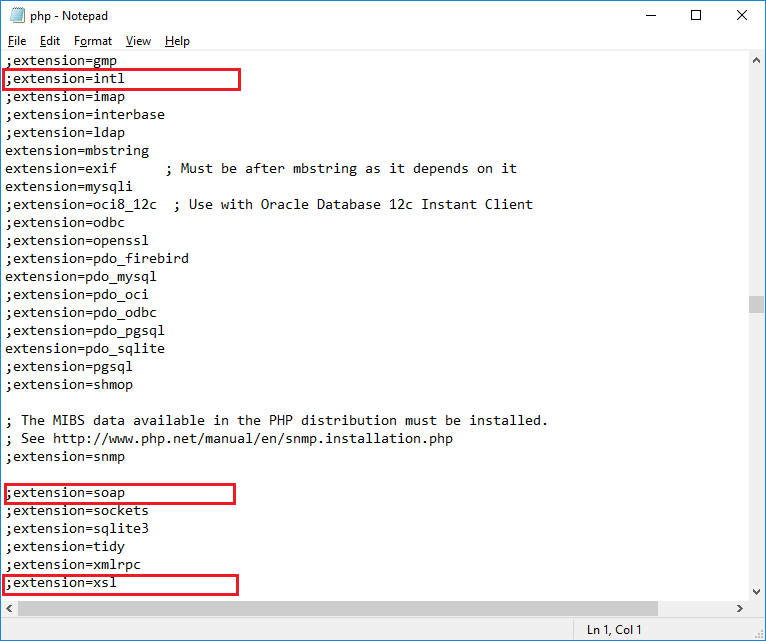
Step 15: Click on try again, where you can see that all Readiness check completed without any error. Now, click on Next for step 2. 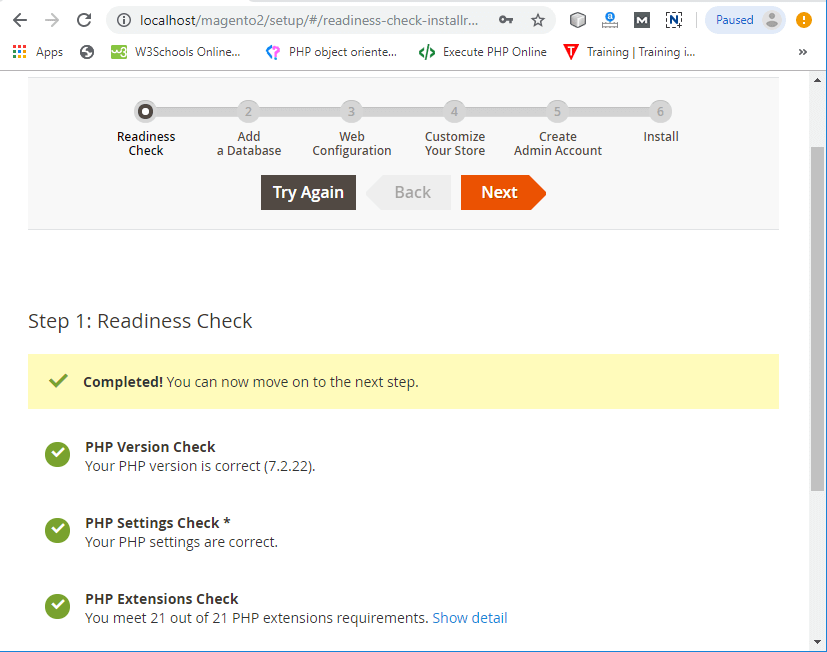
Step 16: Here, you need to add a database for your Magento2. So, create a database by name magento2 in phpMyAdmin. The same database name will be passed in the Database Name field at the time of Magento 2 installation. 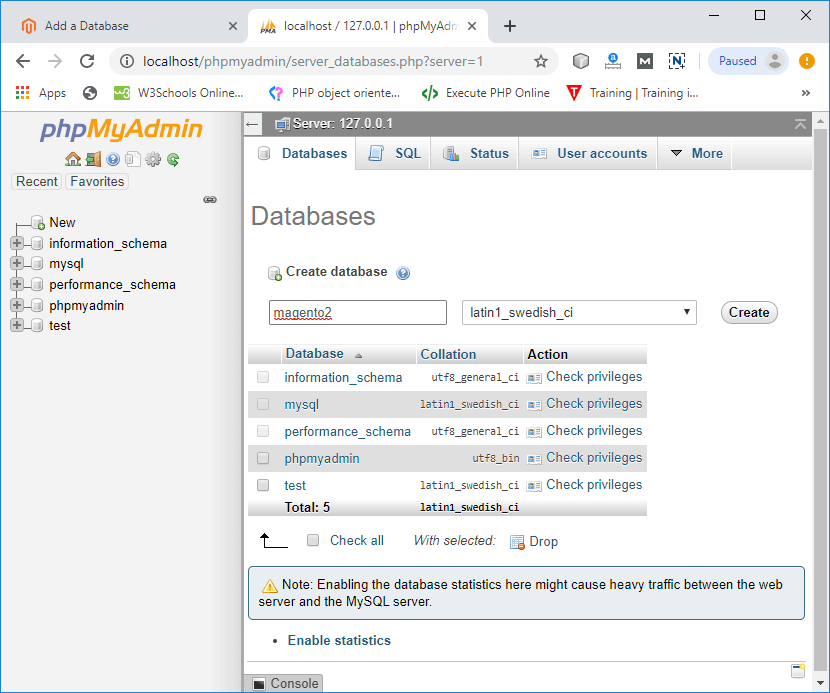
Step 17: Provide the database name and other details as shown below and click on Next. Database name should be passed same, which you have created earlier. 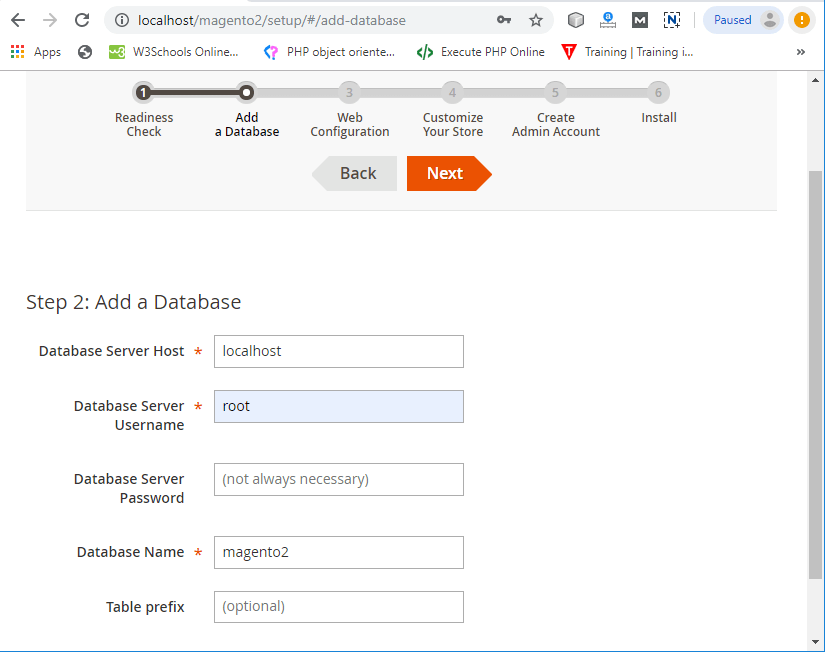
Step 18: Now, we have to do web configuration to run the Magento 2 on the web. Store address and Magento admin address comes automatically filled by default. You can also change them as per your preference as we have taken admin. 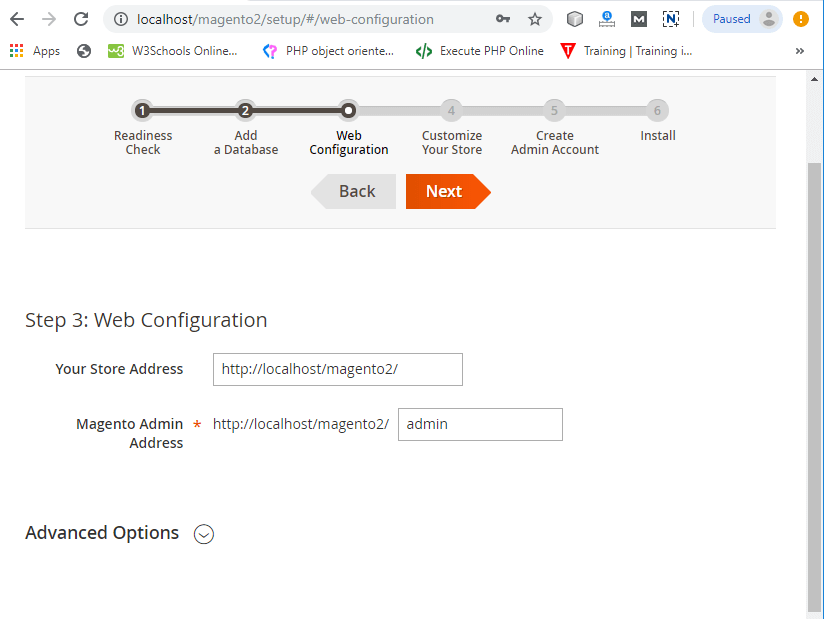
Step 19: Next step is to customize your store. Configure the Default Time Zone, Language, and Currency and click Next. Here you do not need to change anything. Click on the Next button and move ahead. 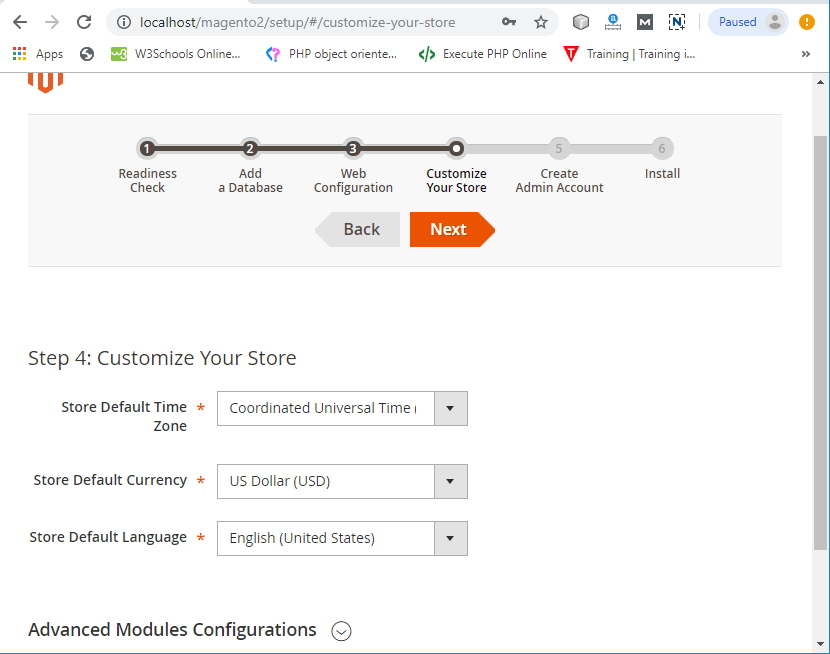
Step 20: Enter the proper details here to create the admin account. Enter the username, email id, password, and confirm password in the given fields. 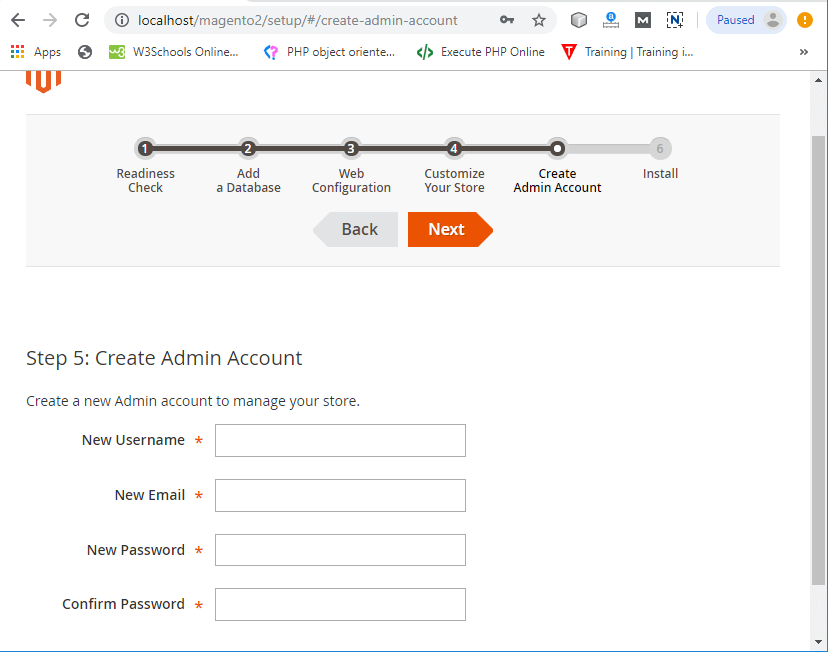
Step 21: Now, you are ready to install. Click on install and start the installation. 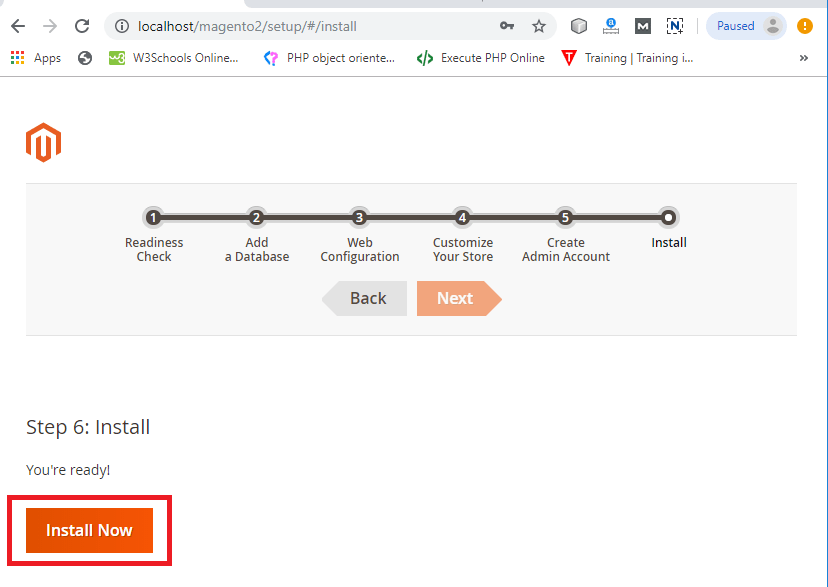
Step 22: Magento 2.3.2 is successfully installed on your system if you get a success page similar to the below page. Magento is ready to launch, where you will get Store address and Magento admin address. Click on Launch Magento Admin to launch the Magento. 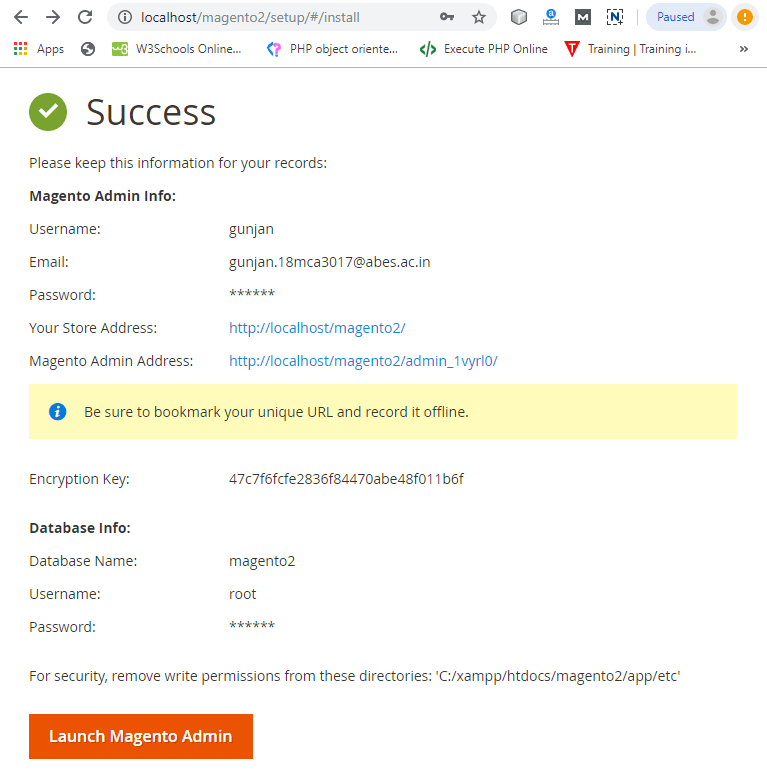
Step 23: After launching the Magento Admin, if a blank screen is showing rather than the admin login panel, then go inside the xampp/htdocs/magento2/vendor/magento/framework/View/Element/Template/File/ and open Validator.php file. Replace code Replace with Step 24: Again Launch the Magento Admin, an Admin Login page will open. Now, enter the username and password in it and click on Sign in. 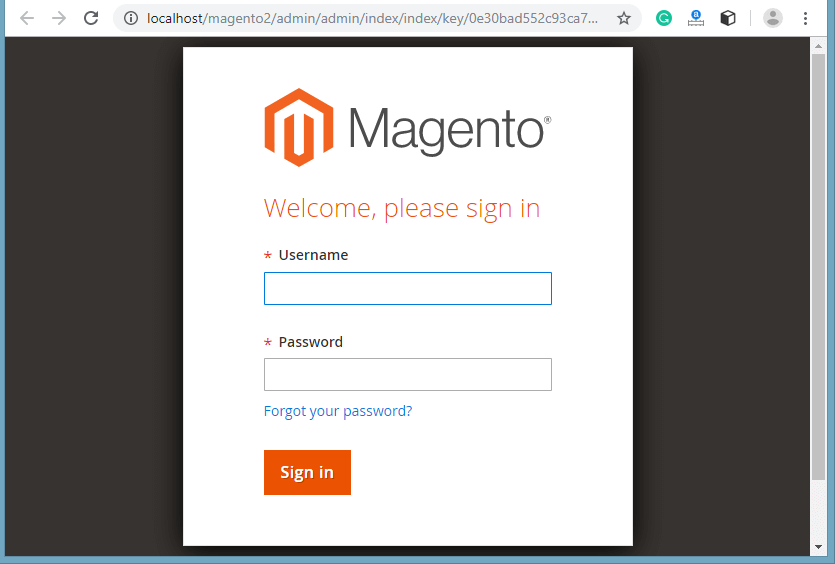
Magento 2 Lume interfaceIf the front end interface is missing the Luma logo, and the CMS homepage is showing same as the below screenshot, then follow the steps given below: 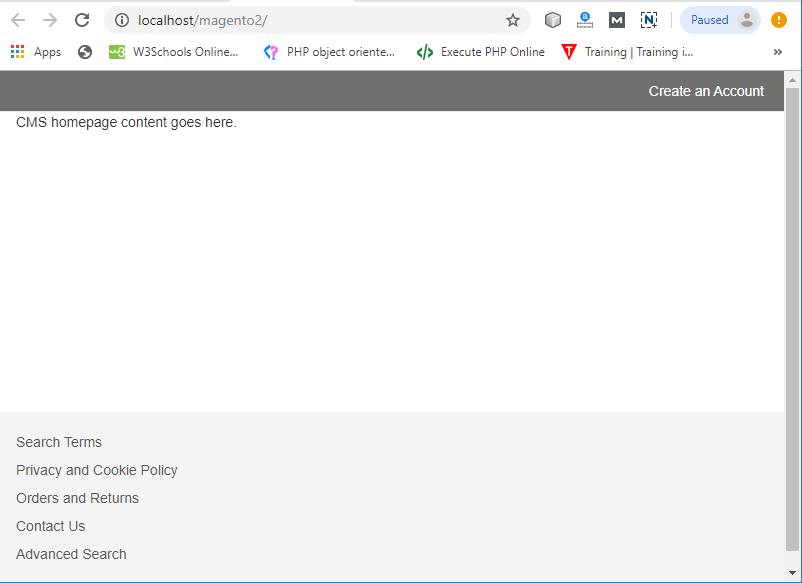
Follow the below instructions to fix it.
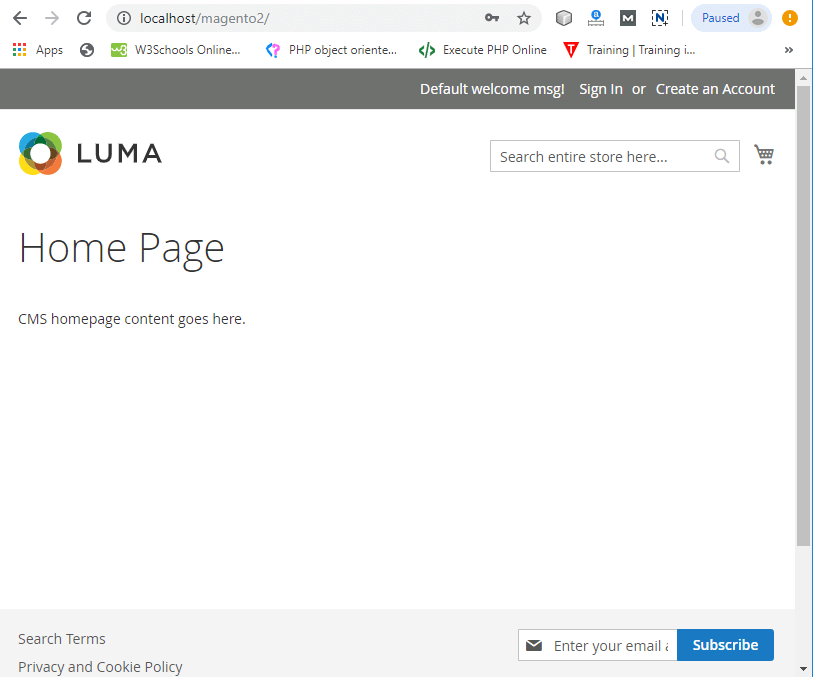
Note: See the installation error page for any Magento 2 errors, if you are facing problem while installing Magento 2 as well as at the time of Launching Magento Admin Panel.
Next TopicInstall Magento 2 using Composer
|
 For Videos Join Our Youtube Channel: Join Now
Feedback
- Send your Feedback to [email protected]
Help Others, Please Share


