| |

How to Remove Watermark Using GIMPGIMP is an open-source image editor that allows us to quickly edit photos. We can use it for editing, drawing, graphics purposes. It is a fascinating software to edit photos. One of the major tasks of photo editing is to remove the watermark from an image. It is a great alternative to Photoshop. The watermark is used to copyright the image. On the internet, we are required to use any image. But if the image contains watermark it means the image is copyrighted, and we can not use it. So it is required to remove the watermark. There are multiple ways to remove the watermark using GIMP. But we are going to discuss some easiest and effective ways to remove the watermark. However, it depends on the image's background, which tool will be more effective. We can remove water using the crop tool. It is also an effective method to remove the unwanted element from the image. One of the major disadvantages of this tool is that it may remove any important part of the image. So it is not a recommended method. Learn more about how to Crop an Image. In this section, we will discuss how to remove watermark using the clone and heal tool. These two tools we found more effective in removing the unwanted element from an image. These tools fill the watermarked part of the image with a similar image pattern. How to Remove Watermark Using Clone ToolThe clone tool is used to refix the image. It is one of the effective tools to fix an image. We can copy a similar part of the image by holding the CTRL key and paste it to the defective part. It paints the copied image part on the defective part of the image. To remove watermark from an image using the clone tool, follow the below steps: Step1: Open an Image The first step is to open the image using the Open option from the File menu or hit the CTRL+O keys. It will open a dialog window: 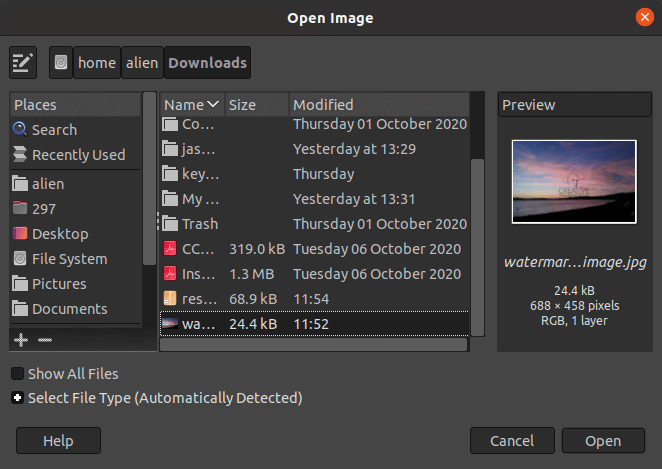
Select the image from the file system that we want to open and click Open. It will open the image with GIMP. We can also drag the image from the file system. 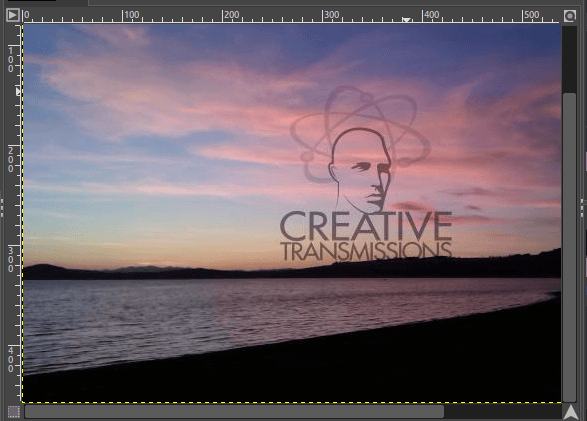
Step2: Select the Clone Tool Now, select the clone tool from the Tools-> Paint Tools-> Clone menu or hit the C key. We can also do the same by clicking on the below icon: 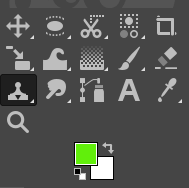
It will activate the clone tool. Step3: Select a Similar Region Now, select a clear region from the image or other image that matches the image's watermarked area. To select a region, hold the CTRL-key and click on a specific area. It will copy that particular region to paint. 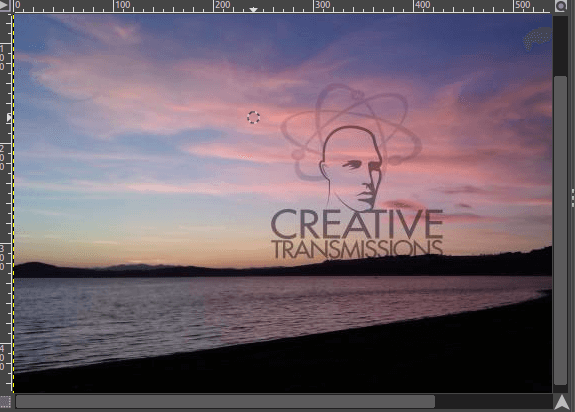
Step4: Start Painting Now start painting over the watermark image. To paint a specific part, leave the CTRL key and start sliding the cursor over the region. It works like a brush. It will paint the copied region; We can repeat the cloning process by selecting the different regions (Step3). It is recommended to zoom the image and adjust the brush size as per the need for an improved result. 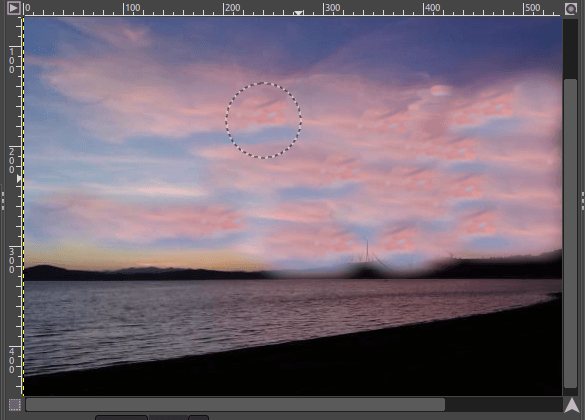
As we can see, the watermark symbol has been removed from our image using the clone tool. We can adjust the clone tool settings from the Tool option menu given at the bottom to the Toolbox menu. The brush size, angle, spacing, mode and other options can be adjusted by this menu: 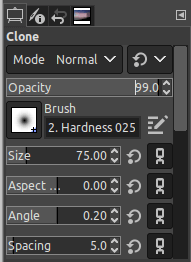
Similarly, we can do the same using the Heal tool. Both tools are much similar to work as they both are used to fix the image regions. See our detailed tutorial on how to fix regions using the Clone tool and the Heal tool. Apart from the clone and heal tool, there are other ways to remove the watermark or unwanted part from the image. One other method is by using the resynthesizer plug-in is also very popular among graphic designers and photographers. Let's understand it. Remove watermark using Resynthesizer plug-inThe resynthesizer plug-in is one of the finest plug-ins for GIMP. It supports several tools to edit photos. We can remove watermark using the resynthesizer plug-in's Heal Transparency tool; It is an effective way to remove the watermark from an image. It extracts elements from the image and blends them with the background. Let's understand how to remove watermark using the Resynthesizer Plug-in. To use the resynthesizer plug-in, install it. See how to Install Resynthesizer Plug-in. Now, open the image in GIMP using the Open option from the File menu or hit the CTRL+O keys. 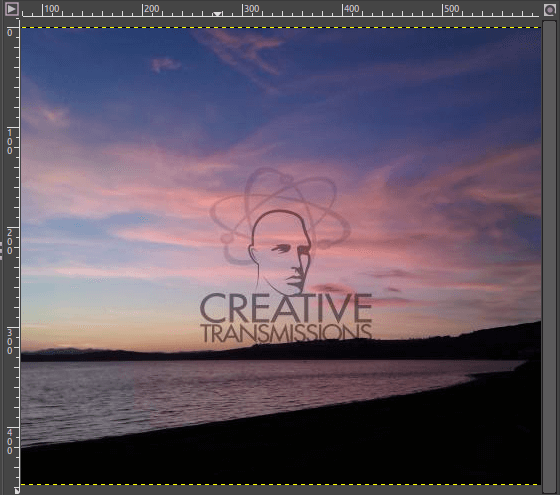
Now, select the watermark using any selection tools like rectangle select, free select, ellipse select, etc. We are using free select because it allows us to select only the specific part of the image. 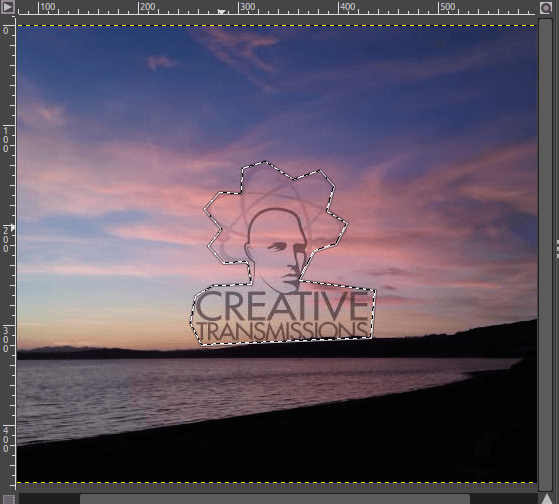
After selecting the watermarked region, apply the Heal Selection filter to blend the selected region with the background. To apply the Heal Selection filter, navigate to Filters-> Enhance-> Heal Selection menu. 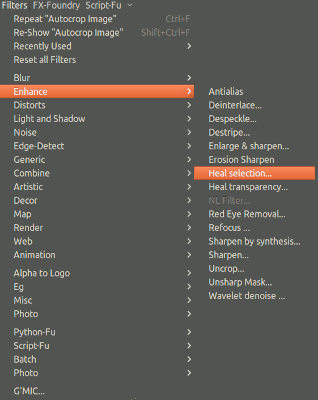
It will open a dialog window to specify the healing properties. The context sampling width specifies the number of pixels outside the selected region. And the samples from all four edges left and right sides, or above and below. It depends on the type of image. Specify the properties and click OK to Heal the region. It will blend the watermark with the background automatically. 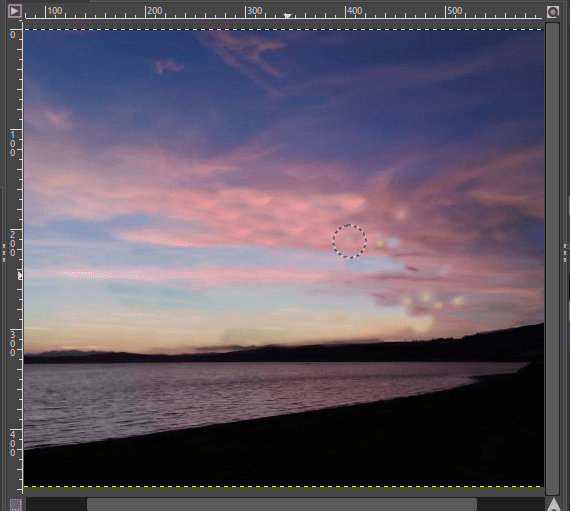
We can see the watermarked symbol has been removed from the above image. It is the finest way to fix the defective region of the image, But we require the Resythesizer plug-in. Remove watermark from the Images having LayersSome images contain layers; removing a watermark from these images is a very straightforward process. Usually, the images saved in the default format of a tool contains layers such as PSD file for Photoshop and XCF file for GIMP. Editing these images is straightforward because these images contain layers. To remove watermark from an image that has layer, follow the below steps:
It will delete the watermark from the image. Now save the image in any of the required image formats. Apart from the above methods, there are multiple ways to edit the photos. For further details on how to edit photos, visit Photo editing in GIMP.
Next TopicGIMP Logo Making
|
 For Videos Join Our Youtube Channel: Join Now
Feedback
- Send your Feedback to [email protected]
Help Others, Please Share


