| |

Illustrator Workspace OverviewThe Adobe Illustrator has an efficient work area and user interface to create and edit our designs and artwork for print, using on the web, and on mobile devices. 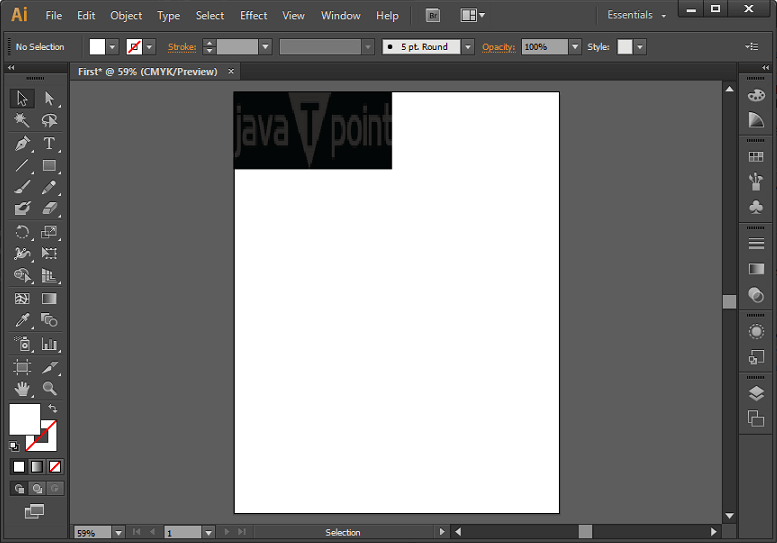
Inside Illustrator's home window, we have panels, bars, and various tools to create and manipulate our documents and files. In the above image, there is a document view in the center, panel view on the right hand, Menu bar, tool palette on the left, and three palette groups in the vertical dock. Display panel menu options Take your pointer on the panel menu icon on the upper-right corner of the panel, and right-click on it. Adjust panel brightness On the User Interface preference, move your mouse on the Brightness slider. It affects all the panels, including the Control panel. Screen Modes Using the mode option available at the bottom of the Tools palette, we can change the size of the illustrator window. 
Status barThe option is available at the lower-left edge of the illustrator window when you're in the maximized screen. It shows the information about one of the given topics and displays the current zoom level. E.g., the date and time tool, the number of undo and redo available the document color profile, or the status of the managed file.
Control PanelThe control panel is docked at the top of the work area. It is the quick access options related to the object that we want to access. Variety of options displayed in the control panel depending on the type of tools or objects we are using. 
For Example - The control panel displays a text formatting option when we select any text object, also, to opt for changing the color placement and the dimension of the object. Customizing the WorkspaceWe will move and manipulate panels to create a custom workspace. We can design and save the customized Workspace and switch in between. 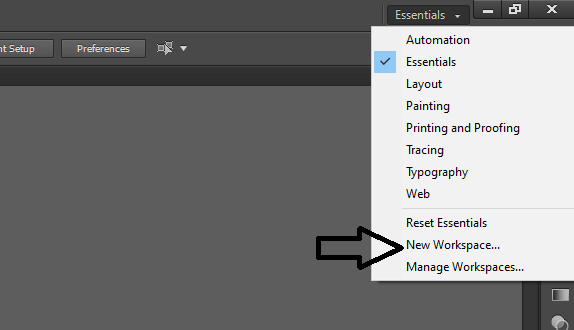
Customizing Dock and Undock panels: Dock and Undock are the collections of panels or panel groups that are displayed together. If we move them into and out of a dock, we can dock or undock panels. These panels generally appear in the vertical orientation. 
Rename or duplicate a workspaceStep 1: You have to click on the windows tab on the menu bar. 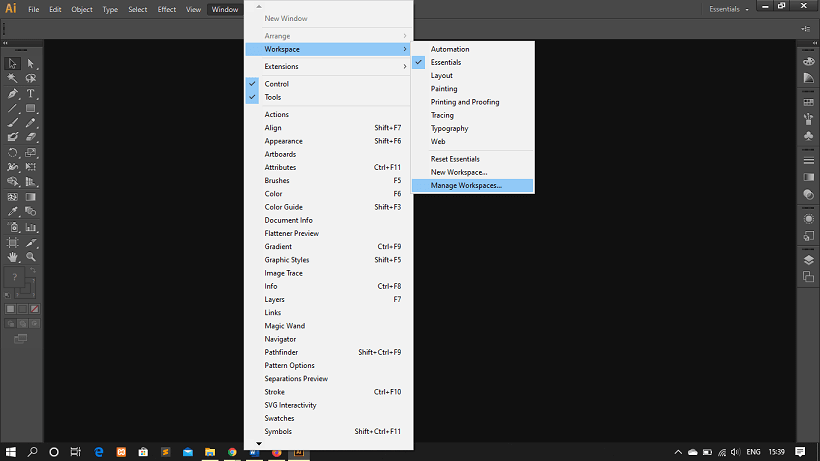
Step 2: Then, a drop-down menu will appear, click on Workspace. Then click on Manage Workspace from the child menu. Step 3: Select the Workspace that you want to rename, then click on, OK. 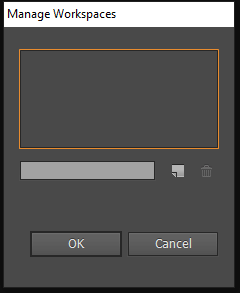
Step 4: Or, if you want to duplicate a workspace, then select it and click the new button. Tools panelThe tools panel is on the left side of the illustrator window. However, we can modify its location according to our need by dragging the Illustrator icon or its title bar. We can also hide the tools from the Windows tab → Tools. 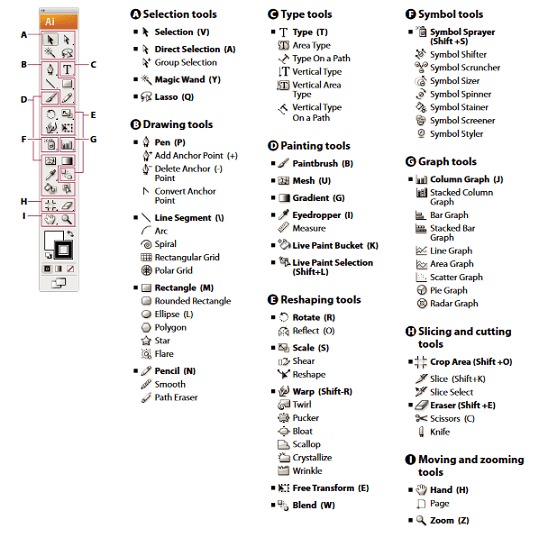
We can use the above tools to select, create, and manipulate objects in Adobe Illustrator. Some of the tools are used to type, select, paint, draw, sample, edit, and move images. Files and templatesIn Illustrator, a document is a space in which we create artwork. We can generate a document in Illustrator that is destined for many different types of output. Based on our intended output, we can start a new document profile that includes preset values for orientation, transparency, size, resolution, units, and color mode. 
For example - As you know, instead of points, the film and video document profile use pixels, and we can select a specific crop area that matched the device we are using, such as NTSC DV widescreen, etc. We can choose the template from the following profiles: 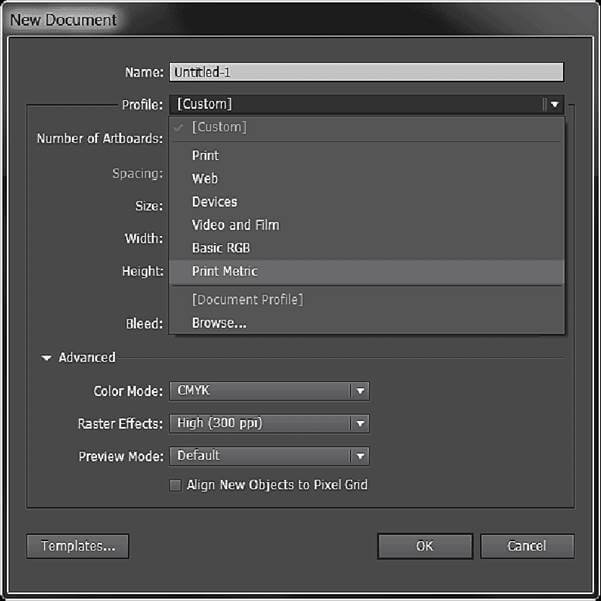
Print Document: This profile provides a variety of other preset print sizes to choose from and uses a default letter size artboard. We can use this profile in case if we want to send this file for output to a high-end printer. Web Document: The web document profile enables the preset options that are optimized for output to the web. Mobile and Devices Document: Creates a small file size that is preset for a specific mobile device. We can select the device that we are using from the Size menu. To view the document layout in a specified device interface, click on Device Central to open Adobe Device Central. Video and Film Document: The profile gives some specified preset of crop area size for film and video. To ensure that the dimensions are interpreted correctly in video applications, Illustrator creates only square pixel files and adjusts the Width and Height values. For example, if we choose pixel standard NTSC DV, it uses a pixel size of 648 x 480, which translates to 740 x 480 pixels in video-based applications. Basic CMYK Document: The profile provides a variety of sizes to choose from and uses a default letter size artboard. In case we want to send a document to multiple types of media, we can use this profile., We can manually increase the Raster Effects setting to High if one of the media types is a service bureau. Basic RGB Document: The RGB profile provides a variety of print, video, and web-specific sizes to choose from, but by default, it uses an 800 x 600 size artboard. In case we want to send a document to output to a high-end printer or a service bureau, we cannot use this profile. We can use this profile for records that will be output to the web, mid-level printers, or multiple types of media. Create a new document in IllustratorWe can create new Illustrator documents using two options available, one from an original document profile and another from a template. If we create a document from a new document profile, it gives us a blank document with the profile we selected with default fill and stroke, graphic styles, brushes, colors, symbols, actions, viewing preferences, and other settings From the New Document dialog box, we can customize any document by changing the settings. However, it's always best to start with the new document profile that represents your intended output. If you want to use the preset options from another Illustrator file or template, choose Browse from the New Document Profile menu and open the file you want to use. Step 1: You can perform any one of the following operations to create a new document: 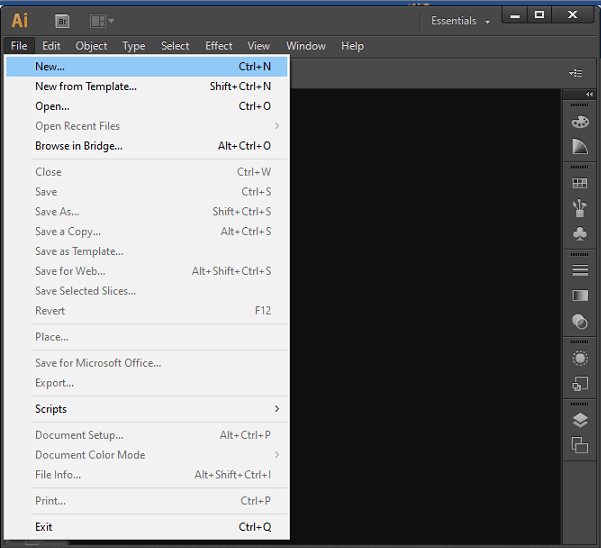
Step 2: To customize the document, specify the desired options. To determine the following additional options click on the Advanced: 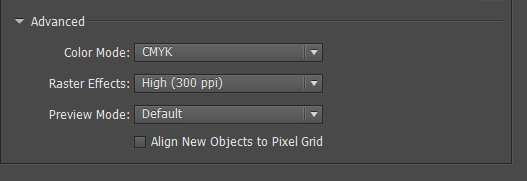
Color Mode: The color mode for the new document will be specified using this option. If we try to change the color mode, it will convert the default contents of the selected new document profile to a new color mode that results in a change of color-an information message will pop-up before applying the changes. Raster Effects: This option is used to specify the resolution for raster effects inside the document. The raster effect is set to high by default. We can fix this to High when we all plan to give output to a high-end printer at very high resolution. Transparency Grid: This option is used to specify the prospects for the transparency grid for documents of the Video and Film profile. Preview Mode: The preview mode sets the default view for the document.
Step 3: We can preview our new document in the mobile device interface if we choose the Mobile profile by clicking Device Central. TemplatesA new project can be created with some typical settings, and design elements are the template feature of Adobe illustrator. For example - if we need to design a series of T-shirts with similar designs, then we can create a template with desired artboard size, view settings, and print options to easily access those settings next time. Steps to create a new template in Adobe Illustrator Step 1: Create a new or open an existing document. Step 2: The template file can be created and modified in the following ways:
Step 3: Go to Choose File option and then click on Save As Template. Step 4: When you click a Save As dialog box will appear, then select a location for your file → enter a filename, and finally click on Save button. Adobe saves the file in Adobe Illustrator Template (AIT) format. Open a file in IllustratorWe can open files in Adobe illustrator that were created in Illustrator as well as files that were created in other Adobe applications.
Browse for files using Adobe BridgeAdobe Bridge is a cross-platform application that helps us to locate, organize, and browse the files that we need to create print, web, video, and audio content. It included with Adobe Creative Suite, and we can start Bridge from any Creative Suite application. We can use Bridge to access both Adobe and non-Adobe files. 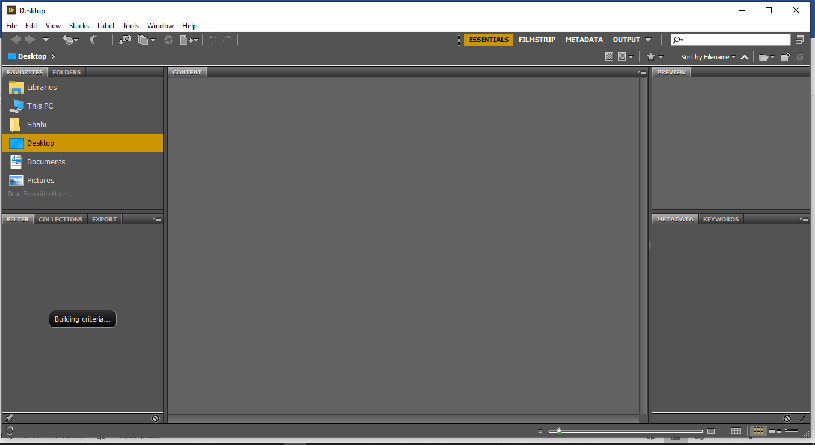
Do one of the following steps to open Bridge from Illustrator:
We can do any of the following from Adobe Bridge:
Undo and redo changesThe Undo and Redo commands let you undo or redo operations, allowing you to correct mistakes as you work. You can destroy or repeat an action after you select the Save command (but not if you have closed and then reopened the file). Click on Edit → Undo or Edit → Redo. You can undo an unlimited number of operations (depending on memory) by repeatedly choosing the Undo command. The Undo command is dimmed if an action cannot be undone.
Next TopicAdobe Illustrator Drawing
|
 For Videos Join Our Youtube Channel: Join Now
Feedback
- Send your Feedback to [email protected]
Help Others, Please Share


