Adobe InDesign TutorialAdobe InDesign is a software, which is the parts of Adobe Creative Suite and an upgraded version of Aldus Page Maker. Aldus Page Maker is a widely used desktop publishing software (DTP Software), which was later purchased by Adobe. Adobe InDesign software is available for various operating systems, such as Mac, Windows, and many more. This software can be purchased as part of the Adobe Creative Suite or as a standalone product. InDesign's features and functionality are much better in comparison to a word processing software like Microsoft Word. It is the de facto program that can work with large publishing houses and websites. This tutorial presents a detailed overview of the software that will help you to exploit its all functionalities. In this tutorial, we are going to discuss the following topic:
What is Adobe InDesign?Adobe InDesign is an editing software created by the Adobe Company. It is mostly used for printing the document. The InDesign software provides various types of document frames that we can select and do our work on that document. It also contains many tools that are very useful in our document. With the help of these tools, we can do things like color, rectangle, zoom in, and zoom out in our document. History of Adobe InDesignInDesign is the successor of Adobe's PageMaker, which was purchased by Adobe in late 1994 with Aldus's acquisition. By 1998, the feature-rich QuarkXPress version 3.3, released in 1992 and 4.0, was released in 1996, lost the entire professional market of Page Maker. Quark stated to buy Adobe and to divest the combined business of PageMaker to prevent it from antitrust problems. Adobe declined the bid, and then they started to work on a new page layout app. Aldus had begun the project, and it was codenamed Shuksan. Later, it was named as K2 and published in 1999 as InDesign version 1.0. In 2002, InDesign became the first publishing software for the Mac OS X-native desktop. It received a significant boost in the distribution version 3 by being bundled in the Creative Suite with Photoshop, Illustrator, and Acrobat. InDesign export files in the Portable Document Format (PDF) of Adobe and is supported multilingually. For text processing, advanced typography with OpenType fonts, advanced transparency feature, optical margin alignment, and cross-platform scripting using JavaScript, it was the first desktop publishing software (DTP) framework to support Unicode. Subsequent software updates implemented new file formats. The system and its document format are not backward-compatible to support the new features, especially typographic, introduced with InDesign CS. Instead, the .inx format, an XML-based document representation, is backward-compatible with InDesign CS2. In 2007, Adobe produced InDesign CS3 as universal binary software compatible with native Intel and PowerPC Mac computers, inconveniencing early adopters of Intel-Mac. Bruce Chizen, CEO of Adobe, declared that Adobe is the first full-line universal application. Versions of Adobe InDesign
Installation of Adobe InDesignAdobe InDesign is a document editing software introduced by Adobe Corporation. Today, it is a trendy application that was developed in 1999. We can download this software by visiting the official website of Adobe. We can use this software for free for seven days. After finishing the free version, we have to buy a subscription of InDesign software on Adobe's official website. This software is available for both Windows and Mac OS. The system's minimum requirement for installing Adobe InDesign on a Windows operating system is given below:
Steps to install Adobe InDesign on WindowsStep 1:Open any browser on your computer system and go to the following URL: https://www.adobe.com/. We will see the below screen: 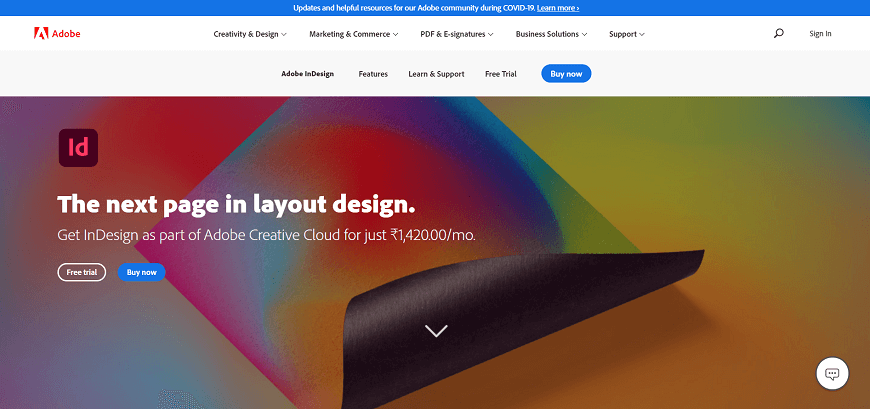
Step 2: Once the webpage will open, click on the creativity and design, and select the View all plans & Pricing. 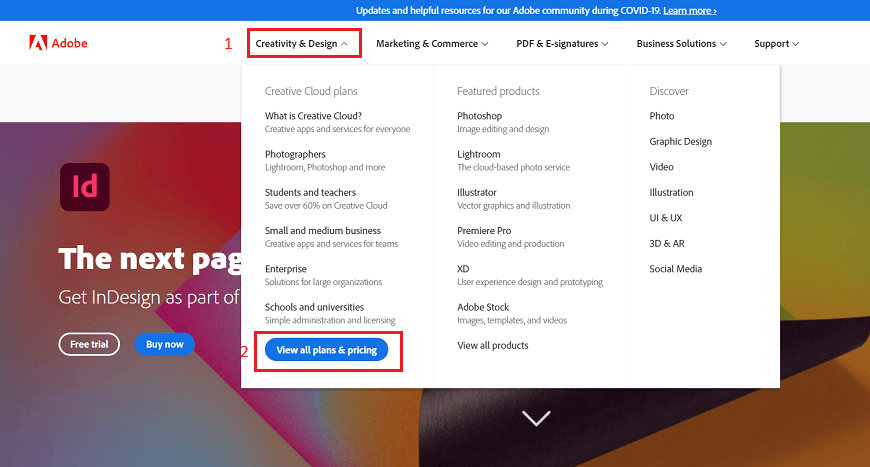
Step 3: We will be redirected to the page that shows various price tier categories, i.e., Individual, Business, Student, Teacher, and University. We can pick all of them to match our needs. 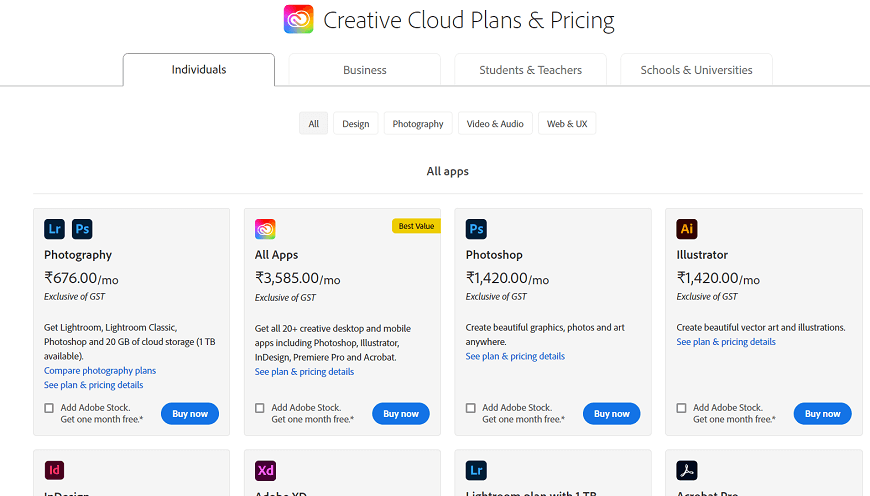
Step 4: Next, we will click on the Adobe InDesign option to choose the plan and then click on Buy Now to continue with the payment option. 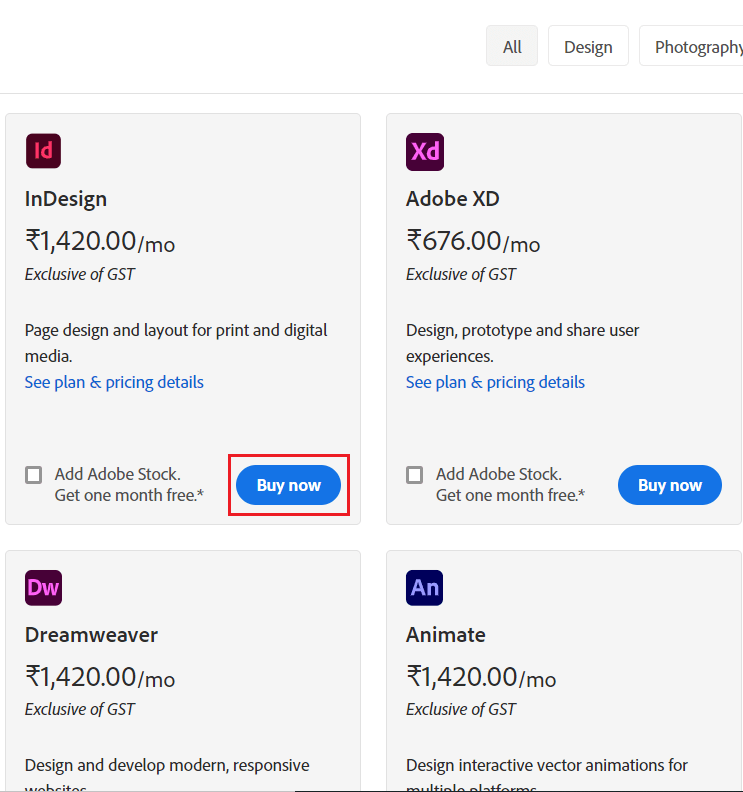
Step 5: After clicking on the Buy now button, it will redirect to the page where we have to fill our email id and ask us to continue with the payment. 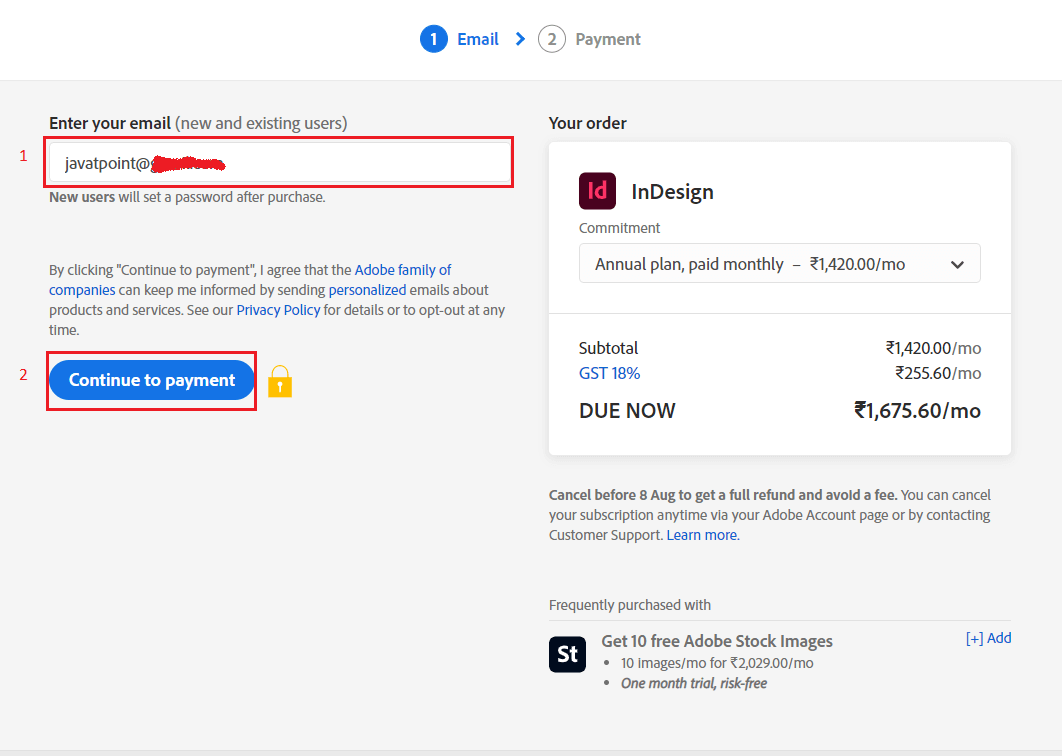
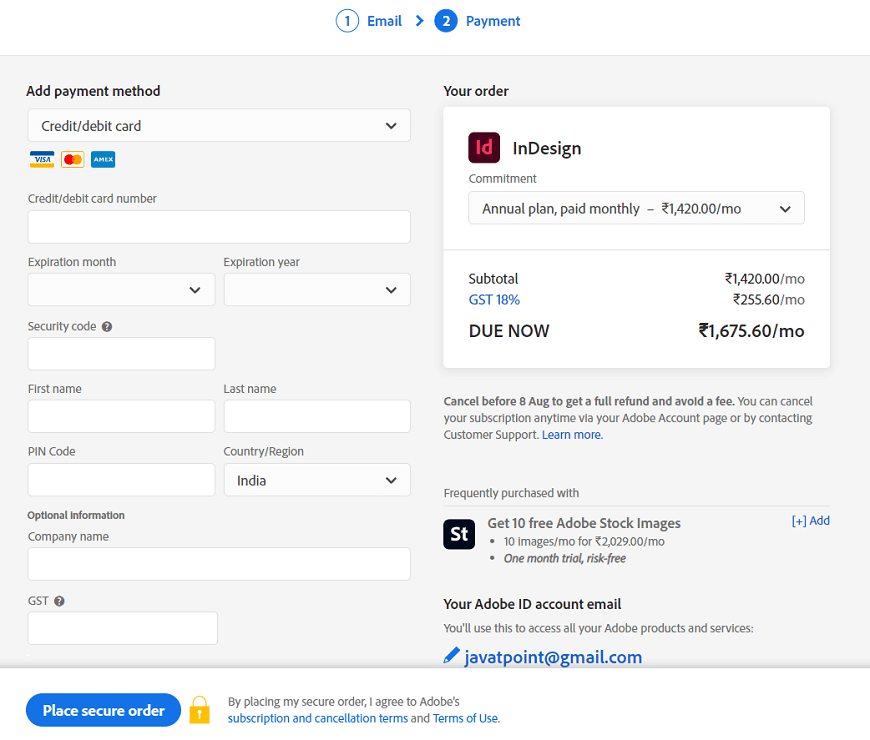
Step 6: After the successful payment, the downloading of an application will start. 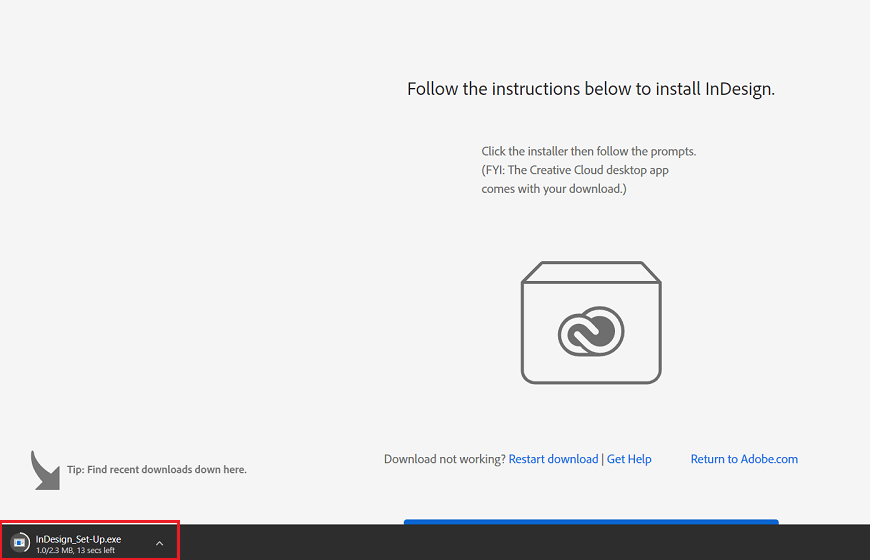
Step 7: When the download completes, double click on the downloaded setup to run it. We will see the below screen, where we need to click on the Yes button. 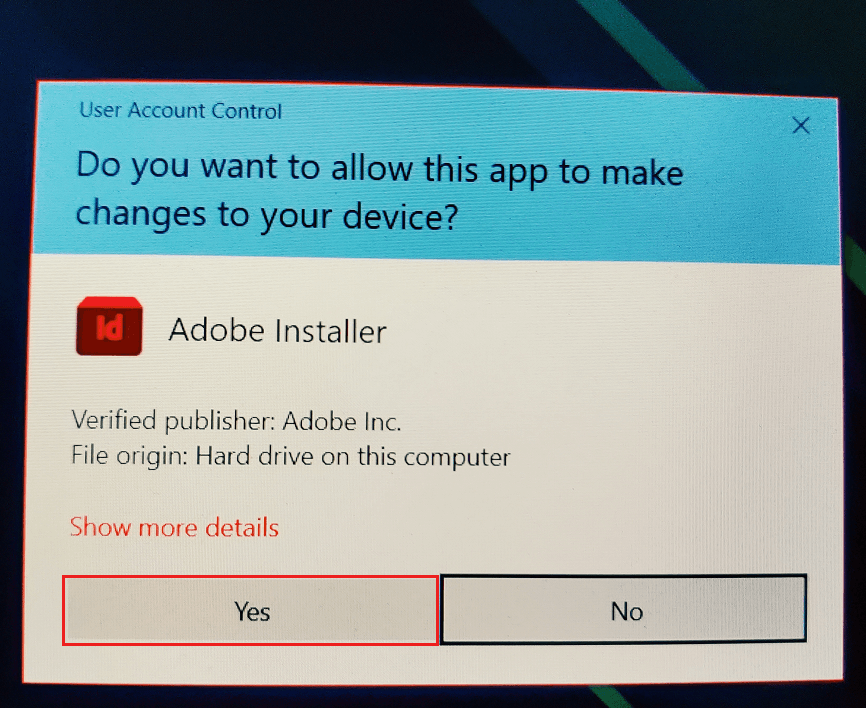
Step 8: Once we click on it, the installation process of the application will start. 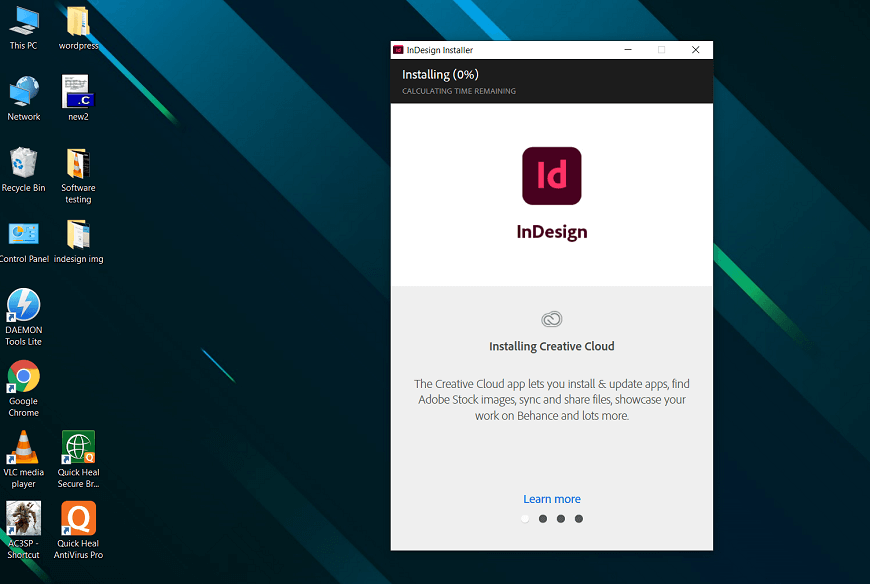
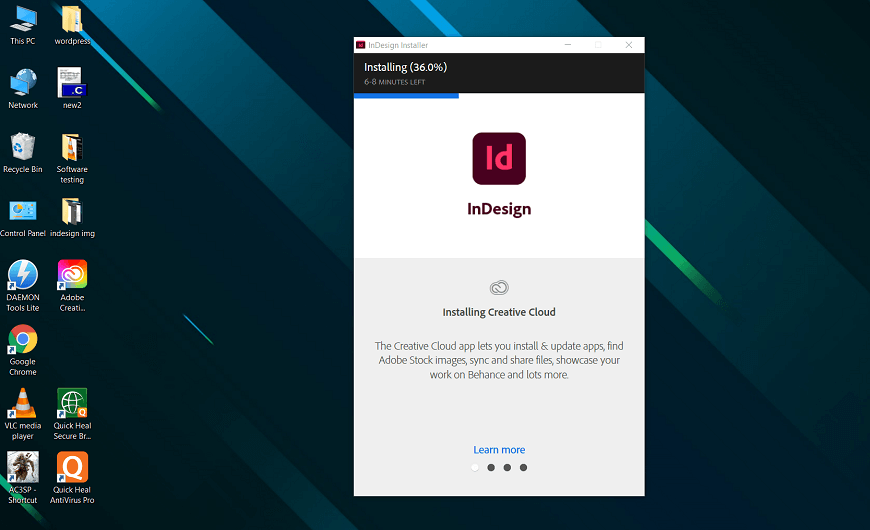
Step 9: When the process completes, the Adobe InDesign has been installed successfully in our system. 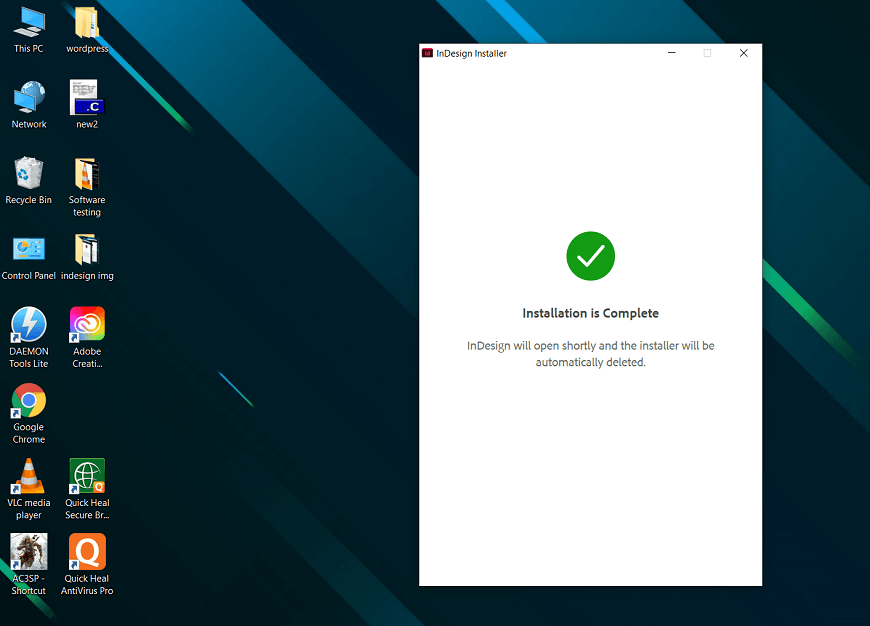
Step 10: The application will start running after the successful installation, as shown in the figure below. 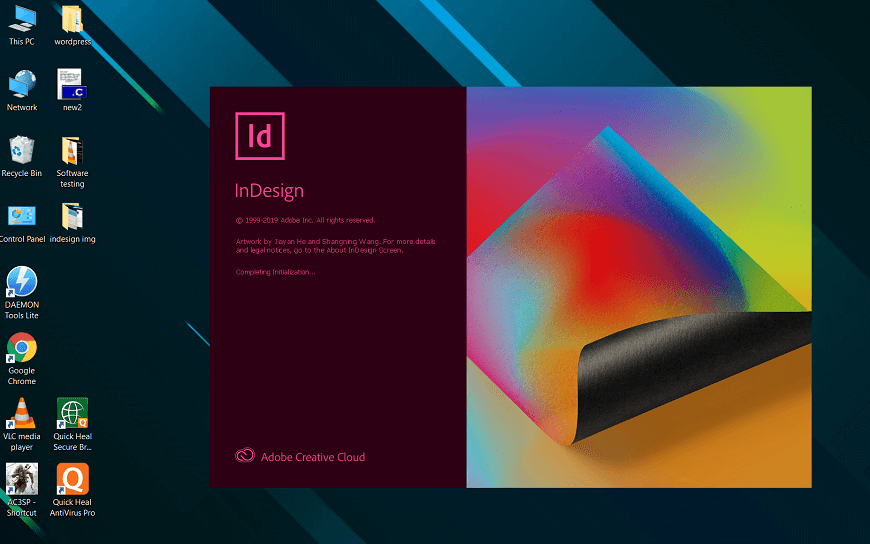
Finally, we can now use the Adobe InDesign complete functionality. 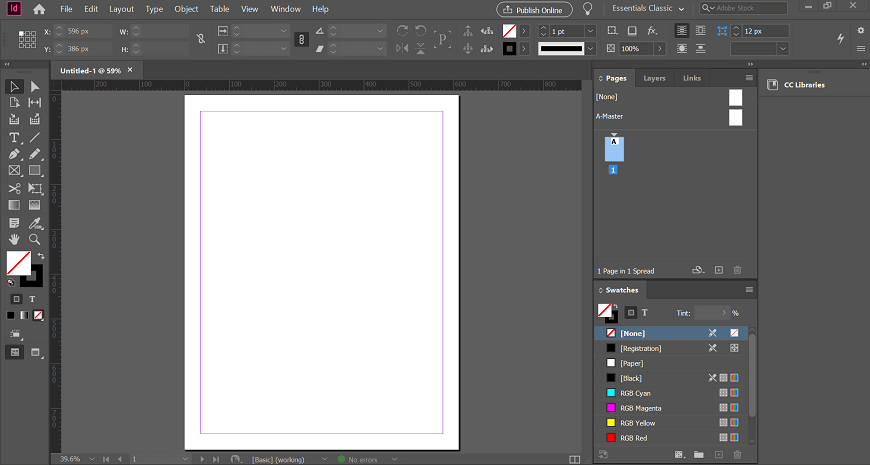
Adobe InDesign - Workspace BasicsA workspace is an area where we create and manipulate our documents and files using various elements. These elements include panels, bars, windows, etc. If we want to understand the InDesign workspace, we need to get the most out of InDesign user interface properly. Let's take a short tour of the UI. 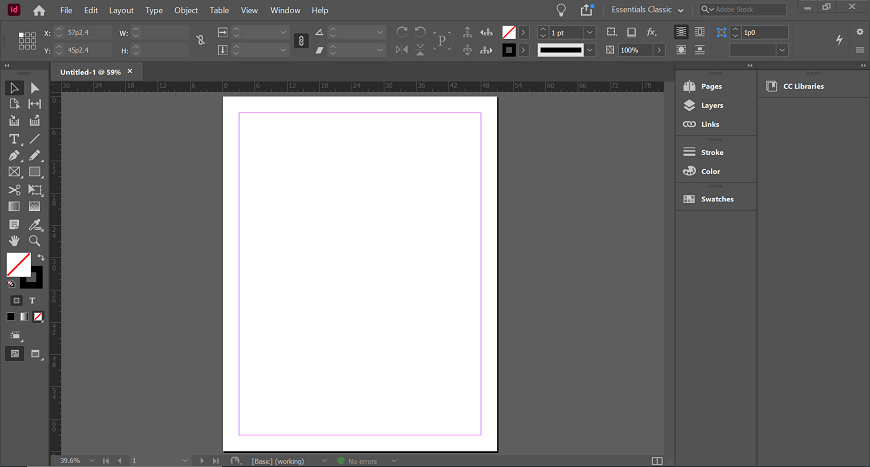
In the most InDesign installations, we will see the default user interface that can be seen in the above screen. It is noted that the user interface can be fully customizable. We can divide the InDesign user interface into several panels as follows: Application BarIt is shown at the top of the screen next to the Help menu, which facilitates us to set the magnification stage of the paper or to turn on and off the rulers and guides. It also helps us to tile vertically or horizontally various screens. The Br and St Icons respectively stand for Adobe Bridge and Adobe Stock, and depending on our configuration, we may or may not see them. 
Control PanelWe can see the long strip below the application button, which is called as Control Panel. It is a quintessential part of the UI. Essentially, it allows us to modify the several features like text formatting, color filling, and a host of context-dependent functions. It is easily accessible and can be floated or docked. We have to make sure that we dock it in a suitable position because it will be used very frequently. 
Document LayoutIt is a blank document that was generated in the New Dialog box using the default options. In the next chapter, we will read more about the New dialog box. If we properly examine this document, we can see that it is covered by black borders that show the limit of the printed page. The pink guides describe the margins at the top and bottom. The left and right purple guides are column guides. 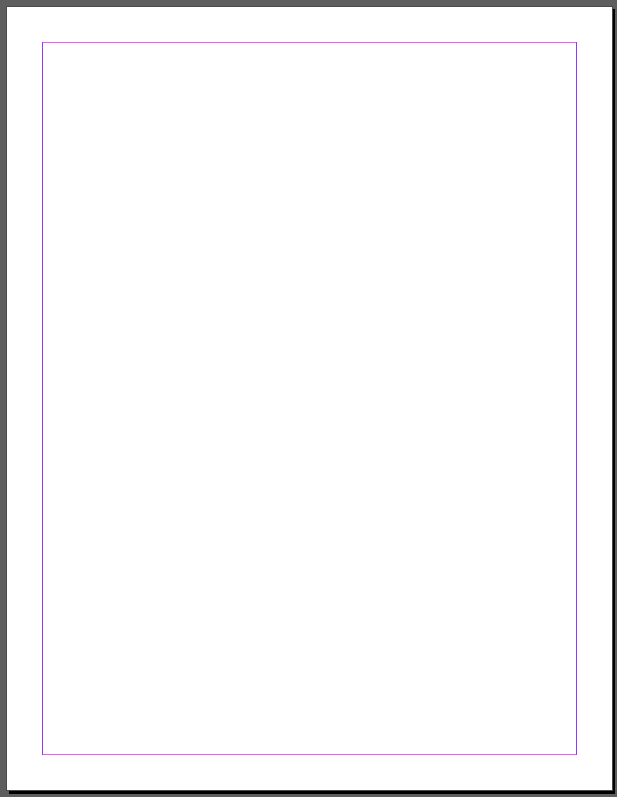
When we have several columns, we can notice that every column is described by the purple guide. However, neither pink nor the purple guides will print out or appear in the exported PDF. ToolbarIt can be seen on the left side of the main workspace that contains all the resources needed to work with the text. It has the tools for picking, the tools for a document, eyedropper software, etc. Clicking on these tools will open advanced functionalities in the Control Panel mentioned above that are important to the device. 
Panels BarThe Panel bar to the right of the workspace has several extra functions. What we see in the Panel bar can differ depending on the workspace. As with the other window components mentioned above, the Panel bar can be freely pushed around or docked to an acceptable location. More options will be accessed by pressing a button in the Panel window. For example, by pressing the Stroke option, a pop-out window will opens that allow us to modify the stroke properties. We can add further functions to the Panel bar by selecting the desired feature and moving to the Window tab. 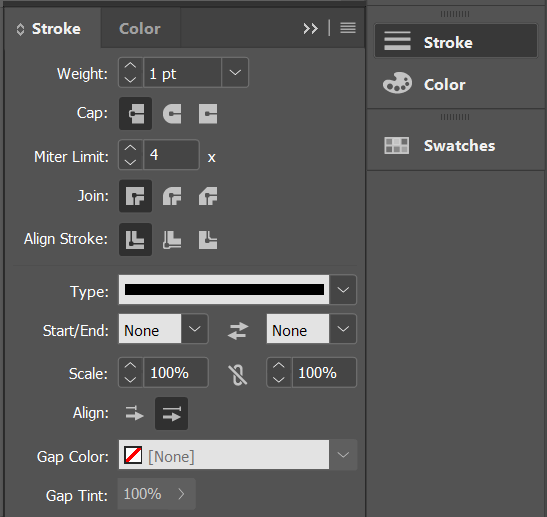
Create the First DocumentIn this section, we will learn how to create a new document and how to choose the right format for our document. First of all, we will open the InDesign application to create a new document. We can open a new document by pressing Ctrl+N on Windows or Command+N on the Mac or navigate to the File menu -> New -> Document option. After that, we will see a window, as shown in the below image. 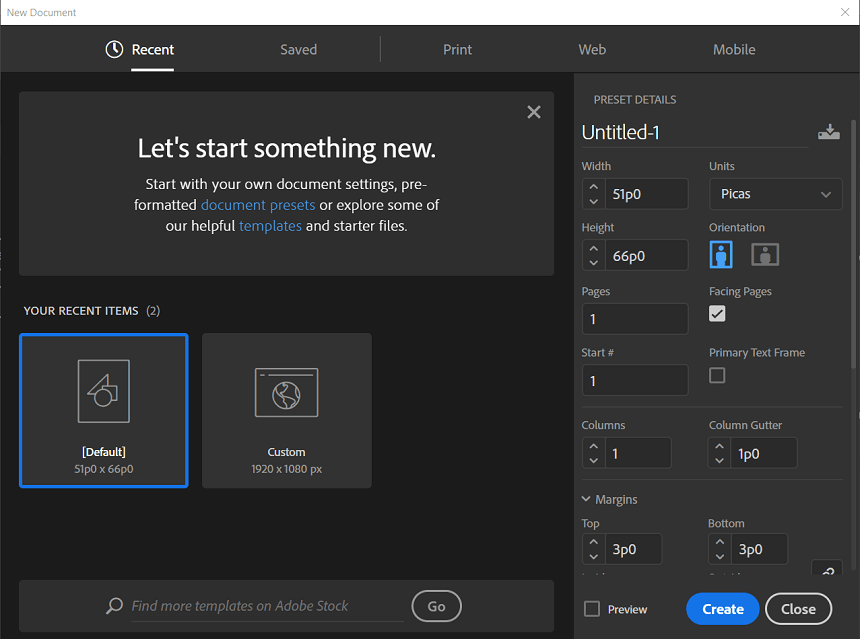
In the window, we can see many types of options that have different importance. Here, we can see different sizes and shape formats to choose various document formats, written vertical and horizontal pages, etc. Here we will find three different categories, which we can see in the below image. 
The categories are divided into Print, Web, and Mobile. Each category has pre-installed templates. In the Print category, we have Letters, Legal, Tabloid page types, which can be used to make page printable. It is also used for all publishing forms, such as a product sheet, template, or uploading to the website. The below image explains it more clearly. 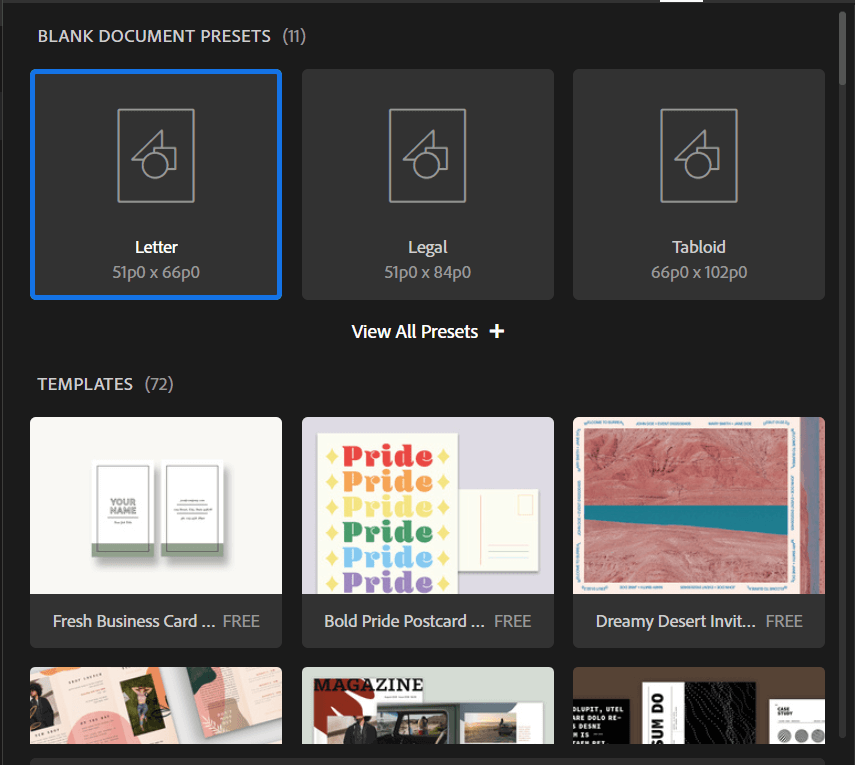
Next, we will talk about the web category where we can select different screen sizes, which we will use on laptop's web pages. This category contains the letter, A4, and many other page sizes. Here, we can also see a lot of Pre-installed Templates, which is shown in the below image. 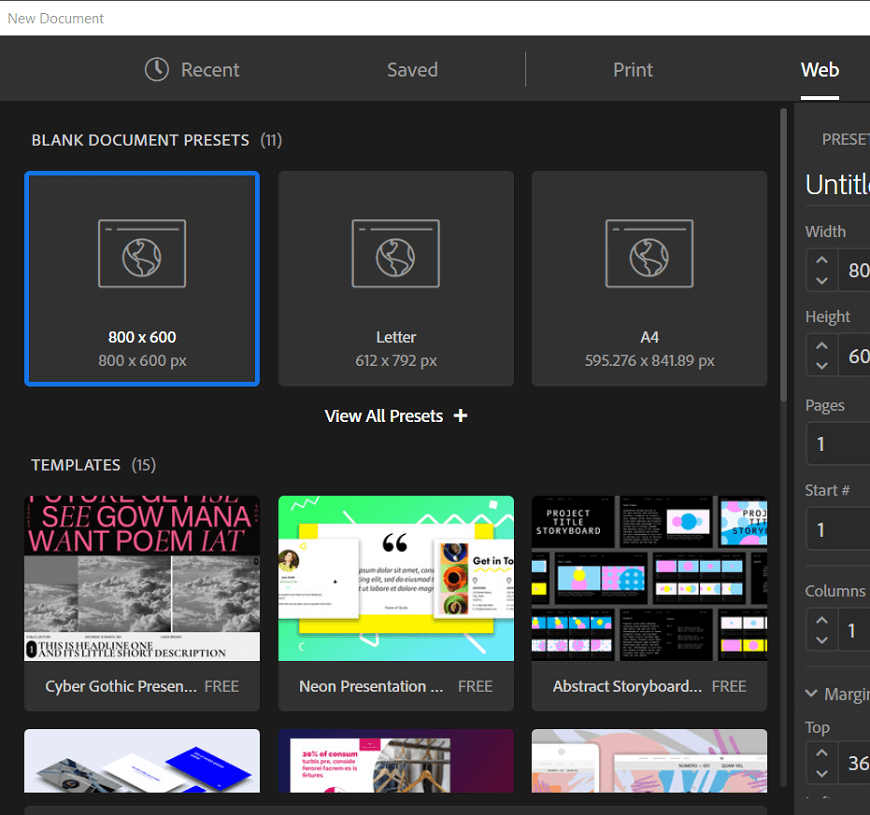
We will now talk about the mobile category that contains all the formats of compatible pages shown in our smartphones. Here, we can choose the different page sizes for mobile display. The below image explains it more clearly. 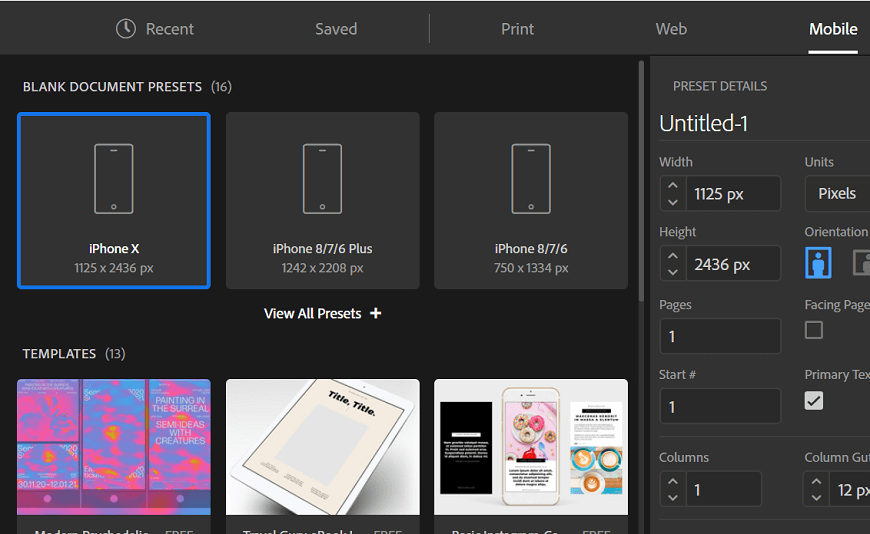
Select the right measurementsIt is used for setting the size and margin of the page itself. Suppose the pre-installed format is not suitable according to our requirements. So we need to select the units according to our requirements appear in the below list. 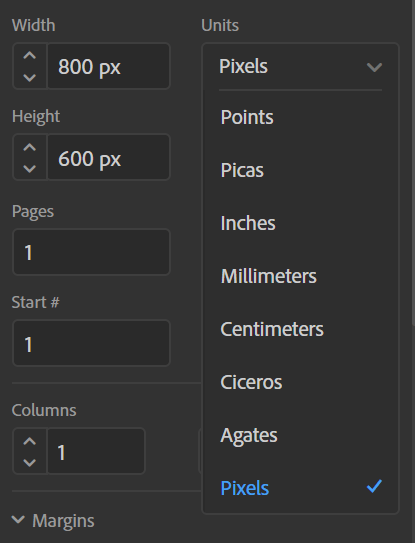
After selecting the unit list, we need to set the page length and width as per our requirement. With the help of this, the page's size can be maintained. Look into the below image. 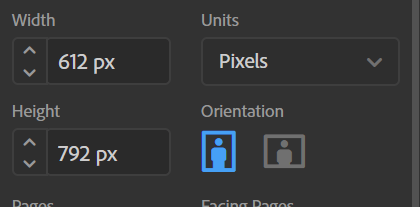
Select the page and page sizeHere we can change the page's number and size, which is displayed on the home screen of our InDesign application. If we want many pages on one home screen, this section is very important to display the number of pages on the home screen. 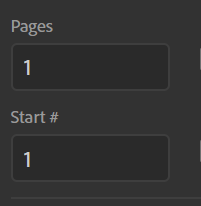
This option is also used to change the page size. By default, many pre-installed sizes of the page are already available, but if we want to make a custom size, they can also be created. So according to our needs, we can change the value by ourselves, which we can see in the below image. 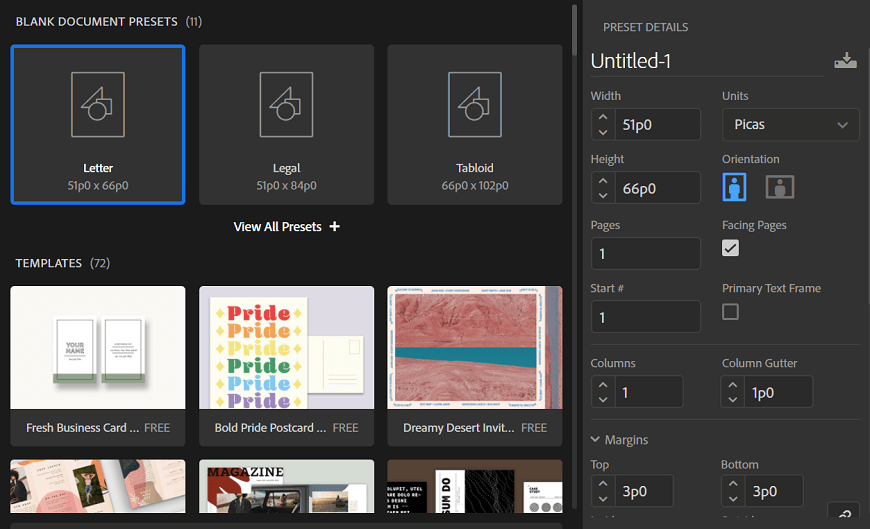
Setup the Margins, Bleed, and SlugMargin means how much margin we want to give outside our page. So we can use the margin option as per our convenience. 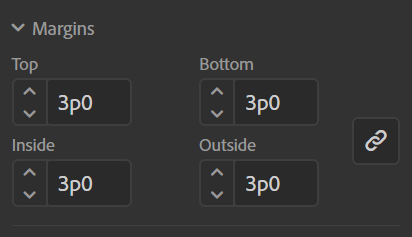
In this option, we have to keep in mind that if we change any margin value, the remaining value also changes. So we have to maintain all the four values of the margin page, such as Top, Bottom, Inside, Outside. Now we will talk about the bleed & slug, which appears in the preset details in the bottom. A bleed is a place that we set outside the margin so that the printing press does not cut out the outside part. Slug is the place where we enter information to understand by the printer, such as color space and a number of pages. 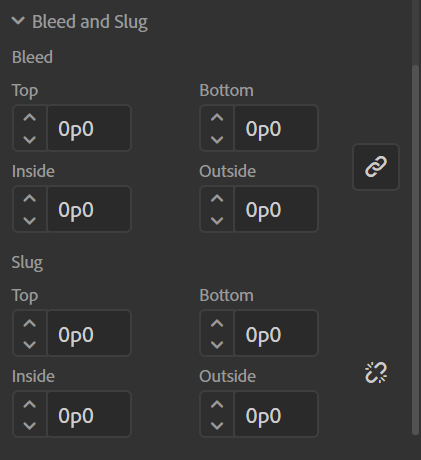
Saving a Preset DetailsHere we will save our document that we have set above according to our requirements, such as the dimensions, size, margin of our document, etc. After that, we can enter the document's name in the preset details, whichever we feel is right to our application. Finally, clicking save icon to save our document so that all the recorded information in our document is saved. 
Viewing the Document DisplayOn this page, we set 2 columns to the value, because of which we see the document page on the InDesign home screen. Now our document is ready where we can do different types of tasks. 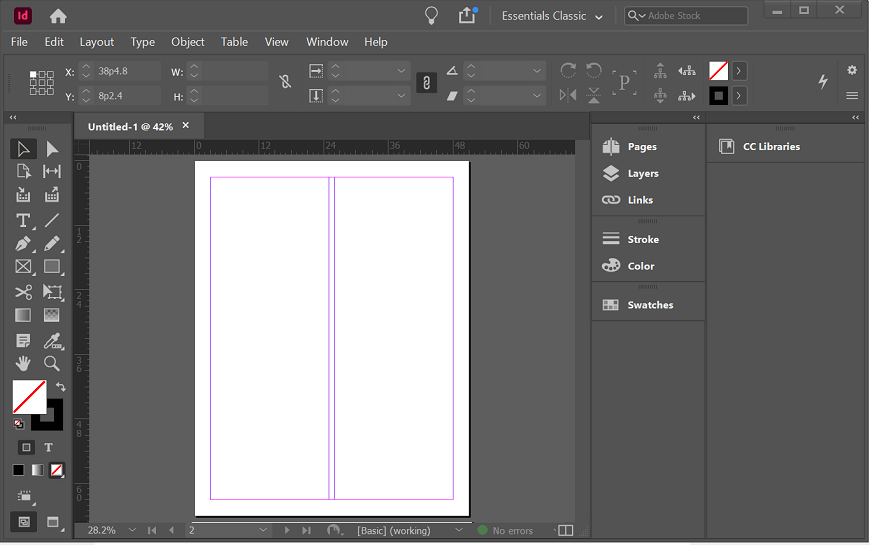
Page ManagementPage management is very useful for us to manage the page. With page management, we can add many Surrey Pages. At the same time, we can use many options like Insert, Remove, Delete Duplicate Pages, etc. in the panel option. The page PanelIn this section, we have taken a spread paper on the home screen. And in the InDesign panel bar, we will get three options that are used to set the document. 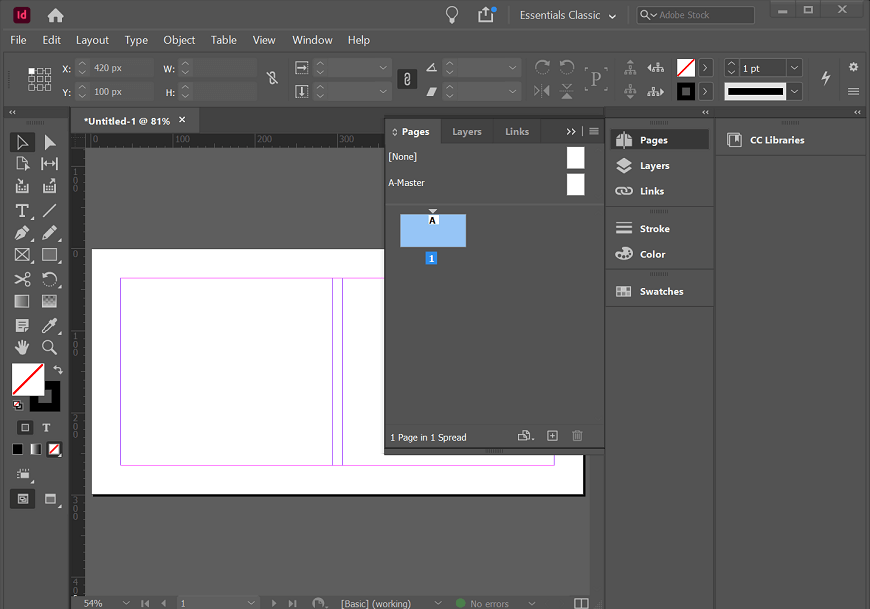
Below, we can see three buttons; the first button is called Edit Page Size. With this option, we can change the dimension of the page. It provides many types of dimensions to set the document. The second button is called Create New Page, which allows us to create a new page on the side of the page. And the third button is called Delete Selected Pages, which allows us to delete and select pages. 
Options in the Pages PanelThis application provides many options in the panel control with the help of which we can manage the page. The options it provides have different functions. 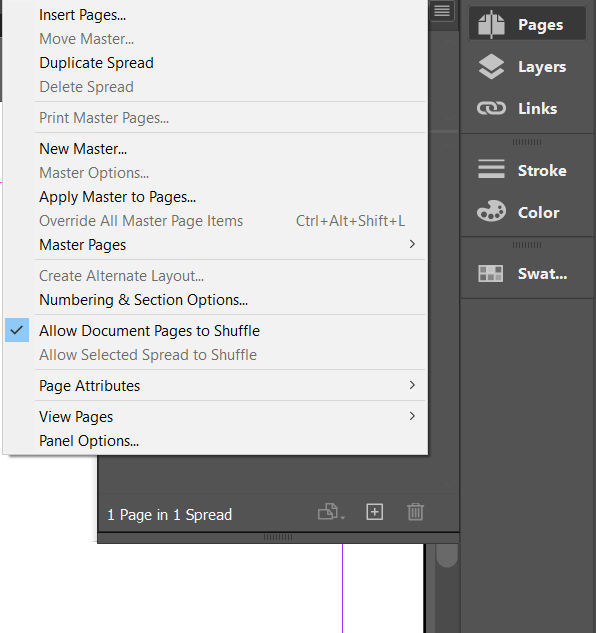
If you need more than one page, you can use the Insert page option, which will add another new page wherever you want to insert it. We can add any number of pages according to our needs like we need two pages, then we will set the number of pages 2 in the value. We can also select the after a page or before page option to insert the page in a specified position. 
If you want to change the page's position after setting the number of pages, you have to take the help of the Move Pages given in the options list. With the help of which you can change the position of the page wherever we need them. 
Using the Page ToolHere we can go to the File menu and select the option of Document Setup. In this option, we can change the dimension of the page and its length or width. We can also open it with the help of the Ctrl + Alt + P button, but remember that all the value of our document will be affected. 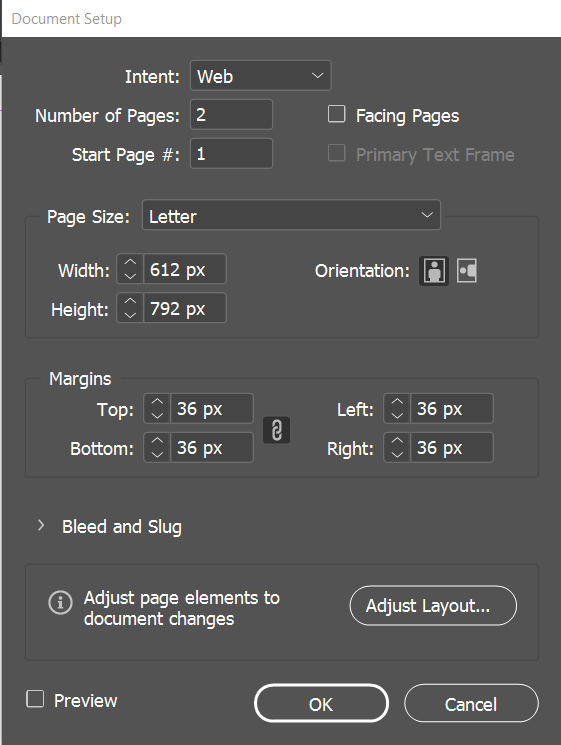
Master PagesThe master page represents the main layout in the document, and changes to the master page affect the entire page. There can be many master pages. The first master page is represented by the name of the master page, as shown in the image below. 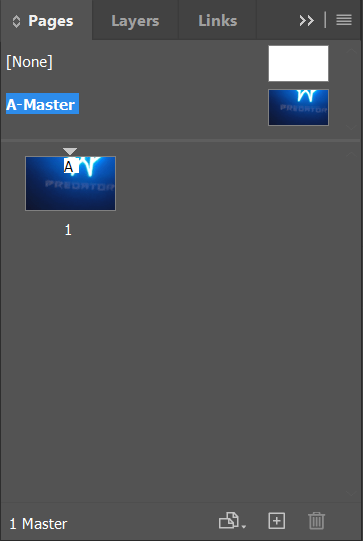
Opening the page panel opens up the flyout where you can select the master page and the nonce. Clicking twice on the master page makes the page split into two pages. 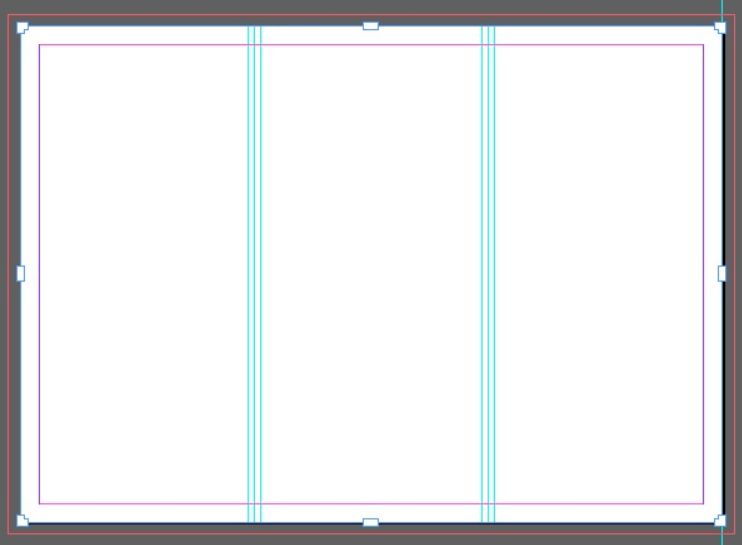
You can also add various options, such as footers, headers, page numbers, or layouts in it so that it is applied to the page along with the master page. Section Options & Text FramesSection option allows us to separate a document from specifying several types of document numbers. As you give the number to any page, you may want to specify the initial chapters in Roman numerals and introductory chapters like a preface in natural numbers. To do this, we need to compile the file's sections to notify InDesign each section has a particular numbering. The choices for section and numbering can be accessed from the Pages Panel menu. 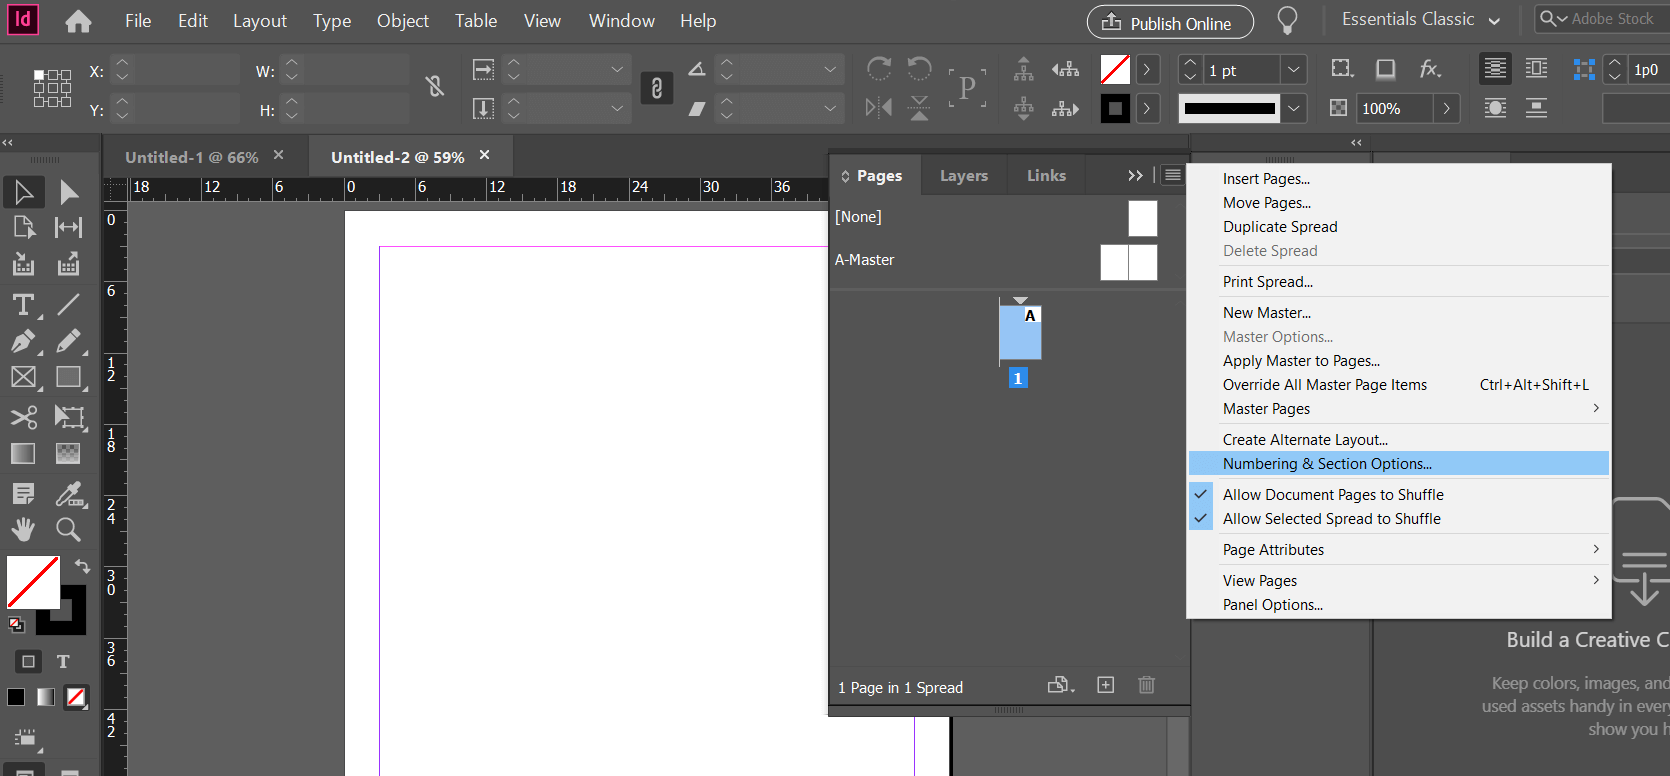
Click on the Numbering and Section option button opens a dialog box to decide the number of the starting page for the tab you have selected. You may use the design of numeration. The pages should follow your chosen numbering method before you pick another page and repeat the same cycle. 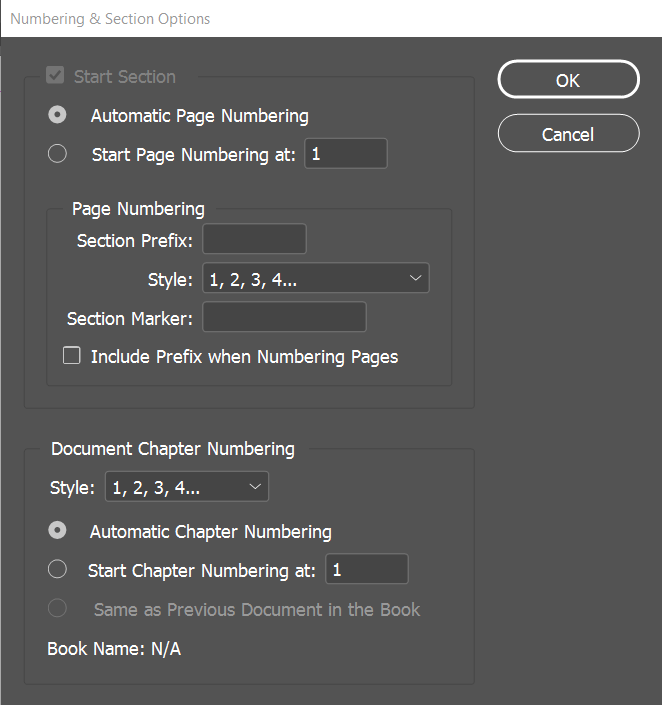
A new section will begin from the previous selected section, and this time you will be able to pick a different numbering system. Creating Text FramesTo build a text frame, we can choose the Type tool to compose the text in. You can change this frame on the fly, and even later. 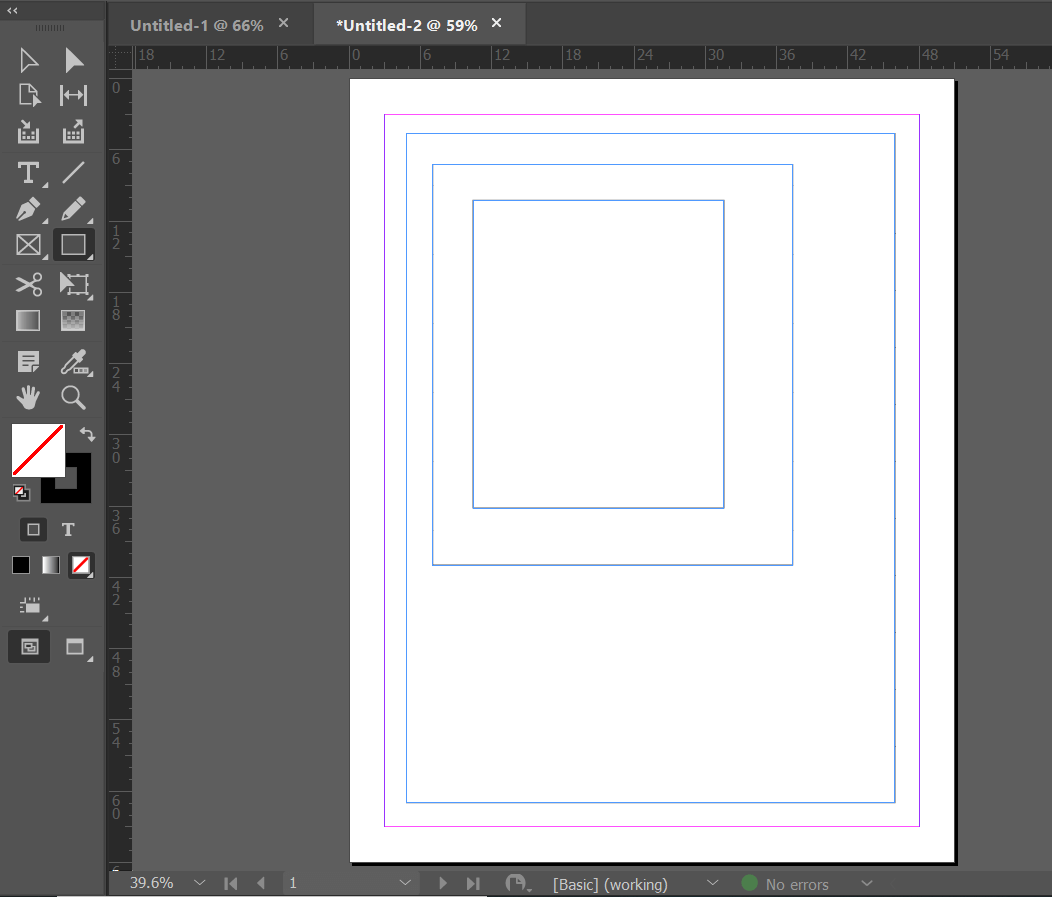
Design can also be translated into a text-frame. Start drawing the paper's design, pick the tool Style from the toolbar, and click the shape inside. Note that the shift in cursor means that the form is now being translated into a text frame. 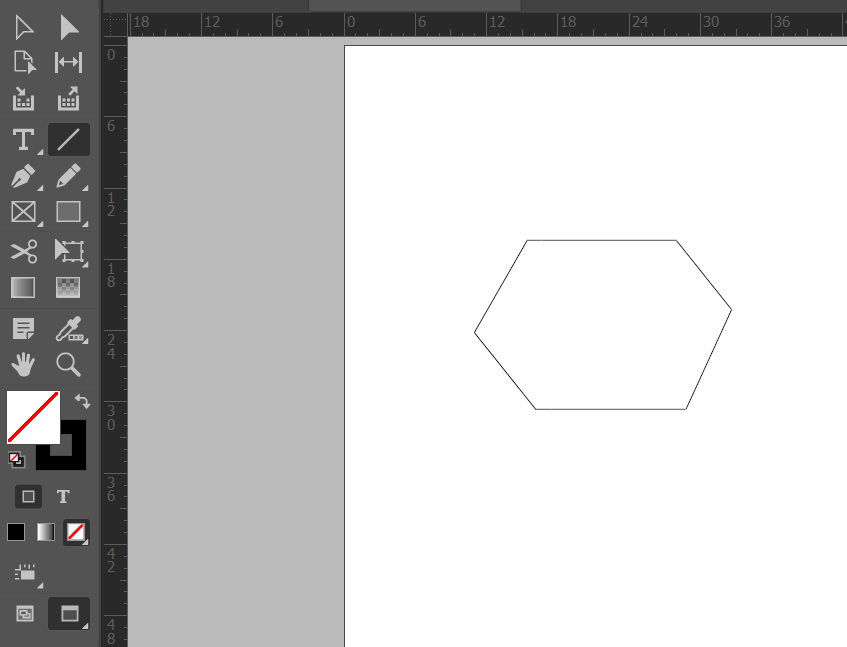
Within an InDesign document, a Word document can be put directly as a text frame. Go to the Menu Tab, and click Location that will open the dialog box to Setup. Use any RTF or text document you wish to incorporate into the document. InDesign can inspect the paper and show a cursor with the associated text. It allows us to press on a particular region to place it directly on the document or move the cursor to place it in the particular amount of the frame. 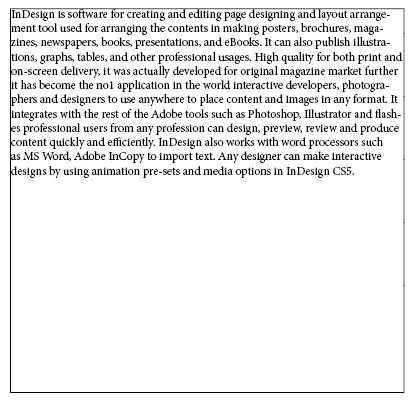
The Place command places the document, even if it contains several pages within the specified text frame. Suppose your paper contains many text pages and imports them into InDesign, press and hold the Shift key when using the Place button. You should find that your imported content is filled in with all the correct pages. Story EditorOur InDesign software has a special feature known as a nifty feature. This feature allows us to edit text and zoom in or zoom out without interruption of the text editor. It calls the Story Editor that will enable us to select any text frame. We can open the Story Editor by navigating to the Admin menu or press Ctrl + Y together if we are using it in Windows. If we are working on Mac, we need to press Command + Y Keys together. After pressing the keys, we will see the screen below. 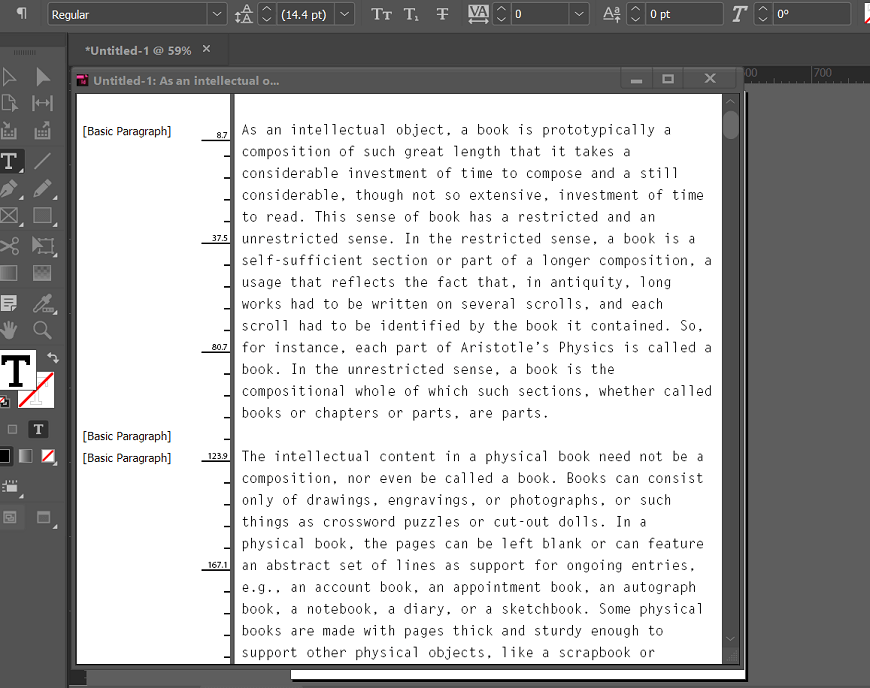
The Story Editor feature provides a lot of options. We can turn off the default text font in our document file, but we can change it in the Story Editor Display option. This option allows us to change the text color, background, themes, font, and line spacing. It is to note that we can make only limited changes using the story editor window, and it does not affect the font in the original text frame. 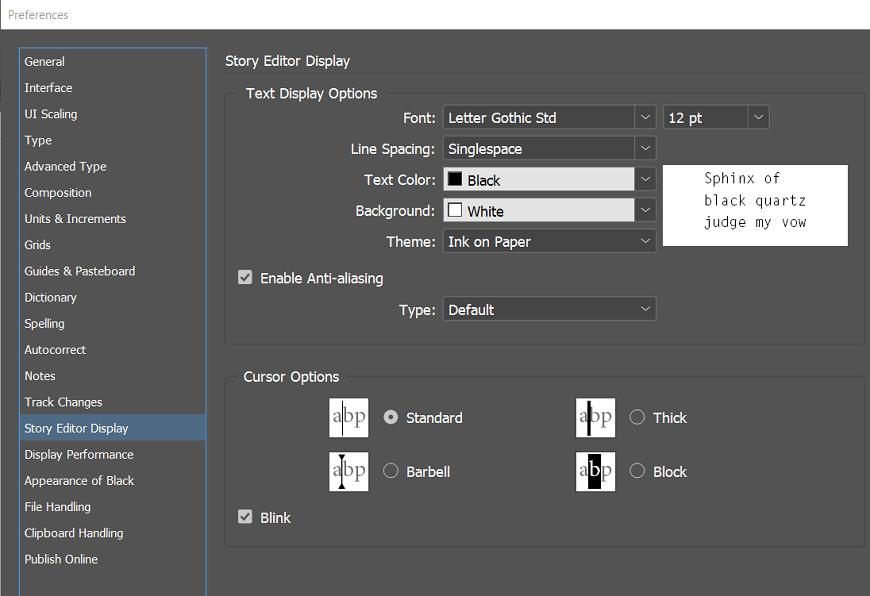
The changes made from the story editor window can be seen quickly in the text frame. When we include finite text, all the changes we make will be applied to the test frame. There is another way that allows us to use the Story Editor very easily. For this, open the information panel and click on the window menu. In the window menu, we need to select the Info option. The information panel precisely shows the number of words, characters, and lines we used, which is very useful in working with a large amount of text. The information panel also tells us a lot of information related to the document. 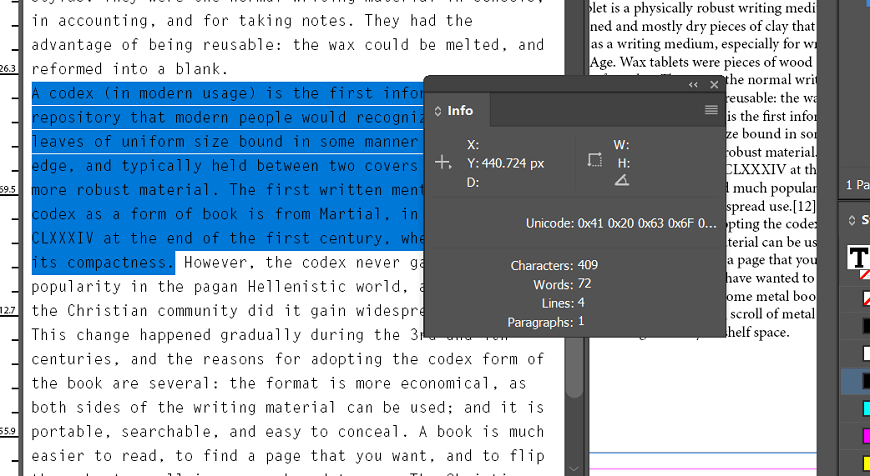
Print Documents and BookletsPrinting Documents Printing documents in Adobe InDesign is very easy. To print a document, we need to go to the File menu and click on print. A popup window will appear on our screen where we get all the print options. The preview of the document appears on the bottom left of the popup and fits into the printed page. Set up groups allow you to change the options such as page orientation, page size, and content location. 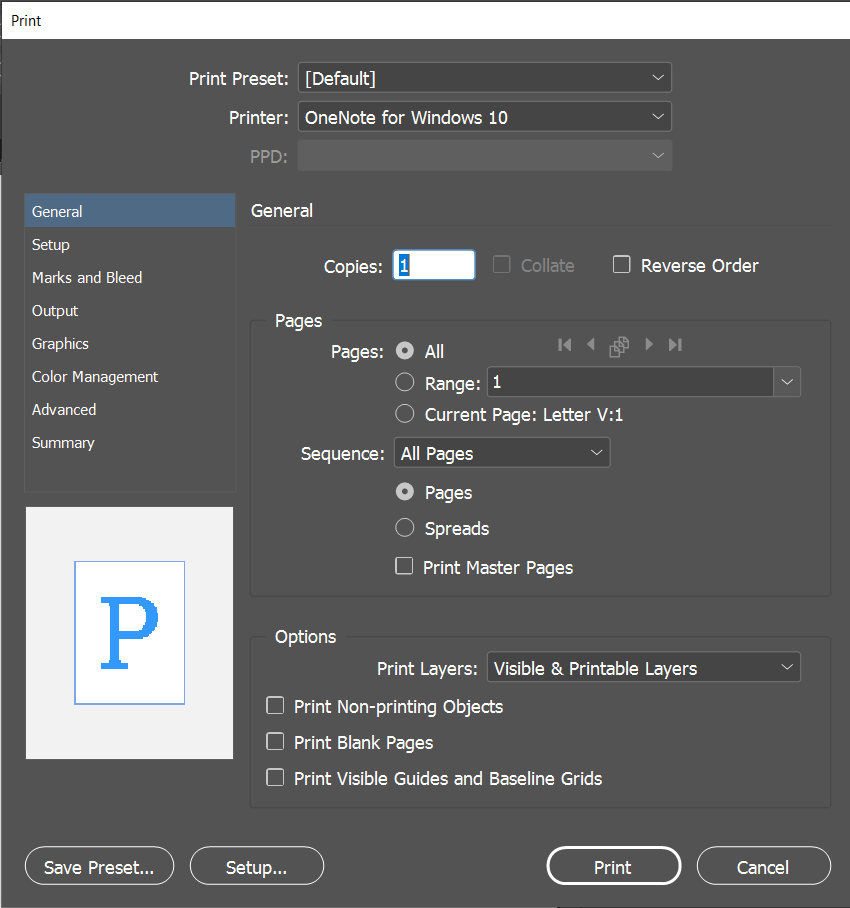
If the same options are also available in your printer driver, it would be a good idea to set as many as possible and needed print options in this dialog itself. Doing so would eliminate several future conflicts between your printer driver and InDesign. The Marks and Bleed category allows you to print documents, which may be useful but not required the bleed and slug marks, the color bar, crop marks, etc. Moving to the advanced category and choosing the High Resolution preset in the Transparency Flattener region is an important thing to remember before high-quality printing. 
Printing BookletsYou can use the Print Booklet command from the File menu for less complicated work, including printing booklets on its own. The Print Booklet command is very useful before you send it to the press to preview your booklet so you can have a good idea of how it will look on paper. 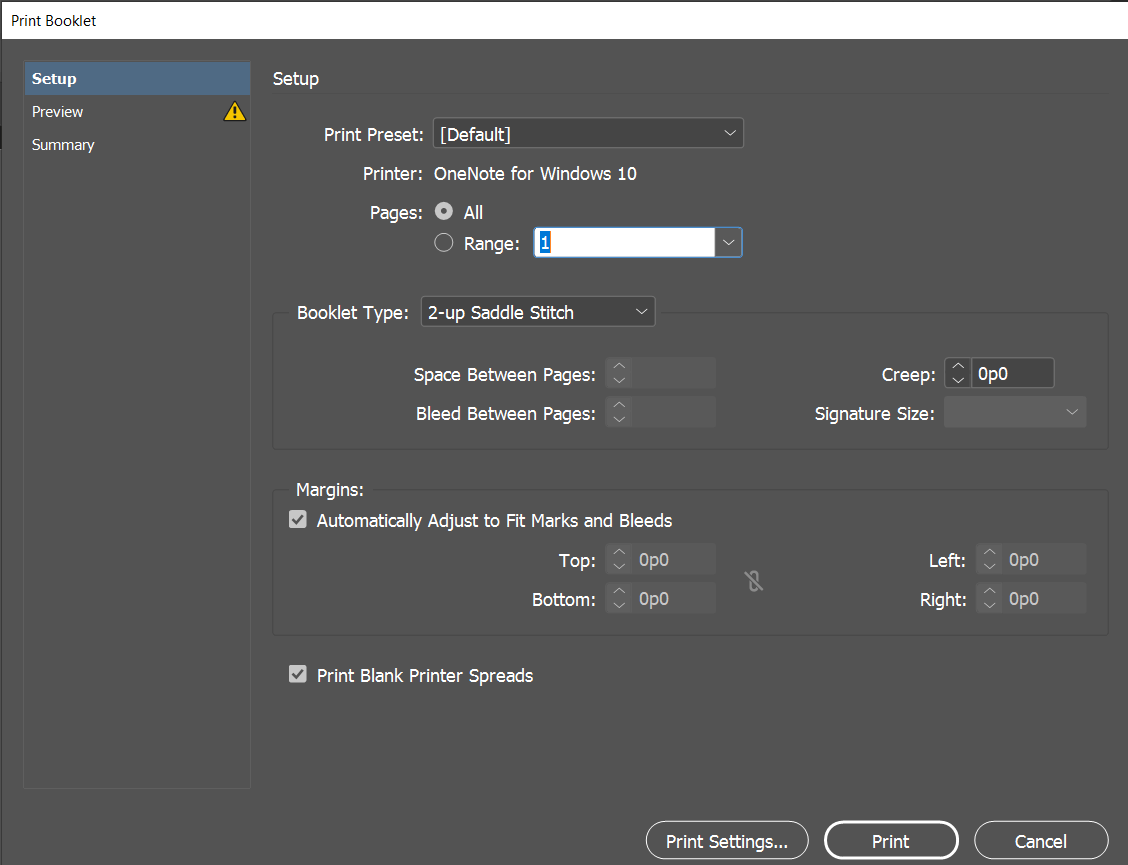
However, there are a few warnings about the use of this functionality. The first thing to keep in mind is that Print Booklet always prints on one spread on the first and last page (accompanied by the second and last except one) again and again until all the pages are written. Another significant point to note is the number of pages should be divisible in the text. You can take the rest of the choices as usual in the Print Booklet dialog box. Near the Preview page, you will see a yellow exclamation suggesting that something is wrong; the page will most likely not seem fit within the booklet. To rectify this, simply tap the Preview page, go to Print Settings and modify the Setup group settings to fit content to the screen, and click OK to go back to the Preview tab in the Print Booklet dialog box. You must agree that the yellow exclamation is gone, and the text fits perfectly into the page. 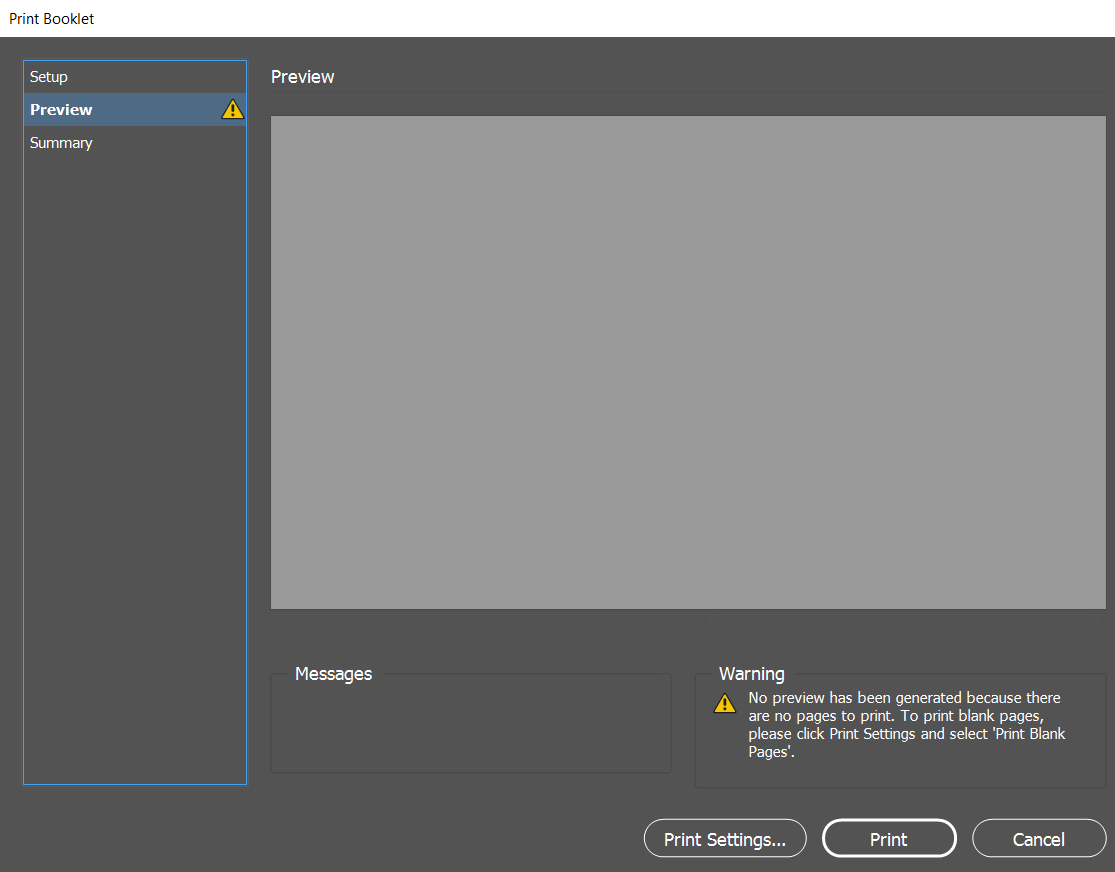
You will also note that additional blank pages that ensure the booklet layout is printed correctly if you have an abundance or less number of books that are divisible by 4. You will also note that watermarks in the preview are on the page number. These are for reference only and will not be written on the finishing booklet. To print the book, click on Download. Selective Text Frame ExportSometimes in selected text frames, you might not want to export the whole document but only the text. InDesign makes it simple and gives you options to export in the formats you want. Earlier, we used the command Export to export files as PDFs. 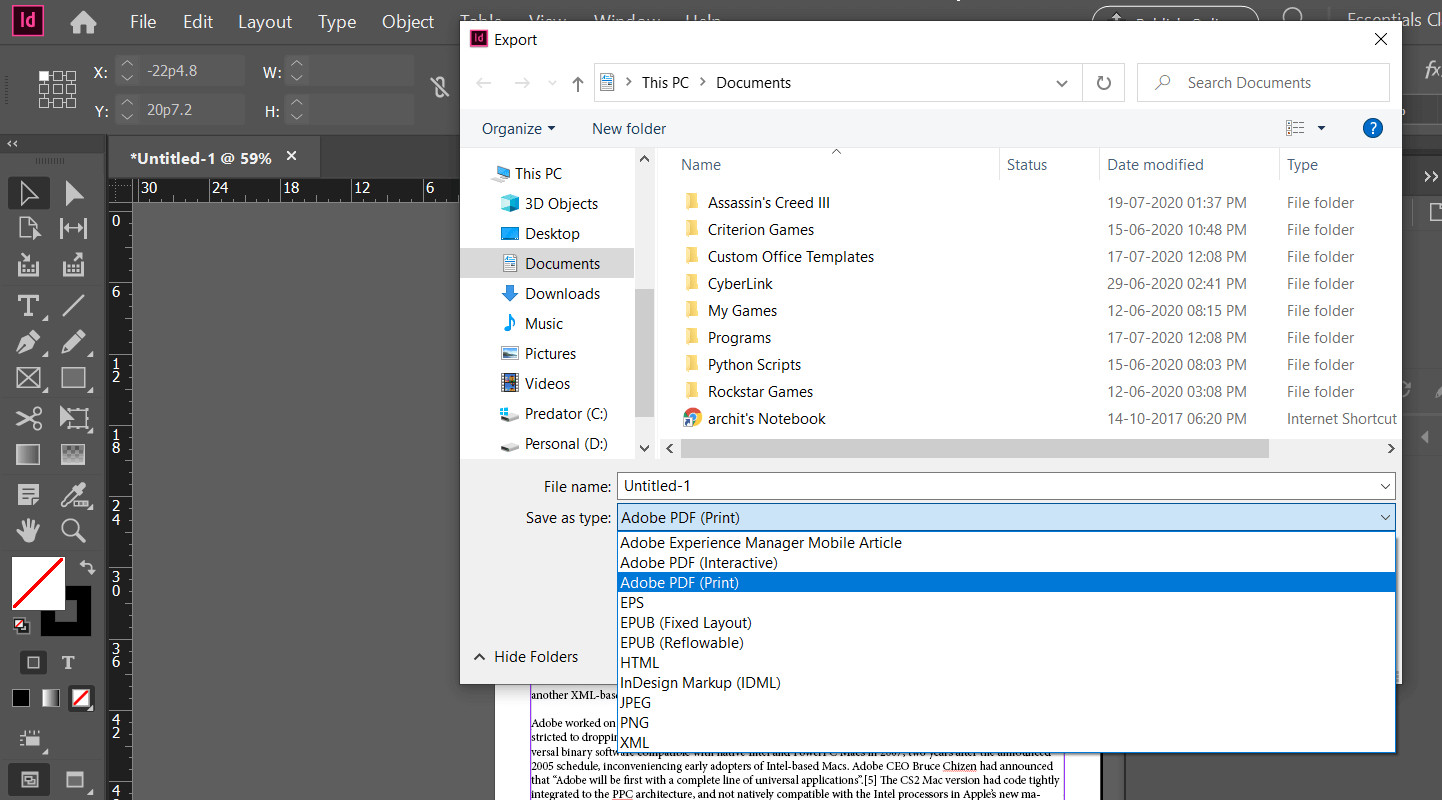
Text Only is a plain, unformatted document format. Rich Text Format allows for simple formatting, and several text processors such as Microsoft Word can read it. Yet other InDesign applications will only read it and not any other word processor. This is helpful if you are exporting the text to work with InDesign built at another workstation. Exporting Text Using ScriptsThis opens the Scripts panel, which lists all the scripts available on the machine. The Scripts panel includes two types of scripts - Client and User. The application lists all scripts which come out of the box with InDesign. This includes JavaScript sample scripts along with VBScript (if running on Windows), or AppleScript (if running on Mac). The user lists all User-installed files. Export Documents as PDFsWhen you press the dropdown menu of the Adobe PDF Preset, you can see that there are plenty of options available in PDF format. PDF / x-1a and PDF / x3a are the most widely used format. You may need to check your printing press before making a decision on the format. Unless your printing press supports this, pick the PDF / x-4 to manage items like clarity and a broader color gamut even more. Use of the preset High-Quality Print is recommended for all other uses, including on-screen. It is best to avoid presetting the Smallest File Size as much as possible as it can impact image resolution and color to minimize file size. 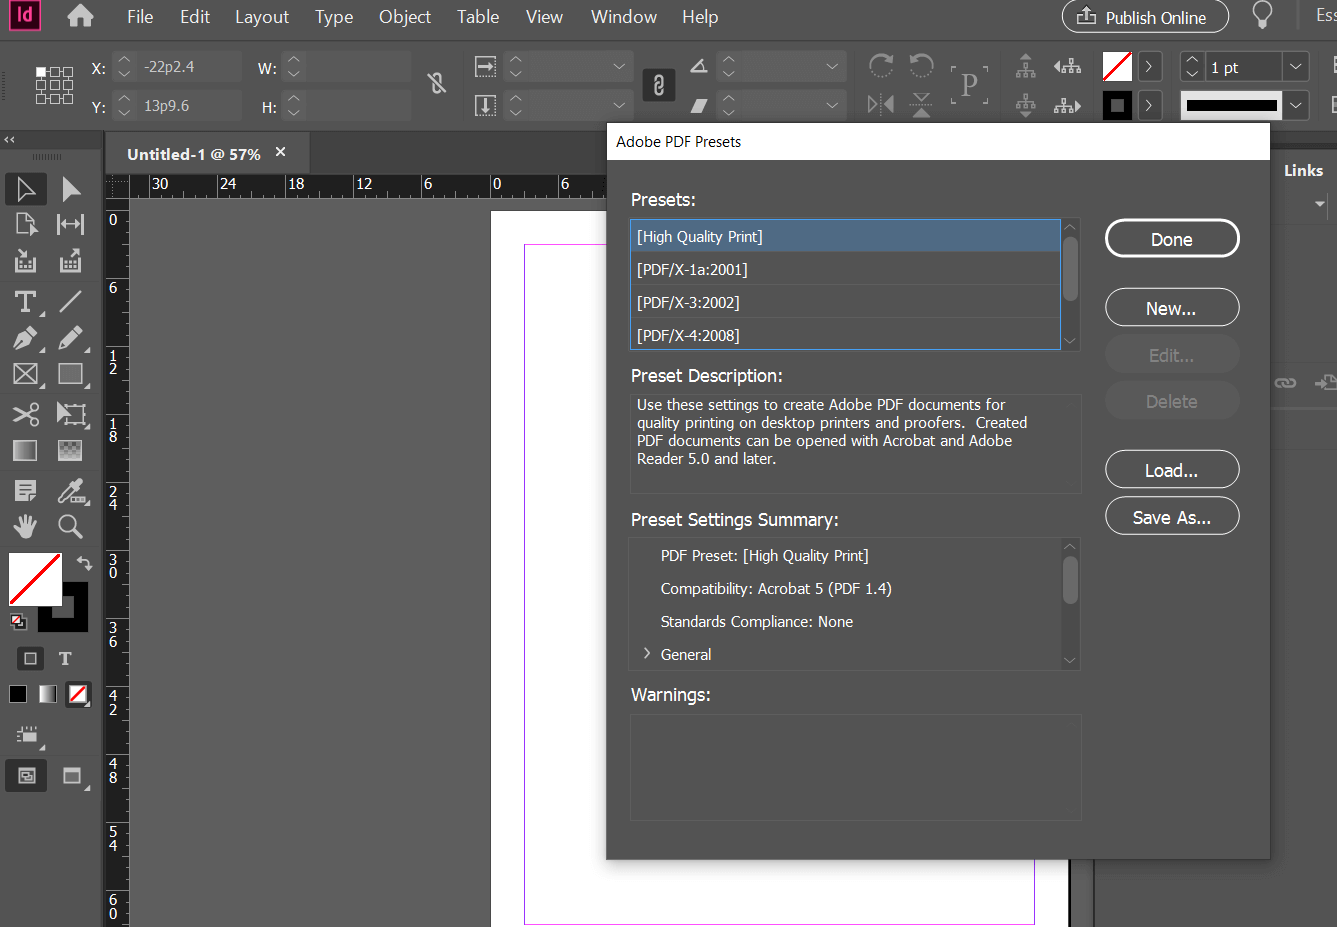
When setting Acrobat 6 compatibility or higher, you get the option to build a Tagged PDF in this dialog box's Options portion. This feature allows you to tag keywords in the PDF, making indexing possible through search engines. 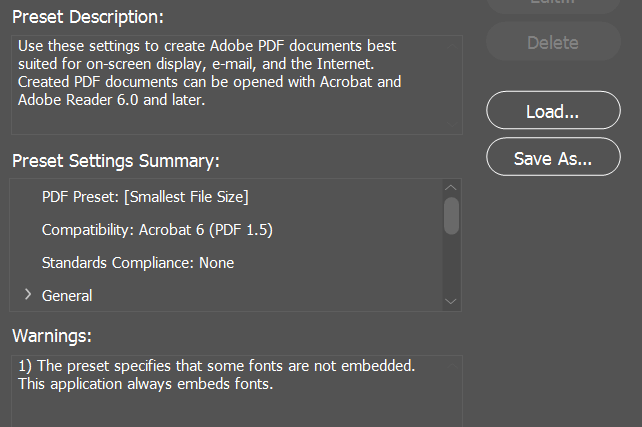
Compression OptionsYou may decide how much compression InDesign will use when exporting the File. It has a significant impact on the overall file size and even how accessible the PDF makes for the internet. If you simply display the web document, a lower pixel value per inch will satisfy. When you're going to get a printout of good quality, then you need a higher ppi. 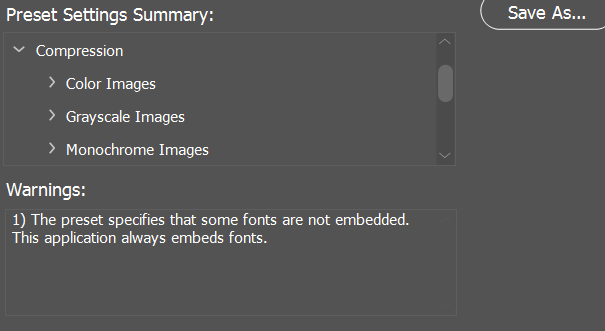
In the Color Images section, set the Bicubic Down sampling to box at around 150 and the picture quality to Better for exporting to the internet. Do that with the segment grayscale option, if your document has grayscale images. Output OptionsIn the Output section of the Export Adobe PDF dialog box, you can test the Color area settings. While viewing the PDF on-screen, it is best to keep the default setting and make sure you pick Include Tagged Reference Profiles in the Profile Inclusion Policy. It means that photographs are an integral part of this PDF. This only refers to the RGB colors. 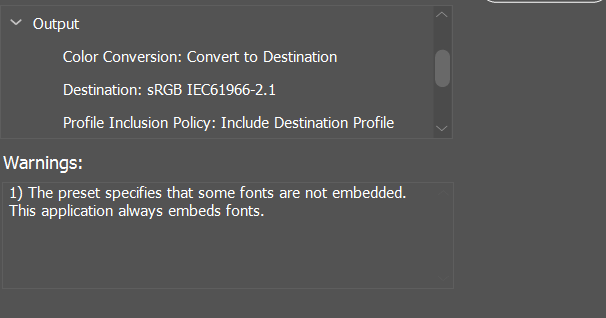
Security OptionsA PDF is one of the most widely used formats for transmitting documents and can be sensitive if you share confidential data. Password security of your PDF file is always recommended to ensure information is kept confidential. Passwords can also be used for conditional restrictions. Once he opens the document, they can choose what we can or cannot do. The previous password security feature limits access to all of the files. Here you can define the activities to which the user is allowed. For instance, the document may be prevented from printing in good quality, or spatial brightness, or from printing. Users may also be prohibited from copying the content of the statement into the toolbar, making comments on it and downloading individual pages or even trying to fill out and signing documents. This is great if you share information that is extremely sensitive to colleagues or outsiders. Interactive DocumentsInDesign makes it easy to add hyperlinks and bookmarks to make your text interactive. However, the interactivity you introduce in the InDesign workspace will not be apparent but can be seen in the exported File. In this chapter, we will discuss a few interactive elements. Setting the workspace for PDF from Advanced to Basic makes sense to allow for easy access to basic tables. Adding URL HyperlinksAdding URL hyperlinks to any object inside InDesign is very simple. You can add hyperlinks to an object to carry the user to the website by clicking on the object in the PDF, or you can add hyperlinks to the text to get the same result. We have selected the text in the example below to point to a hyperlink. To open the New Hyperlink dialog box, go to the Hyperlink tab and press Build a new hyperlink at the bottom of the screen. 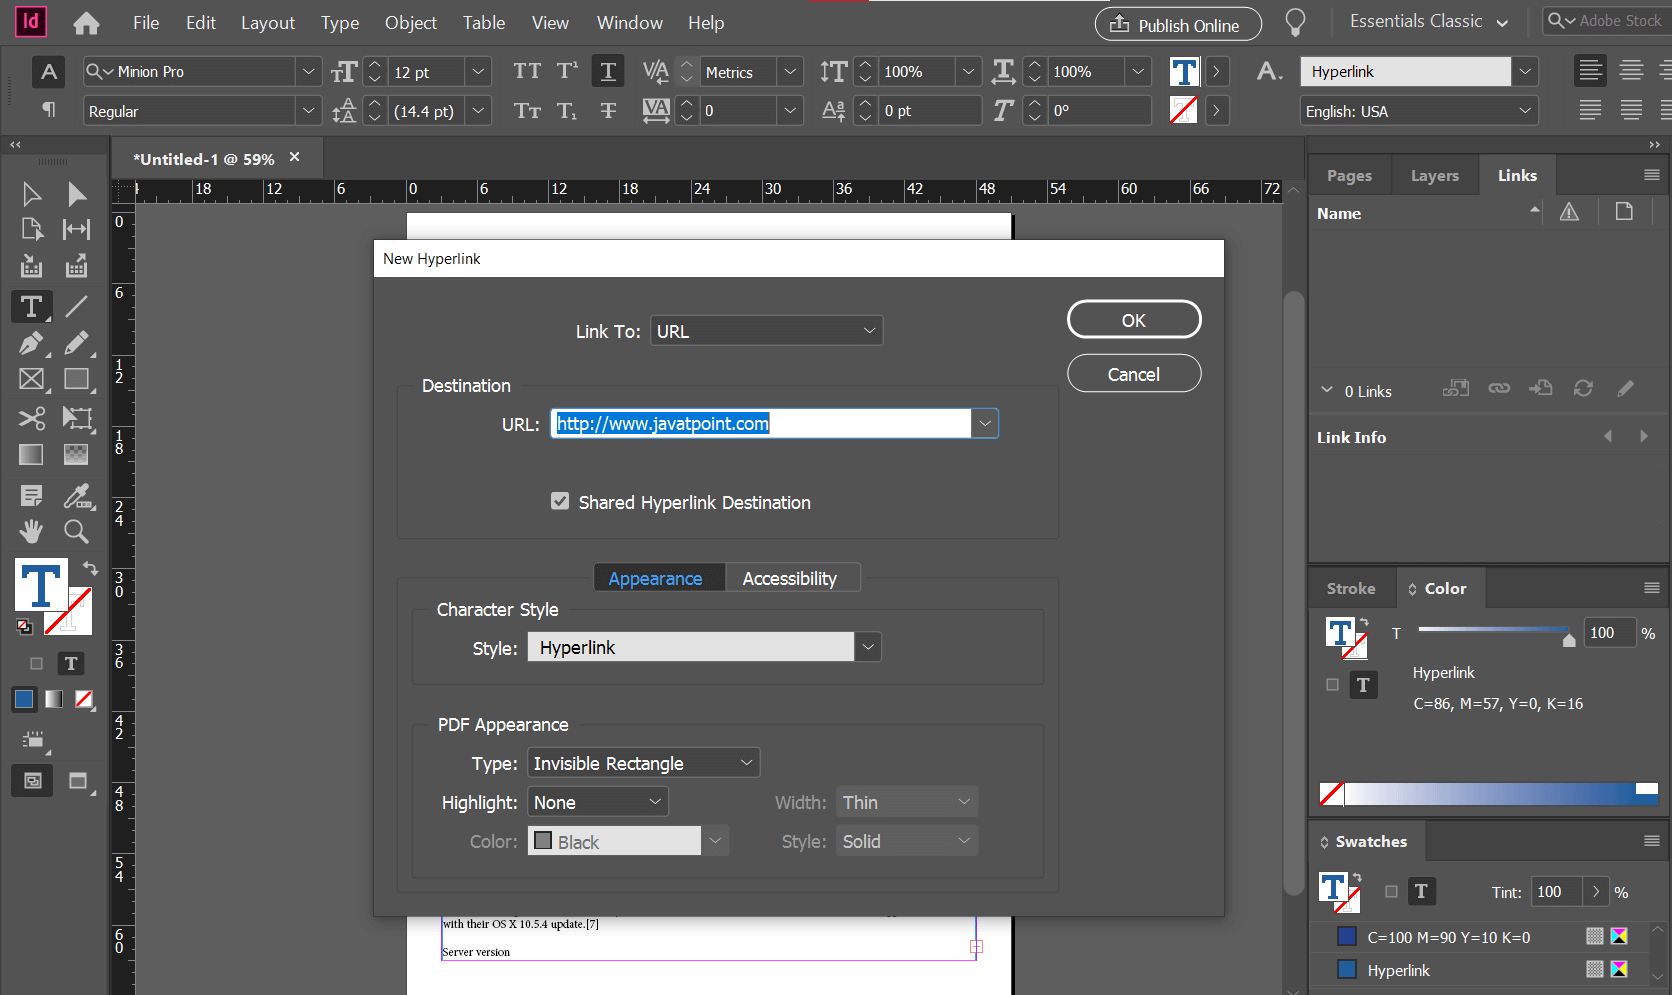
Verify that the field Connection To is set to URL. Now, InDesign generates the URL for the chosen text. This will open the URL in your default web browser if you export this as a PDF and click the file. Hyperlinking a PageSimilar to hyperlinking a URL, an object or text may also be hyperlinked to a particular page in the database. Clicking on the text or object will navigate the user to the page, which is connected. Let's consider a text called Introduction in the following example, by clicking on which we want the user to go to Chapter 1. To open the New Hyperlink dialog box, pick the text and press Build new hyperlink at the bottom of the screen. This time pick Page in the Connection To drop-down menu instead of the URL. We know that Chapter 1 of this book starts from page a1, so pick a1 from the drop-down menu on the Tab. We want the chapter material to zoom in to fit inside the window, so in the zoom setting, we'll pick Fit in Window. Press OK to include a hyperlink in the text. Now, any user who clicks on the Introduction text can go directly to Chapter 1 if this is exported as a PDF. 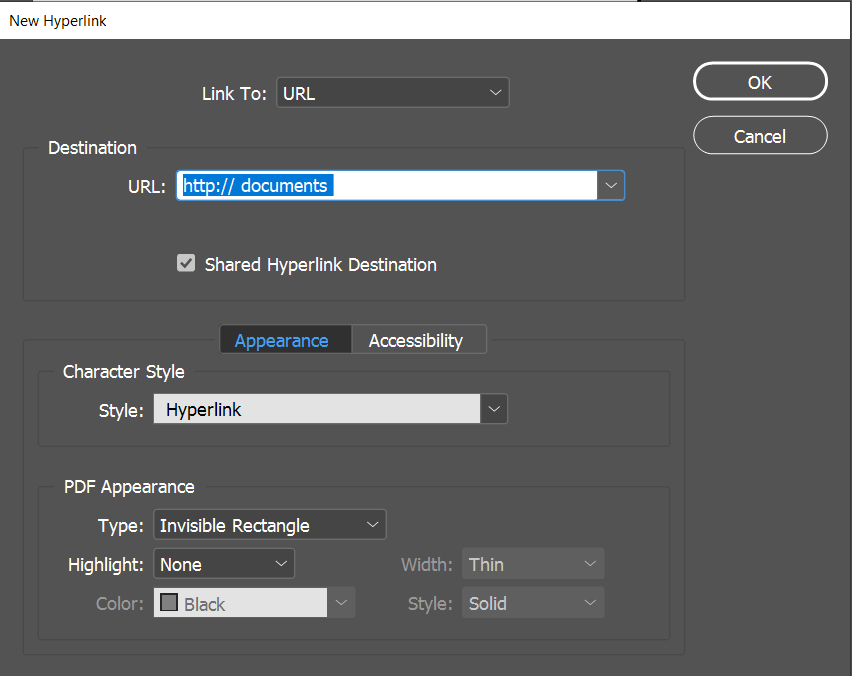
Adding BookmarksBookmark folders are also a link tag that makes navigating the document easier for the user. For each page, you could create a bookmark, or simply create a ToC to insert user profiles. When you insert a ToC, the bookmark toolbar is automatically made. 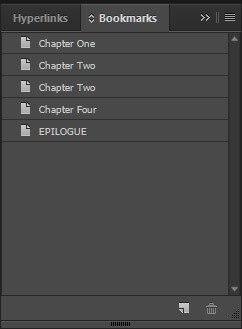
Exporting Interactive DocumentsYou cannot display the interactivity inside the actual InDesign workspace, as stated at the beginning of this chapter. But, if we export it in pdf format, then it provides many options to make this interactive. You must pick the Adobe PDF for all intents and purposes unless you have multimedia content like movies or audio in the text. After this, we need to click on the Save button. LayersThe best way to do so is to use layers to assess how items are simply stacked onto each other. Layers may be used to construct objects that are in a more arranged format. Layers panel helps you to navigate layers. Creating a New LayerYou must showcase the layers in the paper by clicking the Layers panel. Click the Create New Layer at the bottom of the Layers screen to create a new layer directly, or hold down the Alt key on Windows or the Mac Choice key and press Create New Layer to get the New Layer dialog box. 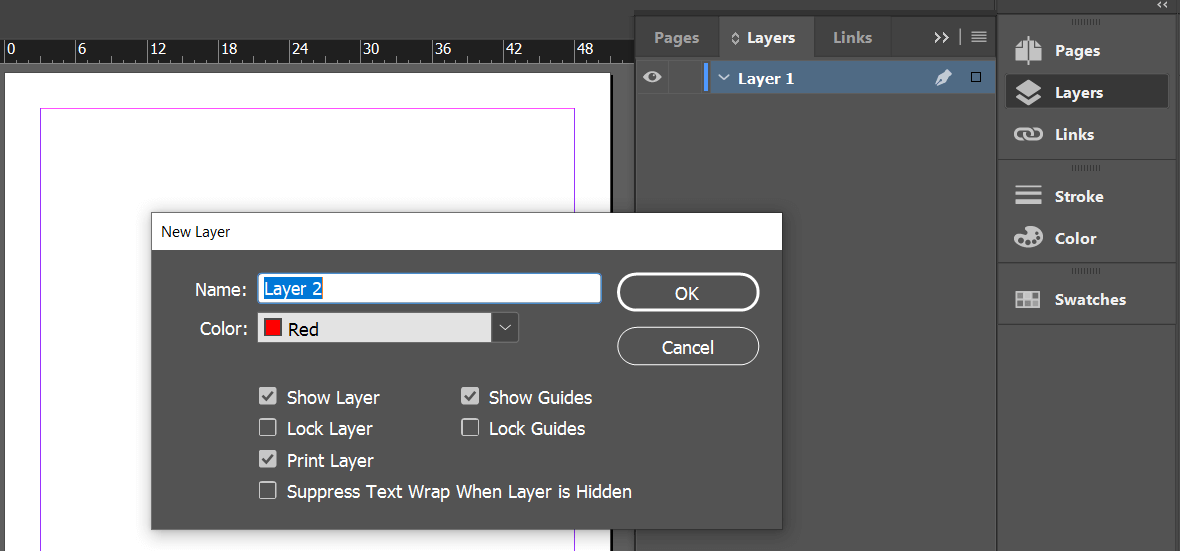
The square is an indicator element of the layer that is currently being worked on. You can click and move the square to some other layer, which displays objects belonging to that layer. In the following paragraph, the square is transformed into a red, and the elements in the Main Layer document are highlighted by clicking and dragging the blue square from the Background layer to the Main layer. Simply click on the eyeball icon will mask or expose the layer in front of the layer name.You may want to see the layer on the screen occasionally, but you don't need to print the objects in the layer. Then, delete the checkmark next to the option Print Sheet. 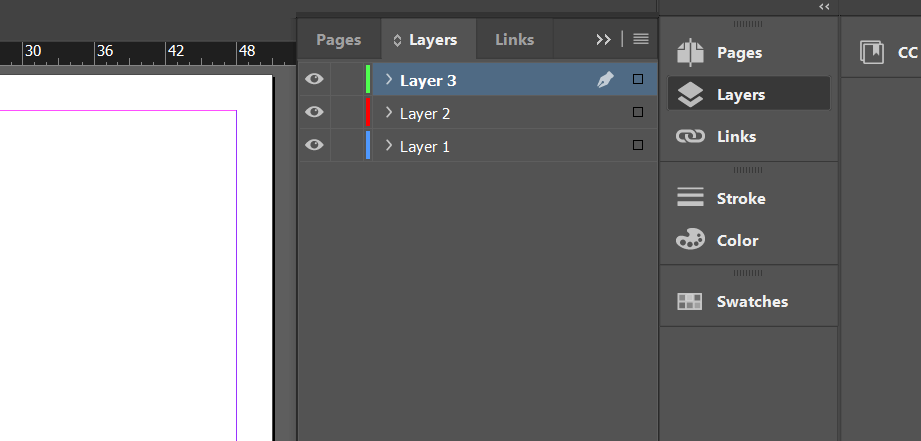
Layer ObjectsEach layer consists of artifacts that can be rearranged in the layer, or even between the layers. Every entity within a layer is given a name. 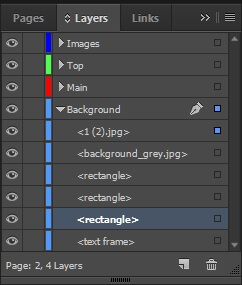
For example, if the Background layer collapses, it will expose the objects inside it. The name means the frame, which is rectangular. These objects can be rearranged by simply clicking and dragging the object (by holding Ctrl on Windows or Command on Mac for multiple object selections) into the desired layer. Sometimes it can be difficult to make sense of what each < rectangle > in a complex text actually means. This will allow you to rename the object to a more noticeable one. Tables Inside a text frame, you can create a table from scratch, or turn existing data into a table. Note that the table created for the text framework will be an anchored object. Creating a New Table Simply select the Text tool to create a new table, and draw a region you want to create a table. 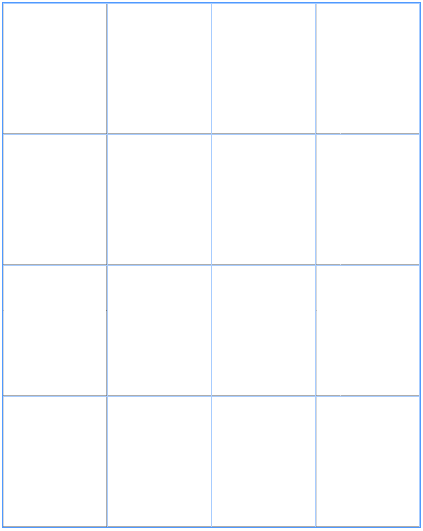
Then go to the Tables menu and pick Build Table to open the dialog box creating a table. Here you can specify the number of rows and columns in your table and decide whether you need headers and footers for the list. Clicking OK will create a table inside the frame of your text. 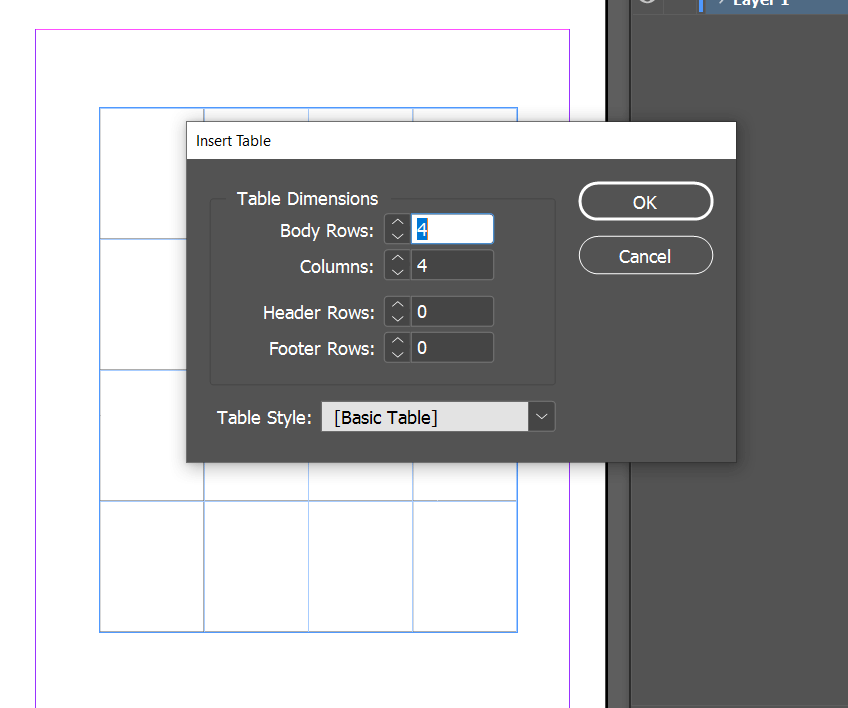
Within this table, you can now enter info. With the help of the Shift and drag option, we can change the entire table proportionally to outside the table. Note that you need the Type tool selected on the toolbar to move the rows or columns because the table is called a text frame. Just drag over the table to delete the list, and press Delete on your keyboard. Creating a Table from Existing Data In the example below, we will use a simple text file that contains information about some cars Company and turn this into a table. 
Click on the text and press Ctrl+A on Windows or Command+A on the Mac to pick the contents of the text frame. Formatting Tables InDesign offers a variety of table layout formatting options. All options for table layout can be accessed via the Table Options dialog box. 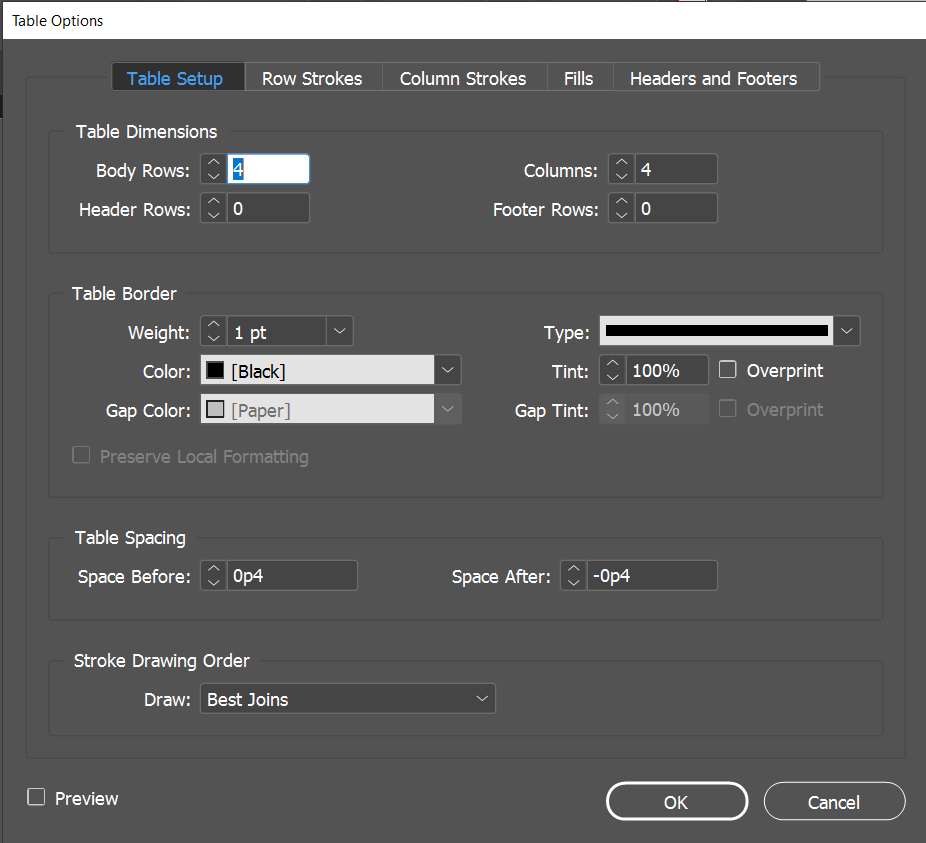
Exploring the options and adjusting the settings is simple. Let us do some simple formatting to see the final output for this example. Before doing so, describing the table's first row as its header would be a good idea. Applying GradientsUse gradients will lend the document some great results. Build an empty gradient swatch for using gradients by going to the Swatches panel options and selecting New Gradient Swatch, and click Ok. To open the Gradient Options dialog box, right-click the new gradient swatch and select Swatch Options. For this case, white to black is the default gradient color. Clicking on the first stop in the Gradient Ramp (the tiny white icon) helps you to identify the CMYK color you want as the starting point of the gradient. You can also change this to RGB to Lab by selecting the corresponding choice from the dropdown menu Stop Color. You can also connect a gradient with several stops by clicking on the Gradient Ramp. You can see a diamond-shaped handle on the Gradient Ramp if you remember, which lets you determine the gradient's size. If you want to delete any of the stops in the gradient, click and drag the stop off the ramp. Blending GradientsYou can fine-tune the gradients that you generated to look more compatible with the rest of the paper. Let us construct two gradient swatches for this - one will be a radial gradient and the other linear. Pick the frames you want to apply to these gradients. Select the Gradient panel to fine-tune the gradients, and change the start and endpoints of the gradient. You can also select the Gradient Swatch Tool from the toolbar, and simply drag a line inside the frame in the direction you want to apply the gradient. PrerequisiteYou must have basic knowledge of computers before learning Adobe InDesign. AudienceOur Adobe InDesign tutorial is designed to help beginners and professionals both. ProblemWe assure you that you will not find any problem with our Adobe InDesign Tutorial. However, if there is any mistake, please post the problem in the contact form. |
 For Videos Join Our Youtube Channel: Join Now
Feedback
- Send your Feedback to [email protected]
Help Others, Please Share


