| |

IntelliJ IDEA First Java ProgramIn this, we will create our first Java Project. We are going to write and execute Hello World program. 1. Create ProjectStart IntelliJ IDE. Go to File -> New -> Project. The below screen appears. 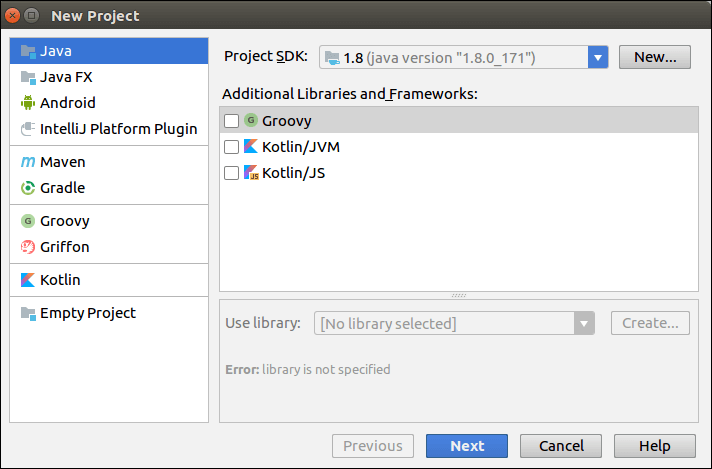
Select The Java Project and appropriate Project SDK. Click Next. Now, Type the Project name and select Project location. Click Finish. 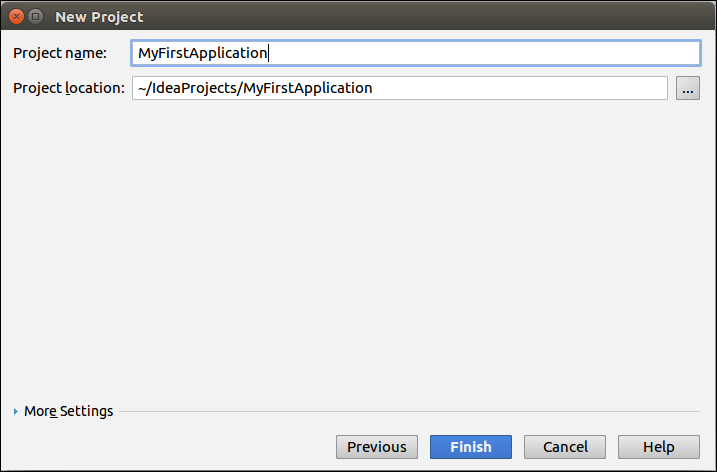
Once we click on Finish Button, the following screen will open. 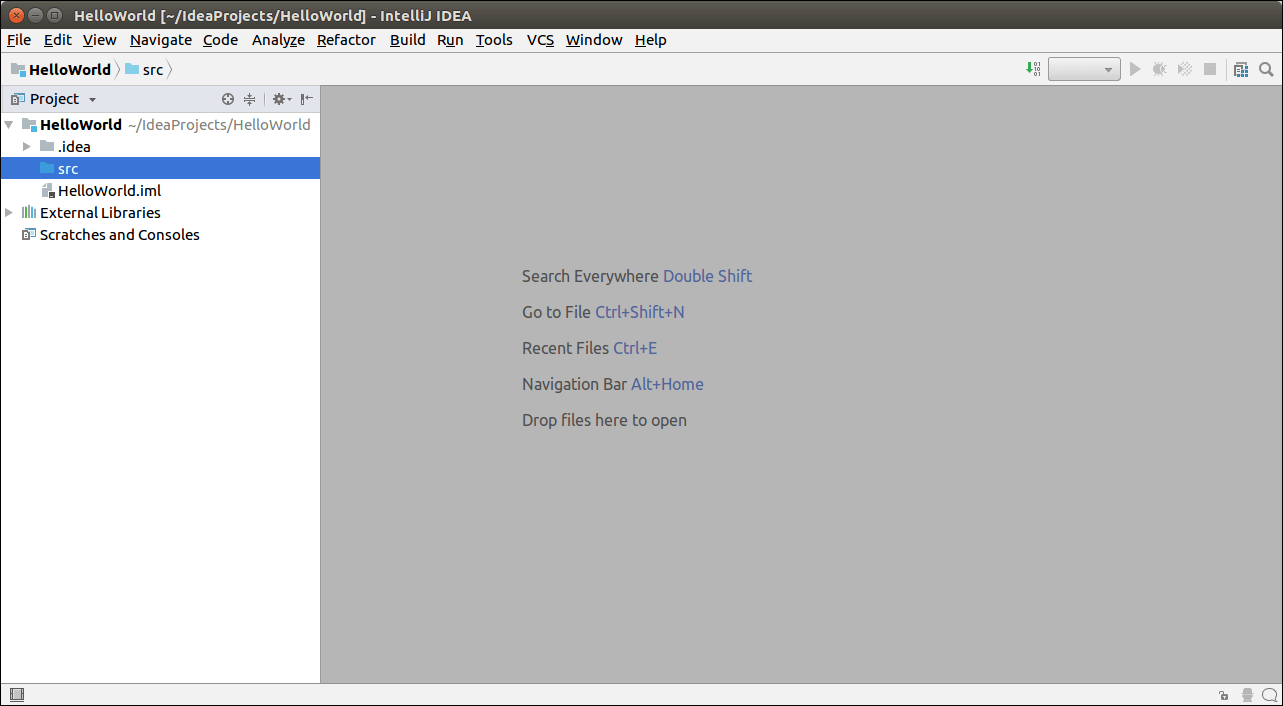
2. Create PackageGo to the Project Structure, right click src -> New -> Package. Enter the Package Name and click Ok Button. 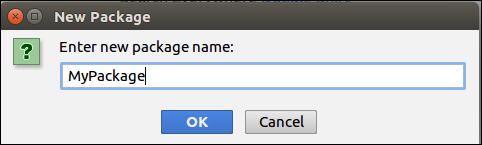
3. Create Java ClassGo to the Project Structure, right click src -> New -> Java Class. Create the New Class Name and click Ok Button. 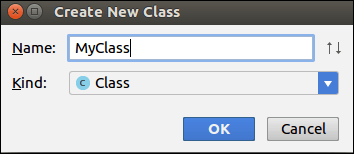
Once we click on Ok Button, the Editor window with the Class Declaration will open. Here we write our code which we want to run and execute. 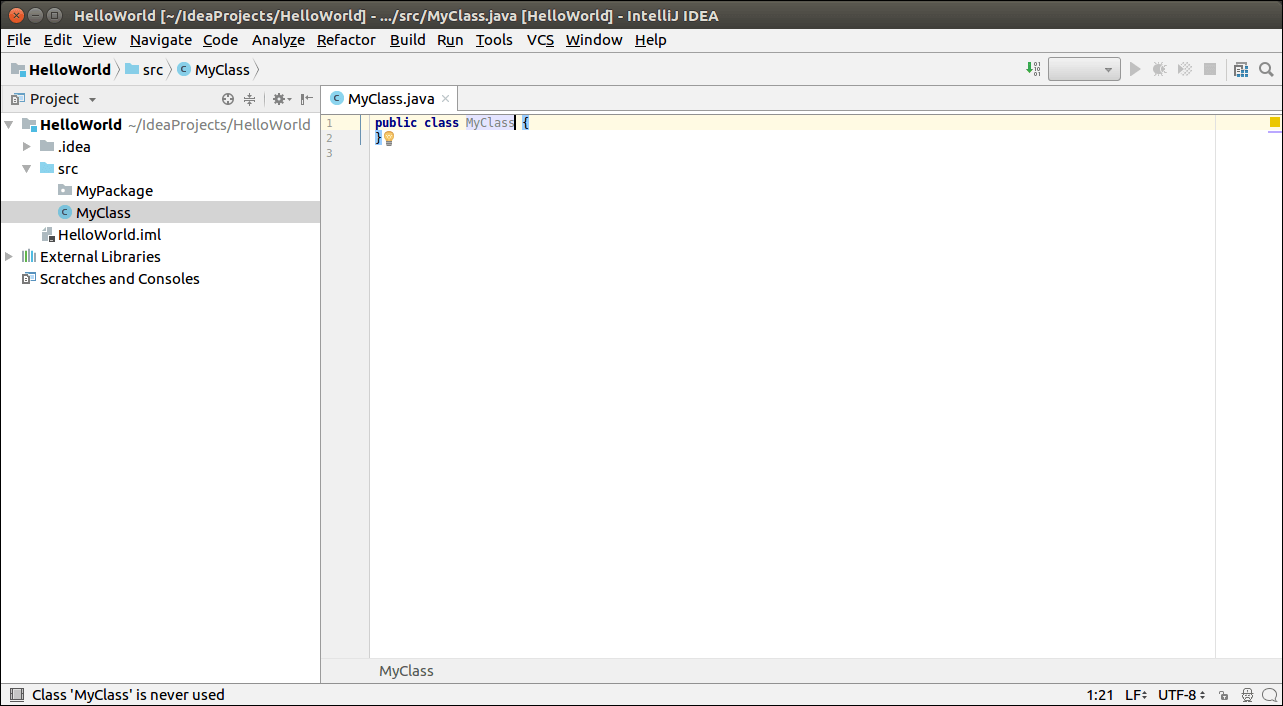
4. Run ApplicationEnter the following code in the Editor Window which will print the output on the console. Go to the Run menu and select the Run option. Again Select the Class name and run. The output will appear on the console. 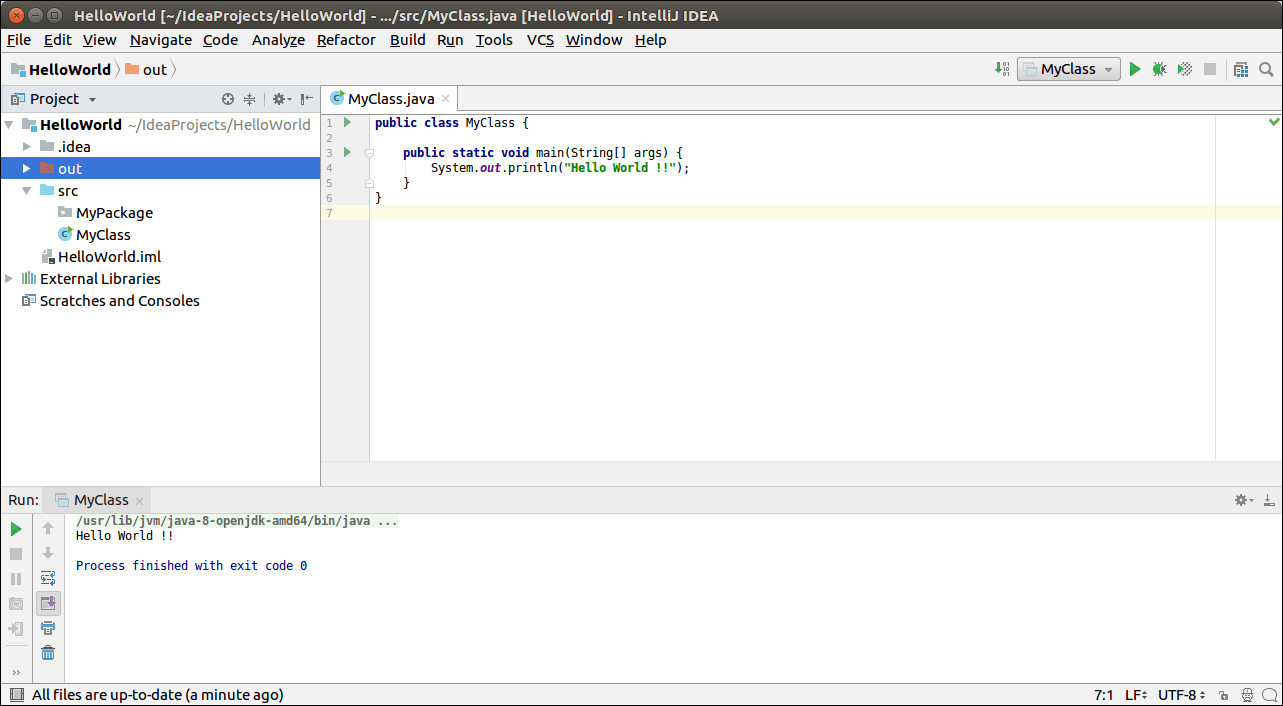
Next TopicIntelliJ vs Eclipse
|
 For Videos Join Our Youtube Channel: Join Now
Feedback
- Send your Feedback to [email protected]
Help Others, Please Share


