| |

Kali Linux InstallationDifferent ways of installing Kali Linux:
We may also set up Kali Linux on ARM (Advance RISC (Reduced Instruction Set Computer) Machine) devices like Raspberry Pie, cubic truck, trimslice, and so on. Kali Linux using Bootable USB:Step 1: Download Kali Linux ISO- Download the ISO image file of Kali Linux from its official website, i.e., https://www.Kali.org/downloads/. Do not download it from any other website because it may contain malware. Here, we are going to download Kali Linux 64-Bit. 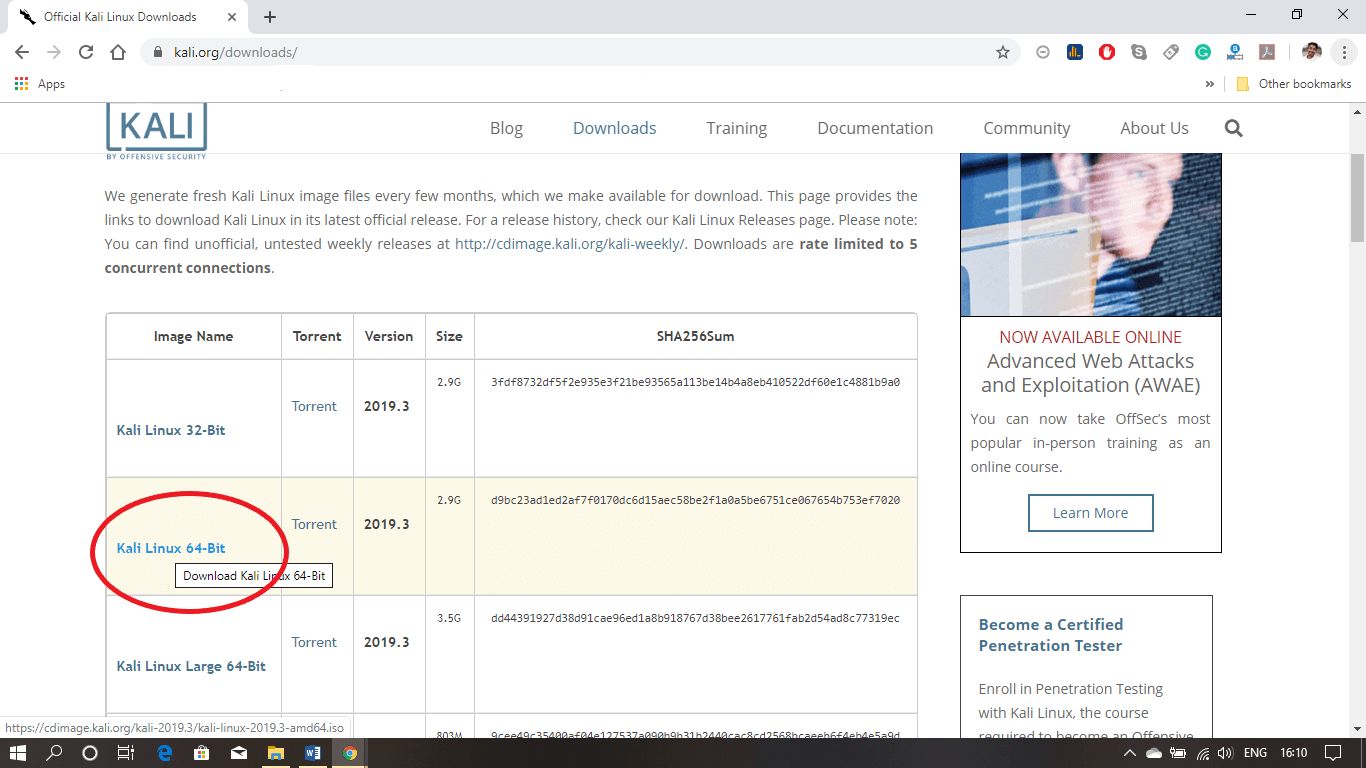
Step 2: You should download any bootable image file processing tool, which allows you to create a bootable USB drive. Step 3: Plug your USB drive into your Windows PC and remember the drive name associated with it (e.g., "H :\"). Step 4: Launch Rufus and choose the Kali Linux ISO file that you want to copy on the USB drive. Match the name of the device selected, which corresponds to the name of the USB device you inserted. 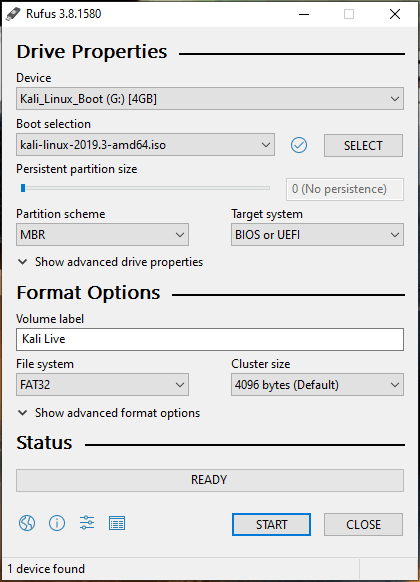
Step 5: Click the Start button to overwrite the contents of the USB device, as shown in the figure. 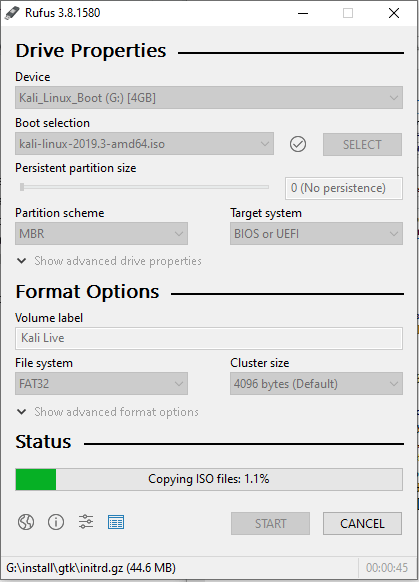
Step 6: Once the status bar is completed 100%, click on close and safely remove the USB drive from the PC. You can now use your USB drive to boot Kali Linux. 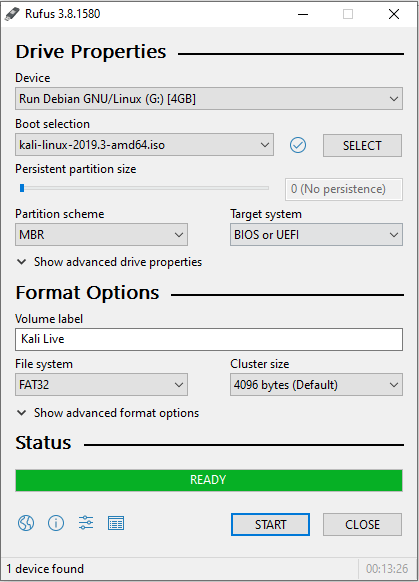
Step 7: Insert your bootable USB drive to your PC and start your PC. Press "Esc" on the first prompt to enter into the Startup Menu. 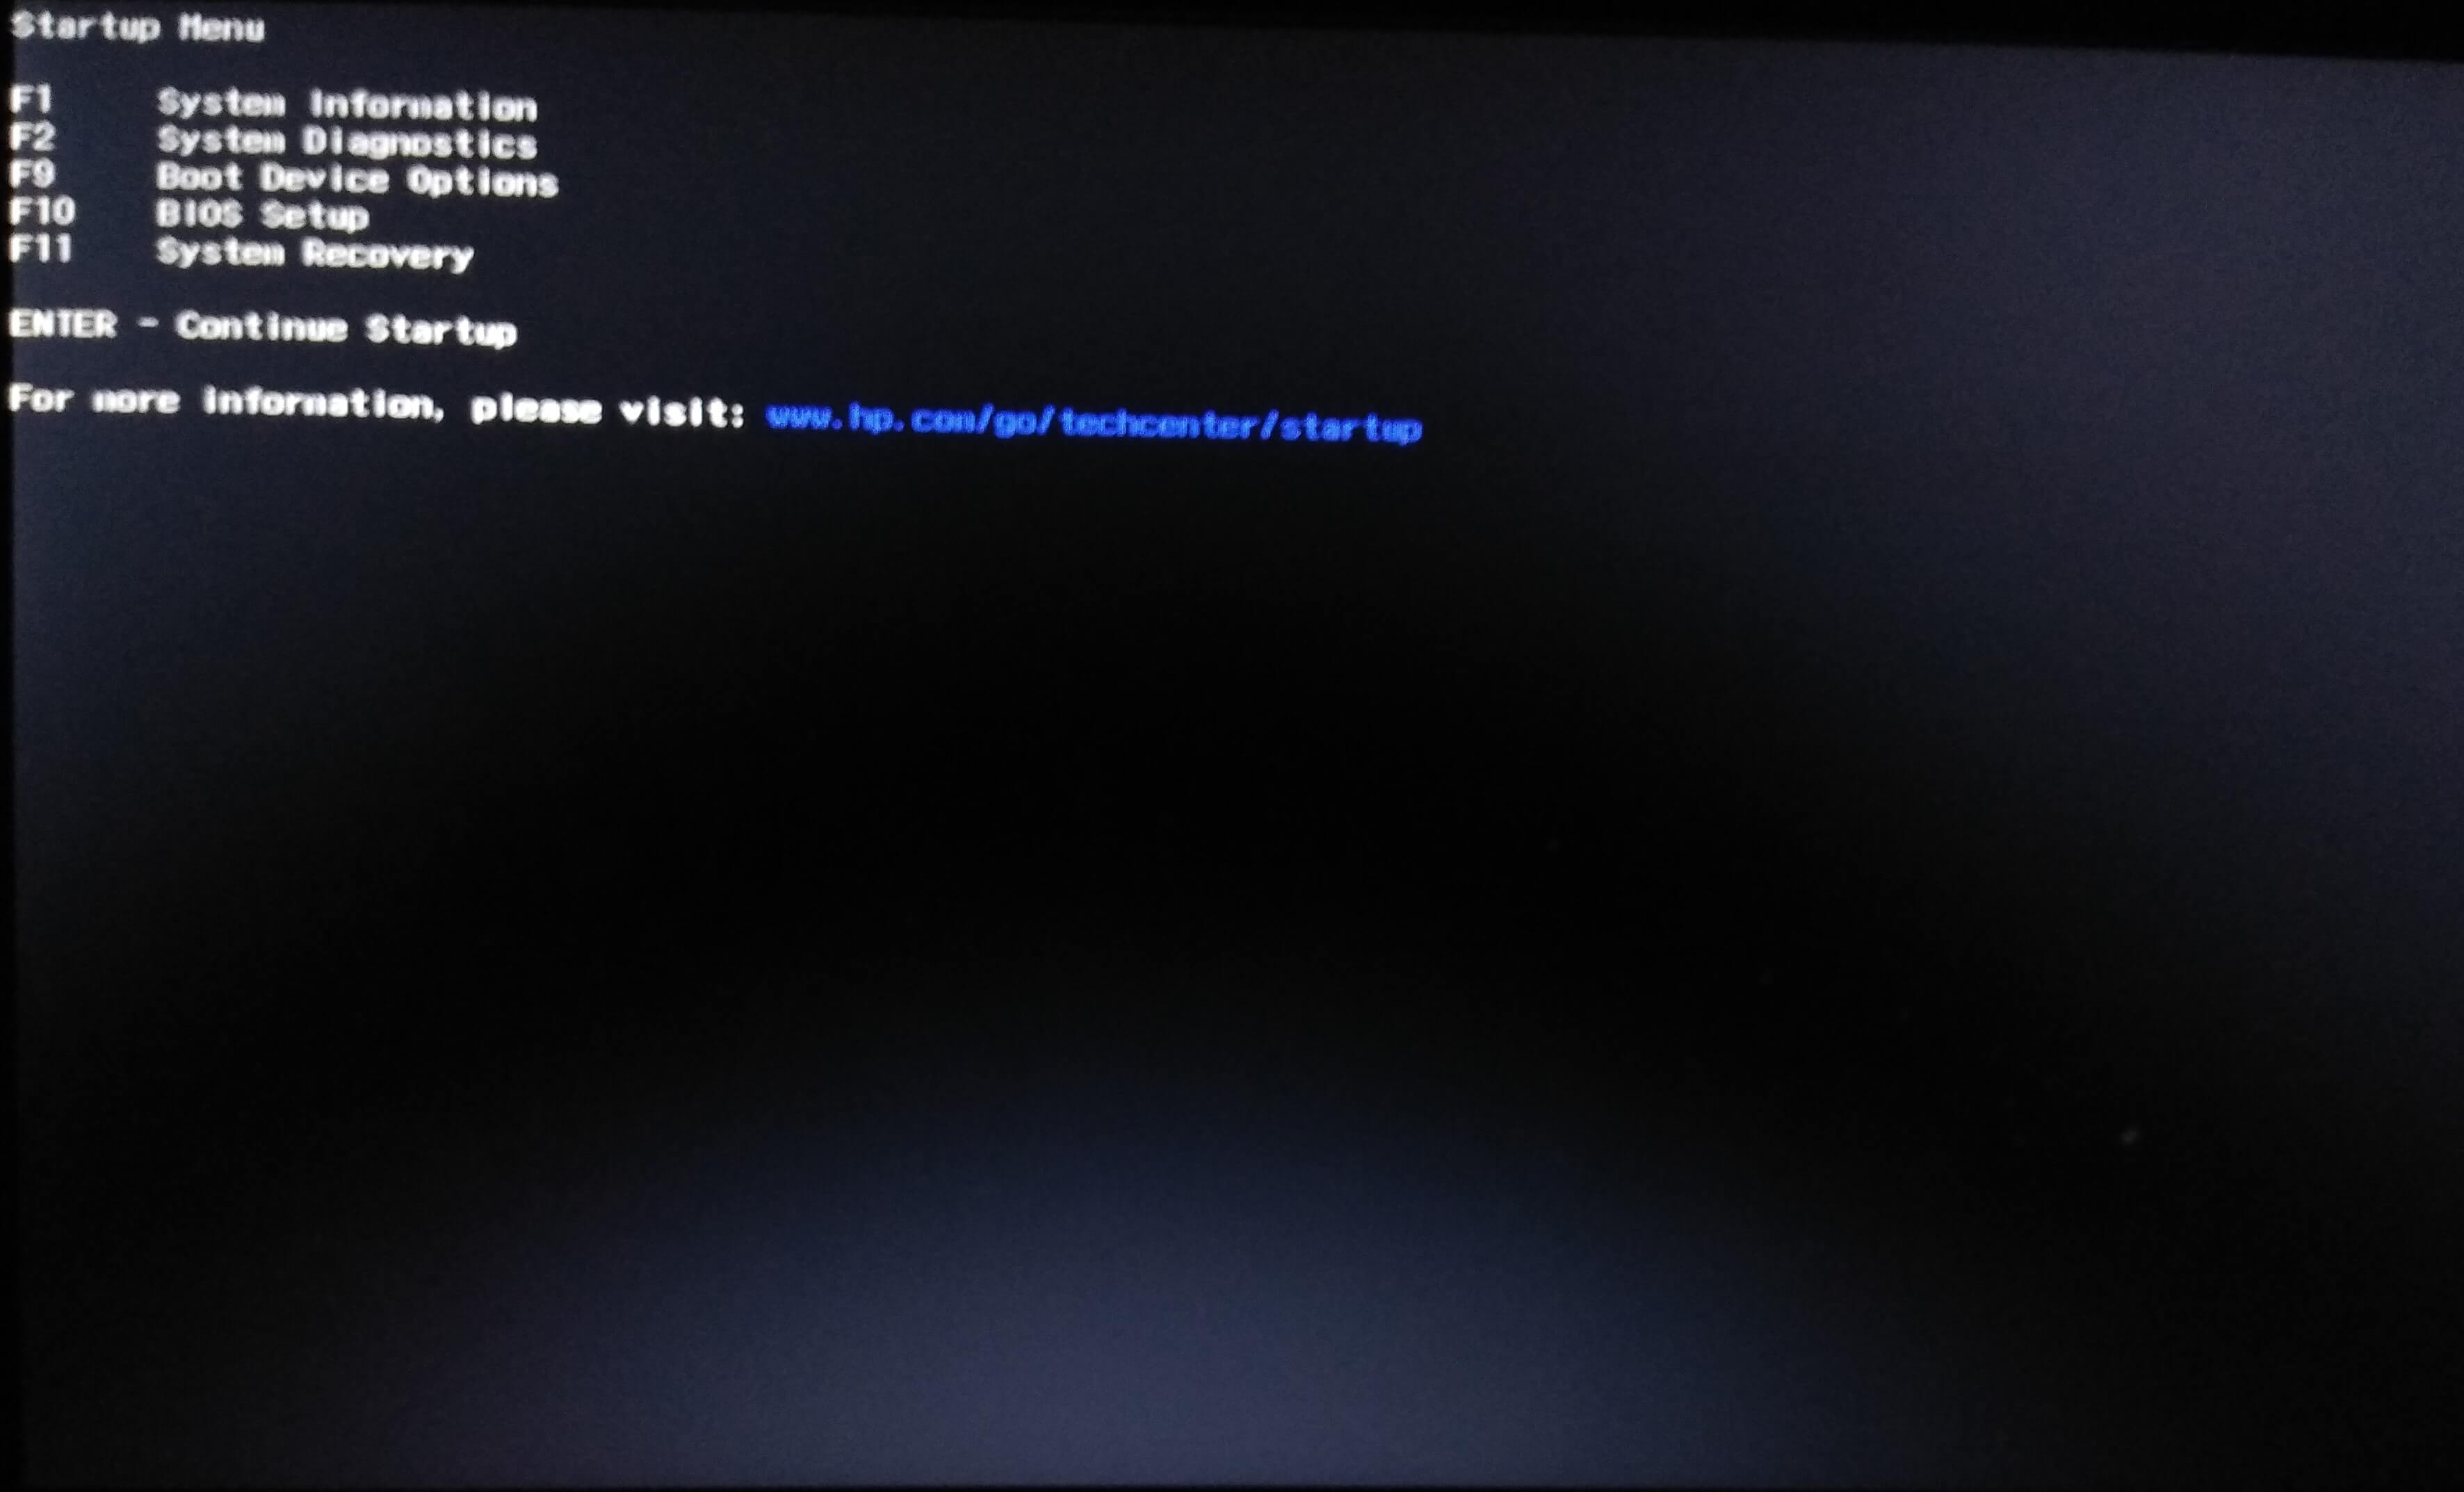
Step 8: Press F9 to enter into the Boot Device option. It will redirect you to the Boot Manager. These options may vary from device to device. 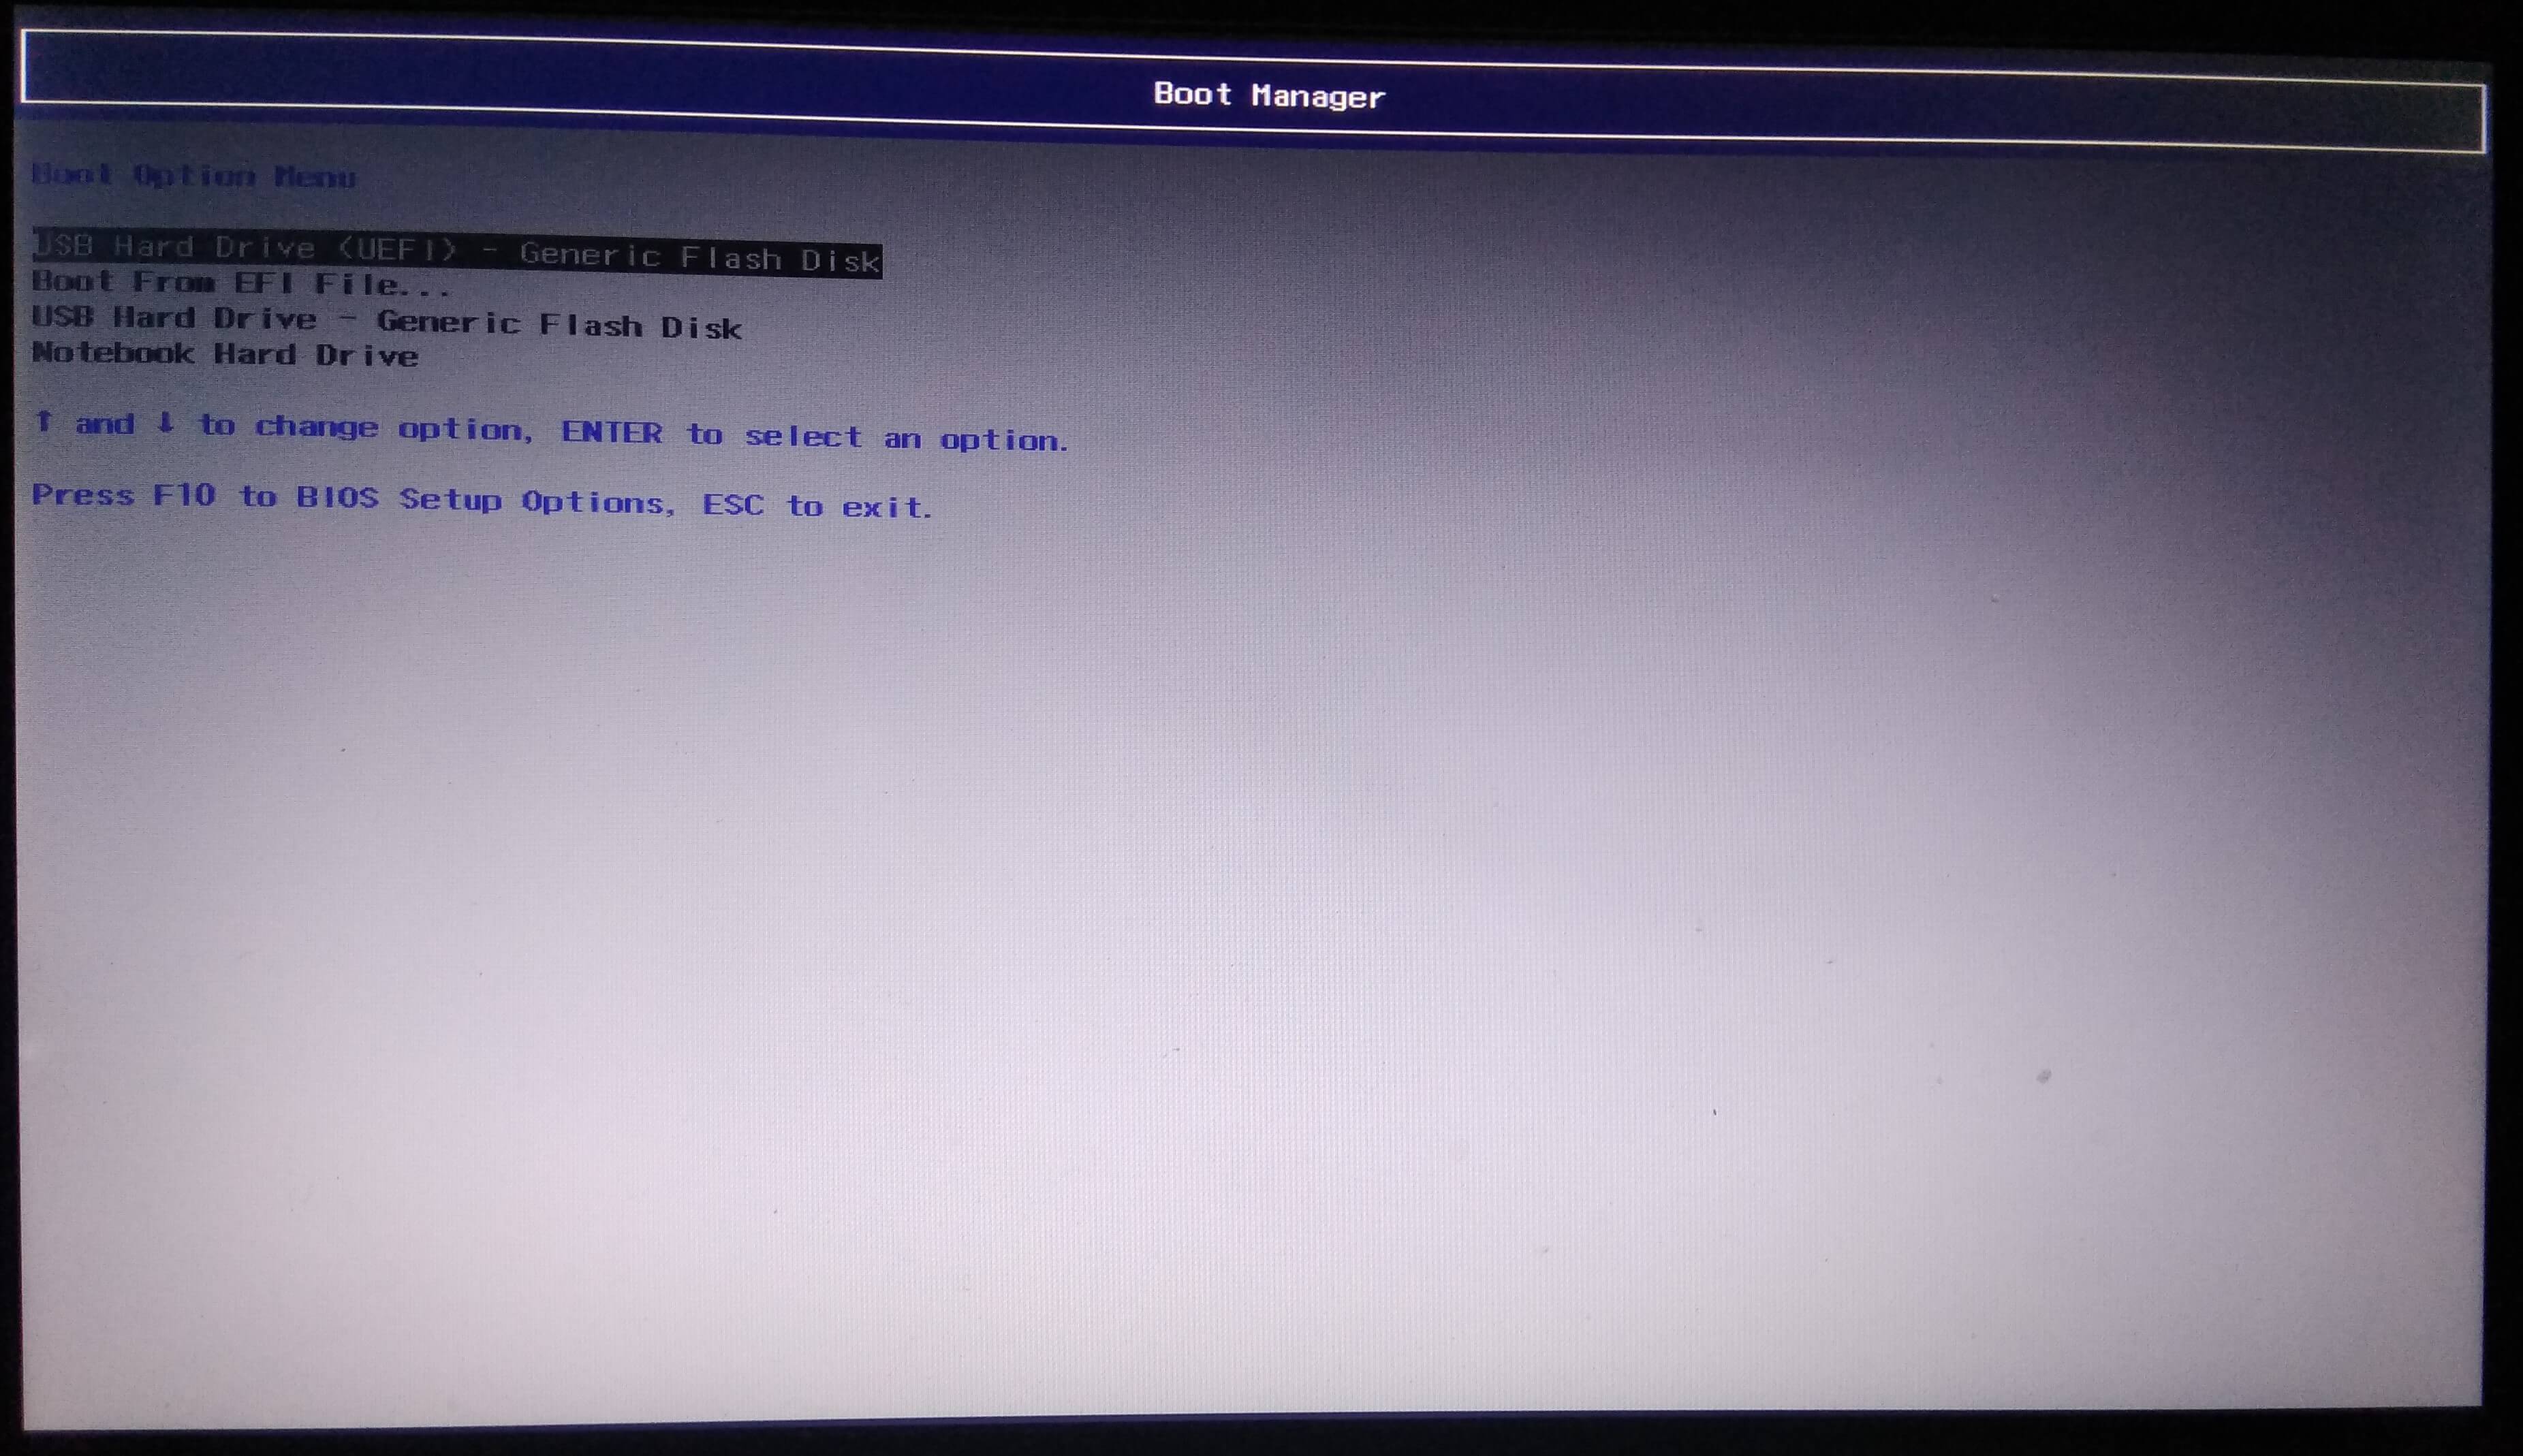
Step 9: Select USB Hard Drive to boot from your bootable USB Drive. It will redirect you to the Kali Linux Live Boot Menu. 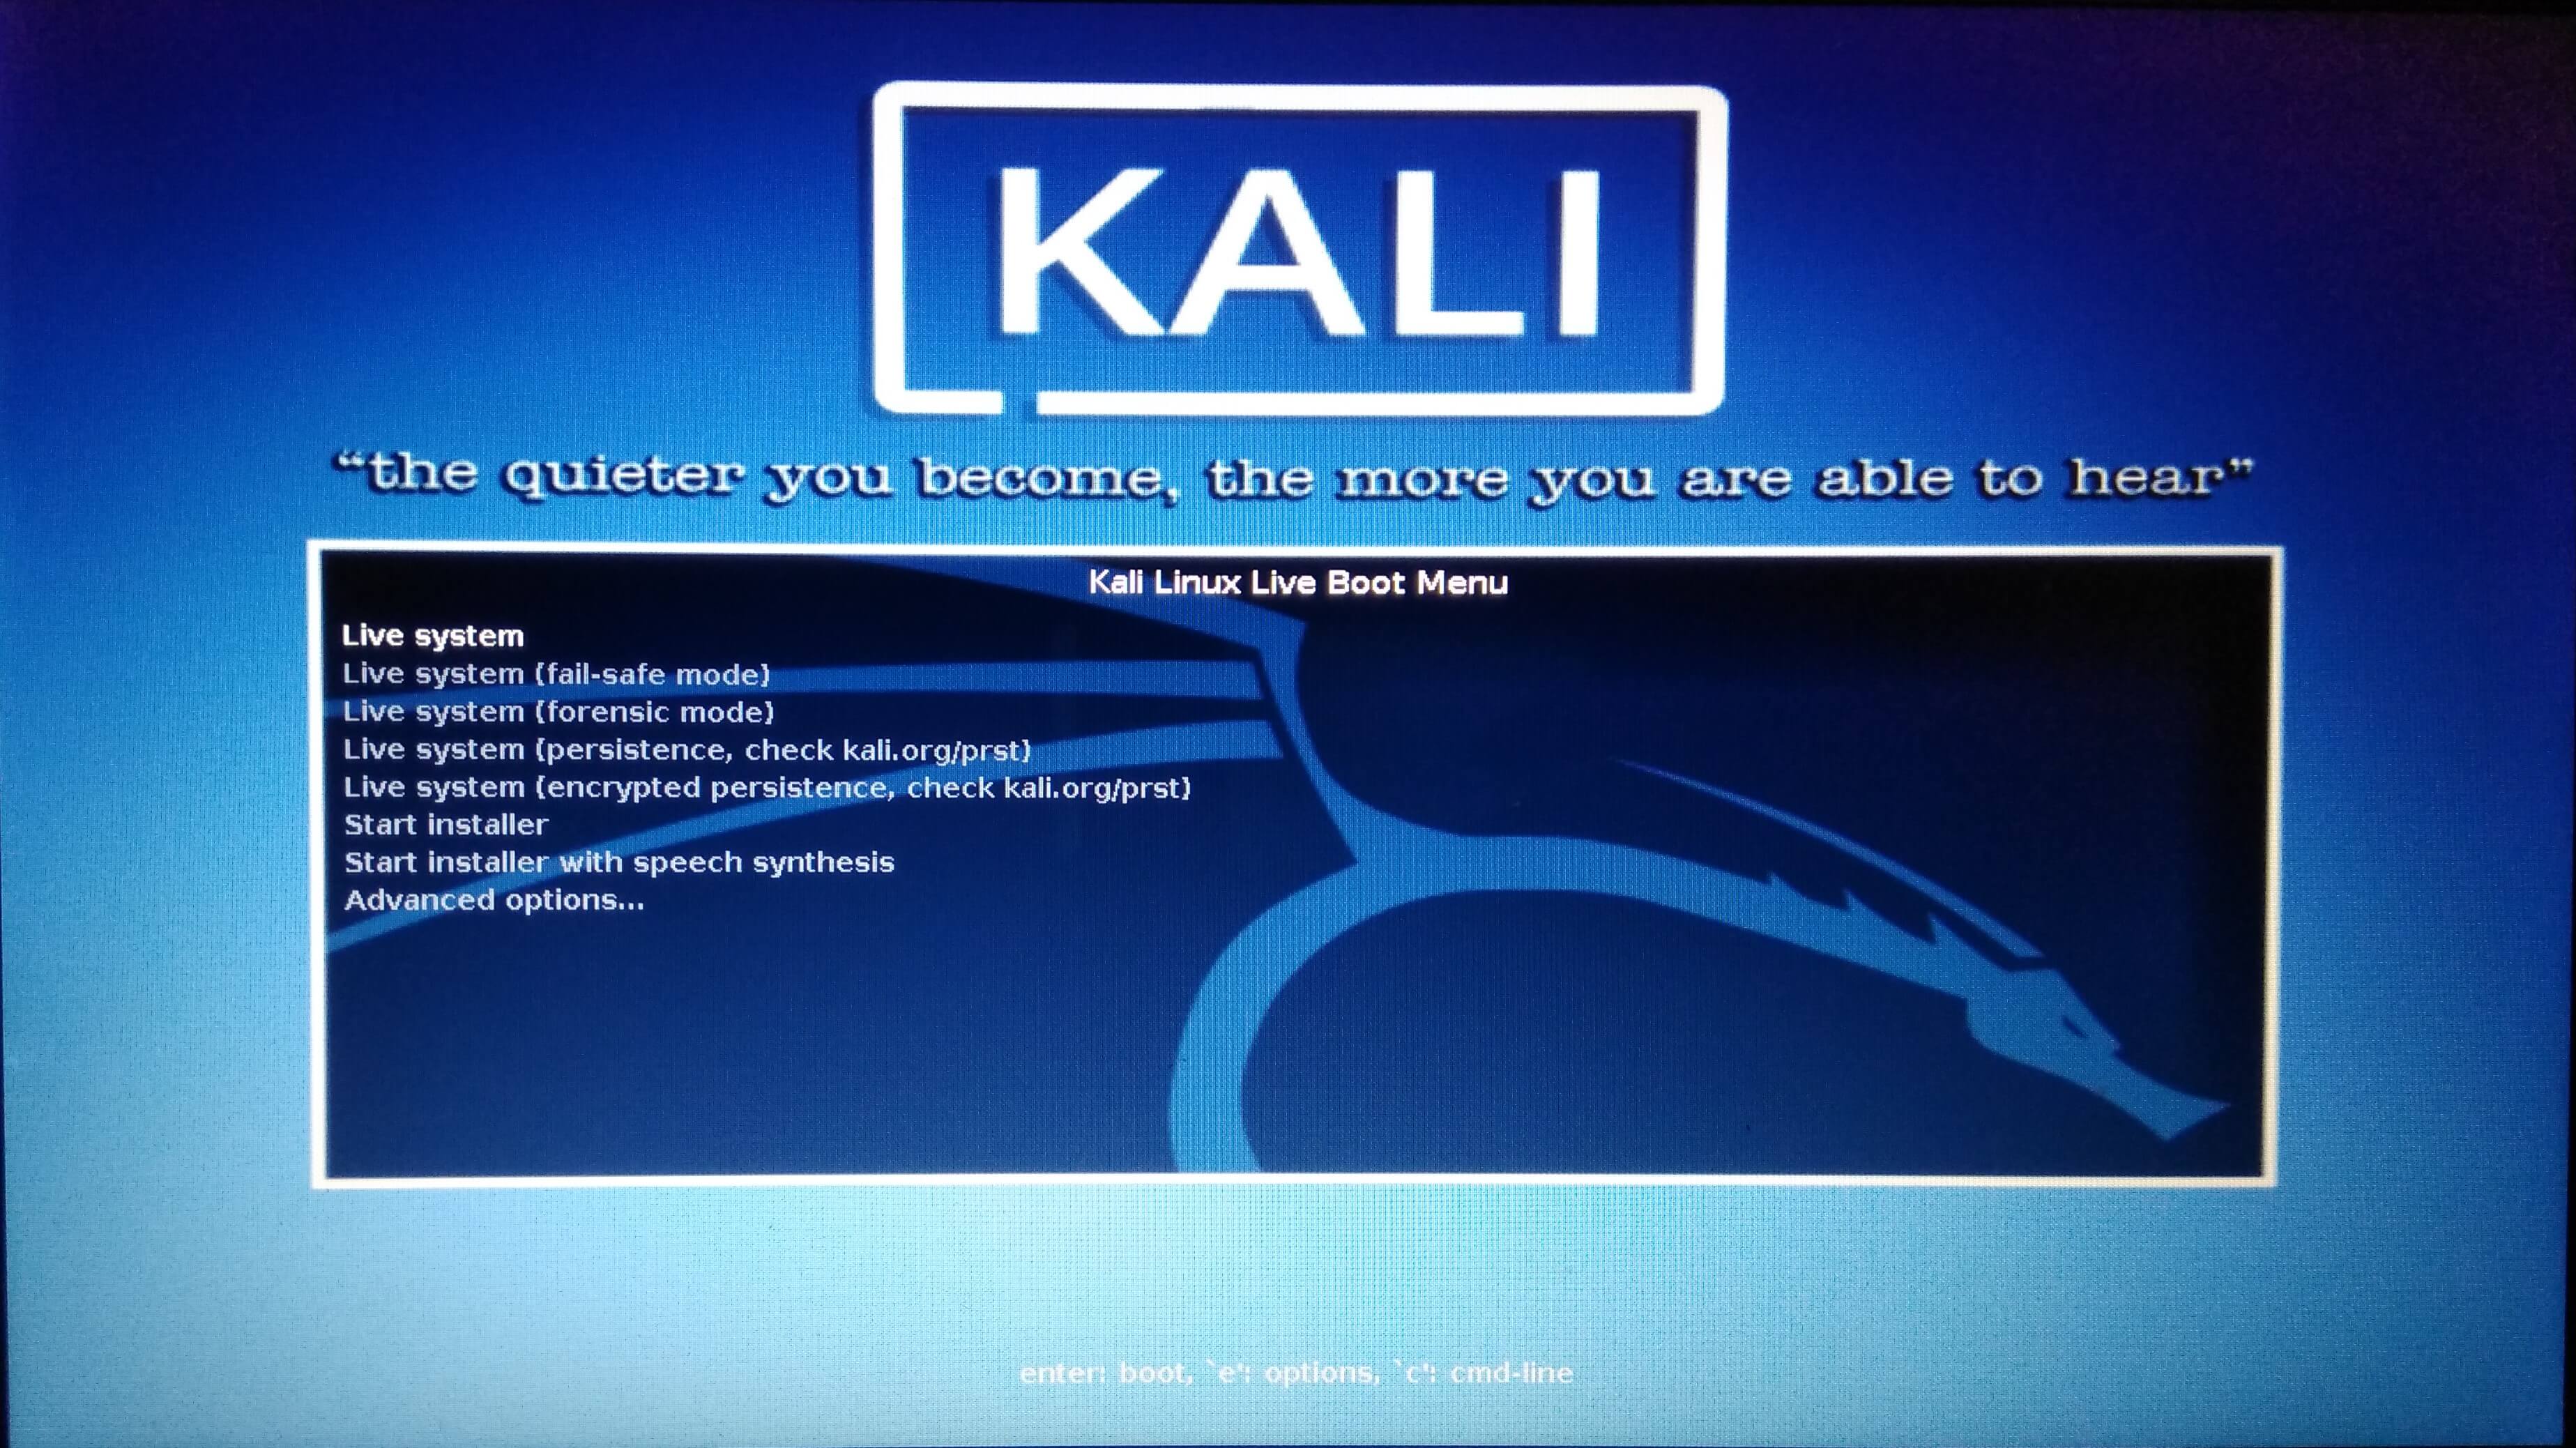
Step 10: Select Live System and press enter to boot Kali Linux. 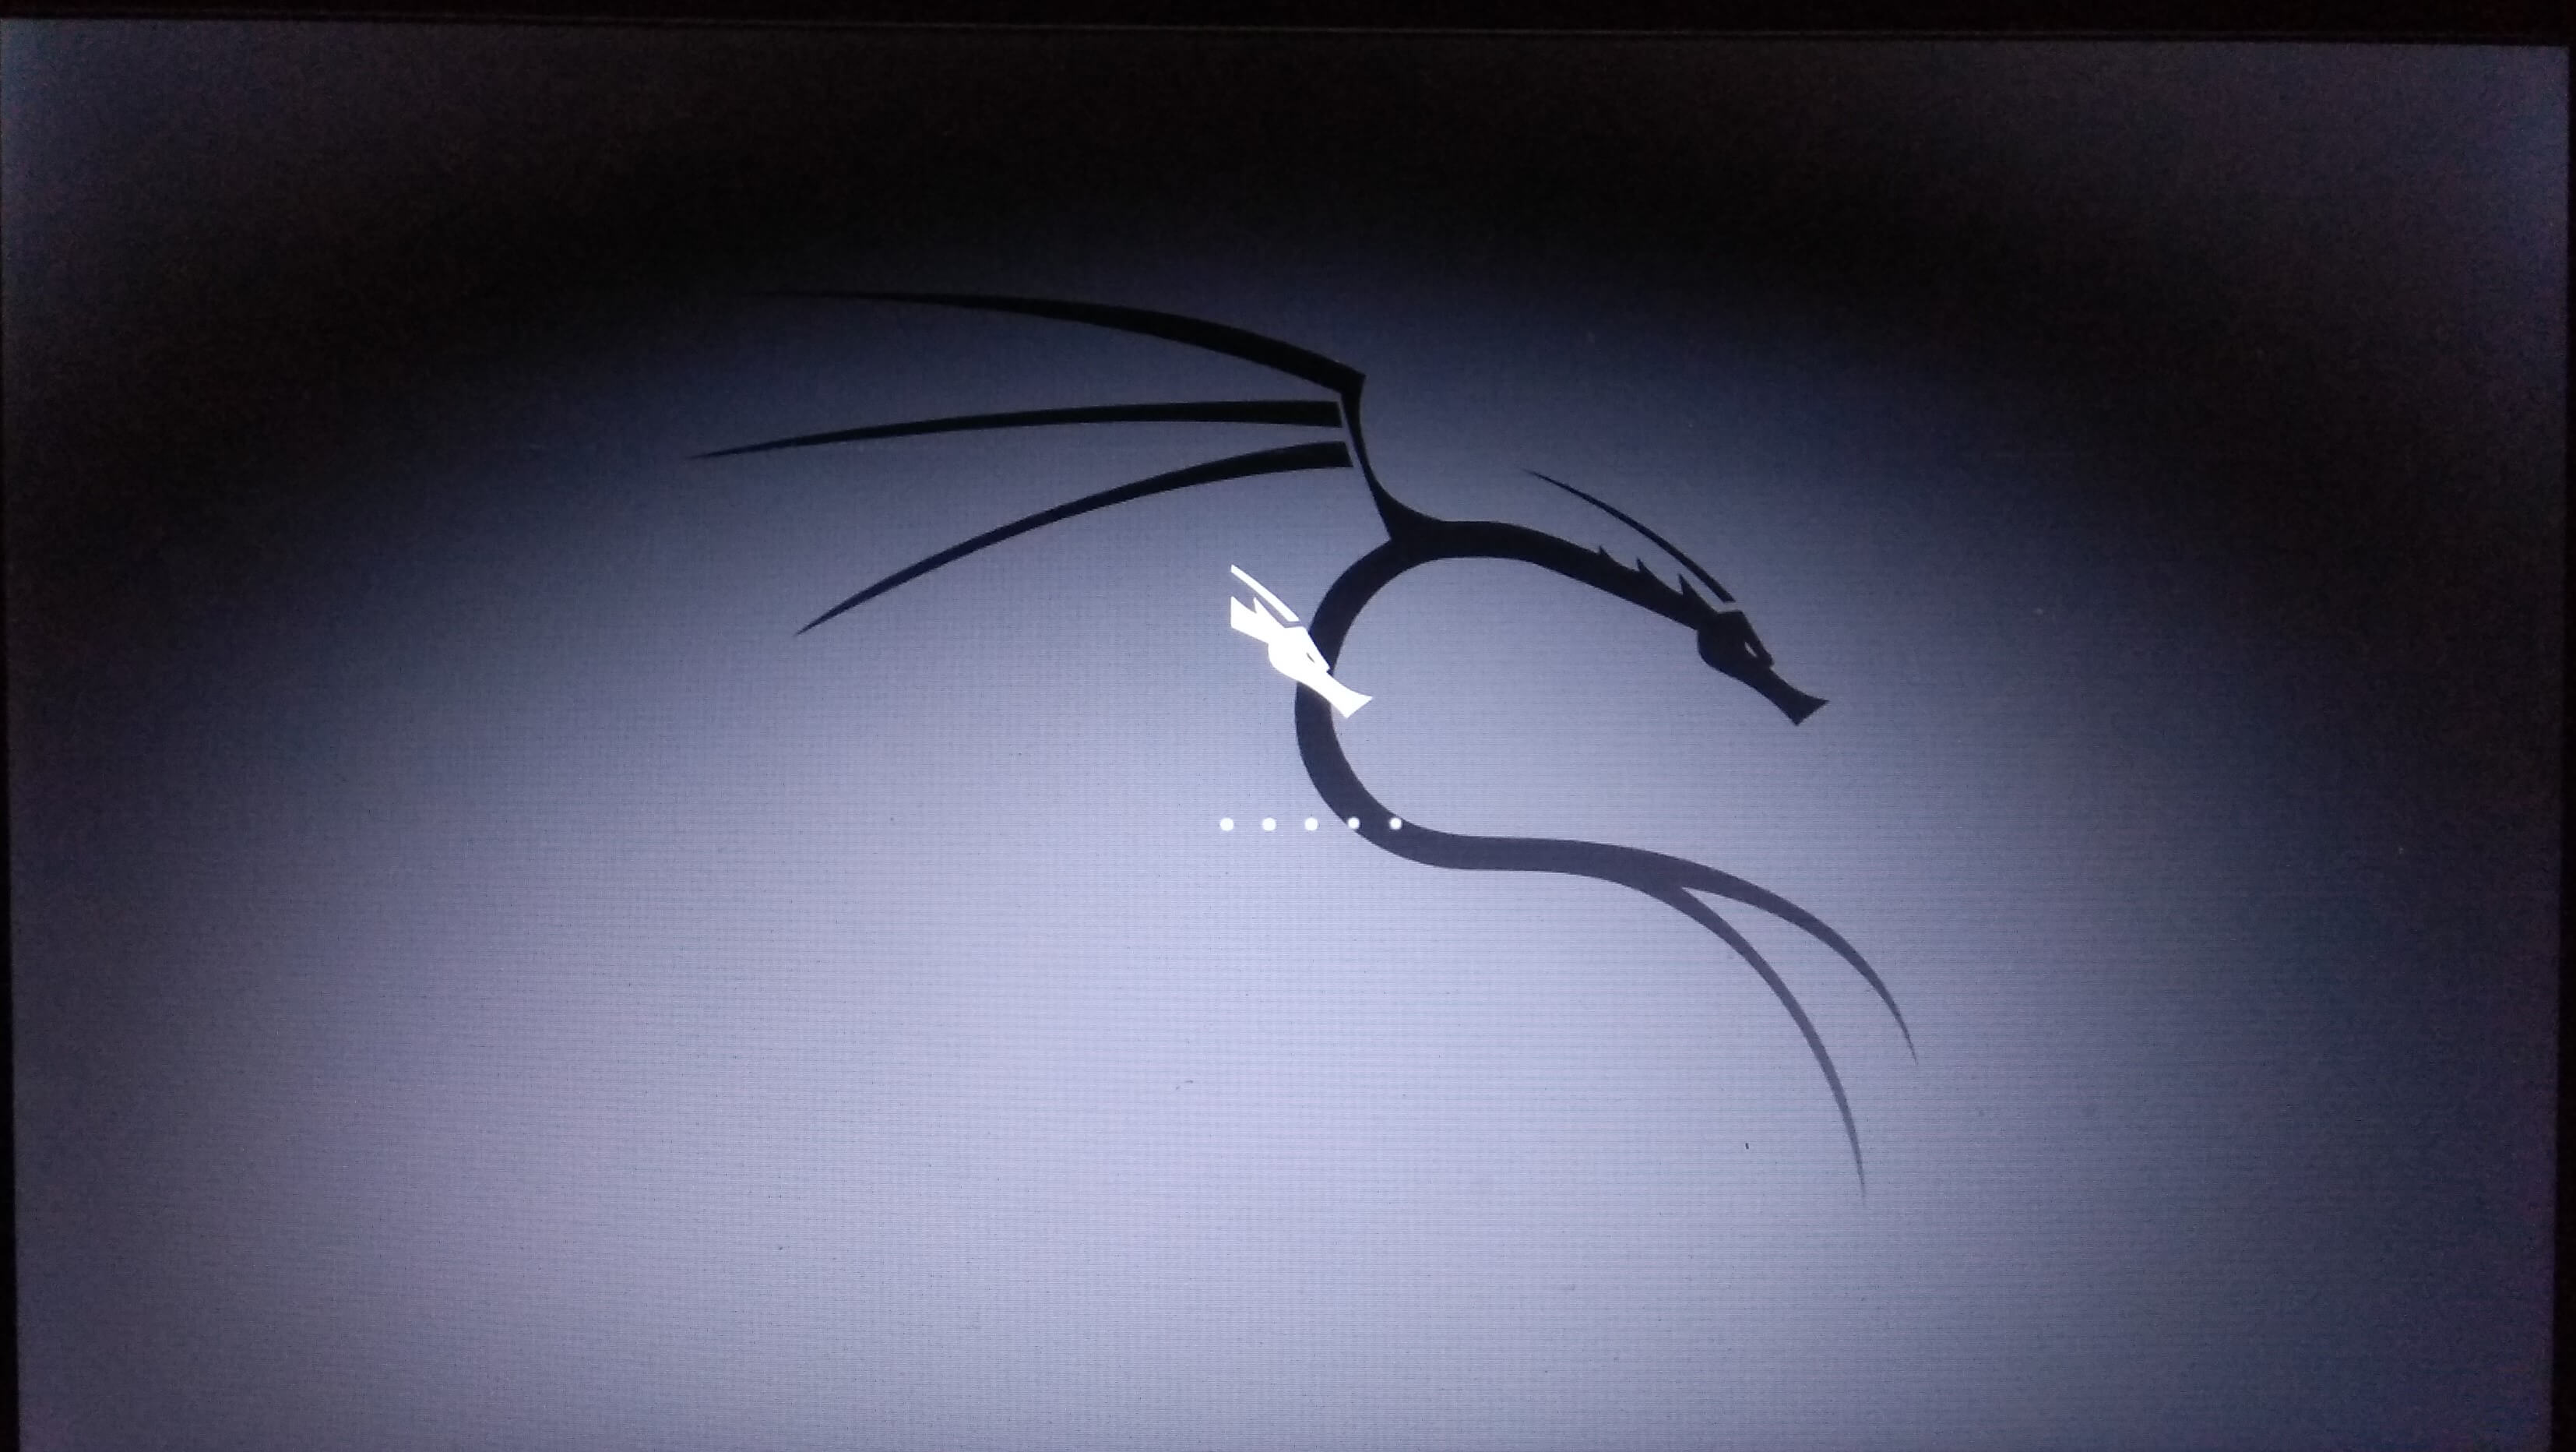
You can now use Kali Linux on the same hardware without disturbing your host operating system. 
How to install Kali Linux on Windows.If you like to try out Kali Linux but not ready to install it permanently on your PC or want to run multiple operating systems at the same time, so using an Operating System in a Virtual machine has various benefits. We can use the tools available in Kali Linux without losing access to our primary Operating System. There are many Virtualization software available for all major operating systems, i.e., VirtualBox, VMware Workstation, Xen, KVM, and Hyper-V, etc. Kali Linux - VirtualBoxStep 1: We are using VirtualBox here. First, download and install VirtualBox on your PC. After a successful installation, the main screen appears something like the Figure below. 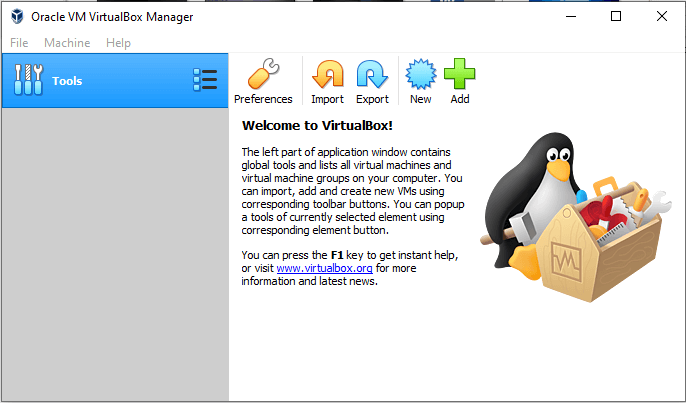
Step 2: Click on New. A wizard will appear, which guides you through other steps where you are required to input parameters of the new virtual machine. 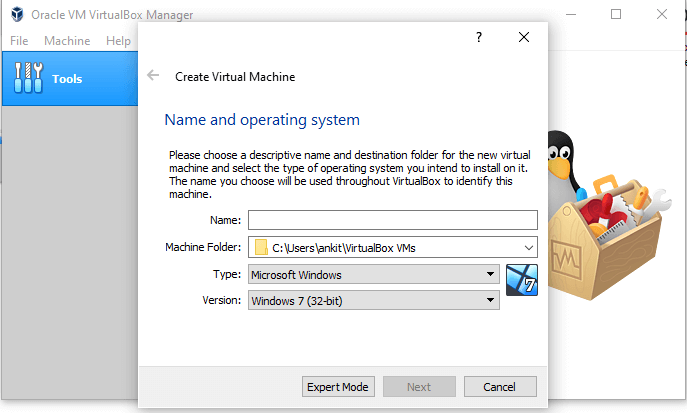
Input name for the new virtual machine, select the type of the operating system and version as Debian because, as we have discussed earlier, Kali is a Debian based OS. Click next to proceed. Step 3: Allocate the memory to the virtual machine. We recommend you to allocate 2GB (2048 MB) of RAM because the live system uses the memory for storing changes made to the file system. 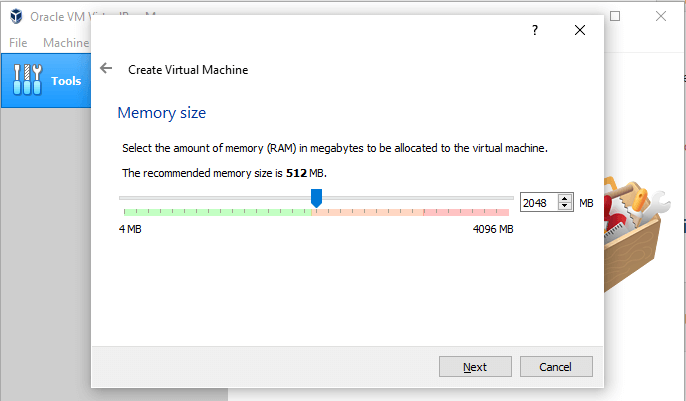
Step 4: We need to choose a physical or virtual hard disk for the new virtual machine. 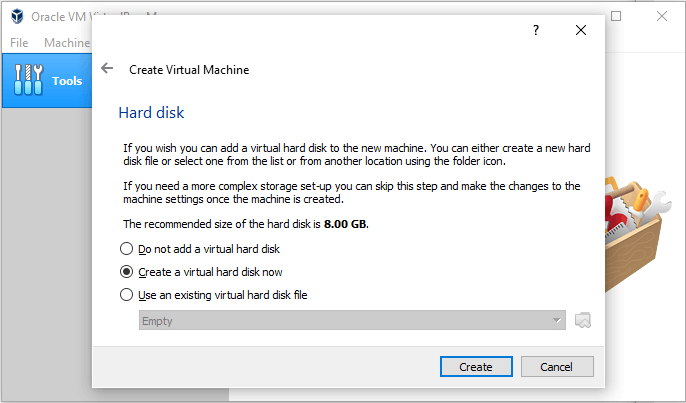
Step 5: The next window allows us to choose the hard disk file type. Keep it default i.e., VDI (Virtualbox Disk Image) is the native format of VirtualBox. 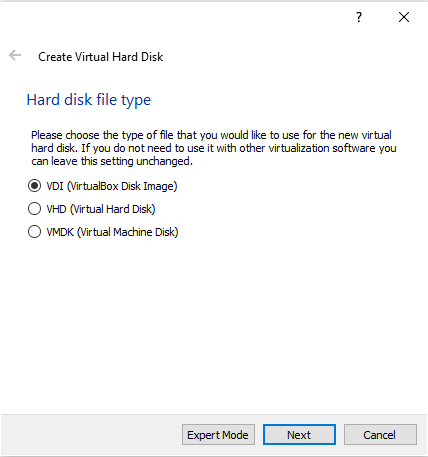
Step 6: On the next window, "Storage on Physical Hard Disk." Select the default selection (Dynamically allocated) because the fixed size allocation takes time to set up and also causes waste of free memory area. 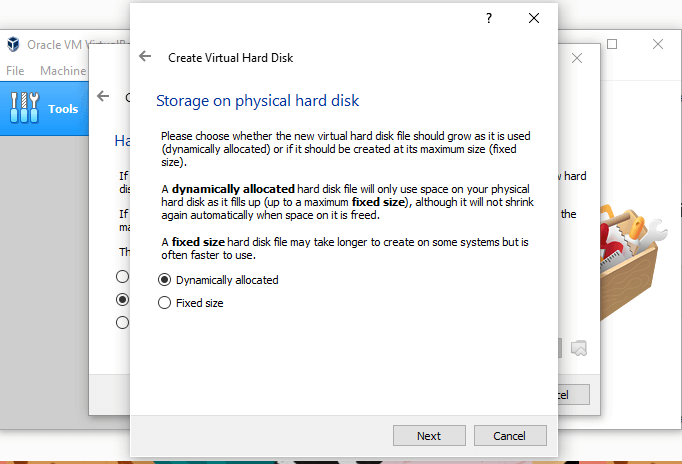
Step 7: The next window will allow you to select the hard disk size. The default selection of 8 GB is not enough for the standard installation of Kali Linux. So, we are allocating 20 GB of hard disk space. You can also use an external drive. By clicking on the create button, the virtual machine will be created. 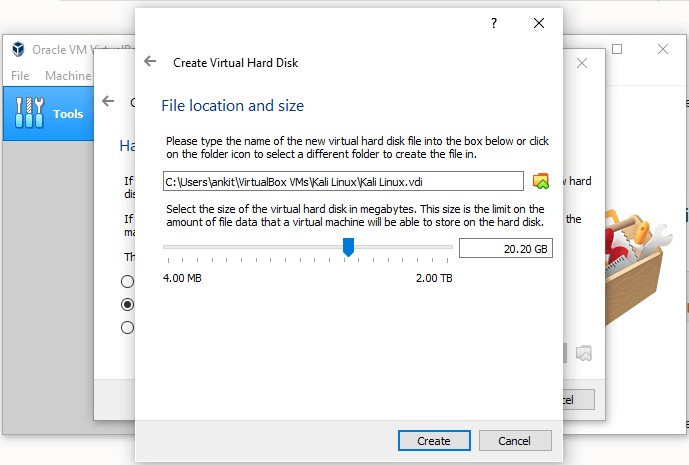
Step 8: The virtual machine has been created, but there is no operating system installed yet. Click on the Settings on the VM Manager screen. 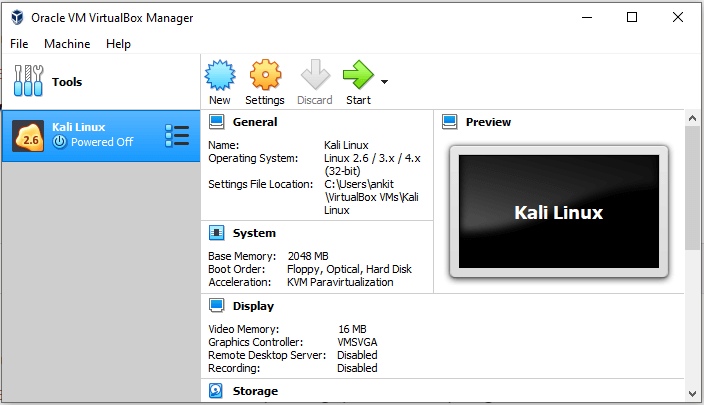
Step 9: Click the Storage option on the left. We need to associate the Kali Linux ISO image with the virtual CD/DVD-ROM reader. Select the CD-ROM drive in the Storage associate list and then click on the CD-ROM icon on the right side that displays a contextual menu where we can choose Virtual Optical Disk File. 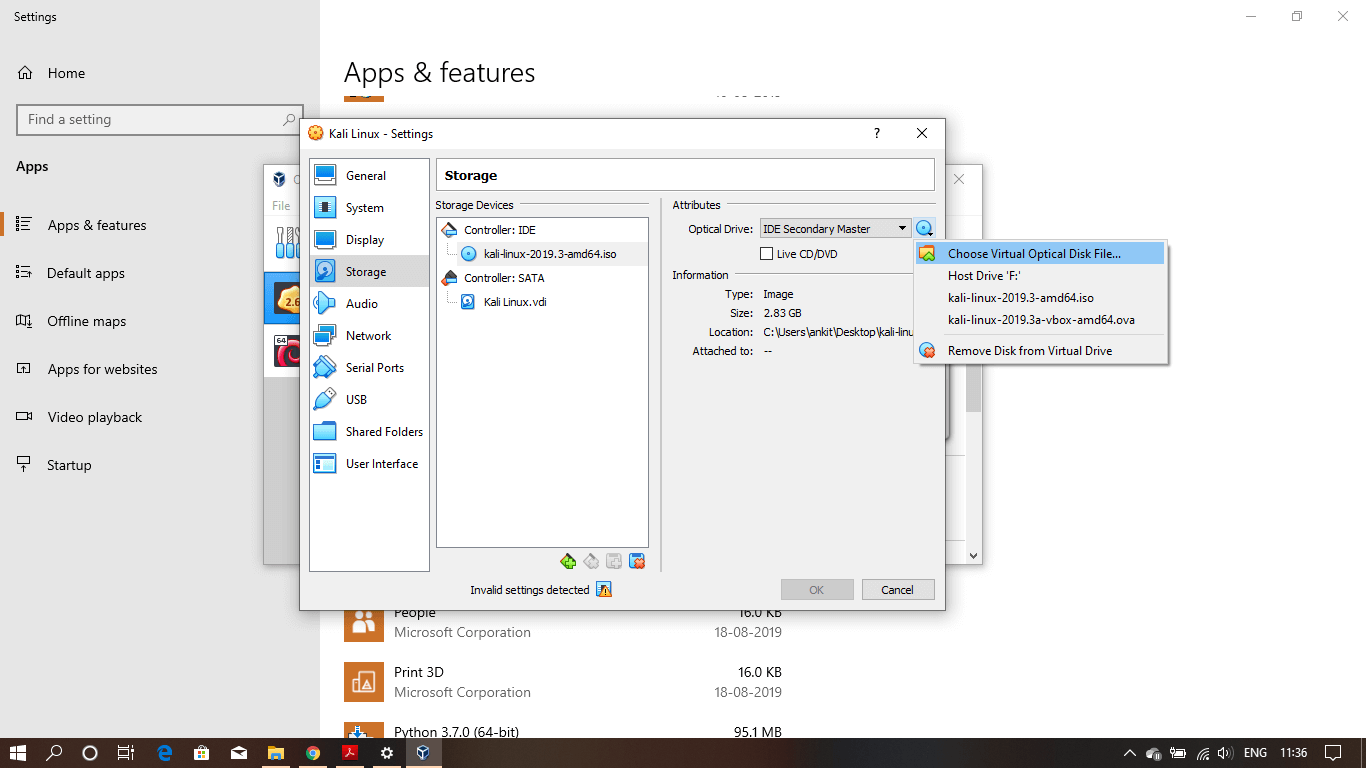
Step 10: Click on the System menu on the left, then select the Motherboard tab from the right-hand side. Define the Boot Order and make sure the system will first try to boot from any optical device before trying boot from a hard disk. You can also change the amount of memory allocated to the Virtual Machine if required. 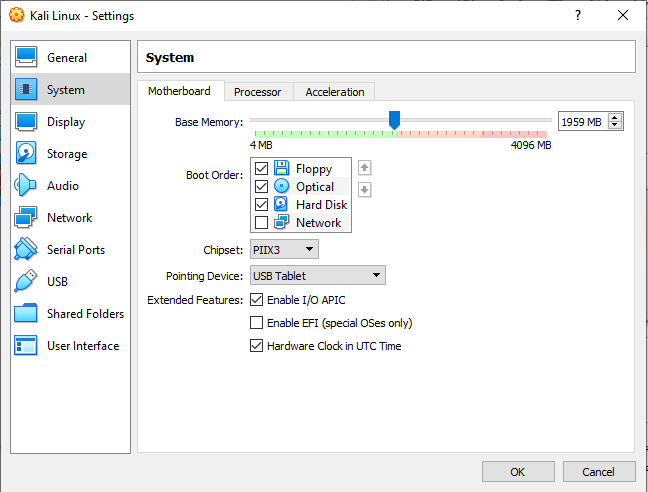
Step 11: In the same menu, but on the "Processor" tab, we can change the no. of processors assigned to the virtual machine. Enable PAE/NX if you are using a 32-bit image. 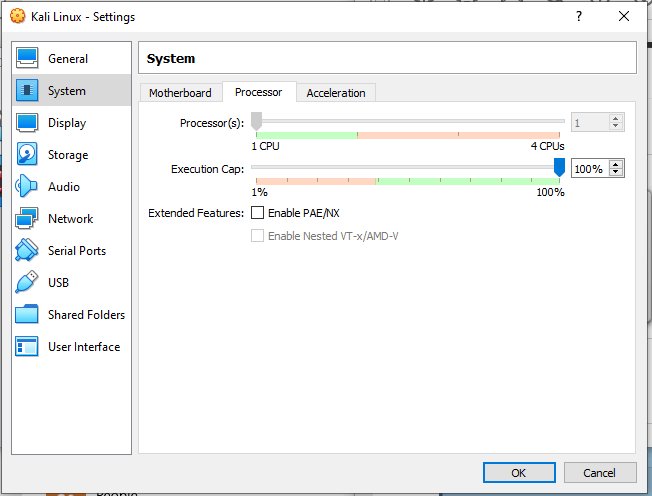
These changes are sufficient to boot the Kali Linux live system. Finally, Click Boot, and the Virtual Machine should boot properly. If not, please review all the settings again and try again. 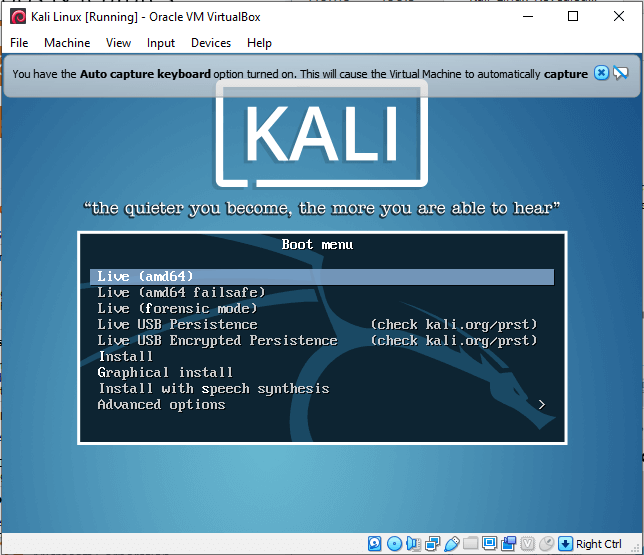
There is one more way to install Kali Linux in VirtualBoxStep 1: Download the Kali Linux custom image, which is generated for VMware and VirtualBox mainly. You can download VirtualBox from "https://www.offensive-security.com/Kali-Linux-vm-vmware-virtualbox-image-download/." 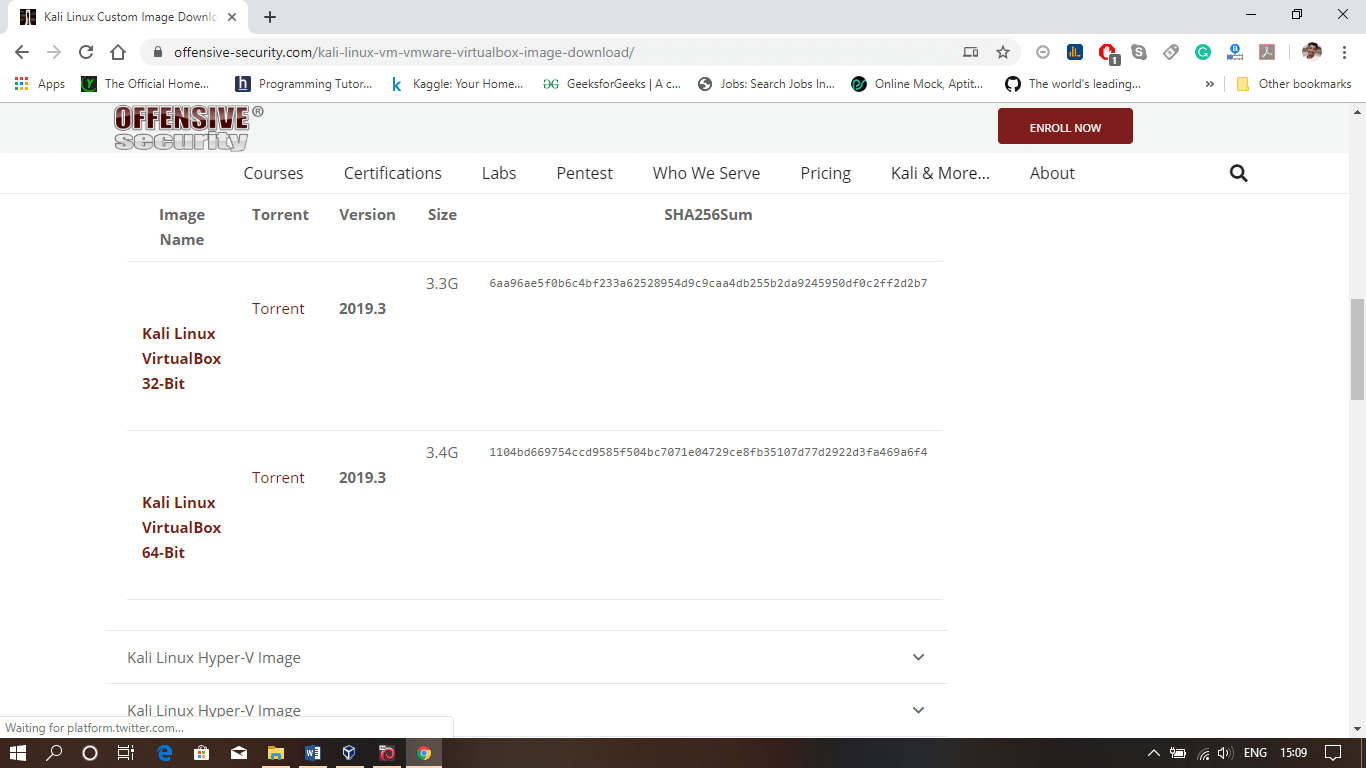
Step 2: Install VirtualBox and then double click on the Kali Linux vbox image file you downloaded, it will redirect you to the wizard shown in the figure below. 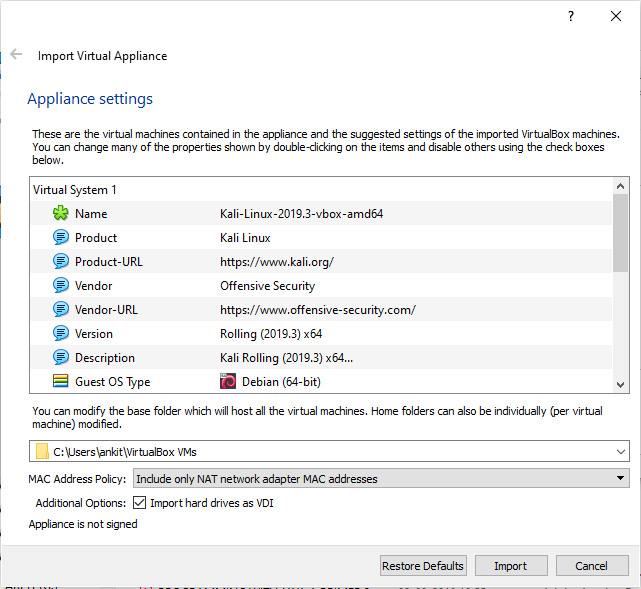
Step 3: Now, click on the Import button. It will take you to the next wizard shown in the figure below. 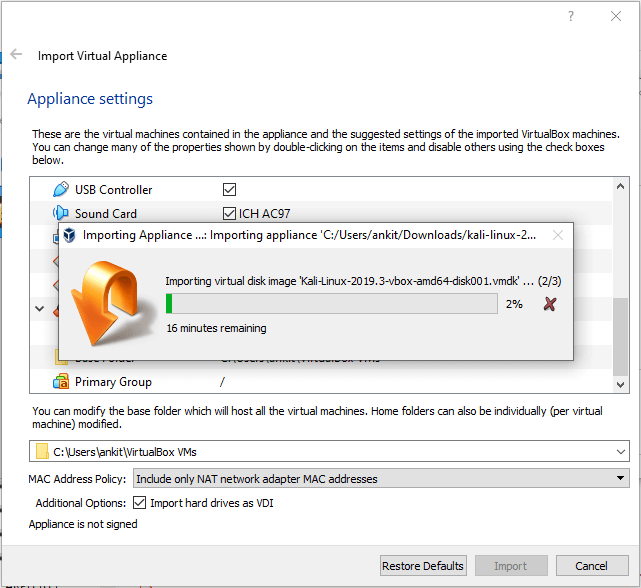
Step 4: After successful completion of the status bar, it will be redirected to the home page of the VirtualBox, as shown in the figure below. 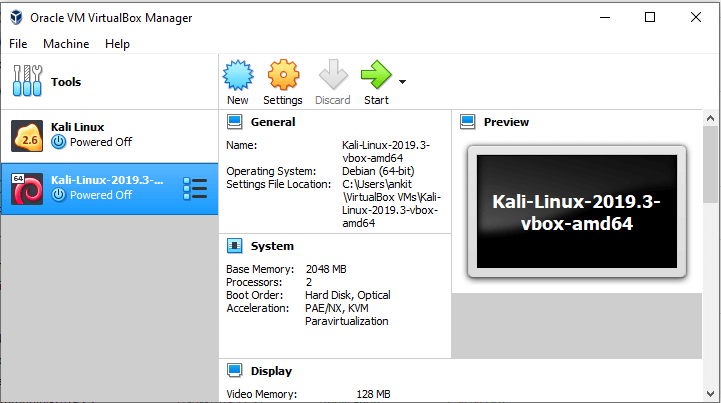
Step 5: Click on the Start button shown on the right-hand side of the window. It will boot the Linux. 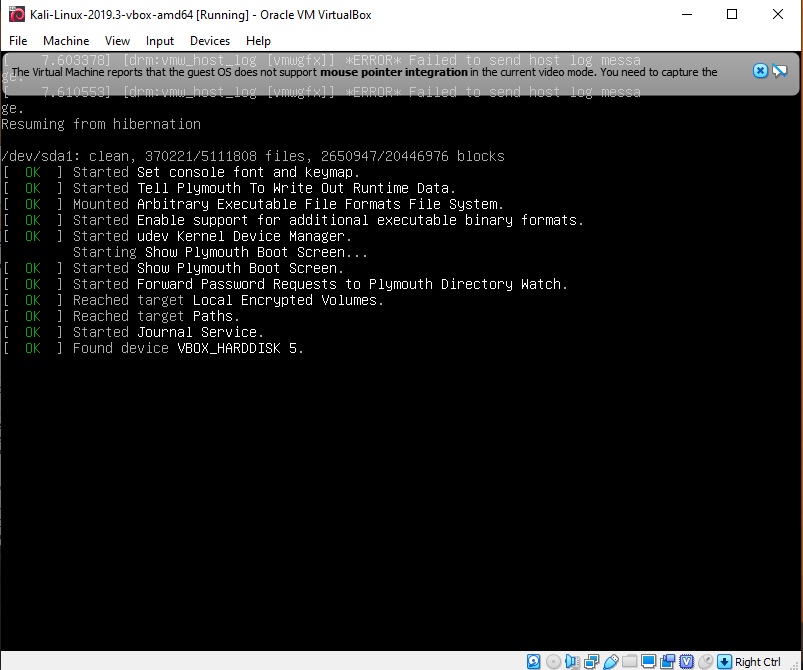
Once the boot completes, it will ask you to enter the Username and Password. The default Username for Kali Linux is "root" and the Kali Linux default password is "toor". Feed the Username and Password then press Enter. It will redirect you to the Home screen of the Kali Linux. 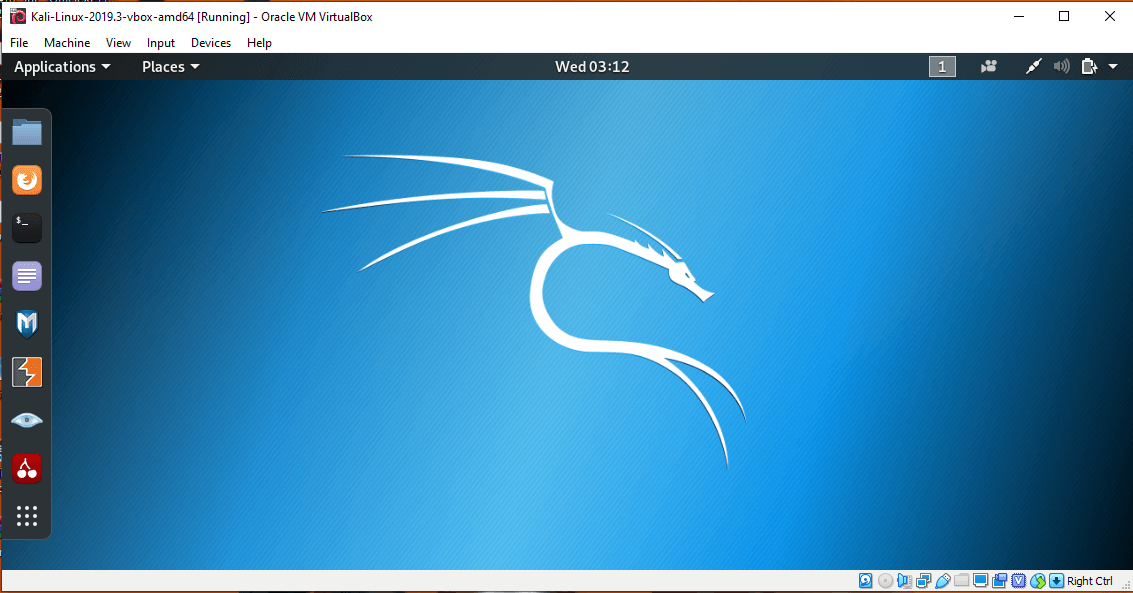
Now you are ready to use Kali Linux without removing your host operating system (Windows or Mac). How to Solve VirtualBox error -"Failed to open a session for the virtual machine" or "Unable to boot- Please Use a Kernel appropriate for your CPU". If you get any error as shown in the figure below, during the boot on Virtual Machine. Restart your PC and press ESC and go to the BIOS setup and Enable virtualization. Save and start your host OS. You will knowable to boot Linux on a Virtual machine. 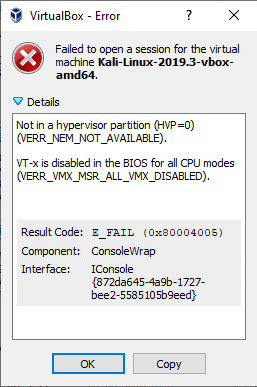 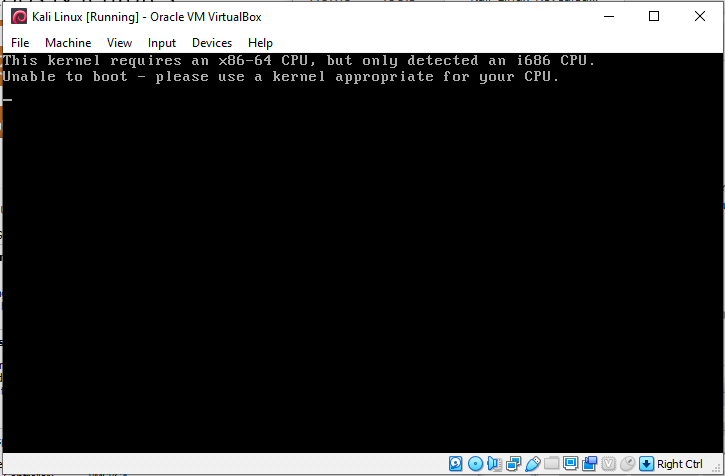
Kali Linux- Raspberry Pi3Raspberry Pi is a quad-core 1.4 GHz, with 1GB of RAM. Kali Linux can be installed on an external micro SD card. If you want to install Kali Linux on your Raspberry Pi3, follow the below instructions: 1. Buy a fast micro SD card or eMMC of size 8 GB. 2. Download the Kali Linux ARM image for your Raspberry Pi from this link: https://www.offensive-security.com/Kali-Linux-arm-images/. 3. Then use the dd utility to image the downloaded file to your micro SD card. 4. Once the dd operation gets completed, boot up the Raspberry Pi3 with the microSD plugged in. Kali Linux- AndroidYou can use Kali Linux on Android using Linux Deploy. You need these things to run Kali on Android. Installing Kali Linux NetHunter on AndroidIntroduction to Kali Linux NetHunter Kali Linux is one of the most famous security auditing and penetration testing operating system. Now, it is possible to get Kali Linux on Android phones because of the NetHunter project. NetHunter is the mobile edition of Kali Linux and was developed for Android devices. It is a strong resource for penetration testing. Also, it is the mobile edition of the famous Kali Linux security OS. We can install it on the unrooted Android Phone to execute several penetration testing tools using our phone. Kali Linux NetHunter is available in three different editions:
For every three editions, the NetHunter suite is composed of the below:
Process to install Kali Linux NetHunterA single requirement to install Kali Linux NetHunter is that the phone must have an Android 7 or newer version. We suggest an Android edition before 12 because the latter audits and kills the application process when they utilize much processing power. 1. Installing Termux on Our Phone
2. Upgrading RepositoriesWe should upgrade the repositories once we have downloaded the Termux app. Debian Linux and almost all of its derived editions use Advanced Package Tool for installing the software. We retrieve the information of the package source from the setup resources by executing the update command. The command, i.e., upgrade, will utilize the information for upgrading every package to its latest editions. a. First, we need to execute the update command: b. Run the below command: When prompted, "Do you want to continue?" click the Y button and press Enter. Configure the storage permissions for Termux with the help of the below command: It should encounter a pop-up that prompts whether we want to permit Termux for accessing files on our device. We need to press "Allow". 3. Installing NetHuntera. First, we need to install wget by executing the following command: When prompted, "Do you want to continue?" click the Y button. b. Download the installation file of NetHunter. Ensure that we correctly input the address. wget -0 install-nethunter-termux https://offs.ec/2MceZWr c. Manage the file permissions of our downloaded file and make it executable: d. Run NetHunter The installation process may take some time, relying on our internet speed. e. Click the N button when prompted whether we wish to remove the downloaded rootfs file, as we may later need it. 4. Launch Kali NetHuntera. To launch the command line interface of the Kali Linux NetHunter, type the following command: b. Also, we can use the command, i.e., nh, as the NetHunter shortcut. c. In the next step, we need to set up the password for NetHunter KeX. Remember that we need to exit from the NetHunter command line interface to execute this command.
d. Remember the RFB port number because we will later use it. e. At this stage, NetHunter is successfully downloaded and active, but we need to set up displays to utilize the software. Kali Linux 2022.1 ISO DownloadKali Linux 2022.1 was published in February 2022. It was followed by the 2021.4a version and was available for laptop and desktop computers. It is available to install 64-bit and 32-bit versions, and an option for different desktop environments like MATE, LXDE, and KDE is available in one ISO image file. The default desktop environment is XFCE. This Kali Linux edition contains several new updates and features like new tools, speech synthesis returned in Kali setup, VMware i3 DE improvements, new Kali Everything flavor image, Chromium and Firefox browser new homepage, visual integrations to shall prompt, new installer theme, new wallpapers, and more compared to the old releases. Features of Kali Linux 2022.1
This update contains new desktop wallpapers, boot, and login displays, in inclusion to the refreshed installer theme, which we may have noticed if we have updated recently. Moreover, the layout, theme, and functions of the boot menu have been improved.
Kali Linux 2022.1 includes some tweaks which will make our life easier since the last prompt update in 2020.4. Examples of this issue may be if writing any professional pentesting report or sharing the command line and association with debugging code; the right-side prompt may have gotten in the way. Hence, if has been deleted from ZSH (default shell).
Kali Linux 2022.1 provides a refreshed appearance for the default landing page carried in Kali. Using the new documentation sites (Kali-Tools and Kali-Docs), the search function will support us in finding most of the things we could require with Kali Linux.
The host-guest aspects (e.g., copy/paste, drag 'n' drop) were by default not enabled for users that utilize Kali within a guest virtual machine using the i3 desktop environment. It had to be manually done. Now, it is fixed and should operate out of the box. It was activated with the i3-wm 4.20.1-1 package. System RequirementsMinimum
Installation processLaunching installer in PC using USBWe can follow the steps provided below:
Launching installer in VMware
Launching installer in VirtualBox
Final stepOnce we jump on to the boot menu of Kali Linux, follow the below steps:
Next TopicConfiguring Kali Linux
|
 For Videos Join Our Youtube Channel: Join Now
Feedback
- Send your Feedback to [email protected]
Help Others, Please Share


