| |

Laravel notification alert using Bootstrap notify pluginIn this section, we are going to learn about notification alerts. We will use Laravel and Bootstrap notify plugin to do this. Notify is a type of jQuery or Bootstrap notification plugin, which is used to create customized, modern notification popups on our Bootstrap web pages. Bootstrap notify is an accessible replacement for popup boxes of JavaScript. Using the Bootstrap notify plugin, we can make standard alerts of Bootstrap into the "growl" like notifications. When we perform some action, we always need to get the notification alert like if we remove items from any website or any form or anywhere, a notification will open, which will show a message such as "Item removed Successfully". The notification alert is important for the end-users so that they can easily understand what is happening, and it also provides them more readable power. Like this, some messages will be shown on creation, listing, updation, and other actions on an item. When we work on the user panel or admin panel, these notification alerts will be mandatory. In order to add notification alerts, we have various versions of Laravel like Laravel 5, 6, 7, and 8. Now we can show notification alerts by adding the Bootstrap notify js plugin. This plugin is used to provide notification of warning message, info message, error message, success message, etc. Using the Bootstrap framework, we are able to add a notification with an impressive layout. In order to show notification, Laravel also has a lot of packages, but in our below application, we will use the Bootstrap notify js plugin because it has the ability to integrate with Bootstrap. After this, we are able to implement Bootstrap notify to perform the flash messages. For this, we have to follow some steps, which are described as follows: Step 1: In this step, we are going to Create a new Route. This new route will be used to test Bootstrap notify notifications like this: routes/web.php Step 2: In this step, we are going to Add Controller method. For this, we will create HomeController as a new controller. After this, we will add the following code into it like this: app/Http/Controllers/HomeController.php Step 3: In this step, we are going to Create Notification file for Layout. For this, we will create a new file named notification-check.blade.php for layout. We will use our resource directory to create this file. resources/views/notification-check.blade.php Step 4: In this step, we are going to Display Bootstrap notify notification. For this, we will create a file named notification.blade.php, which will be useful to show Bootstrap notify notification. resources/views/notification.blade.php Now our above command is ready to run. In order to run this code quickly, we will use the following command: Now we can use our browser to open the bellow URL: When we open the above URL, the following output will be generated like this: 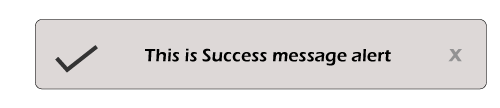
In above section, we provide a notification alert for success. We can also generate examples for warning, info, error notification by using the session variable, which is described as follows: Warning: The command to generate a notification alert for the warning is described as follows: Info: The command to generate a notification alert for the info is described as follows: Error: The command to produce a notification alert for the error is described as follows: |
 For Videos Join Our Youtube Channel: Join Now
Feedback
- Send your Feedback to [email protected]
Help Others, Please Share


