| |

Linux ISOFirst, we will try to know the ISO image. An ISO image is a disk image (archive file) of an optical disc with a conventional International Organization for Standardization (ISO) format. Typically, the ISO image file includes the .ISO file extension. The "ISO" term comes through an ISO 9660 file system which is used with DVD media and CD-ROM. However, the ISO image could also include the UDF file system as the UDF is a backward compatible file to ISO 9660. We can mount the ISO images or files by the loop devices in Linux. It's possible to describe the transfer functions (for decryption or encryption of other objectives) with loop devices. This article specifies how we can mount the ISO files in Linux. In Linux, Mount ISO File1. First of all, we have login as a root user. The command is as follows: 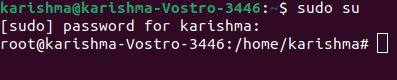
2. Go to the folder where the ISO file is located. 
3. On Linux, we need to establish a mount point directory. 
4. We need to check the /mnt directory. To do so, the command is as follows: 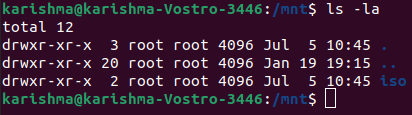
5. We need to mount our ISO file in /mnt directory. 
6. Now, we will mount the ISO file using the following command: 7. Check the /mnt directory: 
We have successfully mounted the ISO file in /mnt directory. What is Loop Device?Through the man page: A loop device is the block device. It can map its data blocks not for any physical device like an optical disk drive or hard disk, but the regular file blocks within a file system or for other block devices. It could be helpful for example to give any block device for an image of a file system saved in a file. Hence, it could be mounted using the mount command. A loop device can be defined as a pseudo-device. It establishes a file that is accessible as any block device. Often, loop devices are used for floppy disc images and CD ISO images. Mounting any file including a filesystem accessible by such the loop mount creates the files in that filesystem. They occur in a mount point directory with the below commands of Linux. We will apply the commands of the mount. The process to mount the ISO images/file in LinuxFirst, we should log in as a superuser if not a superuser then we can switch to the superuser with the help of the following command: 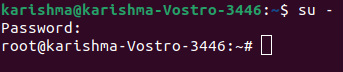
We can use the following command: 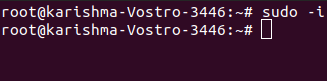
Now, make a directory, i.e., mount point with the help of the following command: 
Also, we can use the following command: 
As i have already mounted the iso file We can verify it using the mount command or df command: 
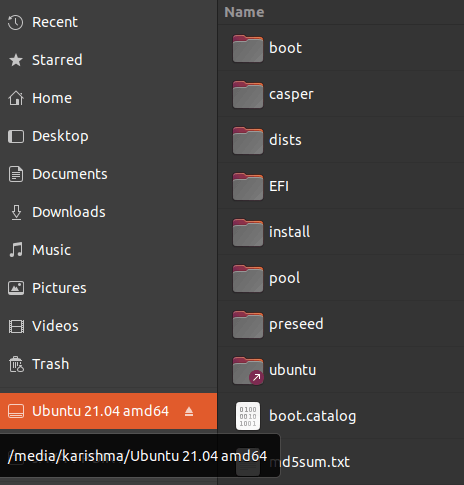
Switch directory for listing files saved in the ISO image: 
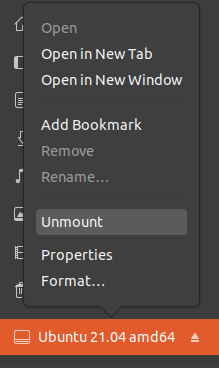
Unmount ISO imageOn Linux, we can use a command to unmount an ISO image/file which is mentioned below: Or, To verify it, we can run the following command: or, or, 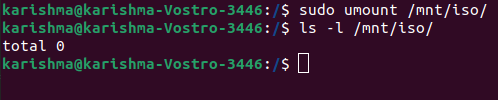
Mount the ISO file with the GUI app in LinuxWe can try a utility for image management. It is known as furiusisomount: It is a general application to mount NG, MDF, BIN, IMG, and, ISO image files without burning them into the disk. Also, it gives some features which are mentioned as follows: Automatically, it mounts NRG, MDF, BIN, IMG, and ISO image files. It establishes the mount point in our home directory. It unmounts various image files. Mount ISO file with KDE GUI or Linux GnomeOne can refer to the file manager app of the files for browsing and organizing the files on our system. Also, we can refer to it to handle files over storage devices (such as iso images, external hard disks), on network shares, and file servers. Open the file in which our .iso file is saved on our computer:
Burn the ISO ImageBurning the ISO to any physical disc is a very efficient task when we wish to make a disc that we will use for installing the OS or software onto another system. Particularly, it is helpful when we are installing an OS (or making a utility disc) and require to use that disc for booting a system. Also, it can be handy to create a disc physical backup copy, or when we just require to provide a copy to anyone else. Windows 10, 8, and 7 have an aspect to burn the ISO file to disc. All we need to do is embed a writable optical disc. Then, right-click on the ISO image or file and choose the option, i.e., "Burn Disk Image". Important: If we do not have any optical disc writer on our PC, we won't notice the command. If we also have an app for compression installed (such as 7-Zip), and it is related to the file extension of the ISO file, we also won't notice the command. Extract the ISO ImageIf we don't wish to burn the ISO image to disc or mount it, but still require to access the files, we can extract all the contents to our PC. For this, we will require a third-party application such as 7-Zip or WinRAR. We suggest the 7-Zip app around here as it is open-source, free, and plenty powerful. 7-Zip associates the file extension, i.e., .iso with the application when we install it. Hence, all we need to do is double-click on the ISO image for opening it up and see its contents. It can take up to minutes depending on the ISO image size, so be patient. We can copy anything we want from an ISO image to a normal folder only by using the dragging and dropping method. Also, we can extract the ISO full content to a regular folder if we prefer. Just right-click on the ISO and point to the menu of 7-Zip. Then, select a command for extraction. Extract Option Explanation
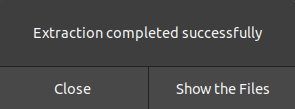
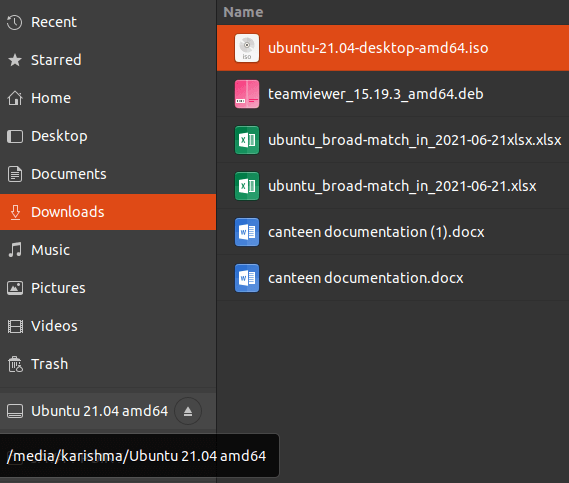
We can also extract the iso file manually. To do so, just "right-click" on the iso file and select the "Extract here" option. It will take minutes to extract the file. 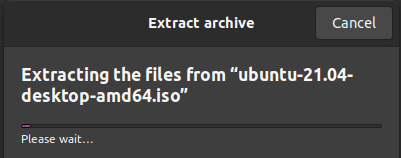
Note: Other apps for compression such as WinRAR act pretty much in a similar way.There is another necessary thing to note here.
Next TopicPutty Command in Linux
|

 For Videos Join Our Youtube Channel: Join Now
Feedback
- Send your Feedback to [email protected]
Help Others, Please Share


