| |

Magento 2 Order ProcessingIn this section, we are going to discuss how an order is created by the customer and processed by admin. The customer needs to create an account on your website to place or process an order. To process an order on the frontend, follow the below steps: On the Magento 2 web store, Go to the website http://localhost/magento2/ where the products are added. Using that Magento 2 store website, the customers can place an order for any product. 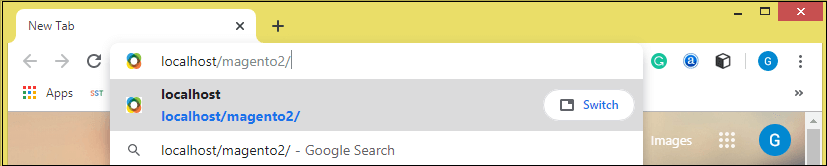
Place an order without having an accountStep 1: Add the product to the cart, which you want to add by clicking on Add to Cart button, which is given below to the product. 
Note: You can directly add a product into the cart without having an account as well as place it. But while tracking your order, you must have to create an account using the same email-id, which you have used to place the order.Step 2: Here, you can see that the product is added to the cart. Click on the shopping cart present at the top right corner and proceed to Checkout. 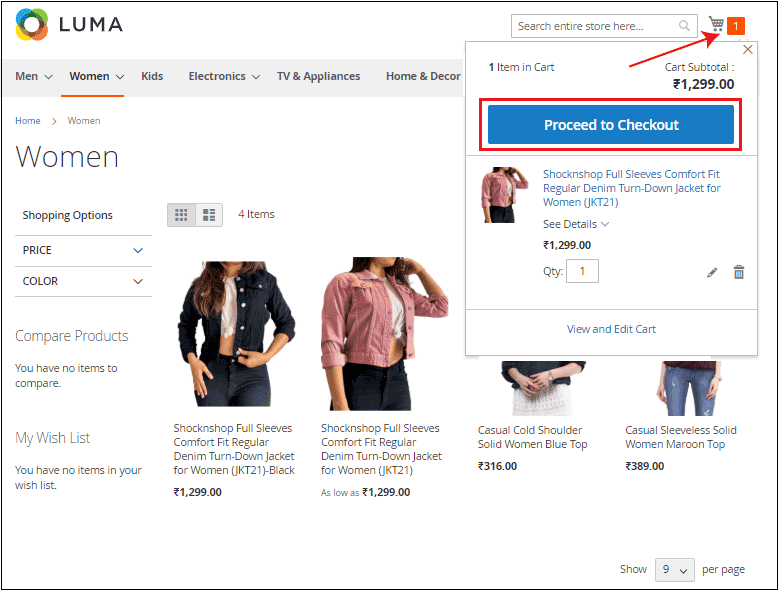
You can increase or decrease the quantity of the product by clicking on View and edit cart link. 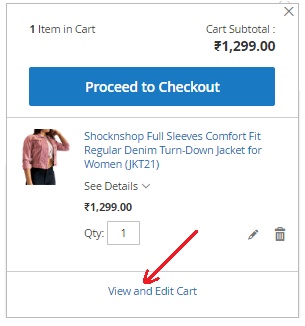
Step 3: Now, you need to provide the details in the shipping address and choose the Shipping Method. Click on the Next button to proceed. 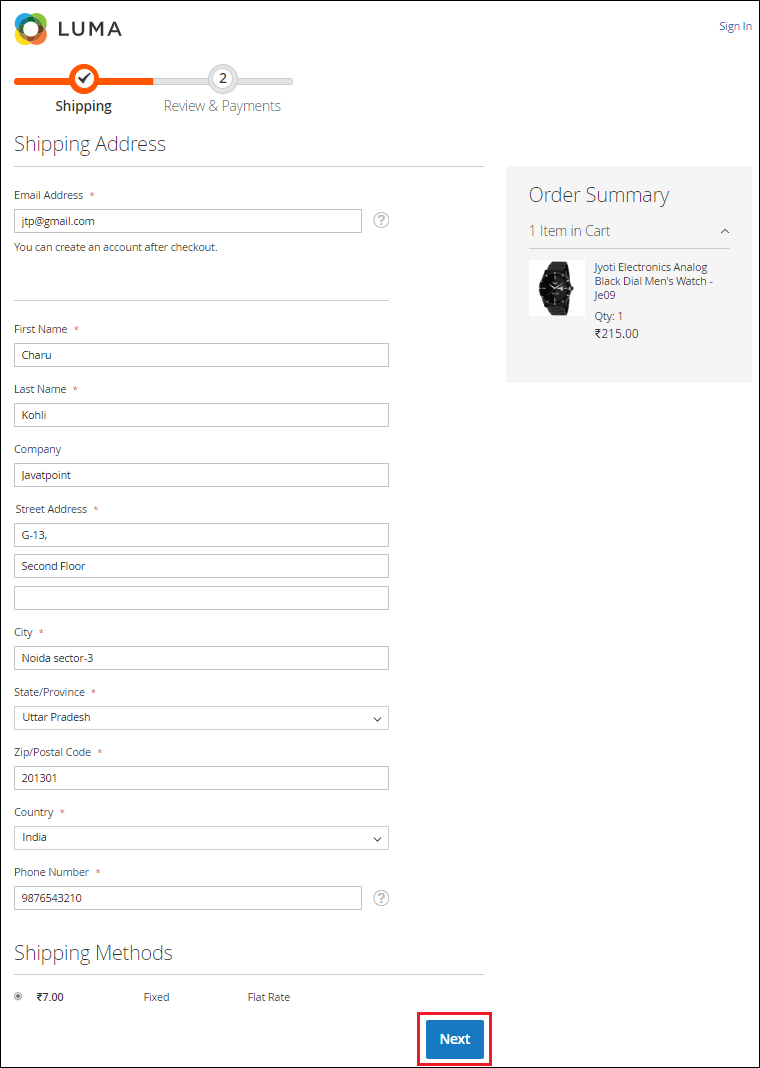
Step 4: Choose your preferred payment method and click on the Place Order button. We choose the Cash on Delivery (COD) method here. 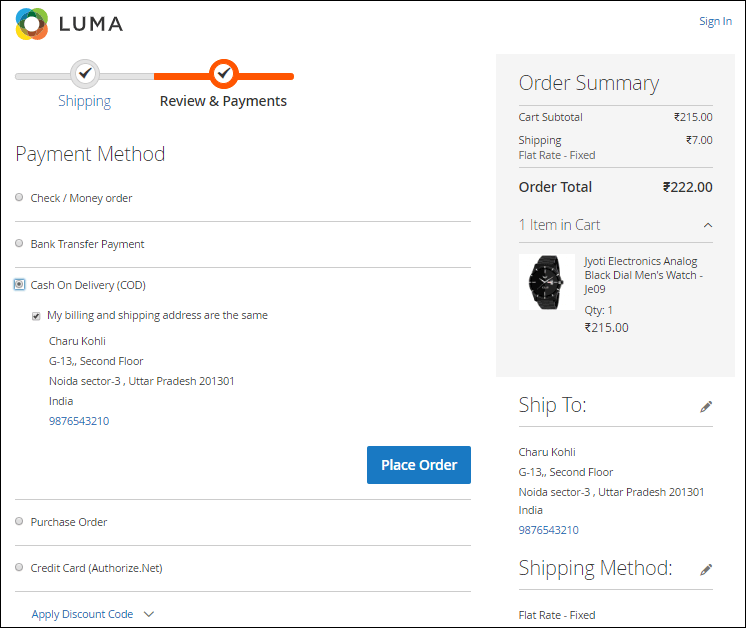
Step 5: Order is done successfully. Continue shopping or sign up to track your order status. 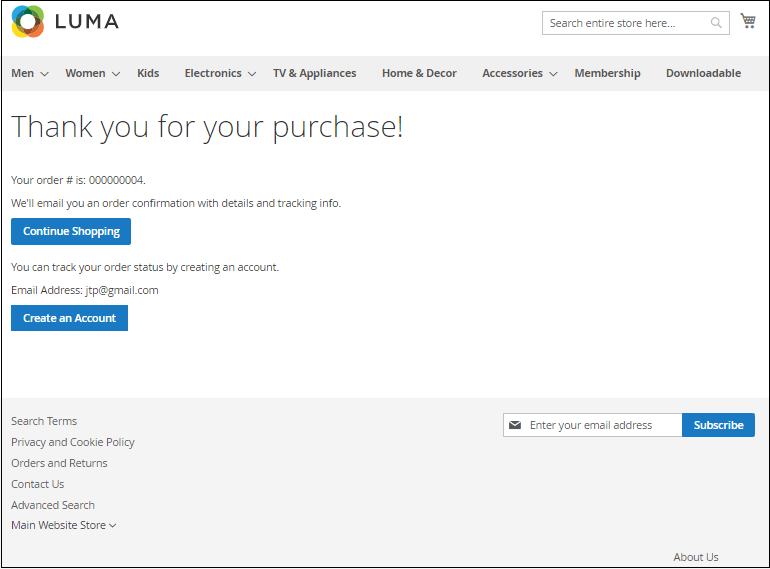
Place order after creating an accountStep 1: If you are a new customer, then you need to sign up. Click on the Create new account present on the top-right corner and create a new account. 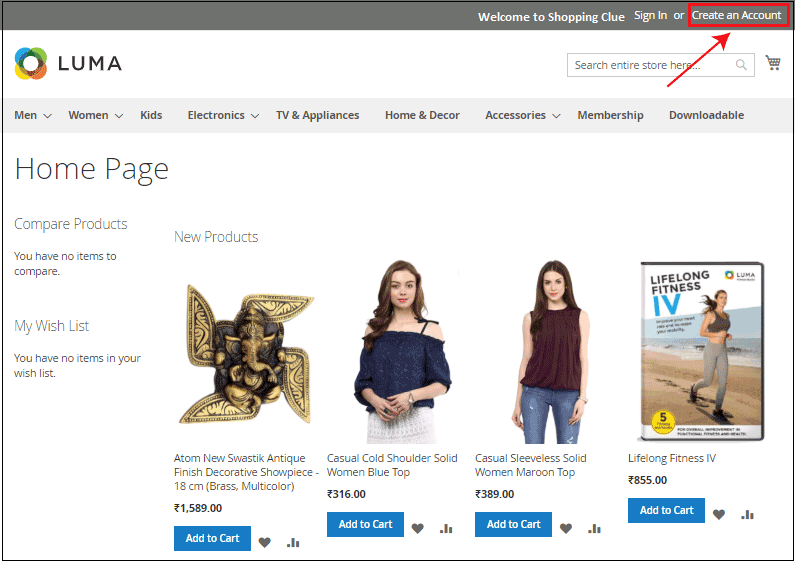
Step 2: Provide the required details in the given fields and click on the Create an Account button to submit details. 
Step 3: You have successfully registered on the website. 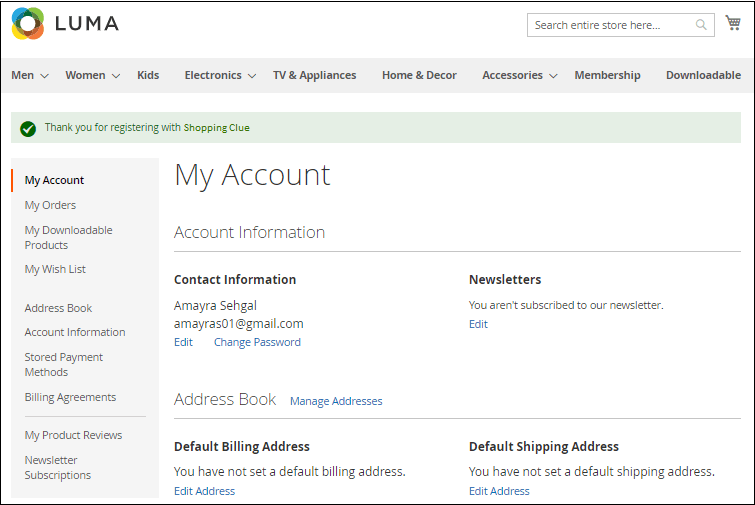
Step 4: Now, after creating the account, come back to the home page and add the products into the cart, which you want to order. 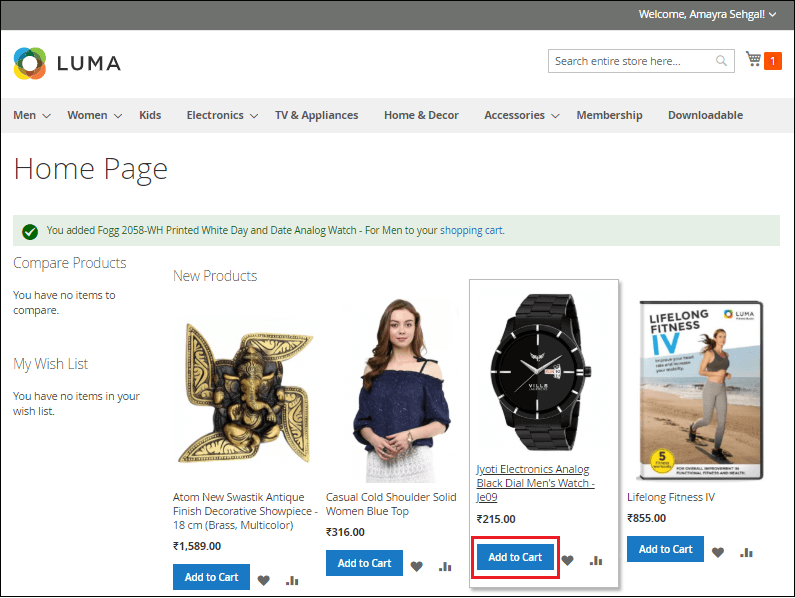
Step 5: Here, you can see that the product is added to the cart. Click on the shopping cart present at the top right corner and proceed to Checkout. 
Note: You can even edit the quantity of the product by clicking on the View and Edit Cart button.Step 6: Now, provide the shipping address to place your order, where you want to ship it, and also choose the Shipping Method. Click on the Next button to proceed. 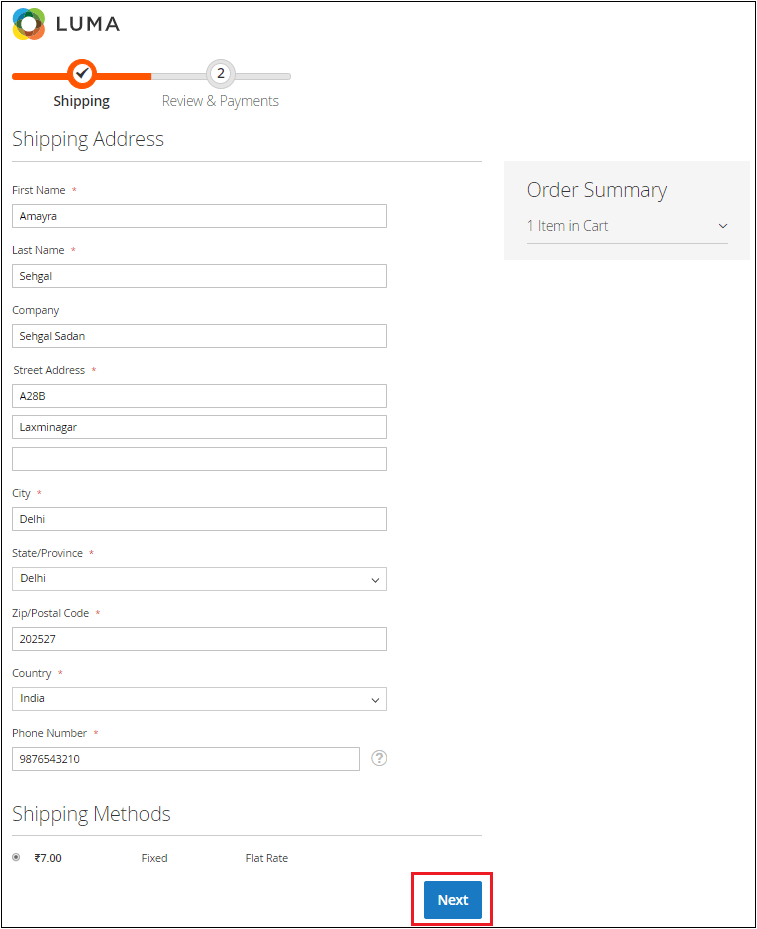
Step 7: Choose your preferred payment method and click on the Place Order button. 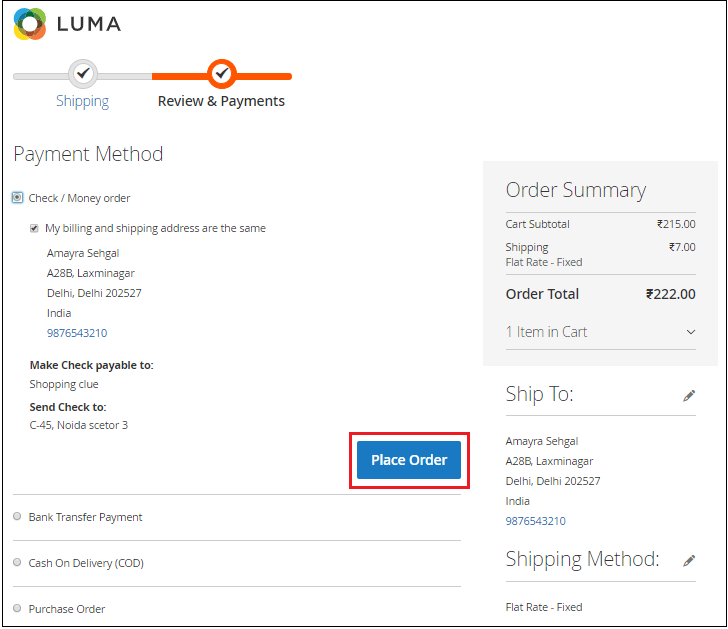
Order is placed successfully. Now continue shopping or tracking your order status. 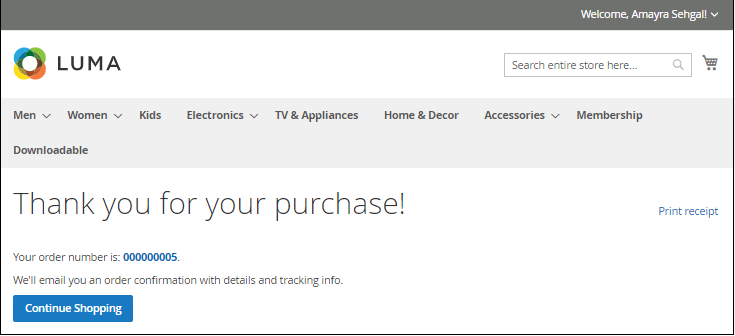
To check this order, Go to Sales >> Orders in the backend of Magento 2. Earlier, when we set up the basic configuration for Magento 2, we saw that we enabled asynchronous indexing for our orders. So, we are unable to see the orders here until unless our indexing is done. 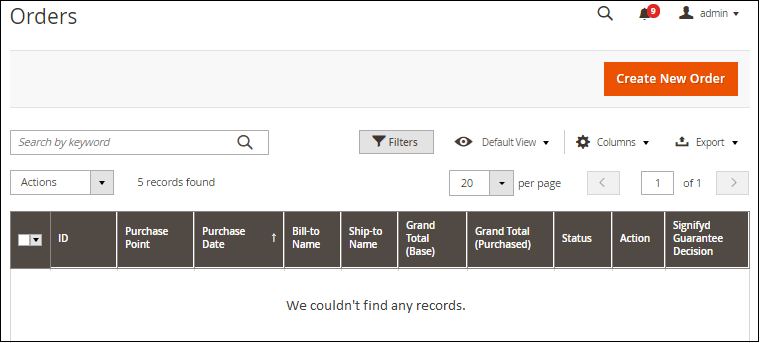
If the record is not found, then Go to Stores >> Configuration. On the left navigation bar, click on the Developer under the Advanced tab. 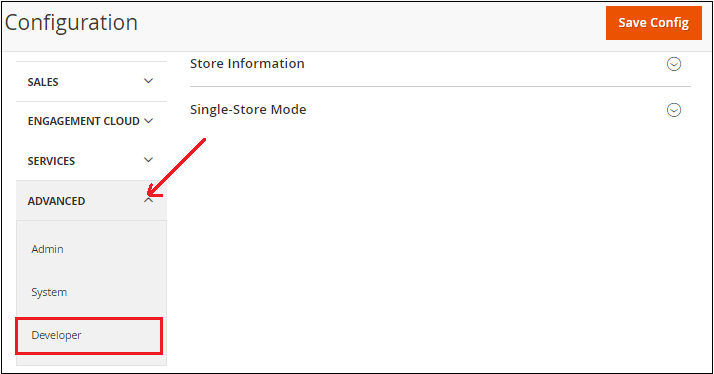
Now, explore the Grid Settings section. Clear the Use System Value and set Disable to the Asynchronous indexing field. Click on the Save Config button. 
Go to Cache Management and clear the Cache as well, and refresh the page again. 
Again go to Sales >> Orders on the Magento 2 navigation bar. You can see that the list of orders is now visible on the page. By default, order status is Pending. 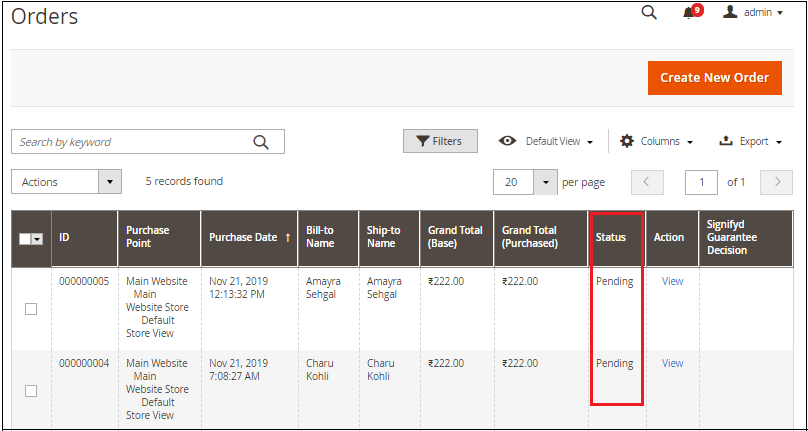
Click on the View link corresponding to the order, for which you want to see the order's information and process it. Here, we will view and process the order number #000000004, which is currently in Pending status. 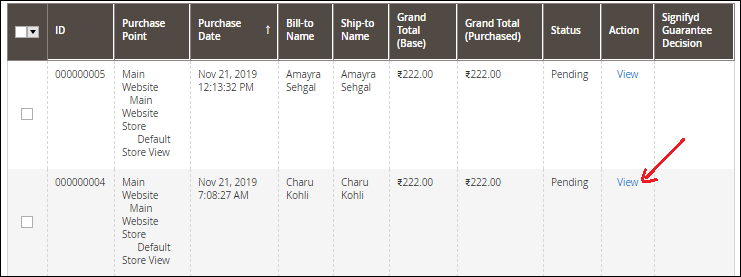
Here, you will see the detailed information of the order and customer account, billing address, payment & shipping method, item ordered, and order total, etc. 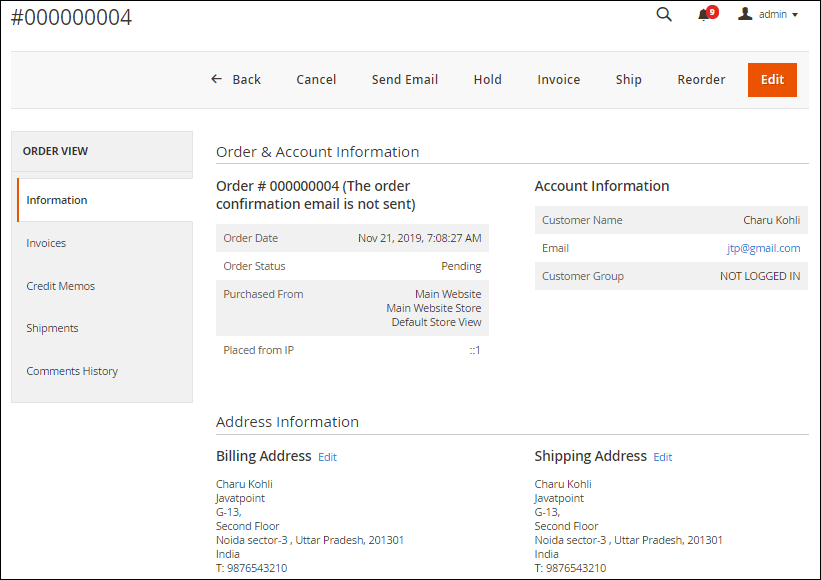
By default, Magento 2's order processing consists of two steps:
Firstly, we will go to the invoice and then shipping. So, click on the Invoice. We are going to invoice for all the items. So, we can increase and reduce the items if needed. 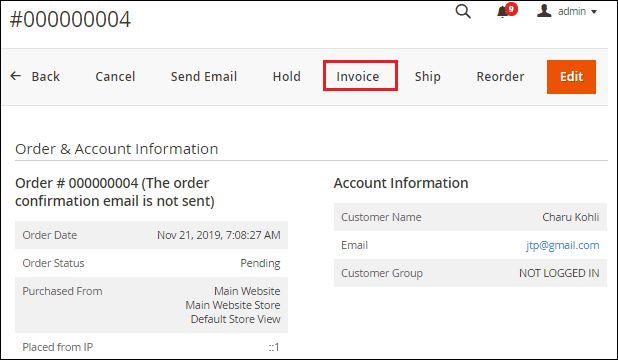
Scroll down and give invoice comments as well as send an email copy of the invoice to the customer, if you want. Click on the Submit Invoice button to create the invoice. 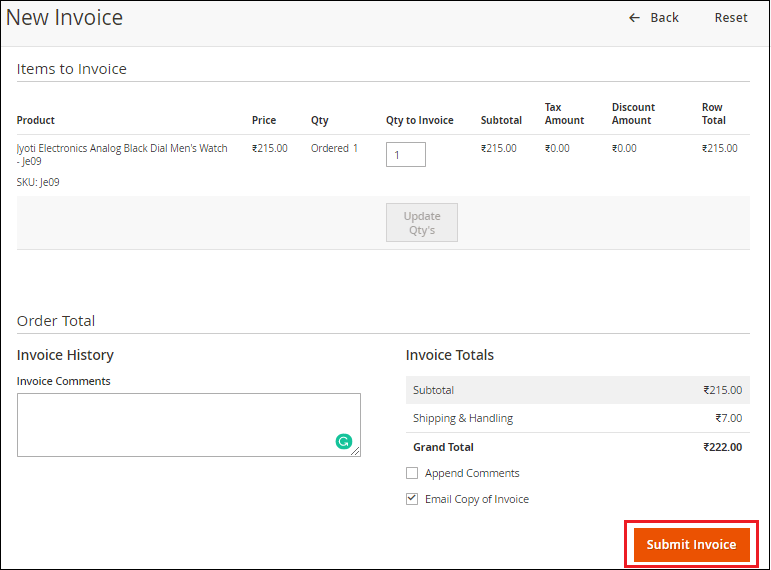
When the invoice is created, Go to the order list once again by navigating to Sales >> Orders to check the order status. By default, the order status was Pending, which is now changed to Processing after creating the invoice for order number #000000004. 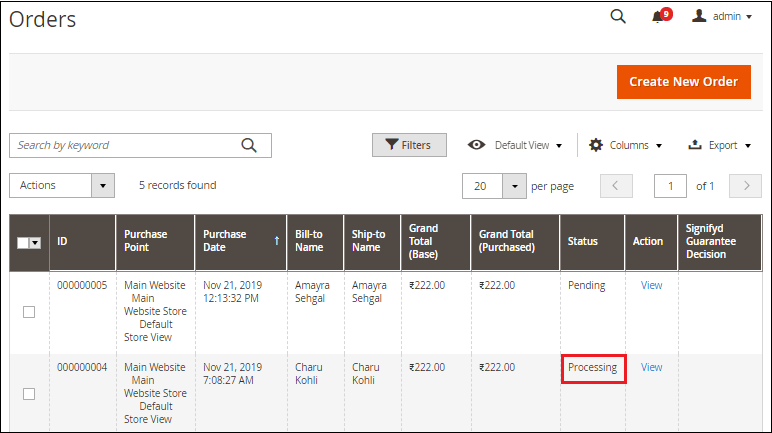
Now, the next step is Shipping. Click on the View action corresponding to order #000000004. Go to the ship for the same order #000000004, which is now in Processing state and create the shipment for the order on the same page. 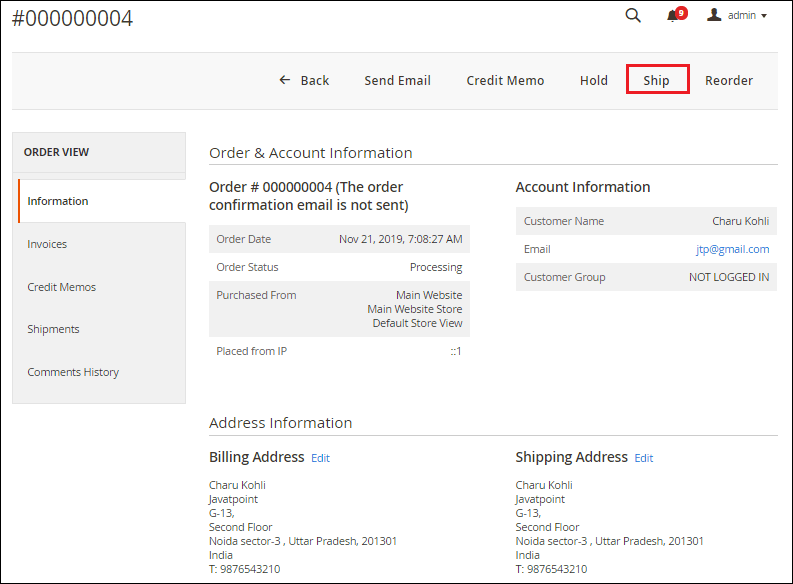
Scroll down and add a tracking number to track the order under the Payment and Shipping Method section. Click on the Add Tracking Number button. Add the tracking information here, such as - Carrier, Title, and Number. 
On the same page, you can provide the shipment comment in the comment section and send an email copy of the shipment to the customer by marking the checkbox if you want. Otherwise, leave it as it is and click on the Submit Shipment button and move ahead to complete the order. 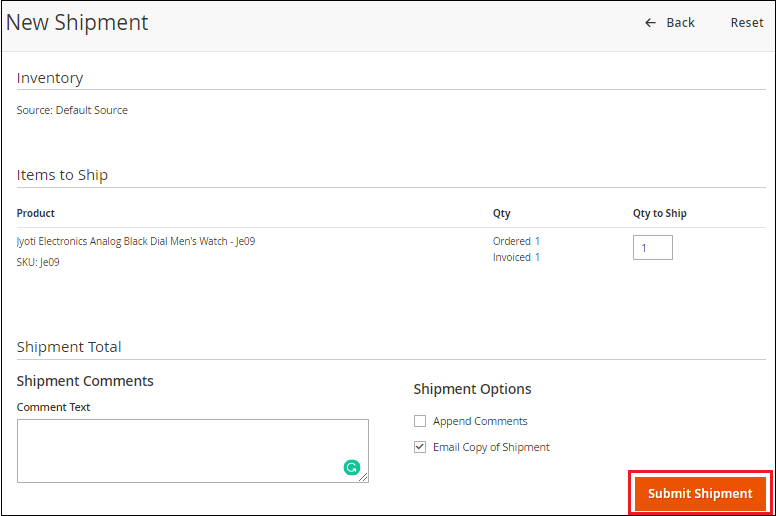
The shipment has been created now. Back to the order list and refresh the page. You can see that the order status is now changed to Complete from the Processing state for order number #000000004. 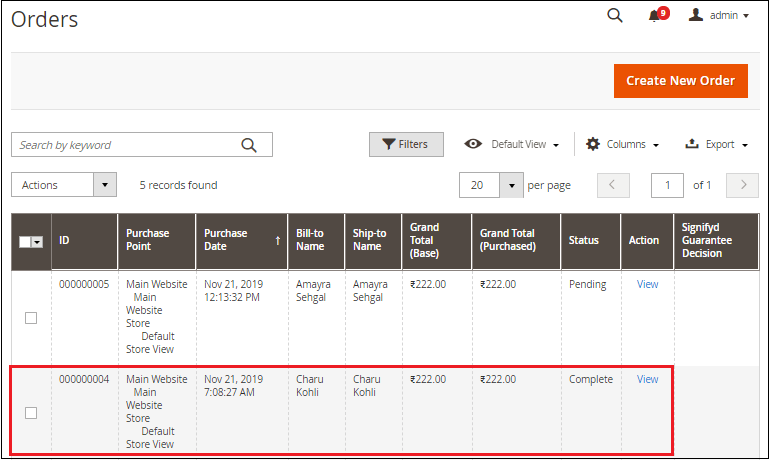
Point to be Noted in Magento 2 Order Processing:
Next Topicset up Order Emails
|
 For Videos Join Our Youtube Channel: Join Now
Feedback
- Send your Feedback to [email protected]
Help Others, Please Share


