MongoDB CompassMongoDB Compass is a GUI for MongoDB. It is also known as MongoDB GUI. MongoDB allows users to analyze the content of their stored data without any prior knowledge of MongoDB query syntax. When we explore exploring our data in the visual environment, we can use Compass GUI to optimize performance, manage indexes, and implement document-validation. All the versions of MongoDB Compass are opensource (i.e., we can freely deploy and view the repositories of all MongoDB GUI versions). The source repositories of MongoDB compass can be found on the following link of GitHub https://github.com/mongodb-js/compass/ Available Compass EditionMongoDB GUI is available in the following four editions:
How to Download and Install MongoDB CompassStep 1: To download MongoDB Compass, you can use your preferred web browser, and Open the https://www.mongodb.com/download-center/compass?jmp=docs page. Step 2: You need to select the installer and version you prefer. GUI installer are available as a .exe or .msi package or a .zip archive. Step 3: Finally, Click on the download button. 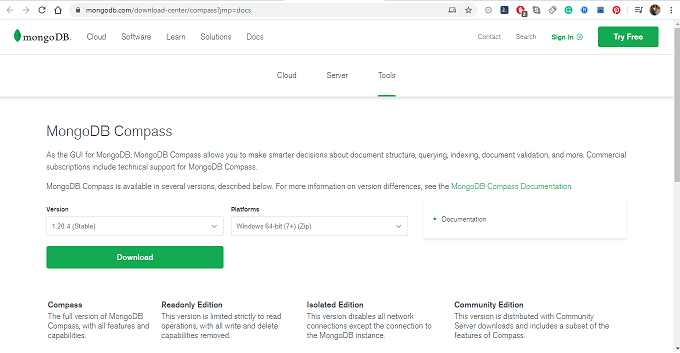
Step 4: Click on the installer file after the download is complete. Step 5: Follow the pop-ups to install MongoDB Compass GUI. Step 6: Once it is installed, it launches and ask you to configure privacy settings and specify update preference. 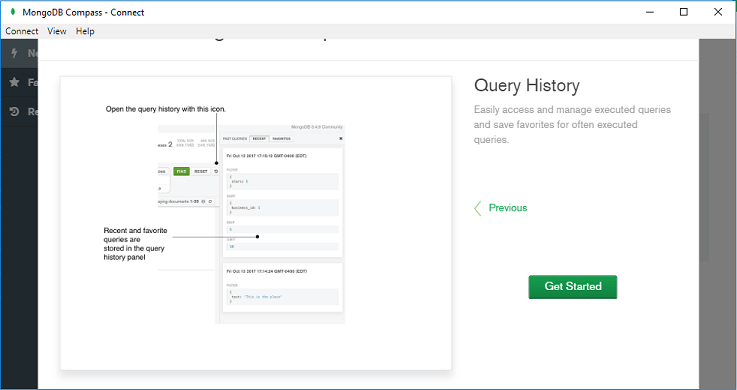
Update MongoDB CompassThere are two ways we can use the updated version of MongoDB Compass 1. We can download and install the latest released version of MongoDB GUI from the official website of MongoDB at any time. We need to check the S/W and H/W requirements for our OS and required version of MongoDB compass to ensure Compass GUI is compatible with our system. 2. We can update Compass by enabling the automatic updates from the Help -> Privacy Settings as shown below. 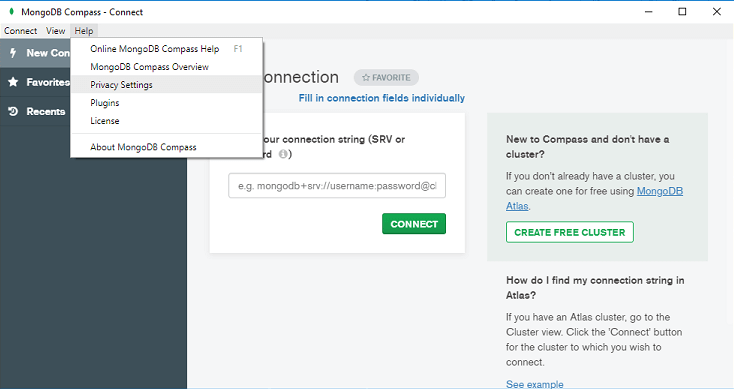
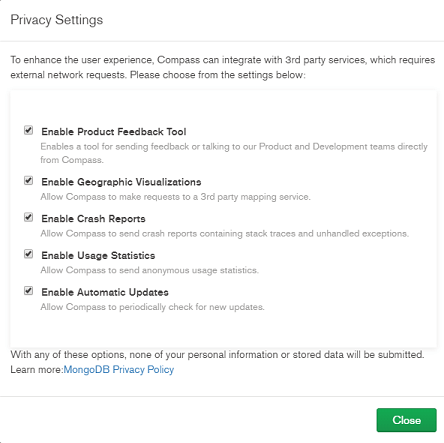
Establishing connection with MongoDB Compass.There are two methods to connect our deployment in MongoDB compass, either we can use the connection string provided on the MongoDB Atlas or we can fill our deployment information in specified fields. By Pasting Connection String. Step 1: When you log in to Compass, an initial dialogue will appear. Step 2: To get the deployment connection string for an Atlas cluster, go to your Atlas cluster view. 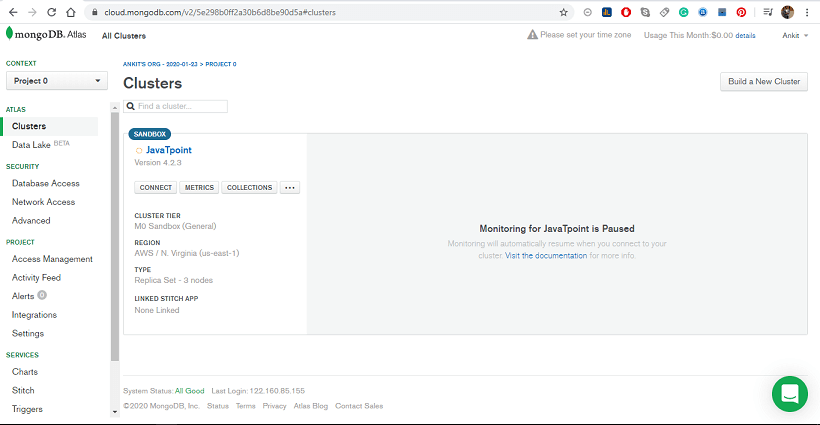
Step 3: Click Connect for the cluster you want to connect. 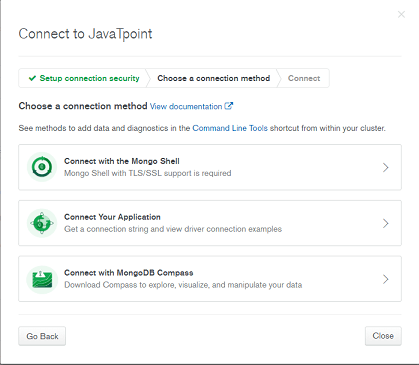
Step 4: After that, click Connect with MongoDB Compass and copy the provided connection string. 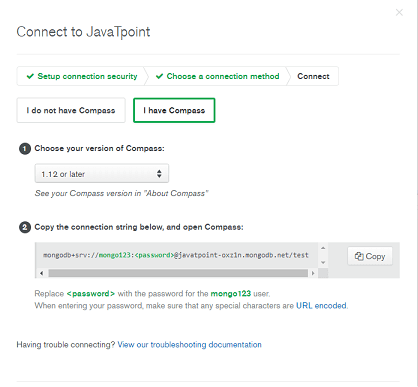
Step 5: Click on connect button, to connect and navigate to the Compass GUI Home Page. 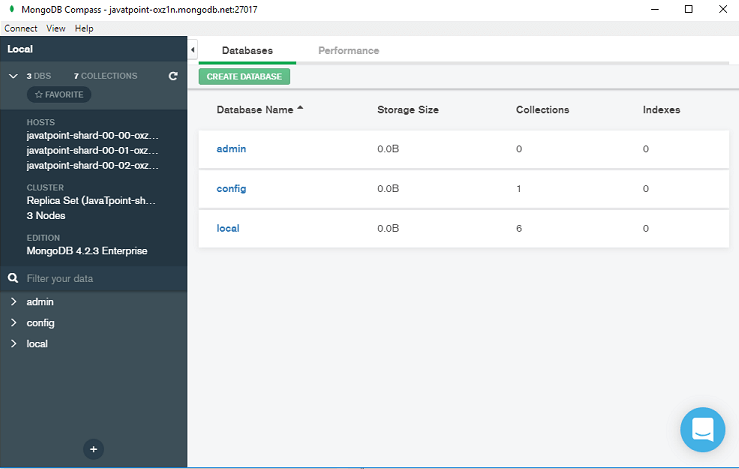
The Compass Home screen displays the details about the MongoDB instance from which Compass is connected, which includes the connection name, the deployment type, hostname, and port, version of MongoDB, performance statistics, and a list of the instance's databases. Creating and Managing Database using CompassWhen you are connected to the MongoDB Atlas or Mongo Shell, the following window will appear. Inside this window, you can see the Database tab. The Database window shows the lists of all the existing databases for your MongoDB deployment. 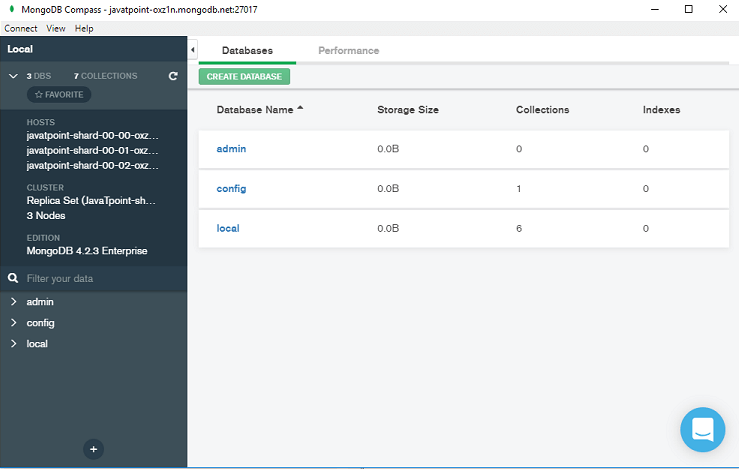
On the above window, when you select a database from the given list to view its collections. You can view database collection when you click the desired Database in the left navigation pan. Create a Database in CompassStep 1: Click on the Create Database button from the database tab. It will take you to the Create Database pop-up dialogue. 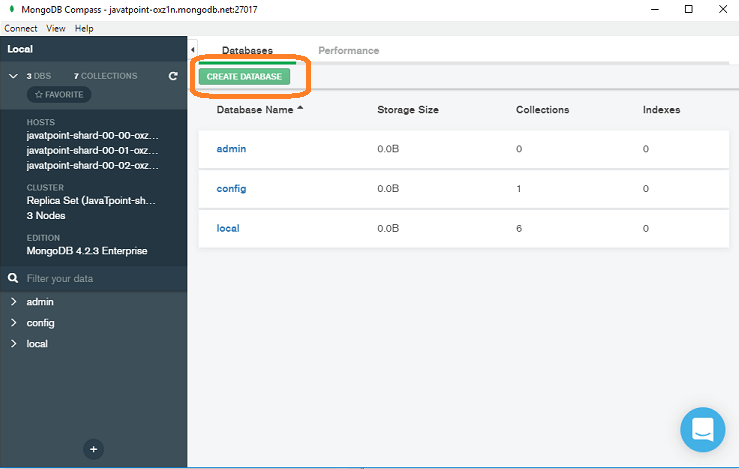
Step 2: In the appeared pop-up window, fill the Database and collection name to create a new database. 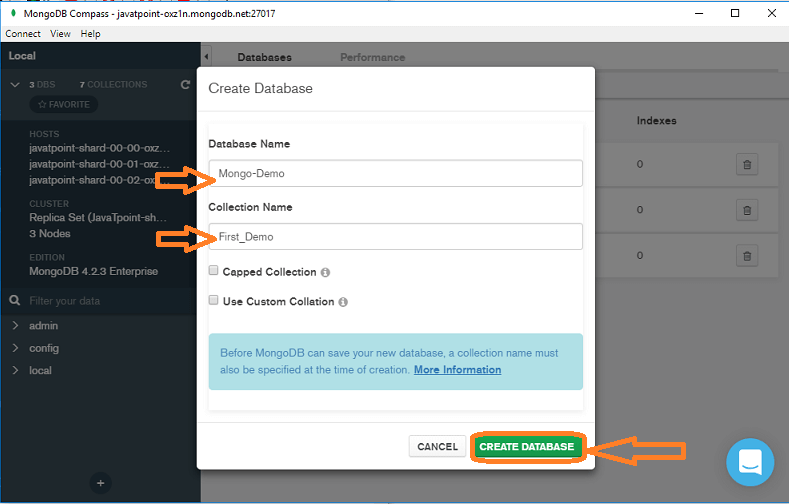
Step 3: Finally, click on Create Database button to create the Database and collection. 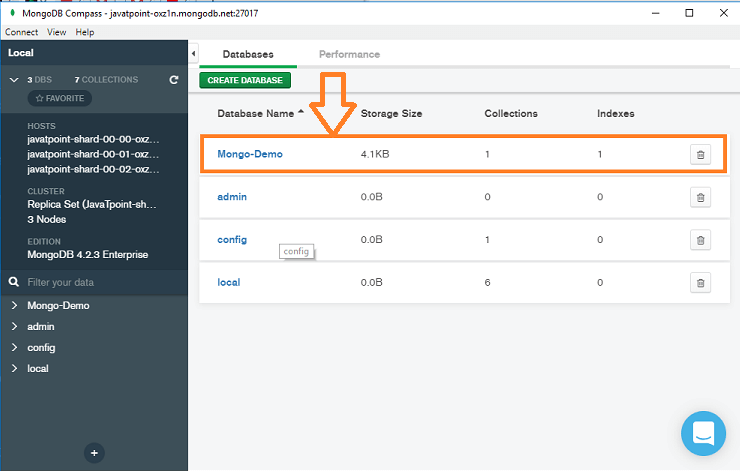
Drop a Database in Compass Step 1: Click on the trash icon that will appear when you hover over the Database name, after that a confirmation dialog appears. 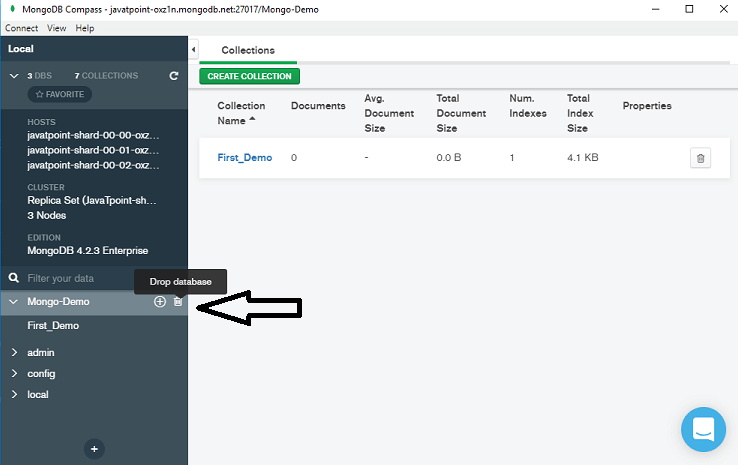
Step 2: In the pop-up window, enter the name of the Database that you want to delete. 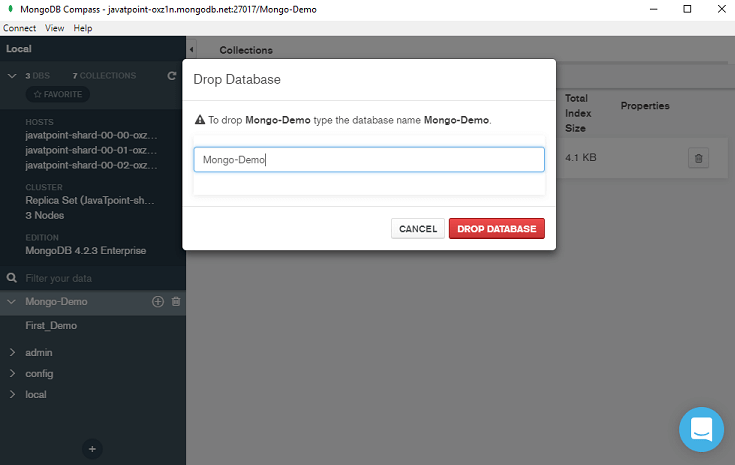
Step 3: Finally, click Drop Database button to delete the Database you selected. 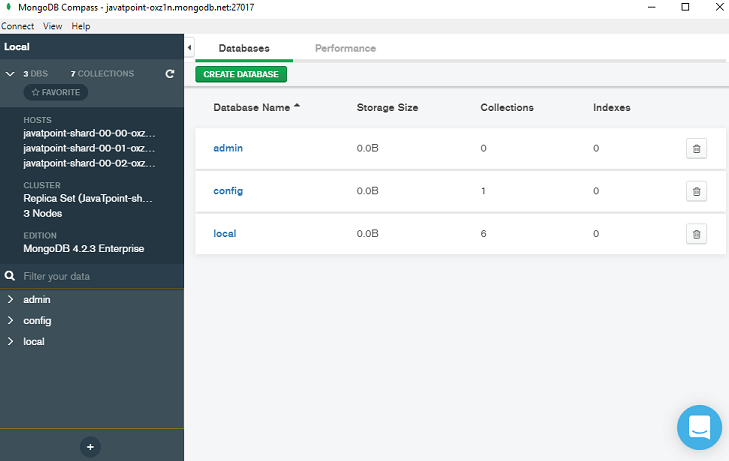
Collections in MongoDB CompassThe Collection window displays the list of all the existing collection and views from the database you have selected. It includes all the name and other related information for the selected collection or view. If you want to gain access to the collection of a database, click on the Database Name in the main Database view, or Click on the database in the left navigation pan. 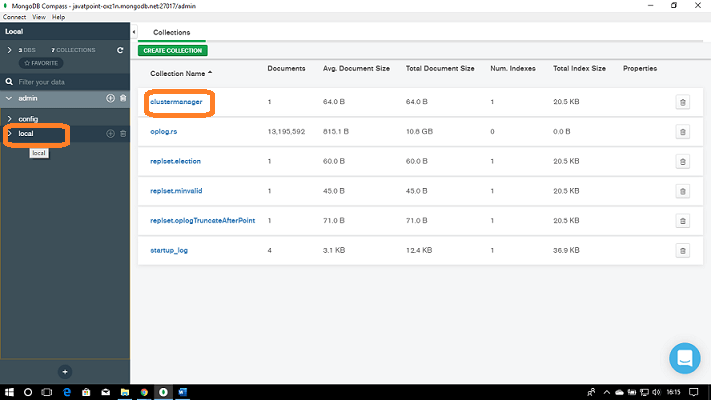
The collection window displays the information like - Collection name, number of documents, size, number of indexes, size of indexes, and Collation properties for the collection. Create a Collection in MongoDB CompassStep 1: Click on the Create Collection button. 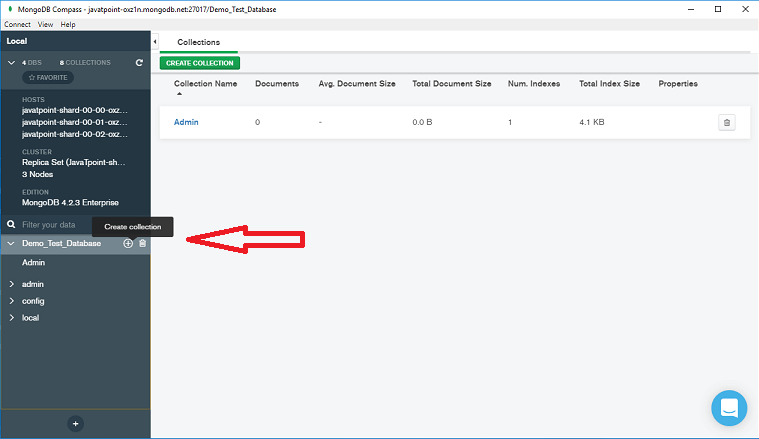
Step 2: After that, fill in the collection details in the Create Collection dialog. 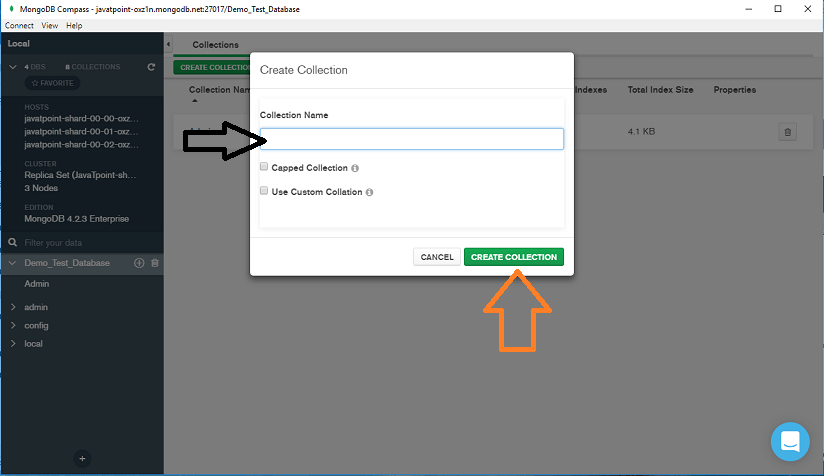
Step 3: Now, click on Create Collection to create the collection 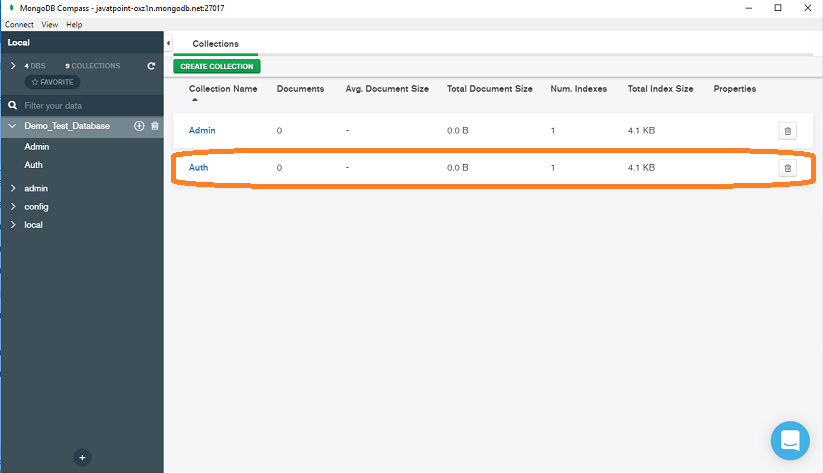
Drop a CollectionStep 1: In the collection window, click on the bin icon for the collection to delete. When you click on the trash icon, a dialog appears to ask your confirmation. 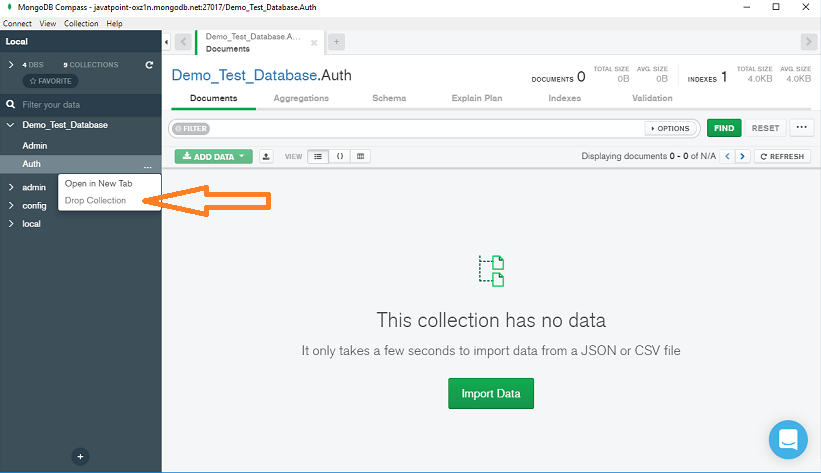
Step 2: In the appeared pop-up dialogue, enter the name of the collection you want to delete from the database. 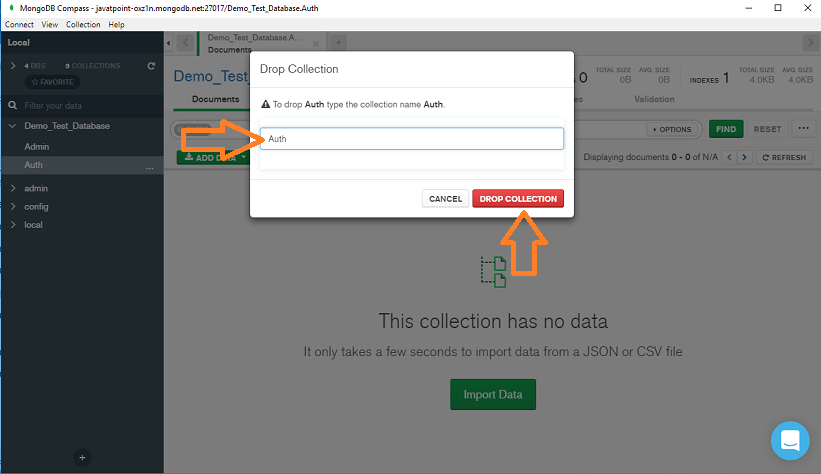
Step 3: Finally, click on Drop Collection button to delete the collection. 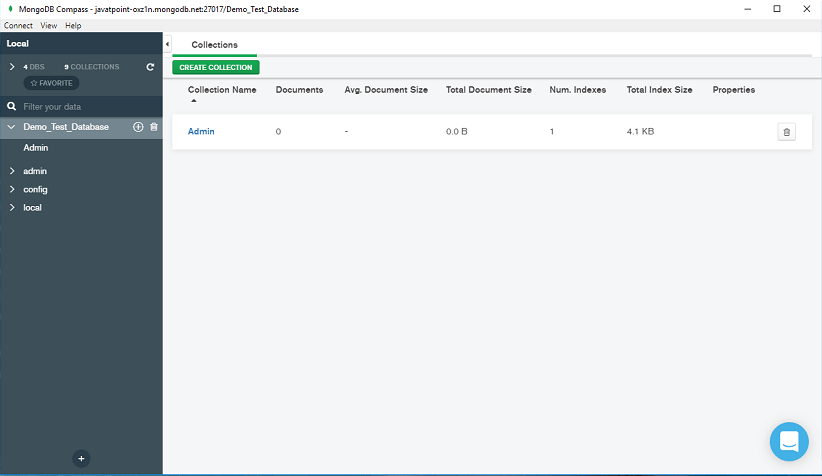
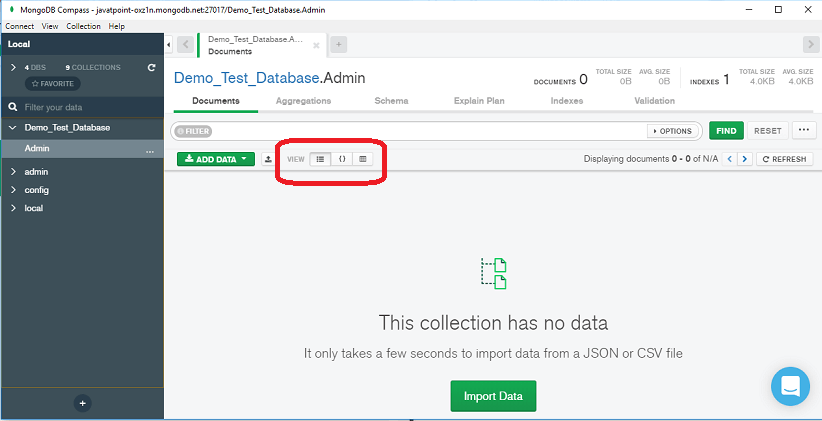
Managing Documents in MongoDB CompassDocuments are the records in a MongoDB collection. Documents are the basic unit of data in MongoDB. Using the document tab, we can perform the following tasks in our selected collection or view:
Next TopicMongoDB BI connector
|
 For Videos Join Our Youtube Channel: Join Now
Feedback
- Send your Feedback to [email protected]
Help Others, Please Share


