MongoDB StitchMongoDB provides a serverless platform to build an application quickly without setting up server infrastructure. MongoDB Stitch is designed as an upgraded version of MongoDB Atlas. It automatically integrates the connection to our database. Stitch illuminates the development and implementation process. It achieved it by neglecting the requirement of building and deploying our backend. MongoDB stitch is available as a backend service that allows us to configure data-authentication, data access rules, and services easily. 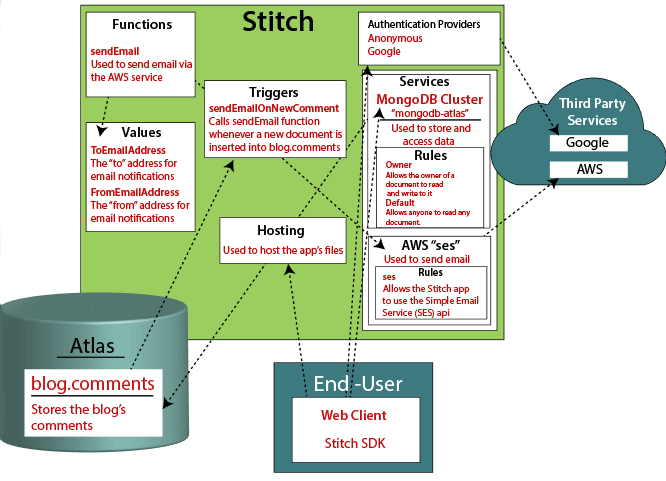
MongoDB stitch provides an upgradable infrastructure design to handle the request. It also coordinates the services and database interactions. i.e., we don't need to spend time and resources on tasks such as configuring our servers, etc. For example- we can use MongoDB Stitch to generate a pipeline that would allow us to accept payment using Stripe via the HTTP service, update the date of purchase, and send a confirmation email with the Mailgun service. Creating a Stitch App using Stitch UIStep 1: Go to https://www.mongodb.com/cloud/atlas page, and log on to your Atlas account. 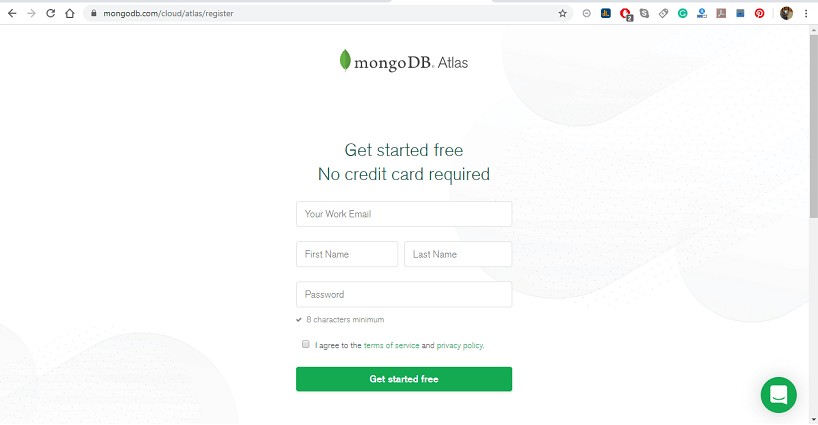
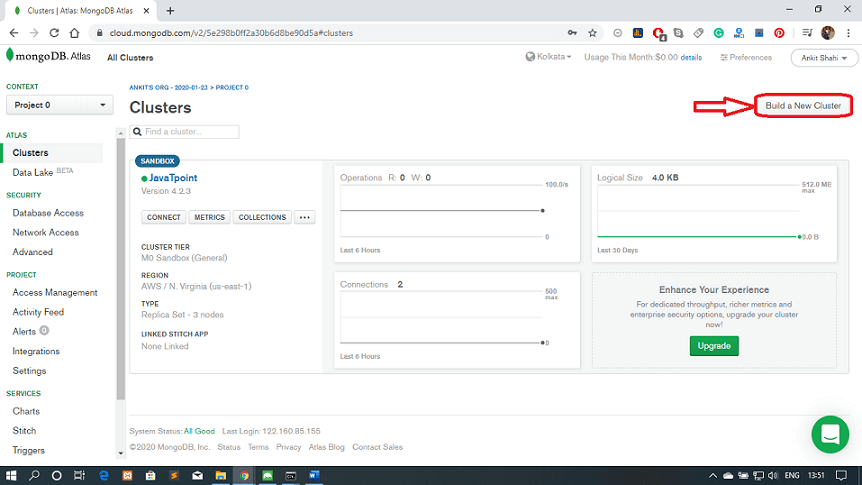
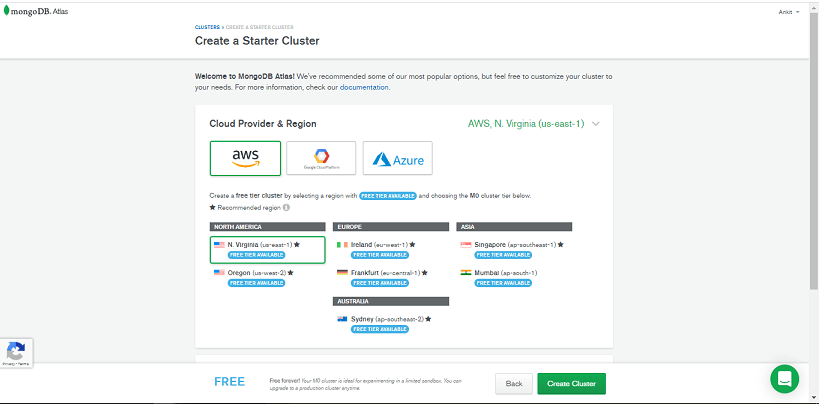
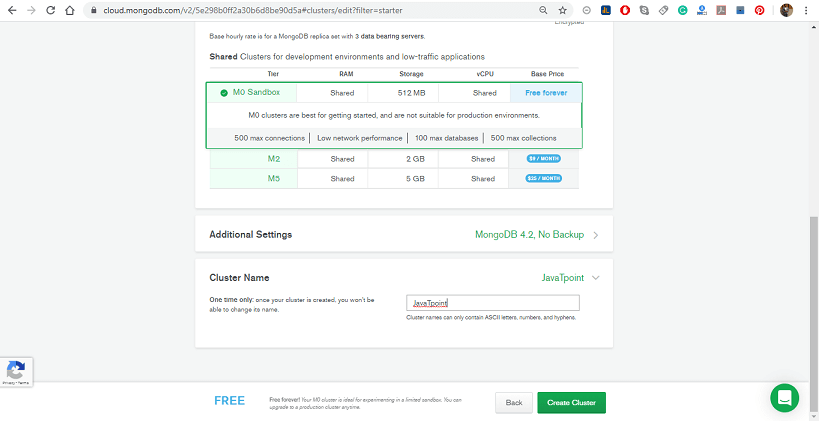
Step 2: Now, you have to create a cluster to use with your MongoDB Stitch app, follow these steps:
Step 3: Inside the MongoDB Atlas, click Stitch Apps from the left-hand navigation window. 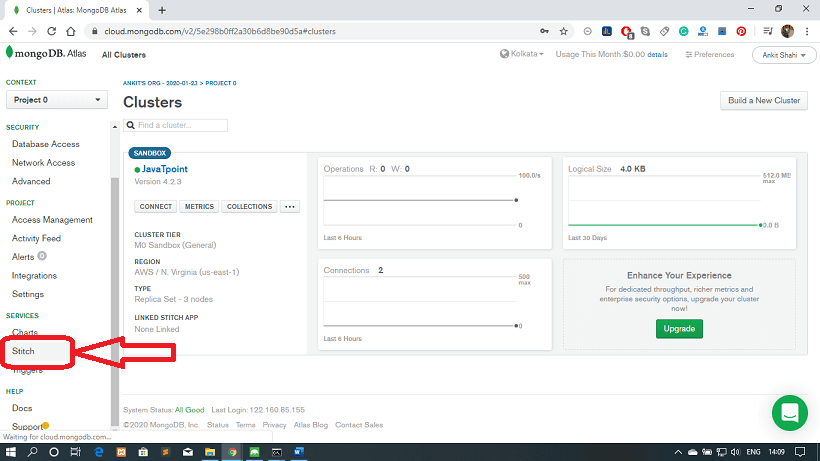
Step 4: After that, click on the Create New Application button. 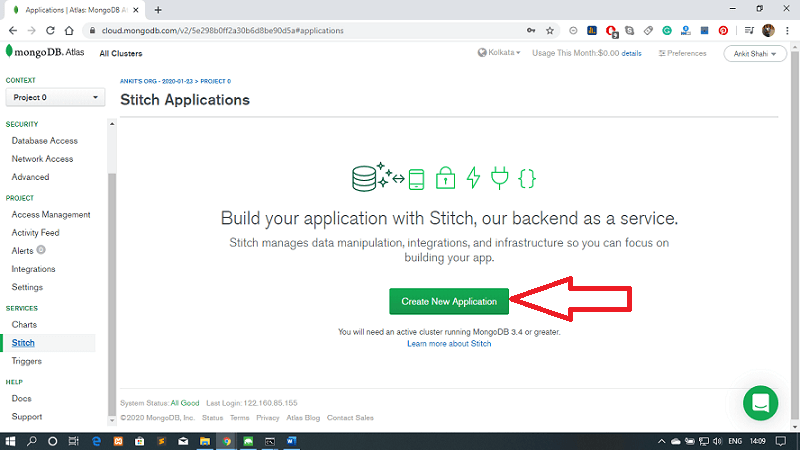
Step 5: On the Create a new application pop-up window, enter a Name for your Stitch app. 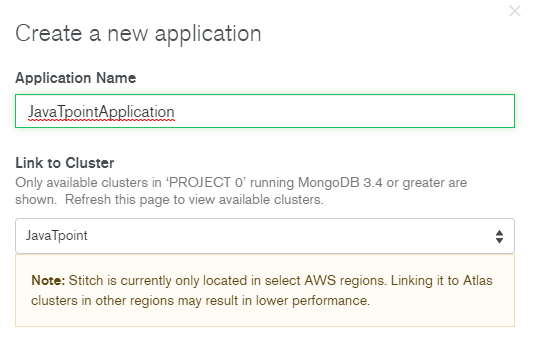
Step 6: Choose a cluster in your project from the Link to Cluster dropdown dialogue. MongoDB Stitch automatically creates a MongoDB service that Is linked to your cluster. Step 7: Fill in the name for the service that Stitch will create in the Stitch Service Name field. 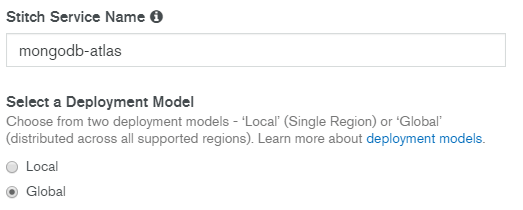
Step 8: Choose a deployment model and deployment region for your application. Then click on the Create button. 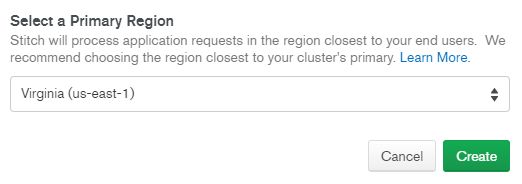
The following window will appear after the successful deployment. 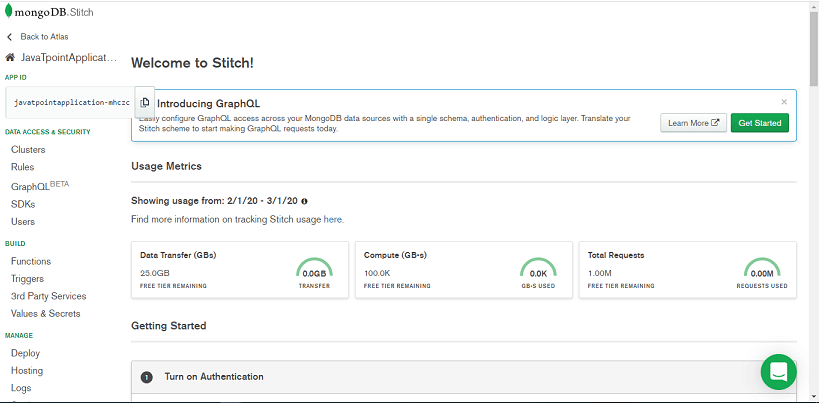
Creating a Stitch App using Stitch CLIStep 1: Firstly, create a new directory for your application and add a stitch.json file to the root level of the directory. The file must contain an empty JSON object. Step 2: Authenticate the MongoDB Stitch application with Atlas using an API key. Step 3: Now, import the Stitch CLI library using the "stitch-cli import" command. Step 4: You should verify if your application is created or not. Query Anywhere with StitchUsing the MongoDB query language, we can query our stored data in MongoDB directly from our client application code. The Stitch server for the MongoDB collection allows us to securely filter the result using the specified data access rules based on the logged-in user or the contents of each document. The Student collection contains documents describing each student in an example collage. Each document includes the student's name, email, address, fees, and information on the student's stream. In the example given below, we compare the student's collection for all the documents and return the formatted results as a table. HTML File: Java Script File: Protecting Data with Rules We can use collection rules if we don't want to allow every student to see the data of every other student. We can use it to control the data that all the user can access it without altering the pattern of the query. Creating a Blog AppHere we are creating a blog and commenting system using Stitch. We are using MongoDB Stitch JavaScript SDK and the MongoDB service to add and query comments directly from the client code. The architecture of the Blog App The blog app architecture requires the following features:
When we use MongoDB Atlas Cluster, we can store comments and the authentication details that allow users to post comments using a temporary account. The three main components of blog architecture are:
The front-end of the blog application architecture handles the display and user interaction. Stitch manages all the request from the front-end and allow only verified requests to the database, which saves comments for our users. Creating Backend for the Blog AppThe backend of the blog app is used to store comments and other details like - authenticate and authorize users, finding existing comments for a blog post etc. We are storing the comments within a sample of MongoDB application. Here, we are going to limit the permission for the user to create, edit, and delete comments only associated with their user ID by authorization. We also need to make sure that a user can't log in as another user; we can achieve this by using the built-in user management system in the MongoDB stitch. Requirements:
Step 1: Create a Stitch Application as directed above. Step 2: Turn on the Anonymous Authentication inside the Stitch application that you have created. Step 3: Finally, configure the blog.comments MongoDB Collection
Step 4: Enable reading and writing to the comments. Step 5: Finally, post your application by clicking on Review & Deploy Changes in the pop-up at the top of the Stitch GUI. Creating a Web Client for the blog appStep 1: Create an HTML page as follows. Step 2: Now, attach the following JavaScript SDK. To attach the MongoDB Stitch SDK. Add the script tag given below to the head section of your html file. Step 3: Initialize the app client and a MongoDB Service client to store comments in MongoDB. Replace the app id with your Stitch <app-id>. You find your App ID on the client page of Stitch Interface. Step 4: Now, add the script given below to query and display the comments when page loads. Step 5: You have to create a file that allows the user to login and display the comment during the loading time. Step 6: Now, create a form to submit the comments.
Next TopicMongoDB Atlas
|
 For Videos Join Our Youtube Channel: Join Now
Feedback
- Send your Feedback to [email protected]
Help Others, Please Share


