| |

Named RoutesNamed routes is an important feature in the Laravel framework. It allows you to refer to the routes when generating URLs or redirects to the specific routes. In short, we can say that the naming route is the way of providing a nickname to the route. Syntax of defining naming routes: We can define the named routes by chaining the name method onto the route definition: We can also specify the named routes for controller actions: Route::get('student/details', 'studentcontroller@showdetails') -> name('student_details'); Generating URLs to named routes Once you assigned a named route to a given route, then you can use the name of the route while generating URLs or redirecting through a global route function. Suppose we have many parameters in the URL; in this case we can provide the short name to the URL. We use an array which wraps everything, and it appears as a second parameter in a get() function. Let's understand through an example. Output: 
We can also check the name of the route from the Git bash window.
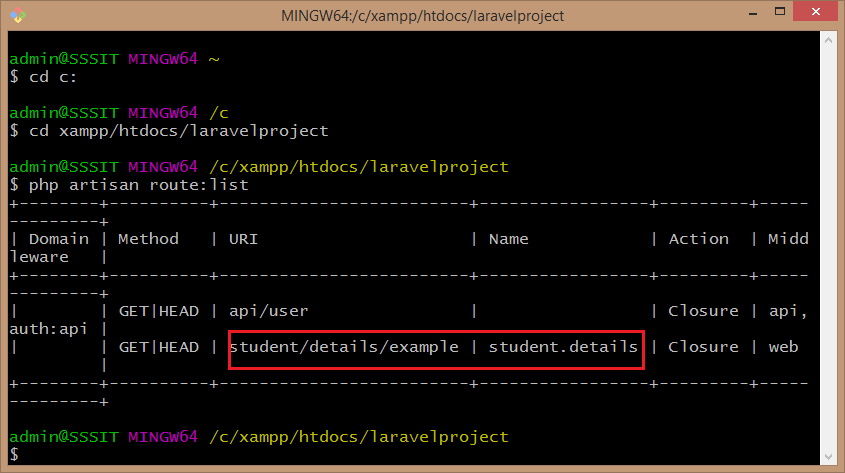
The above output screen shows the URL and its corresponding name, i.e., the name of the URL "student/details/example" is student.details. Note: The benefit of using named routes is that if we change the location of the route, then also the link will work or we can say that it is beneficial for changing the URLs dynamically.Parameters in Named routes Named routes can also be used to define the parameters. The parameters can be passed as the second argument to the route function, and these parameters are automatically inserted into the correct position of the URL: Output: 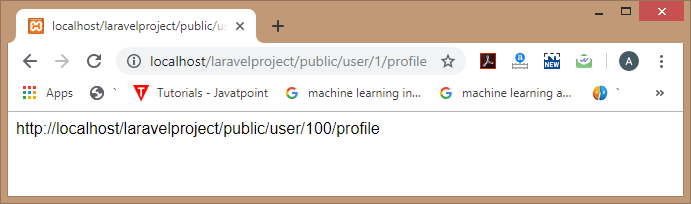
Navigating from one route to another using named routes We can also navigate from one route to another route by using named routes. Step 1: Define the route in the web.php file. Step 2: Move to the resources folder and then click on the views folder. Step 3: Create a new file and it is named as student.blade.php. The above code navigates from student page to the student.details which is the named route. Output: 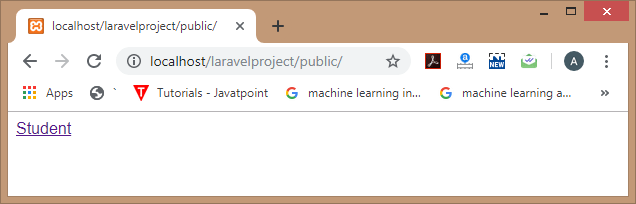
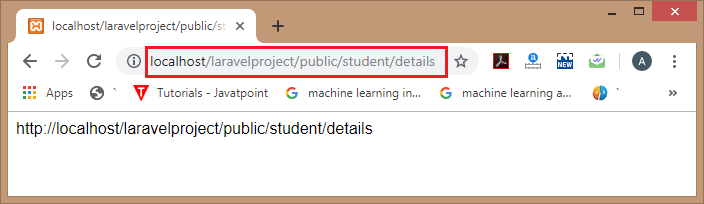
ExplanationWhen we enter the route of the root directory, i.e., localhost/laravelproject/public/, the view of the student is appeared shown in the above screenshot that shows the link of the Student. When we click on the Student link, then the new page appeared whose named route is student.details.
Next TopicLaravel Middleware
|
 For Videos Join Our Youtube Channel: Join Now
Feedback
- Send your Feedback to [email protected]
Help Others, Please Share


