| |

Objects with Lenses in CorelDrawLenses include innovative effects that enable us to modify the object's appearance without actually modifying any object. This chapter includes the following essential topics:
Using lensesLenses modify how an area of the objects beneath a lens represents, not the object's attributes and properties. We can use lenses to the vector object, like polygon, closed path, ellipse, and rectangle. Also, we can modify the bitmap and artistic media's appearance. The lens becomes the vector image itself if we use a lens on the vector object. Similarly, when a lens is positioned on the bitmap, it becomes the bitmap. After we use the lens, we can copy this lens and apply it with other objects. Below are some important lens types that we can use to objects:
To use the lensThe steps to use the lens in CorelDRAW are listed below: 1. Choose the object. 2. Press Effects > Lens. 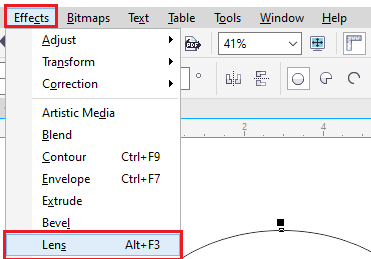
3. Select the lens type through the Lens docker list box.
4. Describe the settings we want. 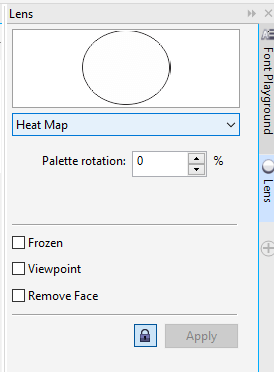
To copy the lensThe steps to copy the lens are listed below: 1. Choose an object on which we wish to copy any lens. 2. Press Effects > Copy effects > Lens from. 3. Press an object to which we wish to copy any lens. 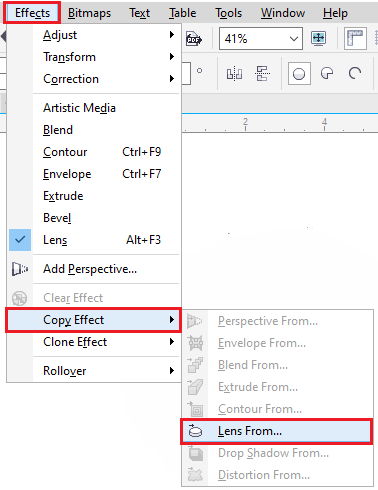
Formatting lensesWe can edit the lens to modify how the lenses are affecting an area below it. For example, we can modify a lens's viewpoint, indicating by the X within the drawing window, for showing a drawing's part. The viewpoint illustrates a center point. We can place a lens anywhere within the drawing window. However, it displays an area around the viewpoint marker always. For example, we can apply a viewpoint marker over any Magnify lens for enlarging a map part. We can also show where the lens flaps the background or other objects. As an output, a lens effect can't be displayed where any lens covers the white space (blank space) within the drawing window. Freezing the lens's latest view lets us move any lens without modifying what's shown from it. Besides, modifications we create to some area below the lens contain no effects over a view. To format the lensThe steps to format the lens are listed below: 1. Choose the object. 2. Press Effects > Lens. 
3. Enable the Viewpoint over the Lens docker. When we wish to show the lens where it encloses another object, enable a checkbox, i.e., Remove face. 4. Press Edit for showing a viewpoint marker. 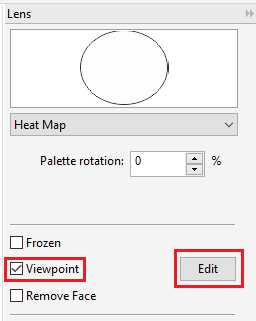
5. Move a viewpoint marker within the drawing window for any new location. 6. Press End. 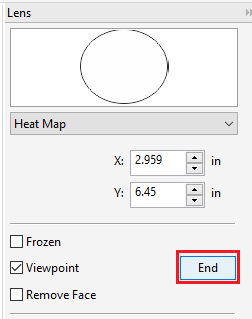
When we wish to freeze the lens current view, enable the checkbox, i.e., Frozen. 7. Press Apply. 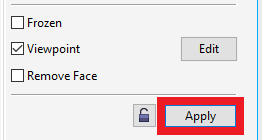
Note: The Checkbox, i.e., Remove face will not be available for Magnify lenses and Fish Eye.
Next TopicStyle sets & styles
|
 For Videos Join Our Youtube Channel: Join Now
Feedback
- Send your Feedback to [email protected]
Help Others, Please Share


