| |

Photoshop Pen ToolThe Photoshop Pen tool is one of the finest tools in Photoshop. It is used to create paths and shapes which can be manipulated to draw complex sections. The creativity of the pen tool is unlimited; we can draw whatever we imagine. Other drawing tools such as the Brush tool, pencil tool in Photoshop works on pixels, but the pen tool creates a vector path. We can create, modify, store, and reuse the paths created using the Pen tool. Generally, the pen tool is used to create an illustration. Another use of the pen tool is to remove an image object from the background. Usually, we choose the tools such as the quick selection tool, magic wand tool, and magic eraser tool, which automatically selects similar color pixels. But, in fewer cases, these tools will not be so much effective and unable to catch the required object properly. For such cases, the pen tool will be the finest tool to trace the object properly. Using Pen Tool, we can create multiple paths within an image or multiple paths segments within a path. It allows us to create custom shapes on our image. The Pen ToolThere are five types of Pen tools available in Photoshop. They can be found by exploring the pen tool icon in the toolbox given left to the workspace. 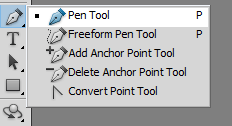
All these tools are used to draw and manipulate the shape. These tools allow us to suit our needs and creative style: The standard pen tool is used to create vector shapes by creating straight segments and curves. The Freeform Pen tool is used to draw paths, just like the pencil tool. It does not allow us to precisely create curves and segments. It is just a hand drawing tool. The Add Anchor point tool allows us to add an anchor point to the created path. It is also a very good tool for manipulating our shape precisely after creating it. The Delete Anchor point tool is used to delete an anchor point from the curve. The Convert Point Tool is used to edit the existing vector shape and paths. It converts anchor points into corner anchor points and vice versa. It is a useful tool for stretching a shape from the line. Generally, the anchor point is available at the starting and end of the line. But, using this tool, we can create an anchor anywhere on the line by converting the smooth anchor point into a corner anchor point. Let's understand how to use Pen Tool: Before start working with the pen tool, make sure that path should be visible because the path and pen tool goes hand in hand. In the default workspace of Photoshop (Essential), paths can be accessed by navigating through the Layers panel tab. If the path is not visible on your screen, select the Paths option from the Window menu. 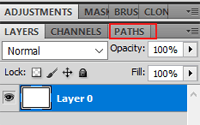
In the Essentials (default) workspace, Paths are accessible by clicking on the Paths tab visible in the Layers Panel. If you don't see a Paths Panel in your workspace, you can access Paths by clicking on the Windows drop-down menu and selecting Paths. How to Use Pen ToolThe pen tool allows us to create straight and curved paths with extreme accuracy. However, it will take some practice to master in Pen tool. Once you are familiar with the pen tool, you can draw anything that you imagine. It is one of the most powerful tools of Photoshop. Don't get disappointed in the beginning, the pen tool may be difficult to work with, but you can adjust the shape or path after creating it. The pen tool is mostly used to create illustrations and trace the images. Designers also used it to remove the background of the image. Because the Photoshop AI selection tools such as quick selection and magic wand tools sometimes fail to recognize the object exactly. But, the Pen tool precisely let us select the objects. So, we can select the region of the image that we want to capture. Note: To cycle through the Pen tool, press the Shift + P key combination.To work with the pen tool, we have three different options available: Shape Layers, Paths, and Pixels at the top bar of the workspace: 
Using these tools, we can easily create selections, shapes, or paths accordingly. To draw with the pen tool, first, we need to activate the pen tool. We can activate the pen tool by pressing the P key, or we can click on the below icon in the toolbox given at the left of the workspace: 
After that, select the tool options as path (to create a path) from the top bar. Now, we can draw a shape or path using the pen tool. We have to choose a starting point and an endpoint. To draw a curve, drag the endpoint to the respective direction. It will create a curve. Use the Alt/opt-drag in the lines to change them, and Ctrl/right-click the paths in the paths tab given the right to the screen and select fill path for creating a shape using the paths. After creating a shape, we can customize it by right-clicking on it. There we will find the following options: 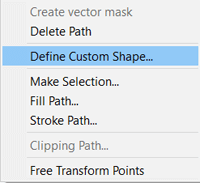
We can choose any of the options from this menu. For example, to fill the color in the created shape, we can choose the Fill path option. It will open the below window to define the color and opacity of the path: 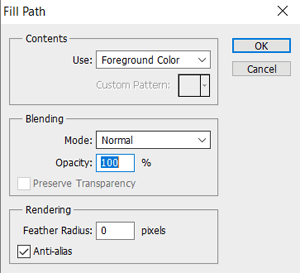
We can choose colors as active foreground color, background color, pattern, etc., to fill the shape. Also, we can define the blending and rendering options. Consider the below shape, which is created by using the pen tool. 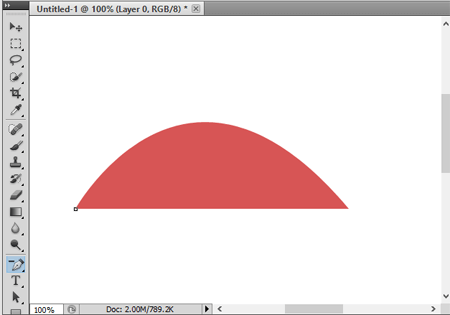
In the above image, we have drawn a sample shape using the pen tool and fill the color in it. We can adjust this image after creating it by using the add anchor point or remove anchor point pen tool. The shapes created using the pen tool are very flexible; we can adjust them whenever we want. Tracing an Object Using Pen ToolThe pen tool is widely used to trace an object from the image. Let's understand how to trace the object using a pen tool. It will be a good practice if you start learning the pen tool by tracing images and illustrations. Follow the below steps to trace an object using the Pen tool. Step1: Open an Image To open an image, press the Ctrl + O keys. Step2: Extract the Background Layer To extract the background layer, double-click on the image layer and create a new layer. Now, we can perform editing on our image. Step3: Select the Pen Tool Now, select the pen tool by pressing the P key or select it from the toolbox given at the left to the workspace. Step4: Start tracing the object Now, start tracing the image. Pick a proper starting point and draw the shape over the edges of the object. While selecting, make sure to select the proper endpoint so that you can precisely select the edge of the object by dragging other points. Press the Alt-click to the endpoint to drag the shape with another point. Repeat this process until the object is completely selected. Consider the below image: 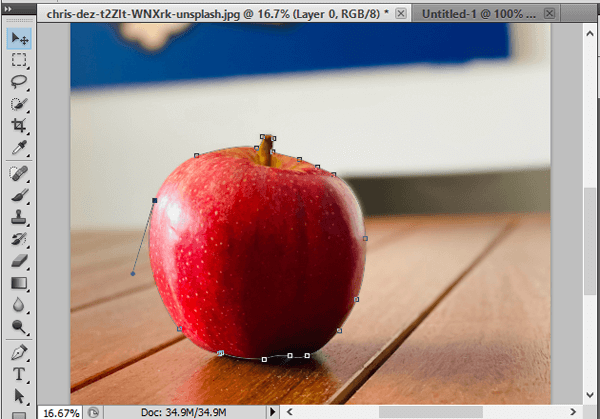
In the above image, we have traced the apple using the pen tool. Now, we can fill or stroke this selection. To complete this shape close the path with the starting point. Freeform Pen ToolThe freeform pen tool allows us to draw a shape or path freely, just like a pencil tool. It automatically adds anchor points to the required location. Drawing with a freeform pen tool is like drawing something using a pencil on a sheet of paper. We do not need to specify the anchor points, but we can adjust the anchor points using add or remove anchor point tool. Following are the steps to use the freeform pen tool:
Thus, we can create a path or shape using the freeform tool. It is the simplest way to draw something precisely. Add Anchor Point ToolAdd anchor point tool is used to reshape the existing vector shape or path. It offers complete control and accuracy over the shape. To manipulate the shape using the add anchor point tool, follow the below steps:
Consider the below image: 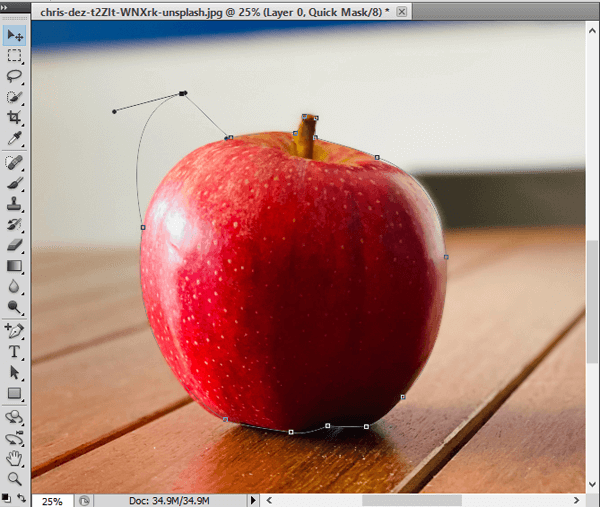
In the above image, we have added an anchor point and stretched it to reshape the existing path. Thus, we can edit a shape after creating it. Delete Anchor Point ToolThe Delete Anchor point is used to remove an existing anchor point. When we remove an anchor point, the shape will be added to the next available anchor point. It also has the ability to reshape an existing shape. To manipulate the shape using the delete anchor point tool, follow the below steps:
Convert Point ToolThe Convert Point tool is also used to manipulate the existing shape. It converts the smooth anchor points into corner points and vice versa. We can manipulate the shape by converting the corner point into smooth anchor points and stretch them as per our need. Follow the below steps to convert a point:
Conclusion:We have discussed pen tools and their sub tools such as add anchor point, delete an anchor point, freeform tool, and convert anchor point tool and their usage. Now, we can create and manipulate a vector shape or path by using these tools.
Next TopicHow to Change Color in Photoshop
|
 For Videos Join Our Youtube Channel: Join Now
Feedback
- Send your Feedback to [email protected]
Help Others, Please Share


