Photoshop WorkspaceThe workspace is the user interface of Photoshop. It is a combination of the preset layouts for the various elements. It will determine which of the tools panel will be displayed on your screen and how they will be arranged. In Photoshop, we can customize our workspace to choose what panels will be displayed and organize Photoshop toolbar. The custom menus and keyboard shortcuts are also part of the workspaces. We can easily customize our Photoshop layout for specific tasks and match the way in which we would like to work. Photoshop provides several panels such as brush, channels, layers, masks, etc. By default, it comes with several workspaces such as 3D, Design, Motion, Painting, Graphics, Photography, etc.; we can find workspaces by navigating to the Window-> Workspace menu. It is not good to show all the panels in your workspace because Photoshop contains too many panels. It would be better if we only place the panel that we need; otherwise, we should close it. For example, while editing photos, you will need different panels for editing and retouching, and while performing graphic designing tasks, you will need different panels. So we will only open only those panels that we need for our task. It will help us to pick the task at hand and keep our screen free of clutter. Thus, it allows us to work more efficiently. In this section, we will understand the default workspace and how to reset the workspace to defaults. Further, we will see how to customize the workspace in Photoshop. Default Workspace in PhotoshopThe default Photoshop workspace is called Essentials. If you have never customized your workspace, then you must be using the essentials workspace. Generally, the essentials workspace is considered more useful and handy because it is a general-purpose workspace. In our tutorial, we will use the essentials workspace and will add some extra panels when it will be needed. The essentials workspace includes some more commonly used panels such as Layers, adjustments, Tools, Color, and swatches panel. For example, we have opened an image in our essentials workspace. You can notice different useful panels are available by default. 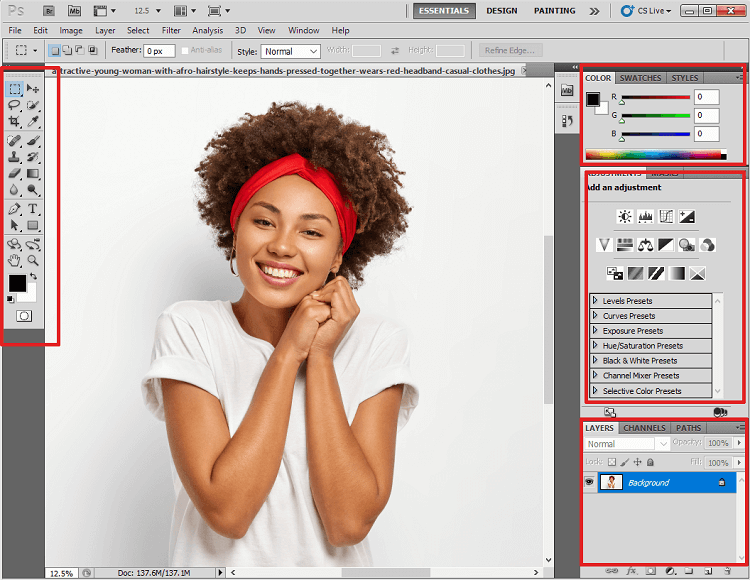
You can add another panel by navigating to the Windows menu. It contains several panels such as 3D, Actions, Adjustments, Animations, Brush, etc. 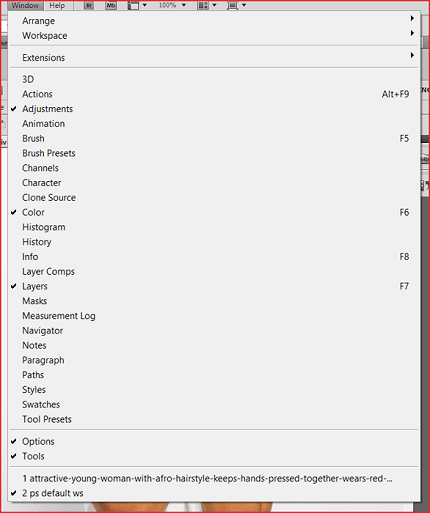
To get a panel to your workspace, click on it. It will be displayed in your workspace by a small window. For example, we want to display the brush panel on our workspace, just click on it, and it will be displayed in our workspace as follows: 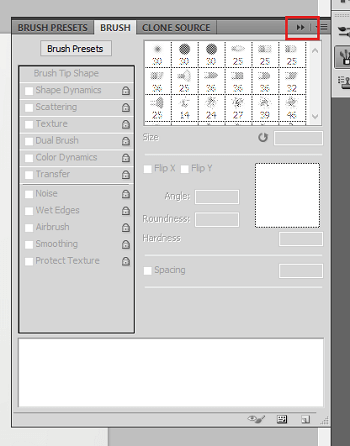
If you want to close it, click on the arrow icon highlighted in the above image. It will be closed. Similarly, you can display any required panels in your workspace. How to Reset Workspace?There may be a chance while working with Photoshop, you may lose the default view of the essentials workspace, and you want to get it back. You can easily reset your workspace any number of times by navigating to Window-> workspace -> Reset Essentials. It will reset our workspace to its default view. Other Workspaces in PhotoshopThe default workspace of Photoshop is essential, but it is not the only workspace available in Photoshop. Besides the essentials, there are several other workspaces such as 3D, Design, Motion, Painting, and Photography are available in Photoshop. To activate any of these workspaces, just select a workspace from the Window-> Workspace menu. 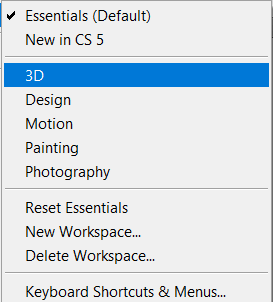
We can also add a custom workspace to this list. The checkmark displayed at the essentials workspace shows that it is currently activated. The Photography workspace is good for editing and retouching photos. When we switch to the Photography workspace, it will change the available panels and tools in our workspace and place useful panels and tools. In the Photography workspace, several useful panels such as histogram and navigators, History and device preview, actions, info, etc., are added to our workspace. The Painting workspace is useful for digital painting tasks. Once we switch our workspace to painting, our Photoshop user interface is changed. It will place panels that are useful for digital paintings. For example, compared to the Photography workspace, the Histogram panel is replaced with the swatches panel. And, the Libraries and adjustment panels have been replaced with the Brush Presets panel. How to Customize Photoshop WorkspaceWe can easily customize the default layout of Photoshop. We can add new panels to our workspace and move the existing panels to a different area. Let's understand how to customize the Photoshop workspace. Adding a New PanelTo add a new panel in our workspace, we can select it from the Window menu. For example, if we want to add a Style panel to our workspace, we can select it from the Window-> Style menu. By default, it will be opened with the colors and swatches panel. 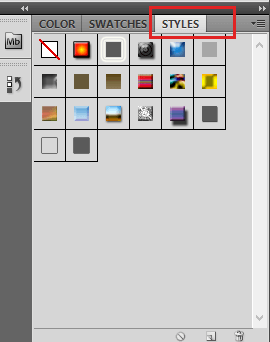
When we select a new panel, it will be placed in a predefined location. But, we can move them to our specified location. Let's understand how to position a panel. Moving a PanelTo move an existing panel to any other location, just drag the panel window and drop it on your favorite location. For example, if we want style panel on our image canvas or with layers windows, drag it and drop it on the area where we want to add it. 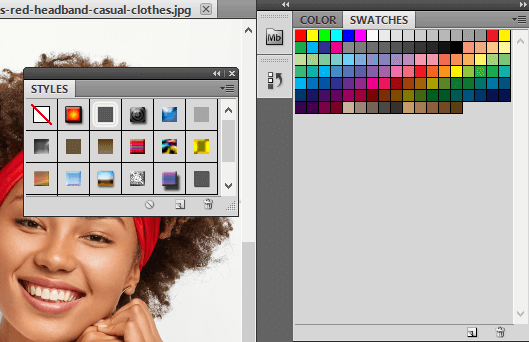
From the above image, we have placed our style panel on an image canvas. Similarly, we can place it in any other location. Closing a PanelTo close a panel is also a straightforward process, just like opening a panel. We can close a panel by clicking on the close window icon if it is on our image canvas, and if it is on a tab group like layers, colors, swatches, then to close it, right-click on the panel window and select the close option. 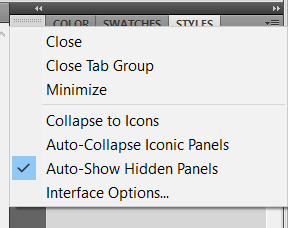
It will instantly close it. We can choose other options from this menu like Close Tab Group, Minimize, and Collapse to icons, etc., instead of closing it.
Next TopicPhotoshop Shortcut Keys
|
 For Videos Join Our Youtube Channel: Join Now
Feedback
- Send your Feedback to [email protected]
Help Others, Please Share


