| |

PySpark InstallationIn this tutorial, we will discuss the PySpark installation on various operating systems.
PySpark requires Java version 1.8.0 or the above version and Python 3.6 or the above version. Before installing the PySpark in your system, first, ensure that these two are already installed. If not, then install them and make sure PySpark can work with these two components. JavaType the following command in the terminal to check the version of Java in your system. It will display the version of Java. 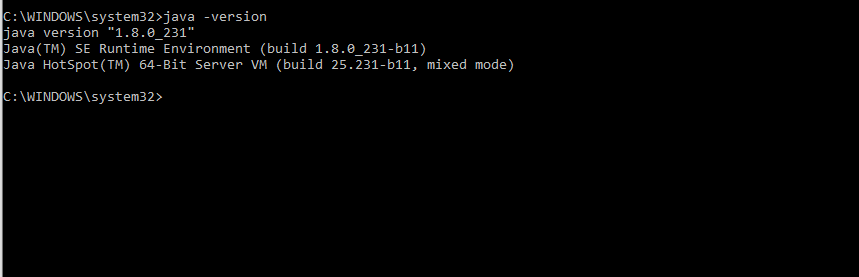
If Java is not installed in the system, it will give the following output, then download the required Java version. For proper Java installation guide visit (https://www.javatpoint.com/how-to-set-path-in-java). PythonPython is a very popular programming language and used by many other software. To check the Python version, type the following command in the command prompt or type only Python. 
It will display the installed version. If Python is not installed in your system, follow the link (https://www.javatpoint.com/how-to-install-python) for the proper Python installation guide. Now we will install the PySpark with Jupyter. We will describe all installation steps sequence-wise. Follow these installation steps for the proper installation of PySpark. These steps are given below: Step-1: Download and install Gnu on the window (GOW) from the given link (https://github.com/bmatzelle/gow/releases). GOW permits you to use Linux commands on windows. For the further installation process, we will need other commands such as curl, gzip, tar, which are provided by GOW. 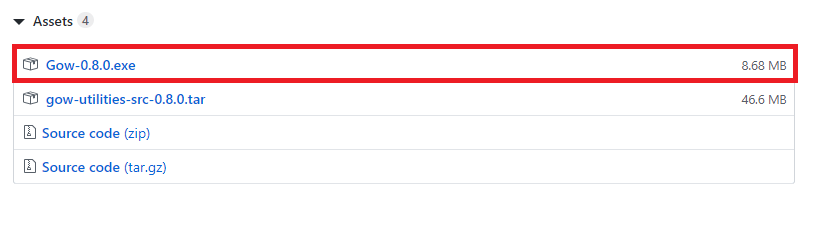
Type the following command to check the GOW is installed or not: 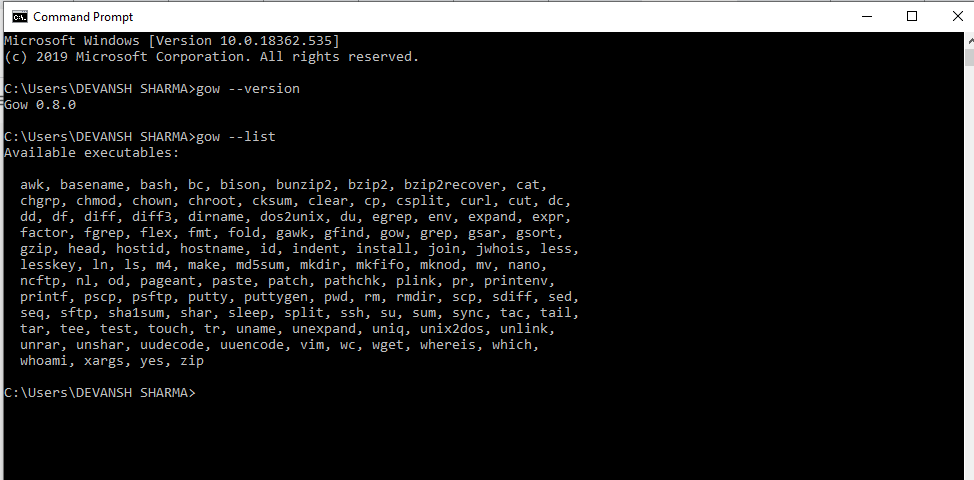
Step-2: Download and install the Anaconda (window version). Skip this step, if you already installed it. Visit the official site and download it. 
Download Anaconda for window installer according to your Python interpreter version. 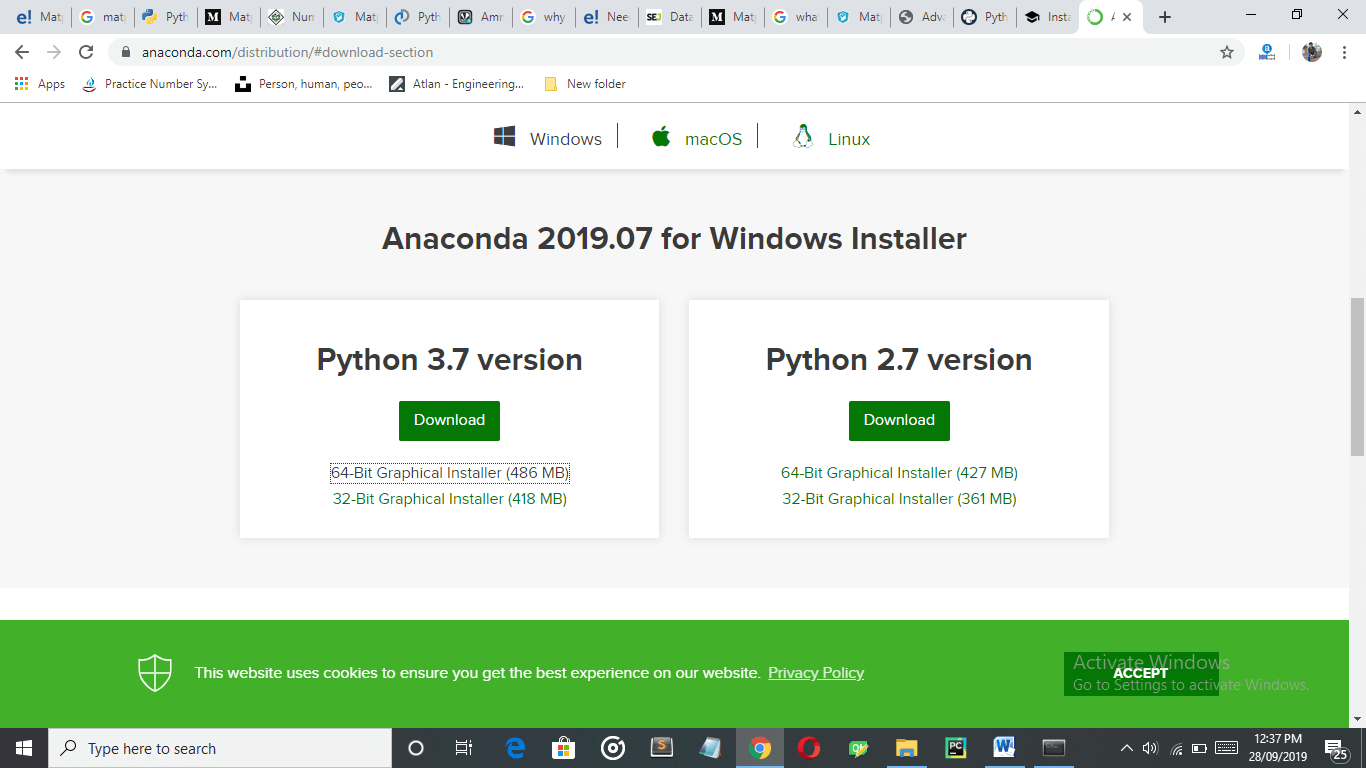
Step-3: Type Anaconda command prompt in the search box to check if it is properly installed or not. Step-4: Download Apache Spark from its official site (https://spark.apache.org/downloads.html). Click on the highlighted link as given in the below image: 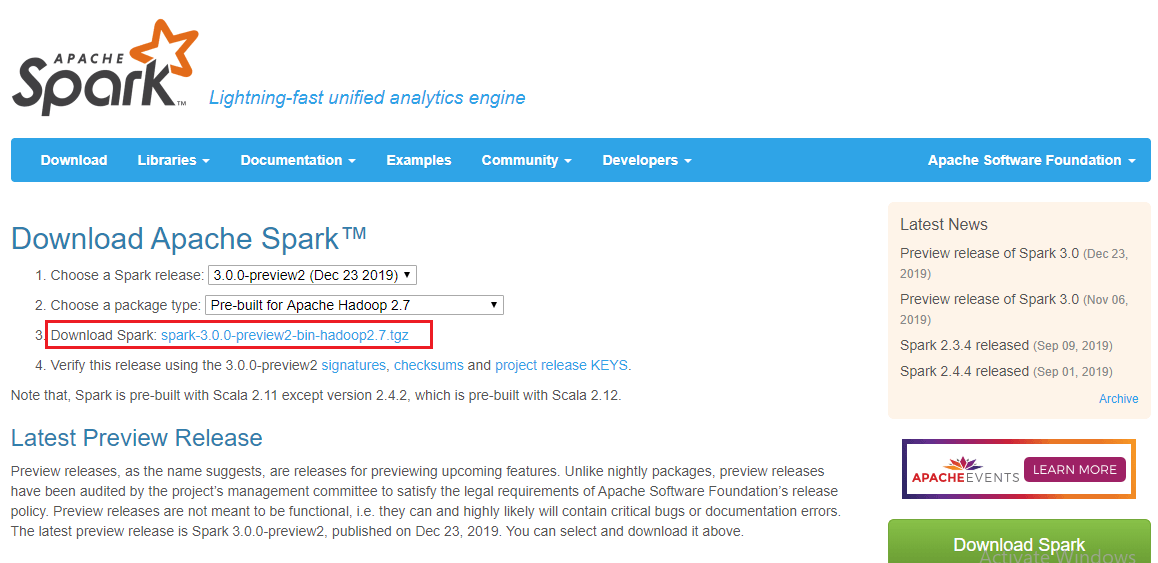
Step-5: Move the file in any directory, where you want to unzip it. We have downloaded it in C drive and unzipped it. The path in our machine will be C:\Spark\spark-3.0.0-bin-hadoop2.7.tgz. Here we have renamed the spark-3.0.0-bin-hadoop2.7.tgz to sparkhome. So, the new path is C:\Spark\sparkhome. Step-6: Download winutlis.exe in the sparkhome/bin by the following command. 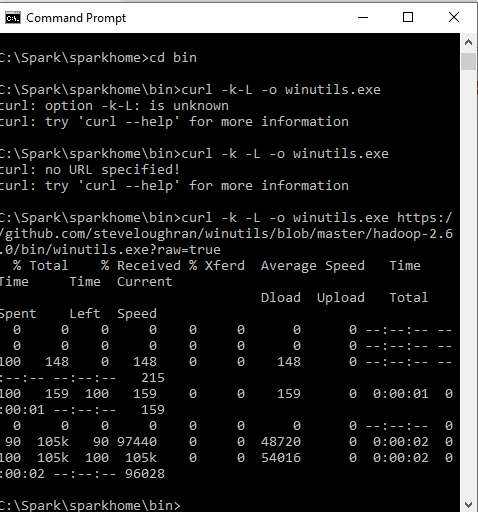
Step-6: Next, we will edit the environment variables so we can easily access the spark notebook in any directory. Step-7: Type the following command: 
Step-8: Next, type the following commands in the terminal.
Step-9: Add the path to the system variable. 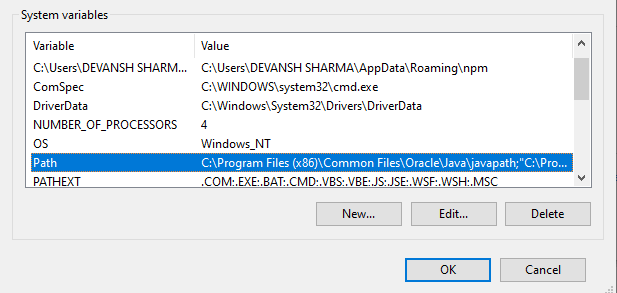
Copy the path and add it to the path variable. 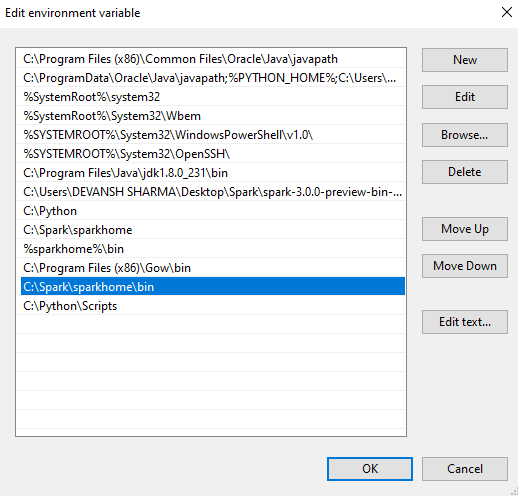
Step-10: Close the command prompt and restart your computer, then open the anaconda prompt and type the following command. It will automatically open the Jupyter notebook. 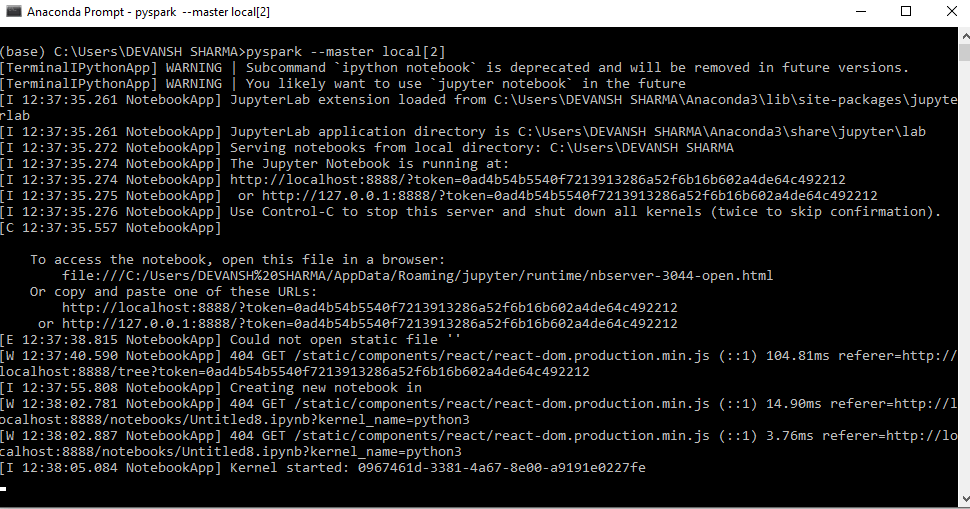
Now we are ready to work with the PySpark. Run the following code if it runs successfully that means PySpark is installed. Output:
The steps are given below to install PySpark in macOS: Step - 1: Create a new Conda environment Firstly, download Anaconda from its official site and install it. If you already have Anaconda, then create a new conda environment using the following command. This command will create a new conda environment with the latest version of Python 3. Activate the environment using the following command: Step - 2: Download PySpark Package You can install the PySpark package using the pip command but couldn't get the cluster to get started properly. The Python Packaged version is suitable for the existing cluster but not contain the tools required to setup your standalone Spark cluster, so it is good to download the full version of Spark from the official site(https://spark.apache.org/downloads.html). It will give the spark-2.3.0-bin-hadoop2.7.tgz and will store the unpacked version in the home directory. Step - 3: Install Java 1.8.0 Download the JDK from its official site, and the version must be 1.8.0 or the latest. Step - 4: Change '.bash_profile' variable settings To find the Spark package and Java SDK, add the following lines to your .bash_profile. These commands are used to inform the base of how to use the recently installed Java and Spark packages. Run source ~/.bash_profile to open a new terminal to auto-source this file. Now Run pyspark command, and it will display the following window: 
We will learn about the basic functionalities of PySpark in the further tutorial.
Next TopicPySpark SparkConf
|
 For Videos Join Our Youtube Channel: Join Now
Feedback
- Send your Feedback to [email protected]
Help Others, Please Share


