| |

Testing of Convolutional Neural Network ModelIn the last section, we implemented a neural network or created a model which classified the handwritten digits. Now, we test our model by grabbing an image from the web. We used the following image: http://calstormbasketball.com/wp-content/uploads/2018/08/5020657994731_01c.jpeg When you paste this link on your browser, you will see the image of number five as: 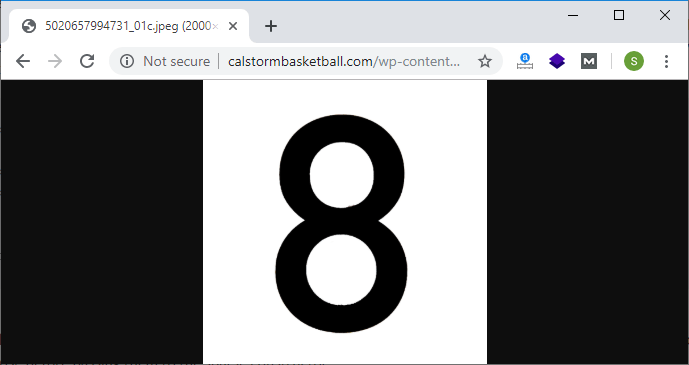
After seeing this, we will realize that it is the number 5. Now, we will try to get our network to predict it. We have the following steps to make predictions of the number image: Step 1: In the first step, we will perform a GET request to retrieve the image data. To make a GET request, we will need to import request as: Now, we set a variable URL and assign the link as a string. Step 2: In the next step, we set a variable response whose value will get from the get() method of request. The get() method will consist of two arguments, i.e., URL and stream and stream will be equals to true. Step 3: We will use the raw content of our response to obtain the image. For this, we first have to import Image from PIL (Python Image Library) as. We use the open() method of image and pass the raw content of response as an argument. The value which will be returned from this method will assign to a variable named img as: Now, we plot the image to make sure that everything is working well. When we run it, it will generate an error because of PIL. We must have to install pillow first to run this code. We must have to run the conda install -c anaconda pillow command on anaconda command prompt to install pillow. When you run the code, it will give the expected output. 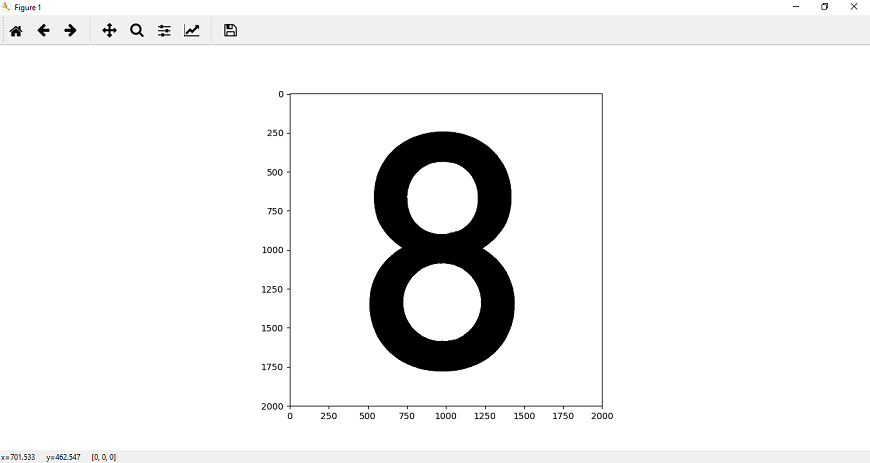
Step 4: We need to ensure that the image corresponds to what the neural network is trained to learn. Our image is of 1000*1000 pixels, so we need to make it into 28*28 grayscale image like ones in the training data. In our trained image dataset, images have a black background and white foreground, and in the above image, there is a white background and black foreground. Now, our first task is to preprocessing this image. We will use the invert () method of PIL.ImageOps and pass our image as an argument. This method will invert the color of our image. This image is in the RGB format with three channels of pixel intensity values, and this will problematic for numerous reasons. For this purpose, we must have to convert this image to be a binary black and white image, and we will convert this image as: We will transform this image in the same way as we have transformed all of our other training images. We have to transform the image in 28*28 pixels, so we have to add an argument resize in our transformed chain composition as: Now, our images are in the form of tensor, so we have to change it into numpy array. Before plotting our image, we have to import PIL.ImageOps and then plot the image as: 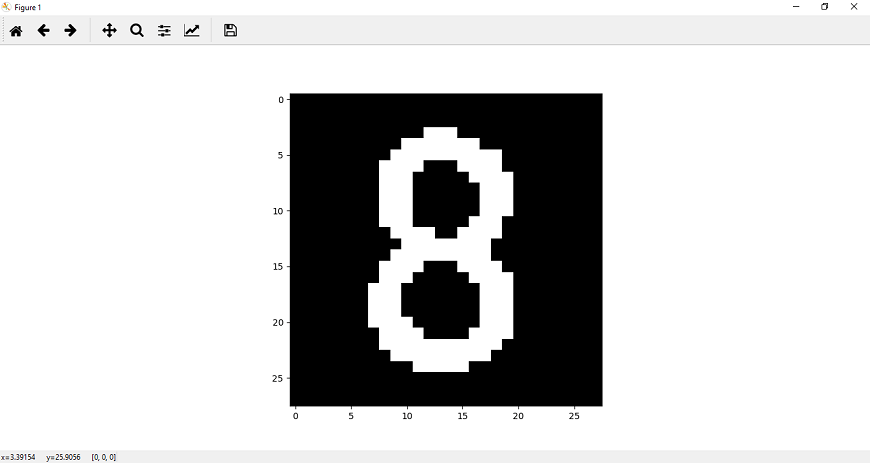
Step 5: Now, we will feed this image into our neural network to make predictions. We will add the image into the device and to ensure four-dimensional input for four-dimensional weight. We will un-squeeze the image and assign it to a new variable image as: This will return a new tensor with a dimension of size one which will be inserted at the specified position zero. It will give us the expected prediction as: 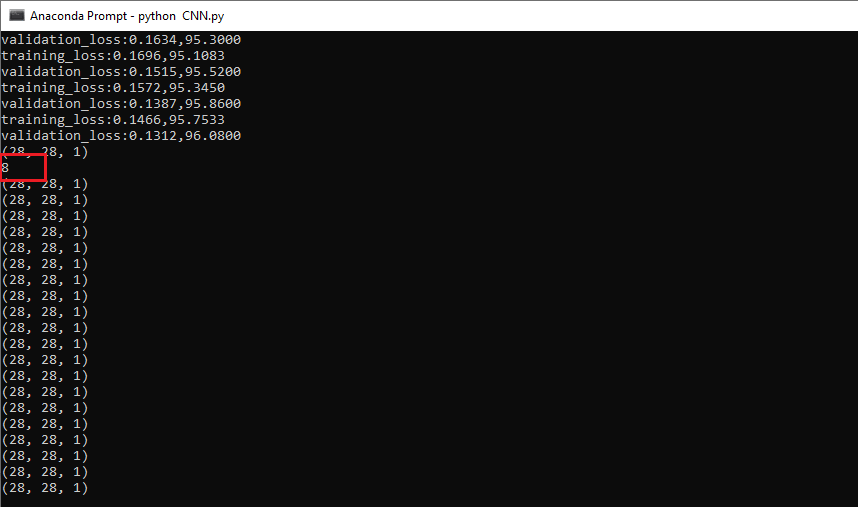
Step 6: In the next step, we wrap our validation loader. It will create an object which allows us to go through the alterable validation loader one element at a time. We access it one element at a time by calling next on our dataiter. The next () function will grab the first batch of our validate data, and that validate data will be split into images and labels as There is no need to reshape the image. We will add the images and labels to our device, and we will require the output of all the images and prediction as well. Step 7: Now, we will plot the images in the batch along with their corresponding labels. It will be done with the help of figure function of plt and set fig size is equal to the tuple of integers 25*4, which will specify the width and height of the figure. Now, we plot 20 MNIST images from our batch. We use add_subplot() method to add a subplot to the current figure and pass 2, 10, and idx as arguments of the function. Here two is no of rows, ten is no of columns, and idx is index. Now, we will display our images with the help of im_show() function and give a title for each image plot as: Finally call plt.show() and it will give us an error. This error will be of im_convert() function i.e. can't convert CUDA tensor to numpy. So we we have to use tensor.cpu() as: Now, we will re call our plt.show() and it will give us the expected outputs as: 
Complete code: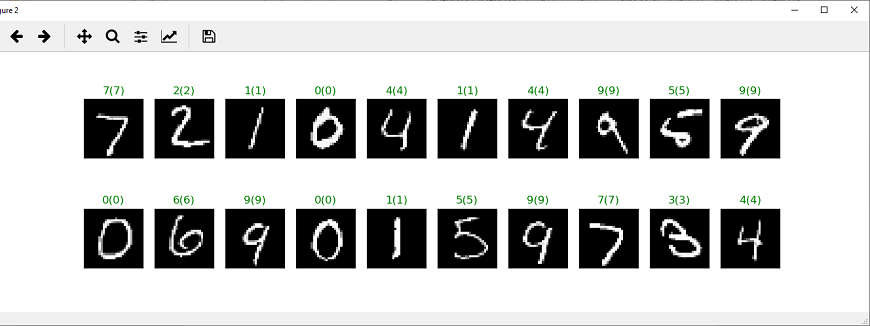

So, it is clear that CNN classifies the images in the best way in comparison to Deep Neural Network. This is the reason we prefer Convolutional Neural Network rather than Deep Neural Network.
Next TopicCIFAR-10 and CIFAR-100 Datase
|
 For Videos Join Our Youtube Channel: Join Now
Feedback
- Send your Feedback to [email protected]
Help Others, Please Share


