| |

Training of Convolutional Neural Network ModelIn the last topic, we implemented our CNN model. Now, our next task is to train it. For training our CNN model, we will involve CUDA tensor type which will implement the same function as CPU tensors, but they utilize for computation. There are the following steps to train our CNN model: Step 1: In the first step of the training section, we will specify the device with the help of torch.device(). We will check for CUDA; if CUDA will be available, then we used Cuda else we will use CPU. Step 2: In the next step, we will assign our model to our device as: Step 3: Now, we will define our loss function. The loss function will define in the same way as we have defined in our previous model in which we have used a deep neural network. After that, we will use the familiar optimizer, i.e., Adam as Step 4: In the next step, we will specify number of epochs. We initialize number of epochs and analyzing the loss at every epoch with the plot. We will initialize two lists, i.e., loss_history and correct history. Step 5: We will start by iterating through every epoch, and for every epoch, we must iterate through every single training batch that's provided to us by the training loader. Each training batch contains one hundred images as well as one hundred labels in a train in training loader as: Step 6: We are dealing with the convolutional neural network in which the inputs are first being passed. We will pass the images in the four dimensionalities, so there is no need to flatten them. As we have assigned our model to our device, in the same way, we assign inputs and labels to our devices also. Now, with the help of these inputs, we get outputs as: Step 7: In the next step, we will perform the optimization algorithm in the same way as we have done before in image recognition. Step 8: To keep track of the losses at every epoch, we will initialize a variable loss, i.e., running_loss. For every loss which is computed as per batch, we must add all up for every single batch and then compute the final loss at every epoch. Now, we will append this accumulated loss for the entire epoch into our losses list. For this, we use an else statement after the looping statement. So once the for loop is finished, then the else statement is called. In this else statement we will print the accumulated loss which was computed for the entire dataset at that specific epoch. Step 11: In the next step, we will find the accuracy of our network. We will initialize the correct variable and assign the value zero. We will compare the predictions made by the model for each training image to the actual labels of the images to show how many of them get correct within an epoch. For each image, we will take the maximum score value. In such that case a tuple is returned. The first value it gives back is the actual top value - the maximum score, which was made by the model for every single image within this batch of images. So, we are not interested in the first tuple value, and the second will correspond to the top predictions made by the model which we will call preds. It will return the index of the maximum value for that image.- Step 12: Each image output will be a collection of values with indices ranging from 0 to 9 such that the MNIST dataset contains classes from 0 to 9. It follows that the prediction where the maximum value occurs corresponds to the prediction made by the model. We will compare all of these predictions made by the model to the actual labels of the images to see how many of them they got correct. This will give the number of correct predictions for every single batch of images. We will define the epoch accuracy in the same way as epoch loss and print both epoch loss and accuracy as This will give the expected result as: 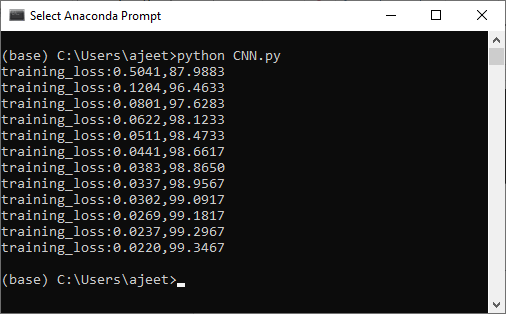
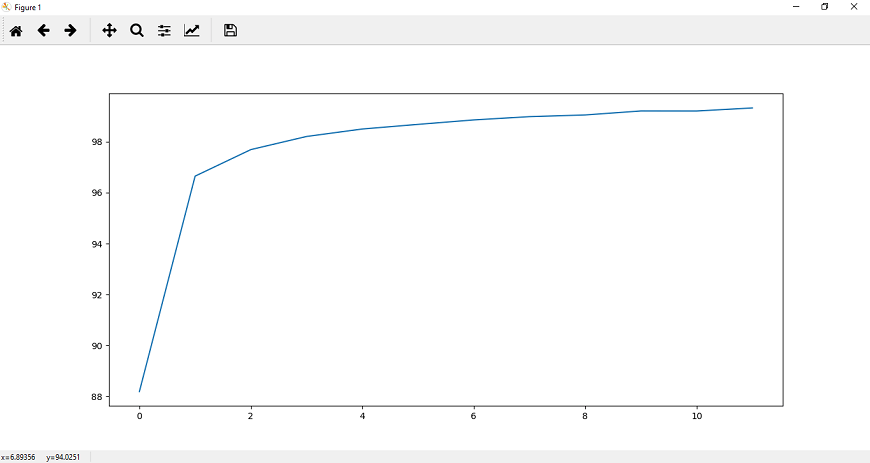
Step 13: Now, we will append the accuracy for the entire epoch into our correct_history list, and for better visualization, we will plot both epoch loss and accuracy as 
Complete Code:
Next TopicValidation of CNN
|
 For Videos Join Our Youtube Channel: Join Now
Feedback
- Send your Feedback to [email protected]
Help Others, Please Share


