| |

Robo 3TWhat is Robo 3T?Robo 3T, formerly known as Robomongo is a popular resource for MongoDB hosting deployments. It provides a Graphical User Interface (GUI) to interact with bricks of data through visual indicators rather than text based interface. It is free and lightweight. We can call it a management tool for MongoDB that is shell-centric and cross-platform. It is not supported by JSON. It is highly specific to be used with MongoDB administrative tools for carrying out GUI-based tasks. Moreover, its shell cannot be embedded into Mongo Shell being given access to the CLI and GUI in MongoDB. Additionally, Robo 3T is a volunteered open source project and is free of cost for the public. If we make use of it with Mongo Shell, we can easily manipulate MongoDB documents like edit, delete and view. It is published under the General Public License version 3 by Free Software Foundation. Why Robo 3T?The main answer to why Robo 3T can be justified with the fact that it is a free machine-friendly software build to make use of the small number of resources available on a machine. It is a highly curated and recommended tool for various large-scale projects that need a high success ratio for generating prime output. As a user we can easily overcome the problem of dealing with messy procedures of using tables and rows typically used in rational databases. Unlike them, Robo 3T is highly reliant on MongoDB Collections and documents. PrerequisitesClient machine identificationThe first thing to get started with Robo 3T is to identify the client machine. We need to have access to the ScaleGrid MongoDB cluster to create a new instance or rather pick the existing instances to connect it through the machine. For this, we need to sign up for a 30-day trial version of ScaleGrid and set up the MongoDB cluster on all plans. To do this, we need to use Bring Your Own Cloud (BYOC) AWS deployment, which is not open to the internet. To access this, we again need to have VPN and should opt for Security Group to securely have a connection with Virtual Private Cloud (VPC). Installing Robo 3TRobo 3T is available on the internet and is free to download. It is highly recommended to check ScaleGrid deployment so that Robo 3T installation is supported with the deployment through the MongoDB version. Also, it is best to use the latest version of Robo 3T by checking the support mechanism of the MongoDB version that can be scaled up to the version of 3.4. Specific database usersTo create a simple read-write or read-only and simple database for users, we need to log into the ScaleGrid console and navigate to the cluster details page. Next, we need to click on the database tab. Further, click on the Manage button beside the database you want to create the user. Consider the below images for reference. 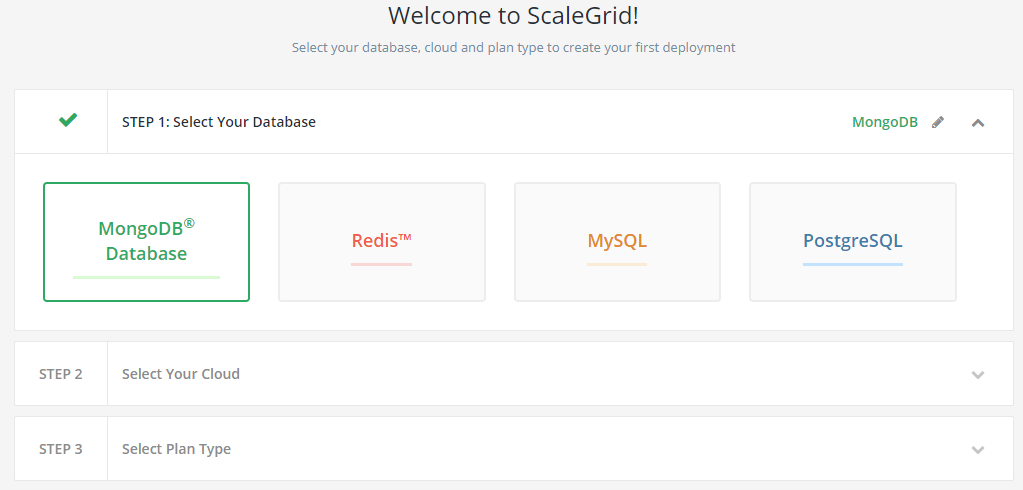
The next step is to select the type of Cloud we want to have into our database for carrying out certain operations. 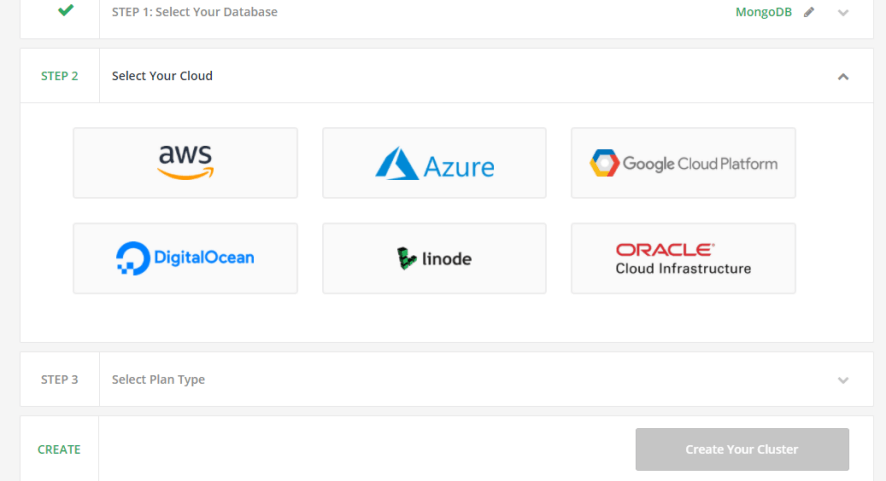
Next, we need to choose whether we want to have our cloud or opt for dedicated hosting and after choosing, click on the button "Create Your Cluster". 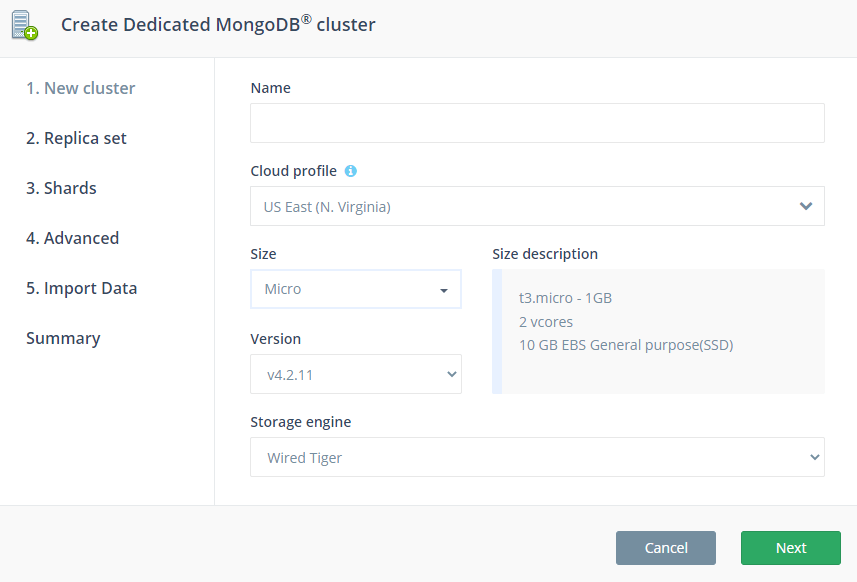
Here, we can specify the name and cloud along with the size of the cloud we want to deploy in. To the left, various advanced configuration options let the users replicate, set proxy shards, and import data from their local storage to the cloud. After doing this, the following window shoots up. 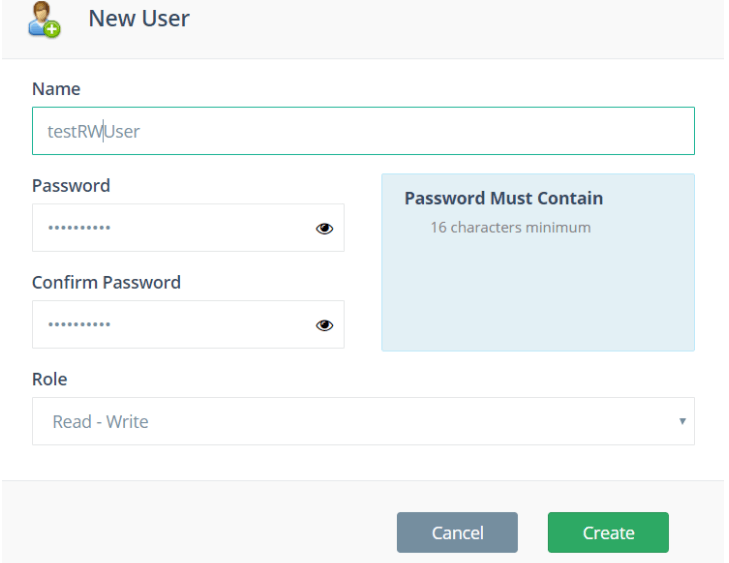
Here, we need to fill in all the details and the action whether it is read-write or read-only. After this, we need to click the green "Create" button that would open up a new window for taking the CIDR IP from the user. A CIDR IP is nothing but an internet protocol to create identifiers for networks and individual devices. It consists of two groups which are called a group of bits. The following console opens up now. 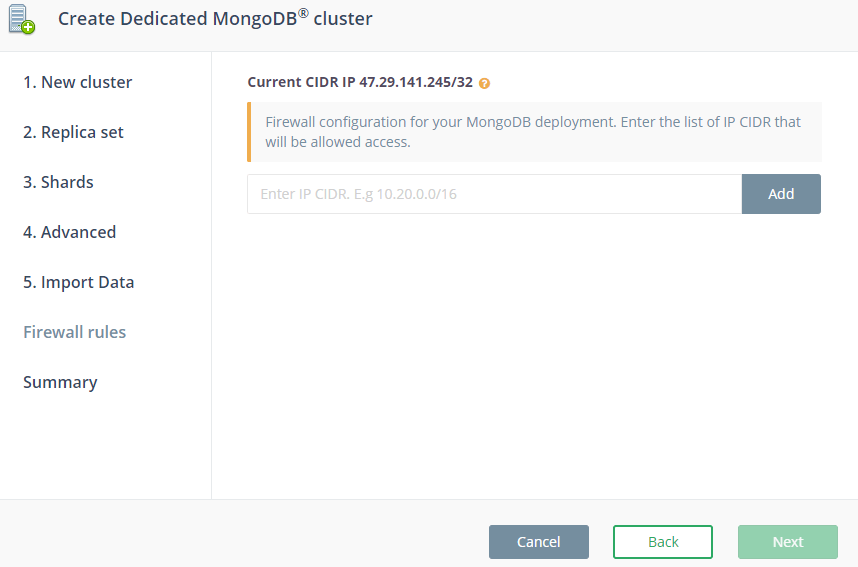
After entering the details, we can successfully create a cluster. It is simple as it looks. No further configuration is needed. Deployment in Standalone MongoDBConsidering we have downloaded the Robo 3T from the internet, it is time to learn about deployment with MongoDB. It starts with the BYOC and Dedicated plan because users get only a 30-day free trial before moving to replicate the developmental sets and setting up production environments. We may need a port and the database server to get started. It can be found in the Connecting String of our MongoDB cluster details page we have previously discussed. Consider the below example to understand the port and the server name from the Connecting String. Connection String: Server Name: Port: The next step is to set up the new connect and to do that we need to start the Robo 3T and launch the 'Manage Connections' window. It may look something like this. 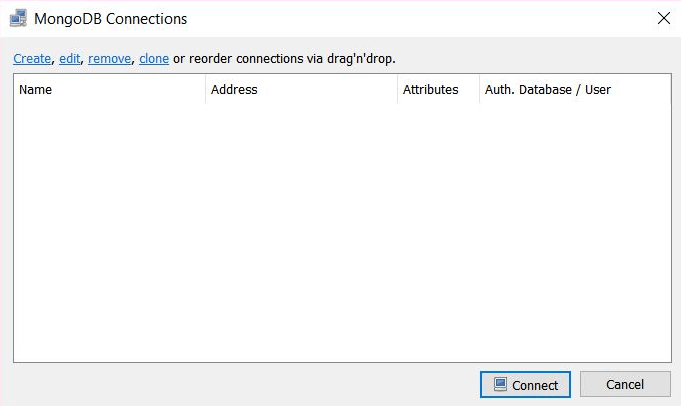
Click on Create to setup a new connection. 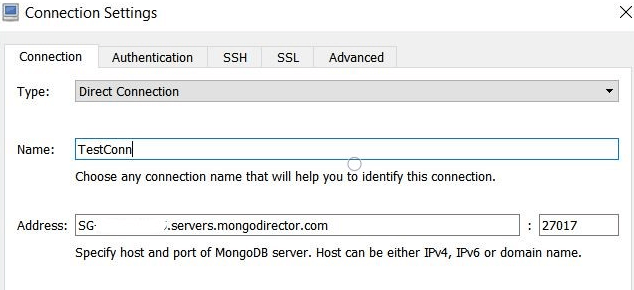
Now, we can adjust the standalone setting through the various console options shown. 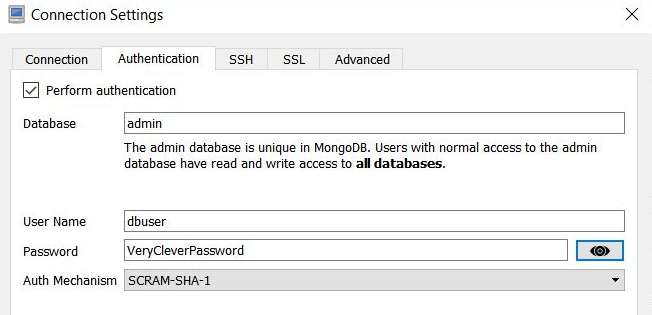
We need to switch to SSL to check if the connection is ensured or not. To do that, click on the 'Test' to check. Robo 3T should be able to connect successfully. 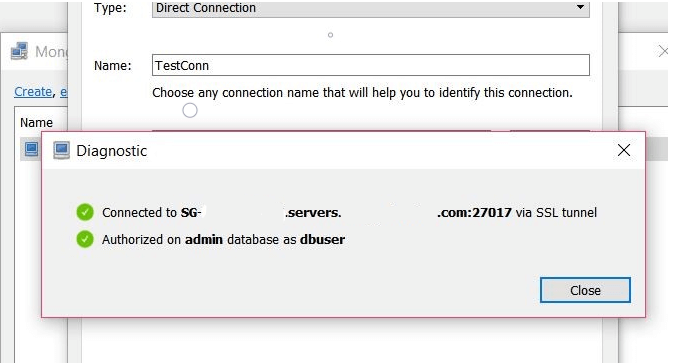
Save the connection by double clicking on it and we would now be able to watch our database. 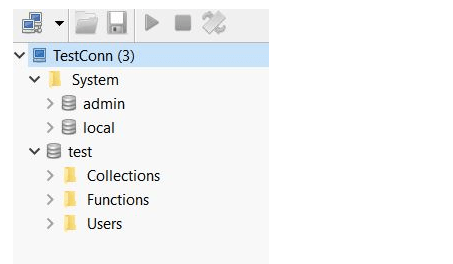
TroubleshootingAfter completing all the above steps either for MongoDB or for a standalone or a replica deployment set, if something fails and our connection seems not working properly, here are the few things to shoot them down using the troubleshooting methods as follows:
Robo 3T advanced optionsThere are various advanced settings to configure MongoDB with Robo 3T. The Connection Manager will always prefer to use global settings by default. It means that the connection will be preferred to be used only with MongoDB preferences. In most cases, it will be the Mongo executable files that are bundled across the Robot 3T or Studio 3T. Additionally, we may have the flexibility to configure the executable version in MongoDB so that each version can use an individual connection mechanism. To do that, we need to uncheck the global setting checkbox and opt for MongoDB executable version. 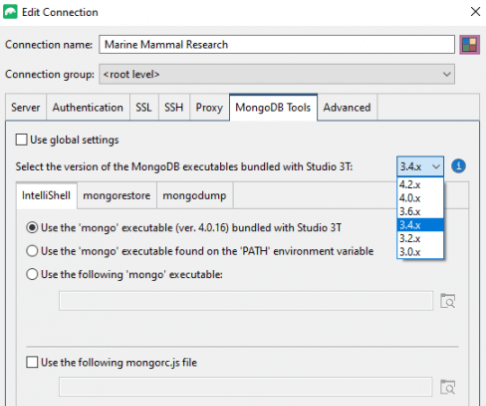
Under this setting, you can choose Mongo executable files bundled under the Robo 3T. For a particular version, those found PATH environment variables can have their files. 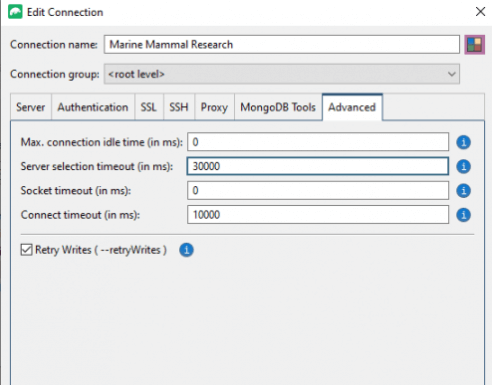
Under the advanced settings, we can easily configure idle time, timeout connections, server selection options, and much more. These options can be explained as follows: Max connection idle time (in ms): This option sets the maximum idle time in milliseconds for any connection. In case of connection dropped out by firewall or load balancing factor, they can be easily channelized by the default value "0" which sets the idle timer to unlimited. Server selection timeout (in ms): It defines how long the Robo 3T or Studio 3T will have to wait for the server to carry out selection before introducing it to an exception. Here, the default value is always 3000 and the negative value beyond that simply means that the timeout will be indefinite. Socket timeout (in ms): The use of this option is to set the socket timeout in milliseconds. It is primarily used for reading and writing operations or I/O operations and the default value "0" defines no timeout. Connect timeout (in ms): Sets the connection timeout in milliseconds, used solely when establishing a new connection. A value of "0" means no timeout. The default value is 10000. In this option, the default option has the value "0" which notifies no timeout and sets the connection timeout to establish new connections meanwhile. Retry writes: This option lets us carry out retryable writes which in turn allows drivers of MongoDB to keep retrying the writable operations every single time a network error occurs. It can thus be made to work with shared clusters or replicate the sets in a healthy environment. SummaryIn this tutorial, we learned about Robo 3T which is based on the developed version of Robomongo. As the name suggests, the Robo 3T is based on the operations associated solely with MongoDB whose dependency can also be channelized through ScaleGrid. We came across various facts about Robo 3T and how a connection is established considering the clustering method for dedicated servers in MongoDB or ScaleGrid. Then, we learned how to carry out deployment methods with a standalone MongoDB server and how to shoot down the problems through various troubleshooting methods. In other instances, we also learned some advanced options that are important for Robo 3T while carrying out connection mechanisms through different types of dependencies and how they are configured for the same. The graphical user interface provided by Robo 3T to configure it with ScaleGrid and MongoDB enables users to widely channelize the CLI tasks at ease. Thus, it can be said that Robo 3T is quite an essential tool for carrying out GUI-based and shell-centric operations at a go.
Next TopicInformation System Definition
|
 For Videos Join Our Youtube Channel: Join Now
Feedback
- Send your Feedback to [email protected]
Help Others, Please Share


