| |

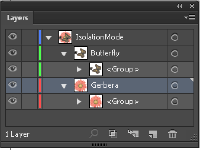
Select and Arrange Objects in Adobe IllustratorIn Adobe Illustrator there are selecting, stacking, and positioning objects precisely to layout and organize the artwork. We measure, align, and group objects to treat it as a single unit. Selection options and preferencesWe need to differentiate the object from the objects around it before we can modify an object. The selection tools and methods available in Illustrator are as follows: Isolation mode: The isolation mode can be used to quickly isolate a layer, sublayer, group, or path of objects from different art in our document. All other materials will be dimmed until the selected segment is in isolation mode. 
Layers panel: It can be used to select individual or multiple objects quickly and precisely. 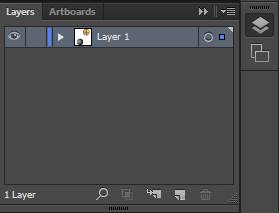
Selection tool: The selection tool Direct Selection tool: The direct selection tool Group Selection tool: Perspective Selection tool: Lasso tool: We can use Lasso tool Magic Wand tool: Magic wand tool Live Paint Selection tool: Isolate artwork for editing in IllustratorUsing the isolation mode, we can isolate the objects to work on it comfortably and edit a particular object or part of the object. When the isolation mode will be activated, the rest of the artwork appears dimmed and the isolated object appears in full color. Steps to isolate an object Step 1: Open the artboard on which you want to perform the operation. 
Step 2: Now, select the object, path, or group. Step 3: Go to the Control panel and click on the Isolate Selected Object button. 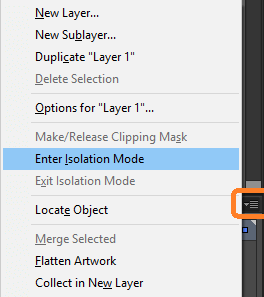
Select objects using the Layers panelStep 1: Look for the object that you want to select in the layers panel. 
Step 2: Click on the object's selection column to select to select individual objects. 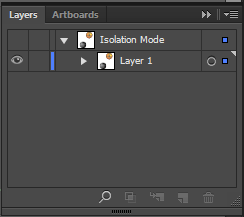
Step 3: To select all artwork in a layer based on the currently selected artwork Choose Select → Object → All on same Layers. 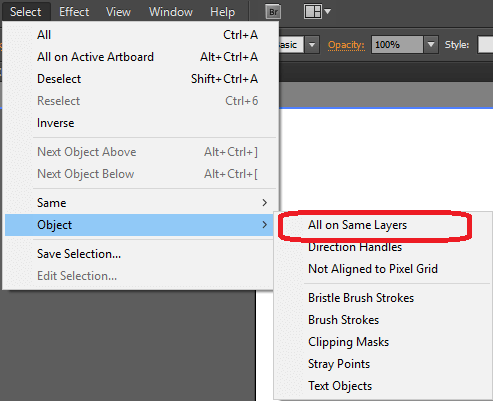
Select filled objectsStep 1: Open the artboard you want to perform operation. 
Step 2: Go to edit menu 
Step 3: Click on the preferences and then Selection & Anchor Display 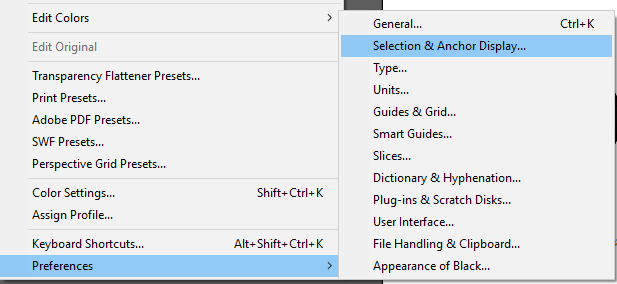
Step 4: Finally select Object Selection by Path only 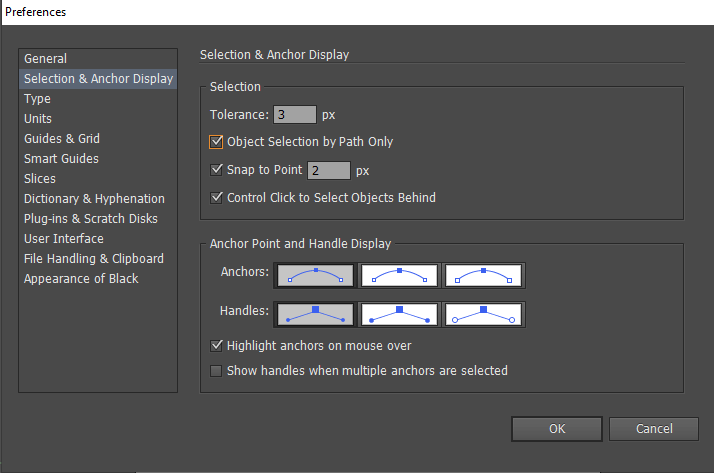
Select one or more groups with the Selection tool Step 1: Go to the tools panel and select the Selection tool . 
Step 2: Now, click on the object or drag around the part or all of the object. 
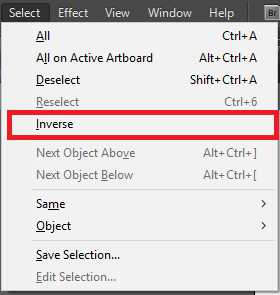
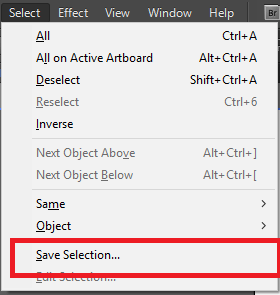
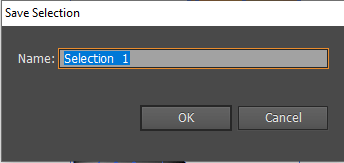
Step 3: Hold down the SHIFT button while clicking the group to add or remove a group to the selection. Select objects and groups within groups with the Selection tool Step 1: Select the selection tool Step 2: Now in the isolation mode, double click on the group you want to select. Step 3: After that, click to select an object within the selected group. Or, double-click to select further down into the group structure. Step 4: Finally, go outside the group and double-click to deselect the group. Repeat, Invert, or save a selection
Moving objects in IllustratorThe objects in Illustrator can be moved by dragging them with a specific tools. Like: arrow keys or by entering some specific value in the panel or dialogue box. Step 1: Open the artboard and select one or more objects. Step 2: Go to edit menu then click on Cut to move the selection or Edit. Step 3: To duplicate the selection, select Copy. Step 4: If you want to paste the object into another file then open the file. Step 5: Go to Edit and Click paste to paste the object into the center of the active window. LayersLayers in Adobe Illustrator can be used to manage all the obejcts that make up our artwork when we create any complex artwork. The structure of the layers can be simple or complex depending on the need. The document can be organised in single parent layer by default. Layer panel can be used to organize, list and edit the object in a document. When an item in the Layers panel contains other items then a triangle will appear to the left of the item's name. You can show or hide the contents by clicking over it. Following are the option available in the layers panel: Visibility column Edit column Target column Selection column Create a layerStep 1: Go to the layers panel and click over the name of the layer on which you want to add the new layer. Step 2: To add a new layer above the selected layer, click on the "Create New Layer" button from the Layers panel. Step 3: If no artwork is select using the draw behind mode then you can draw the artwork behind all artwork on a selected layer. Stack objectsIt can be used to determine how the object will be displayed when they overlap. It depends on the drawing mode we are using. When we create any new layer in the Draw Normal mode, the object will be placed above the active layer and all the new objects will be drawn at the top of active layer. The stacking order of objects can be changed in our artwork at any time by us using the Layer panel or we can use the Object → Arrange commands. 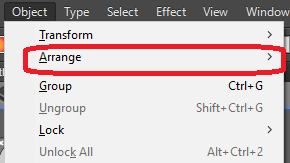
Change the stacking order using the Layers panelStep 1: Click on the itme's name and drag then release the mouse button when the black insertion marks appear at your desired position. Step 2: The items that are removed over a layer or group will be moved above all other objects in the item. Step 3: If you want to reverse the order of items in the Layers panel you have to hold down the Ctrl button and Click the names of the items whose order you want to reverse. Rotating and reflecting objectsWe can rotate the object around the point that is specified by us. It can be the center point of the object. We can use the Transform Each command to rotate the object around the point. Rotating the object using the bounding box Step 1: Open the artboard you want to perform the operation. Step 2: Select the object you want to rotate. Step 3: Now, go to the tools panel and select the Selection tool. Step 4: To change the pointer, move the pointer outside the bounding box and near a bounding box handle then drag it. 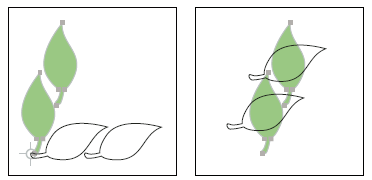
Rotating an object with the Free Transformation tool Step 1: Open the artboard you want to perform the operation. Step 2: Select the object you want to rotate. Step 3: Go to the tools panel and select the Free Transformation tool. Step 4: To change the pointer, position your pointer anywhere outside the bounding box, and then drag the pointer. Reflecting an object with Free Transformation tool Step 1: Open the artboard you want to perform the operation. Step 2: Select the object you want to reflect. Step 3: Go to the tools panel and select the Free Transformation tool. Step 4: Drag the corner handle past the opposite handle while holding the shift key to maintain the object's proportions. 
Locking or unlocking the objects or layersWhen you lock the object, it prevents you from selecting and editing them. To lock the object follow these steps: Step 1: Open the artboard and click on the edit menu to the right of the eye icon in the Layers panel. Step 2: To lock multiple items, drag your pointer across multiple edit column. Step 3: Click on the lock button while selecting the object you want to lock. Step 4: Finally, click on the selection. To unlock the object: Go to the layers panel and click on the lock icon for the object or layer you want to unlock. Duplicating objectsStep 1: Open the artboard and select one or more objects you want to duplicate. Step 2: Select the Selection, Direct Selection, or Group Selection tool from the tools panel. Step 3: Press Alt button and drag the pointer. Drag and drop artwork into a Photoshop document Step 1: Open the artboard and select the artwork you want to copy. Step 2: Now, open the Photoshop document into which you want to copy the selection. Step 3: After that, drag the selection toward the Photoshop window to copy the artwork as a bit map image. Step 4: Release the mouse button when the object moved to the Photoshop window. Step 5: To position the object, click and drag with the shift button pressed. Offset duplicate objectsWe can create a replica of an object that set off from the selected object by a specified distance by using the Offset Path command. It can be usefull when we want to create concentric shapes or make many replication of an object. Step 1: Open the artboard and select one or more object. Step 2: Choose the object and select the path and click on the Offset path. 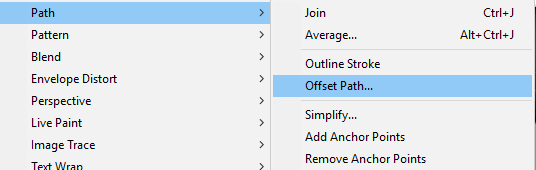
Step 3: Now, specify the offset distance in the appeared dialogue box, line join type, and miter limit. 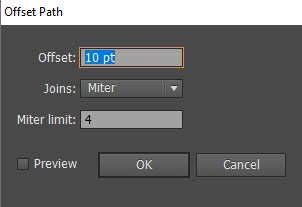
Step 4: Finally click on OK button. Duplicate the objects using the Offset Path effect Step 1: Open the artboard and select one or more object. Step 2: Choose the effect and select the path and click on the Offset path. Step 3: Now, specify the offset distance in the appeared dialogue box, line join type, and miter limit. Step 4: Finally click on OK button. |
 can be used to select the objects or group of objects by a click and dragging over them.
 can be used to select path segments or individual anchor point.
 It can be used to select the object inside a group or a group within multiple groups.
 It can be used to bring objects and text in perspective and different directions.
 to select anchor points, objects, or path segments.
 can be used to select objects of the same color, stroke weight, etc.
 It can be used to select the faces and edges of the live paint group.
 from the tools panel.
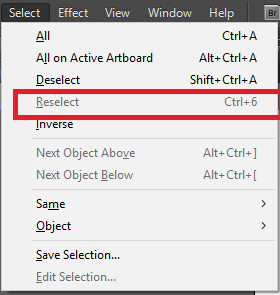
 : Indicates that the item is a template layer or outline layers or the layers are visible or hidden.
 : The edit column can be used to indicate whether items are locked or unlocked. Whether it is locked or not can be indicated by the lock icon.
 : The target button appears as a double ring icon then the item is targeted. The item is targeted or not can be indicated as a single ring.
 : It indicates that the item is selected or not with the help of a color box that appears when an item is selected.
 For Videos Join Our Youtube Channel: Join Now
Feedback
- Send your Feedback to [email protected]
Help Others, Please Share


